Mullvad VPN with Wireguard in PFSENSE - Setup Guide

I used to use PIA VPN with OpenVPN. The speeds were alright, but I no longer trust PIA since they got bought by Kape. I decided to try out Mullvad which seems to be the best VPN Provider currently. Its more expensive than PIA, but its only $5/mo

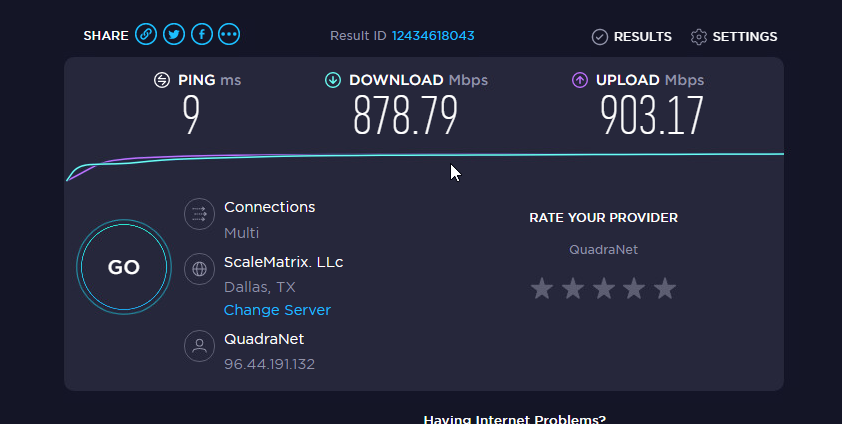
The speeds I am getting are insane. Using WireGuard if PFSENSE I get full line speed with very low CPU Usage on the firewall. The highest I have seen is 10%

I could not find a complete guide on how to get PFSENSE connected to Mullvad with Wireguard. So I looked over 4 or 5 guides on how to set it up, and wrote this including screenshots, to make it easy.
First click the above link, or just go to Mullvad.net and sign up for an account. Save your account number, and pay for the plan. Note that you should keep your account number secret.
Now log into PFSENSE. Go to System > Package Manager and make sure you have Wireguard installed

If you don't, just click "Available Packages" and search for Wireguard, and install it.
Now in the top bar, go to VPN > Wireguard > Settings and make sure its enabled

Now to to Tunnels, and hit Add Tunnel

Click to enable the tunnel, enter a name, it can be anything you like. Leave the port as default and click generate under the interface key.
Copy this key to a a notepad (Or whatever you like) as we will need it later.

Now we need to upload this key to Mullvad in order to get back the IP addresses we can use. Do this from any system that has curl on it. I did it on my Mac, but your PFSENSE box also does. So if nothing else, just SSH to PFSENSE and follow these steps. I am using Putty for this.
You can do this via the browser, but as /u/Griffo_au on reddit pointed out, you need to upload your private key. This isn't really a great idea, and this way is better. And honestly, more simple in my opinion.

Then just type 8 to get to shell

Now you will have a shell prompt open

You'll want to paste the below in Notepad and get it set up, then paste into the PFSENSE Shell
curl https://api.mullvad.net/wg/ -d account=0000000 --data-urlencode pubkey=YOURKEYHERE
Substitute the 000's for your account number with no spaces, and paste the public key we generated in PFSENSE earlier. It will then spit out some IP addresses. Save this in your notes

That's all, you can close the window now.
Now head back to the PFSENSE Window with the Tunnel configruation, and add that IPv4 address and subnet mask into the Interface Address, give it a name and hit Save Tunnel

Now go into the Tunnel you created, and click add peer

Now you'll want to decide what server you want to connect to. go to the below link

And filter for Wireguard, and your location, or wherever you want. I decided on this one

Note down the name, and the public key. If the name is us235-wireguard then the hostname is us235-wireguard.mullvad.net. Don't confuse the public key with your own you generated earlier.
(Note, if you later want to change server, you need to update both of these fields with the new server information)
Now go back to PFSENSE, make sure Enable Peer is enabled and make sure the Tunnel is listing the tunnel we created earlier
Give it a description, and uncheck dynamic endpoint. This will give you the fields to enter the server details
Go ahead and enter the server, and you can leave the port blank. It defaults to 51820 which is the correct port, and paste in the public key from the server selection screen
Lastly, enter 0.0.0.0 with a netmask of 0 in the address configurations, and then hit save

Now the setup in Wireguard is complete, we just need to set up some more things in PFSENSE
Head over to Interfaces, Assignments

At the bottom of the screen you will see a dropdown for Available network ports. You will now have one called tun_wg0 in there. Select it, and click Add

Now go ahead and edit the interface we just created which has tun_wg0 as the port selection
You want to make sure its enabled, give it a better name like Mullvad_WG or whatever you like
Set the IP configuration for Static IPV4 and scroll down to the Static IPV4 configuration. Here you will yet again enter the IP you were given by Mullvad, along with the network mask of /32
Then click Add New Gateway

A new screen will show, make sure Default Gateway is unchecked. If it is checked, it will send all traffic over this gateway by default. This could be what you want though, so if it is, check it. I do not recommend this.
Enter a gateway name, and then again enter the IP address we were given by Mullvad, and hit add

Now you should have a gateway listed on the interface. Go ahead and confirm its listed, and click save

Head over to System > Routing

And you should now see an extra gateway listed

Now go to System >Advanced > Miscellaneous and scroll down to Gateway Monitoring. Check the box to not create rules when gateway is down

As it says there, if the gateway is down by default it will remove the gateway specification in the rule. This means you could accidently send traffic over the regular gateway! So checking this box turns off that "feature"
Next we need to confirm you have outbound NAT rules, if you don't have these the firewall won't be able to send traffic over this connection, so we need to make sure they are there.
Head to Firewall > NAT and click Outbound. Here you SHOULD see some automatic created NAT rules. I have quite a few networks, so mine may look a little different
If you do not see them, you must have manual outbound NAT enabled. Just copy the two existing rules, and make the new ones use Mullvad as the Interface. Easy.

Now we are ready to send traffic over the VPN.
The way I do it is by having an Alias which has a list of internal IP's of systems I want to be forced over the VPN. So lets do that now, but you can easily make your own setup if this does not suit you.
Go to Firewall, Aliases and click Add in the bottom corner

Give the Alias a name, and set it to Type: Hosts
Then enter the IP of the devices you want to be pushed over the VPN. Just make sure they have static IP's or Static Maps, just so the IP doesn't change, and the traffic ends up going over your normal WAN by mistake
Hit Save to save the Alias

With that saved, lets go to Firewall > Rules

Now go to the interface the system you want to use the VPN is on, in my case its LAN.
Then we are going to make 2 rules. The first rule is to make the traffic go over the VPN, and the second is to block access to everything else
Note that they need to be above the default LAN to Any rule, and the allow rule needs to be above the deny rule. Traffic matches these rules top down.

Create a new rule, set it to pass, set address family to ipv4, protocol any and source will be the Alias we created. Give it a name too

Before you save, click show advanced, the blue button and scroll down
We want to set the gateway to the one we created, and then hit save.

The next rule is very simple
Select Block, LAN, IPV4, Any, enter the same Alias, give it a name and hit save.

Now verify they are in the correct order
- Gateway Rule
- Block Rule
- Default LAN to ANY
Now we want to make sure we don't get any DNS leaks, so head to Firewall, NAT, Port Forward and click add new rule
Here we will make a rule to redirect all port 53 DNS traffic from that machine, directly to the Mullvad DNS Servers

Now set the interface to LAN (Or wherever your machine is), Select IPv4 and TCP/UDP. Then select the source as the Alias we made
For destination, it should be set to any, but on the port range make sure its set to DNS
Then, redirect target IP will be The Mullvad DNS Server IP. At the time of writing its 193.138.218.74. But you should probably not trust me, and just go check
For redirect target port, select DNS again. Give it a name, and make sure the Filter Rule Association is set to None
Finally, hit save

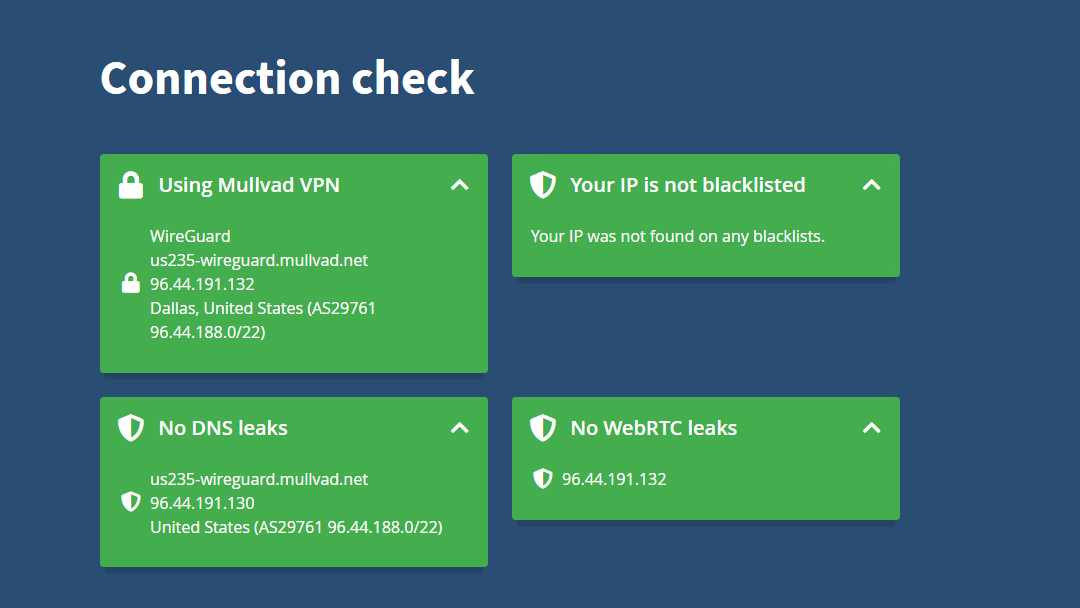
Now if everything worked, that machine will be sent through Mullvad, and all DNS requests will also be redirected to Mullvad. You can check here

As you can see, mine works great

But there is something to keep in mind here, if you are using a browser, its possible further configuration is needed to prevent DNS leaks

For me, the redirect of port 53 is enough, as I'm just using a Debian VM running a torrent client. It doesn't do any fancy DNS tricks
Another note. if you have ipv6 setup on your network, and the system you are redirecting has an ipv6 address, the ipv6 traffic will not match that rule we created since we selected ipv4, and provided ipv4 addresses, and it will go over your regular gateway. In that case you would need to configure ipv6 for Mullvad/Wireguard (Which this guide does not cover!) Or disable ipv6 on that machine.
Hopefully this guide was helpful. Any questions or comments please contact me!
