Power Monitoring Setup (IoTaWatt + Grafana)
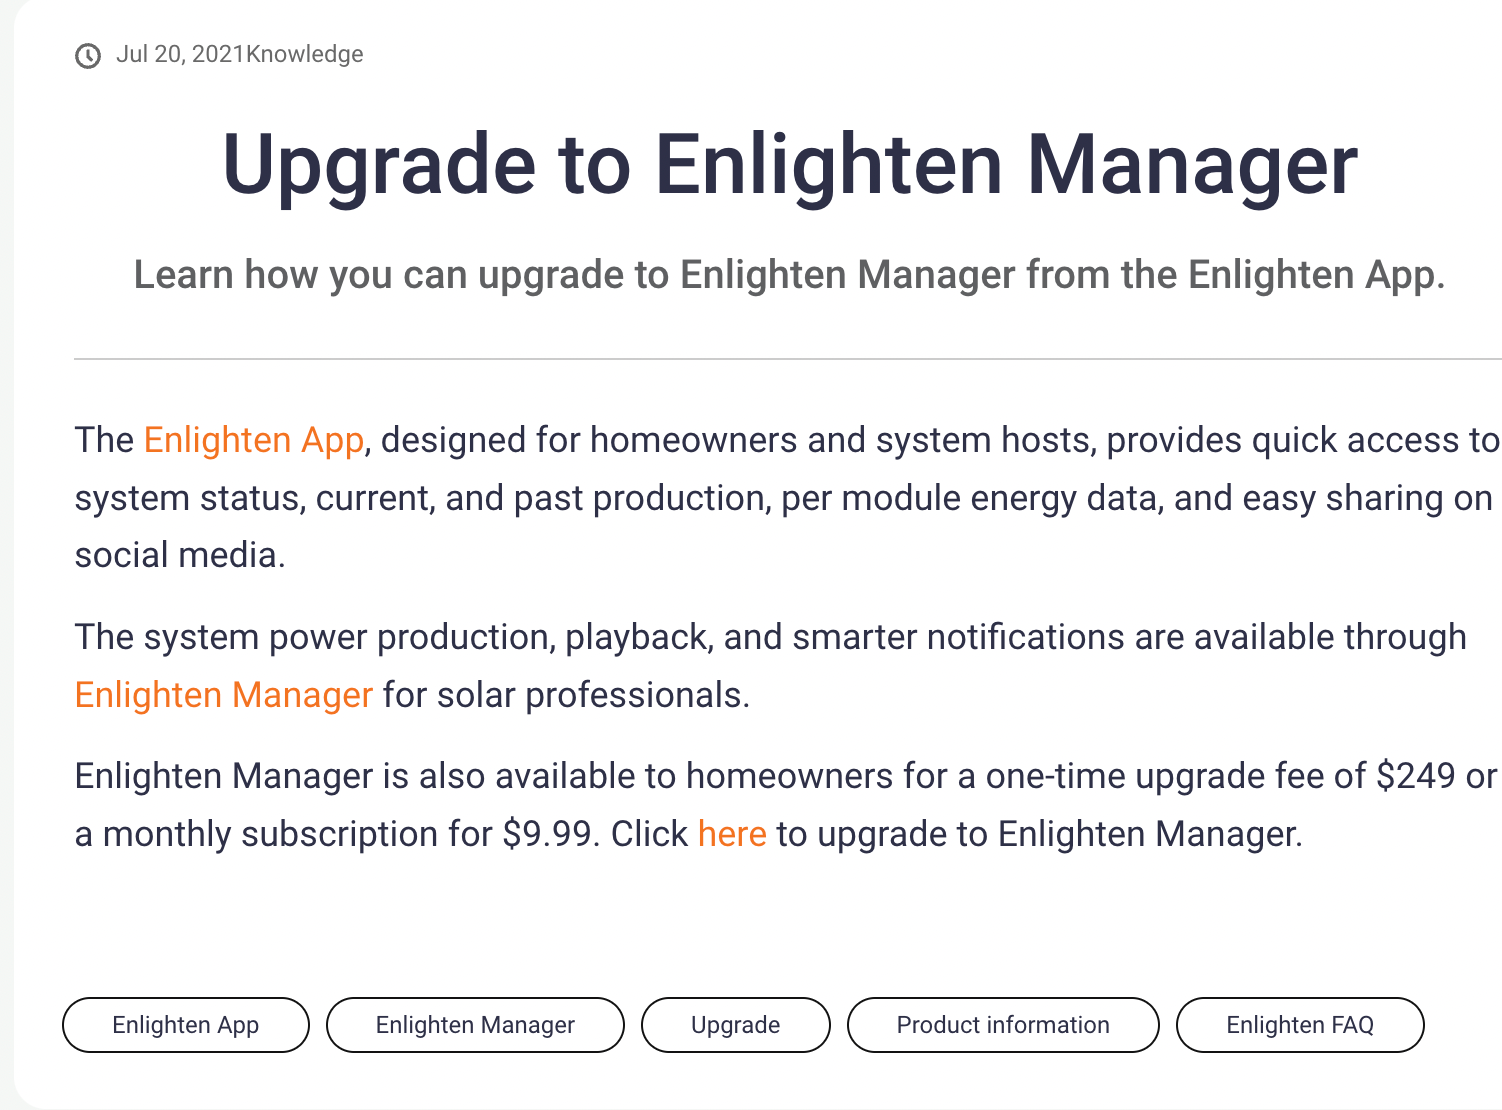
After getting solar panels I got used to checking the Enphase app for power details, but it's not very reliable as sometimes the data is delayed, it requires internet access and it can't get me any information other than solar and grid consumption. So if I want to see how much power I'm using on generator power, I can't. The other annoying thing is that if I want all of the information, I need to pay Enphase to get access. Despite owning the Inverters, and it being my data...
I looked into The Sense Energy Monitor, but it can't give me all the monitoring I want, and it requires the internet, and it needs to power back up each time after switching to generator power. Not really a good fit for me.
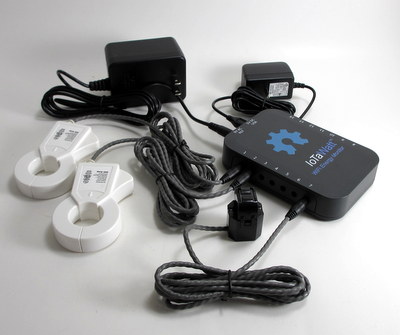
I ended up getting an IoTaWatt, and it's been everything I've wanted and more.
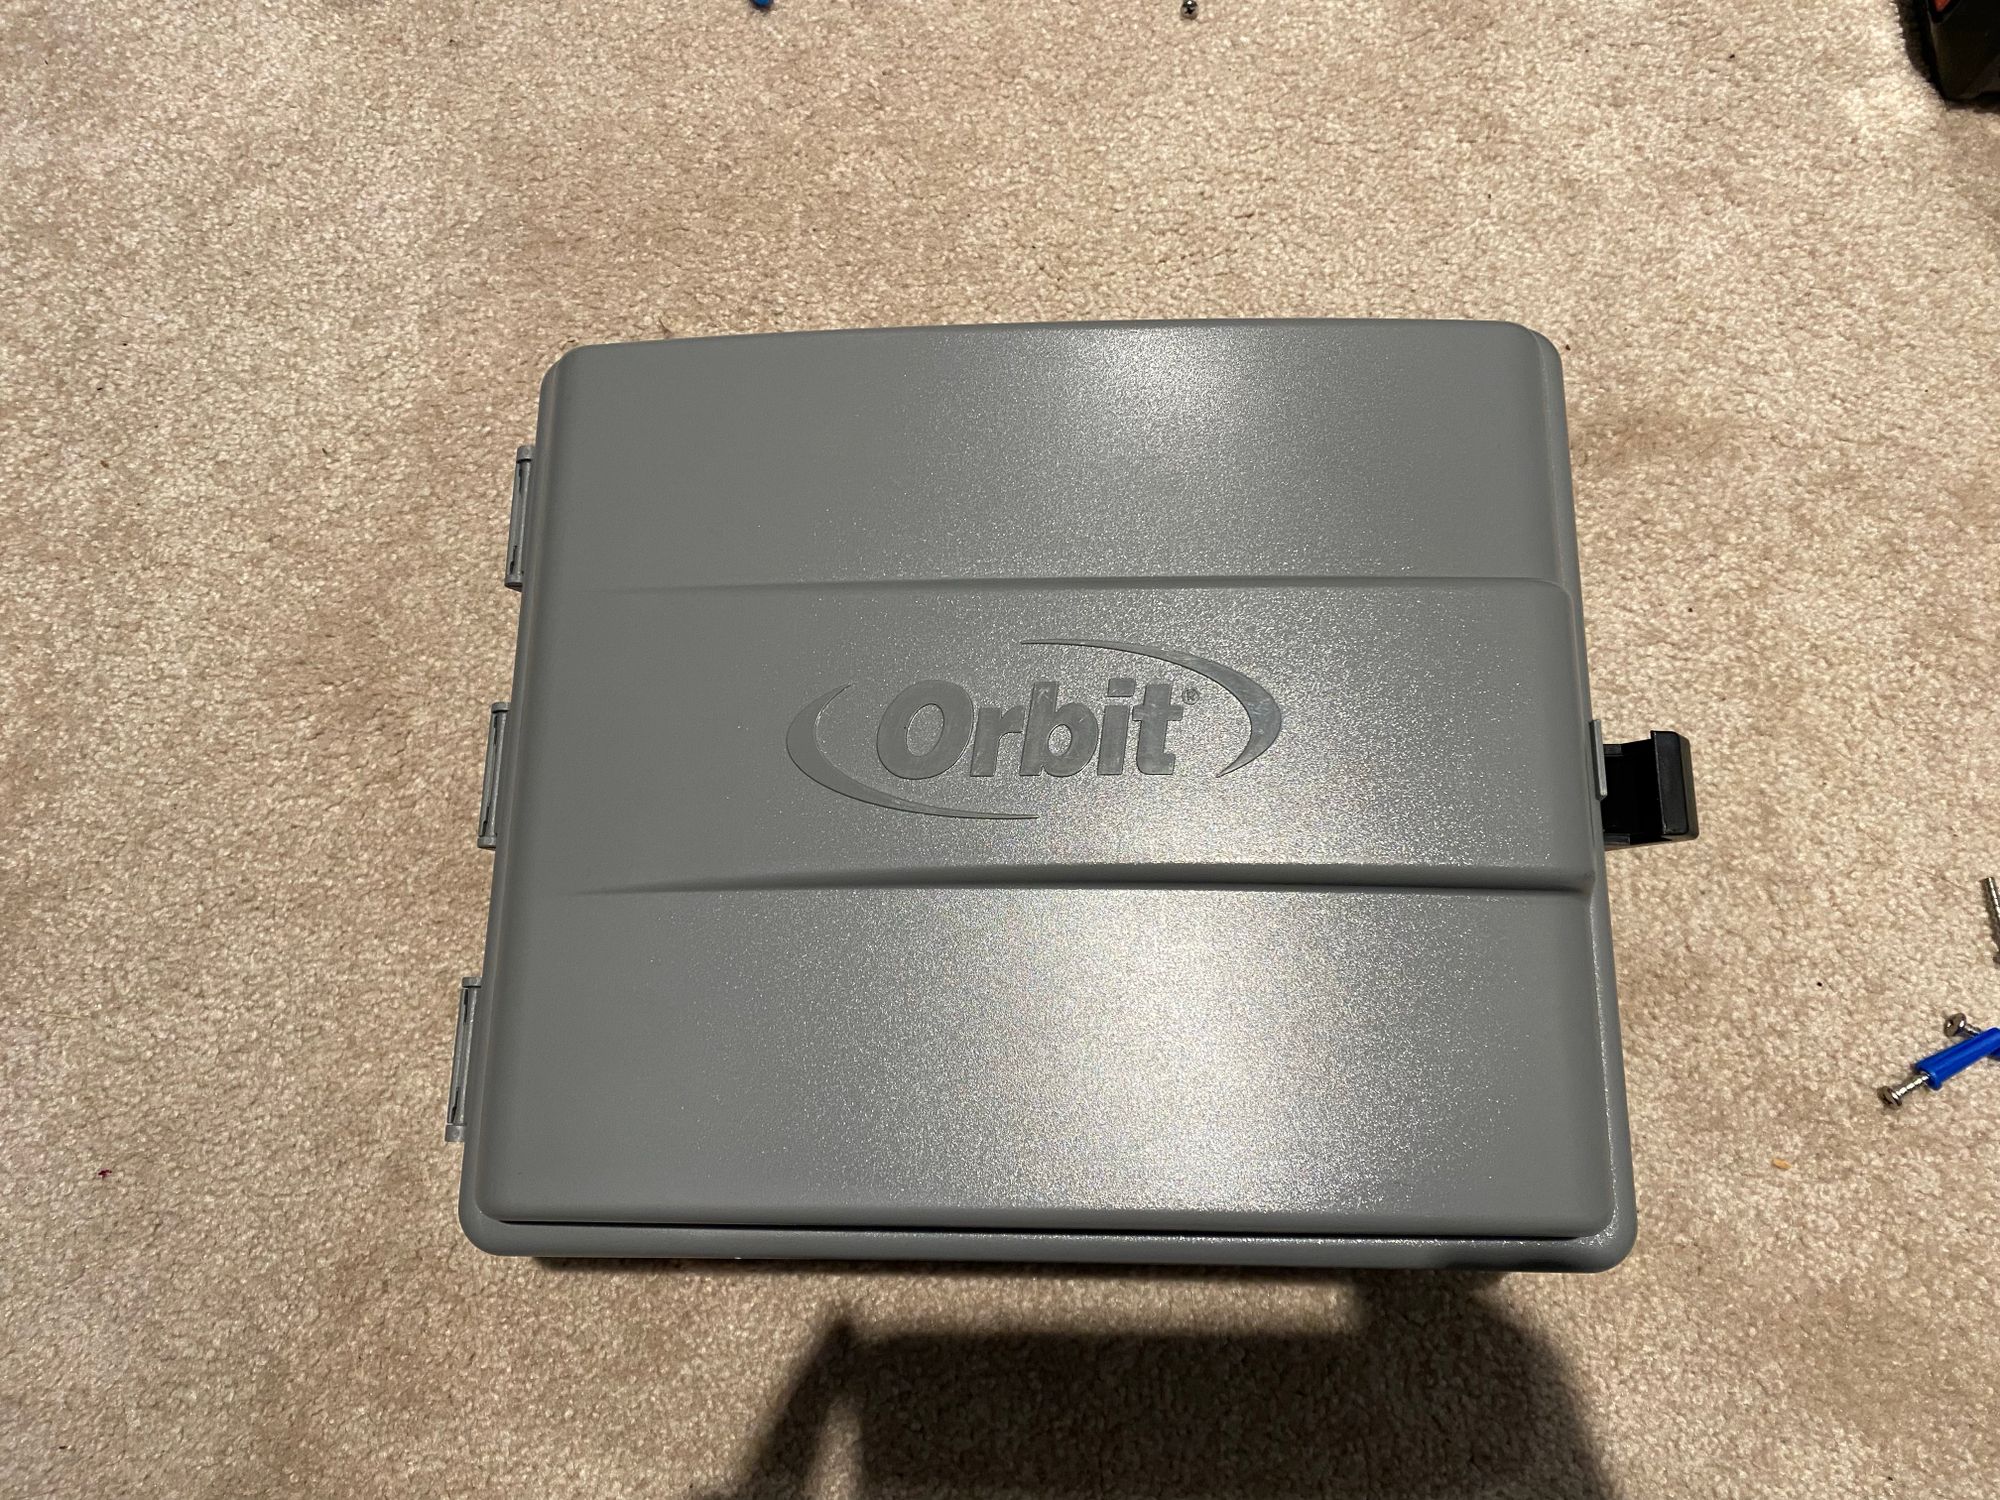
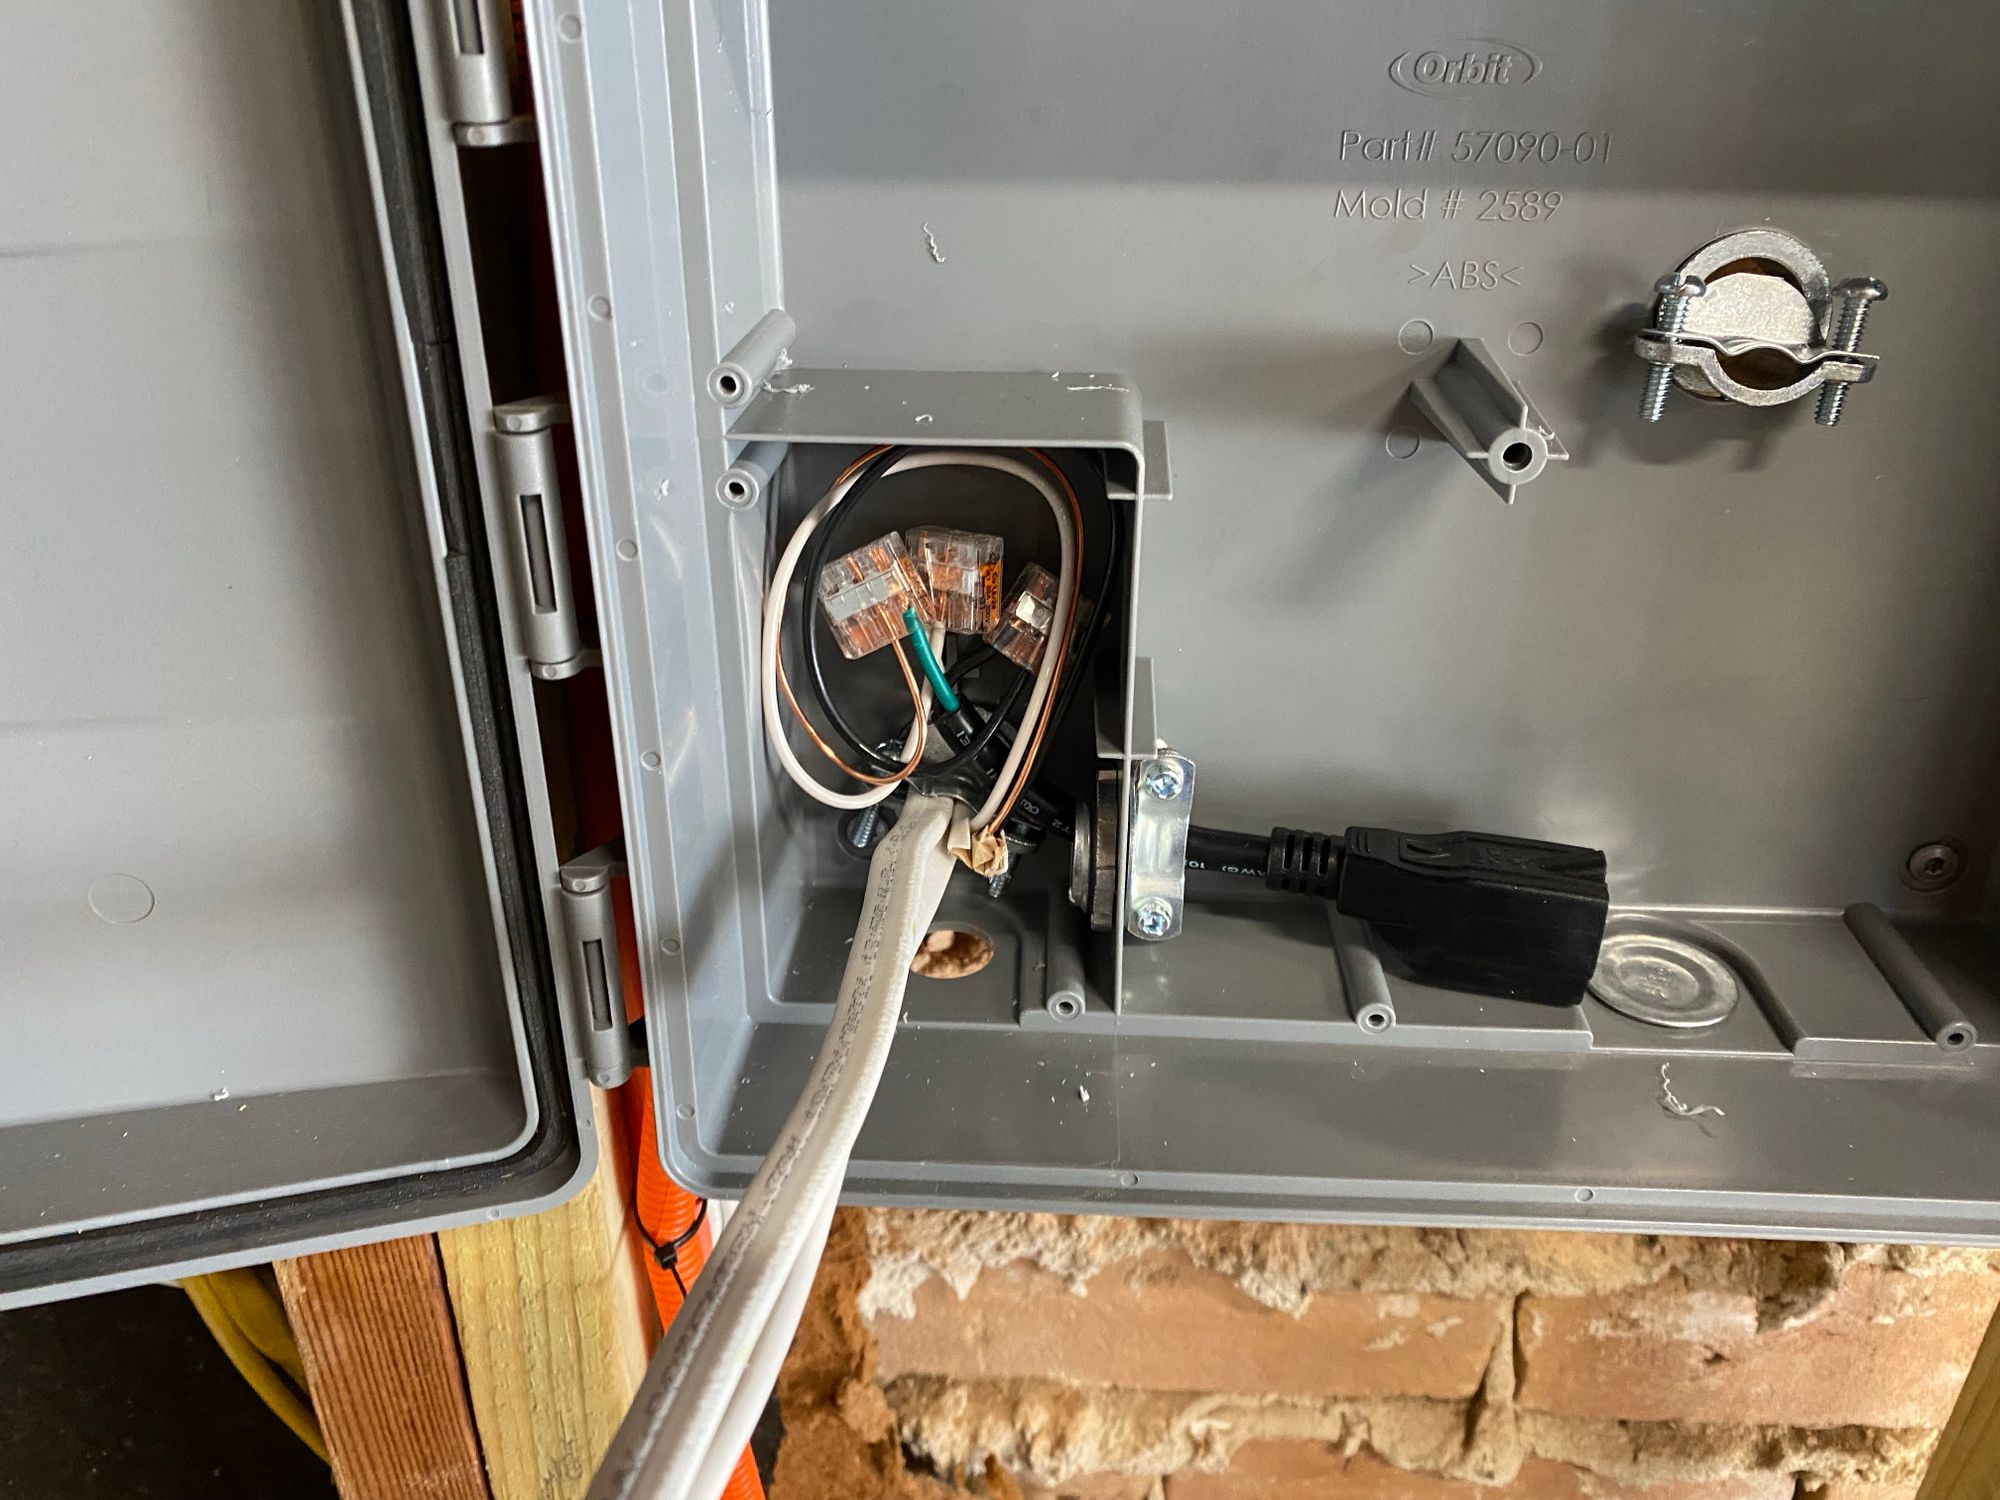
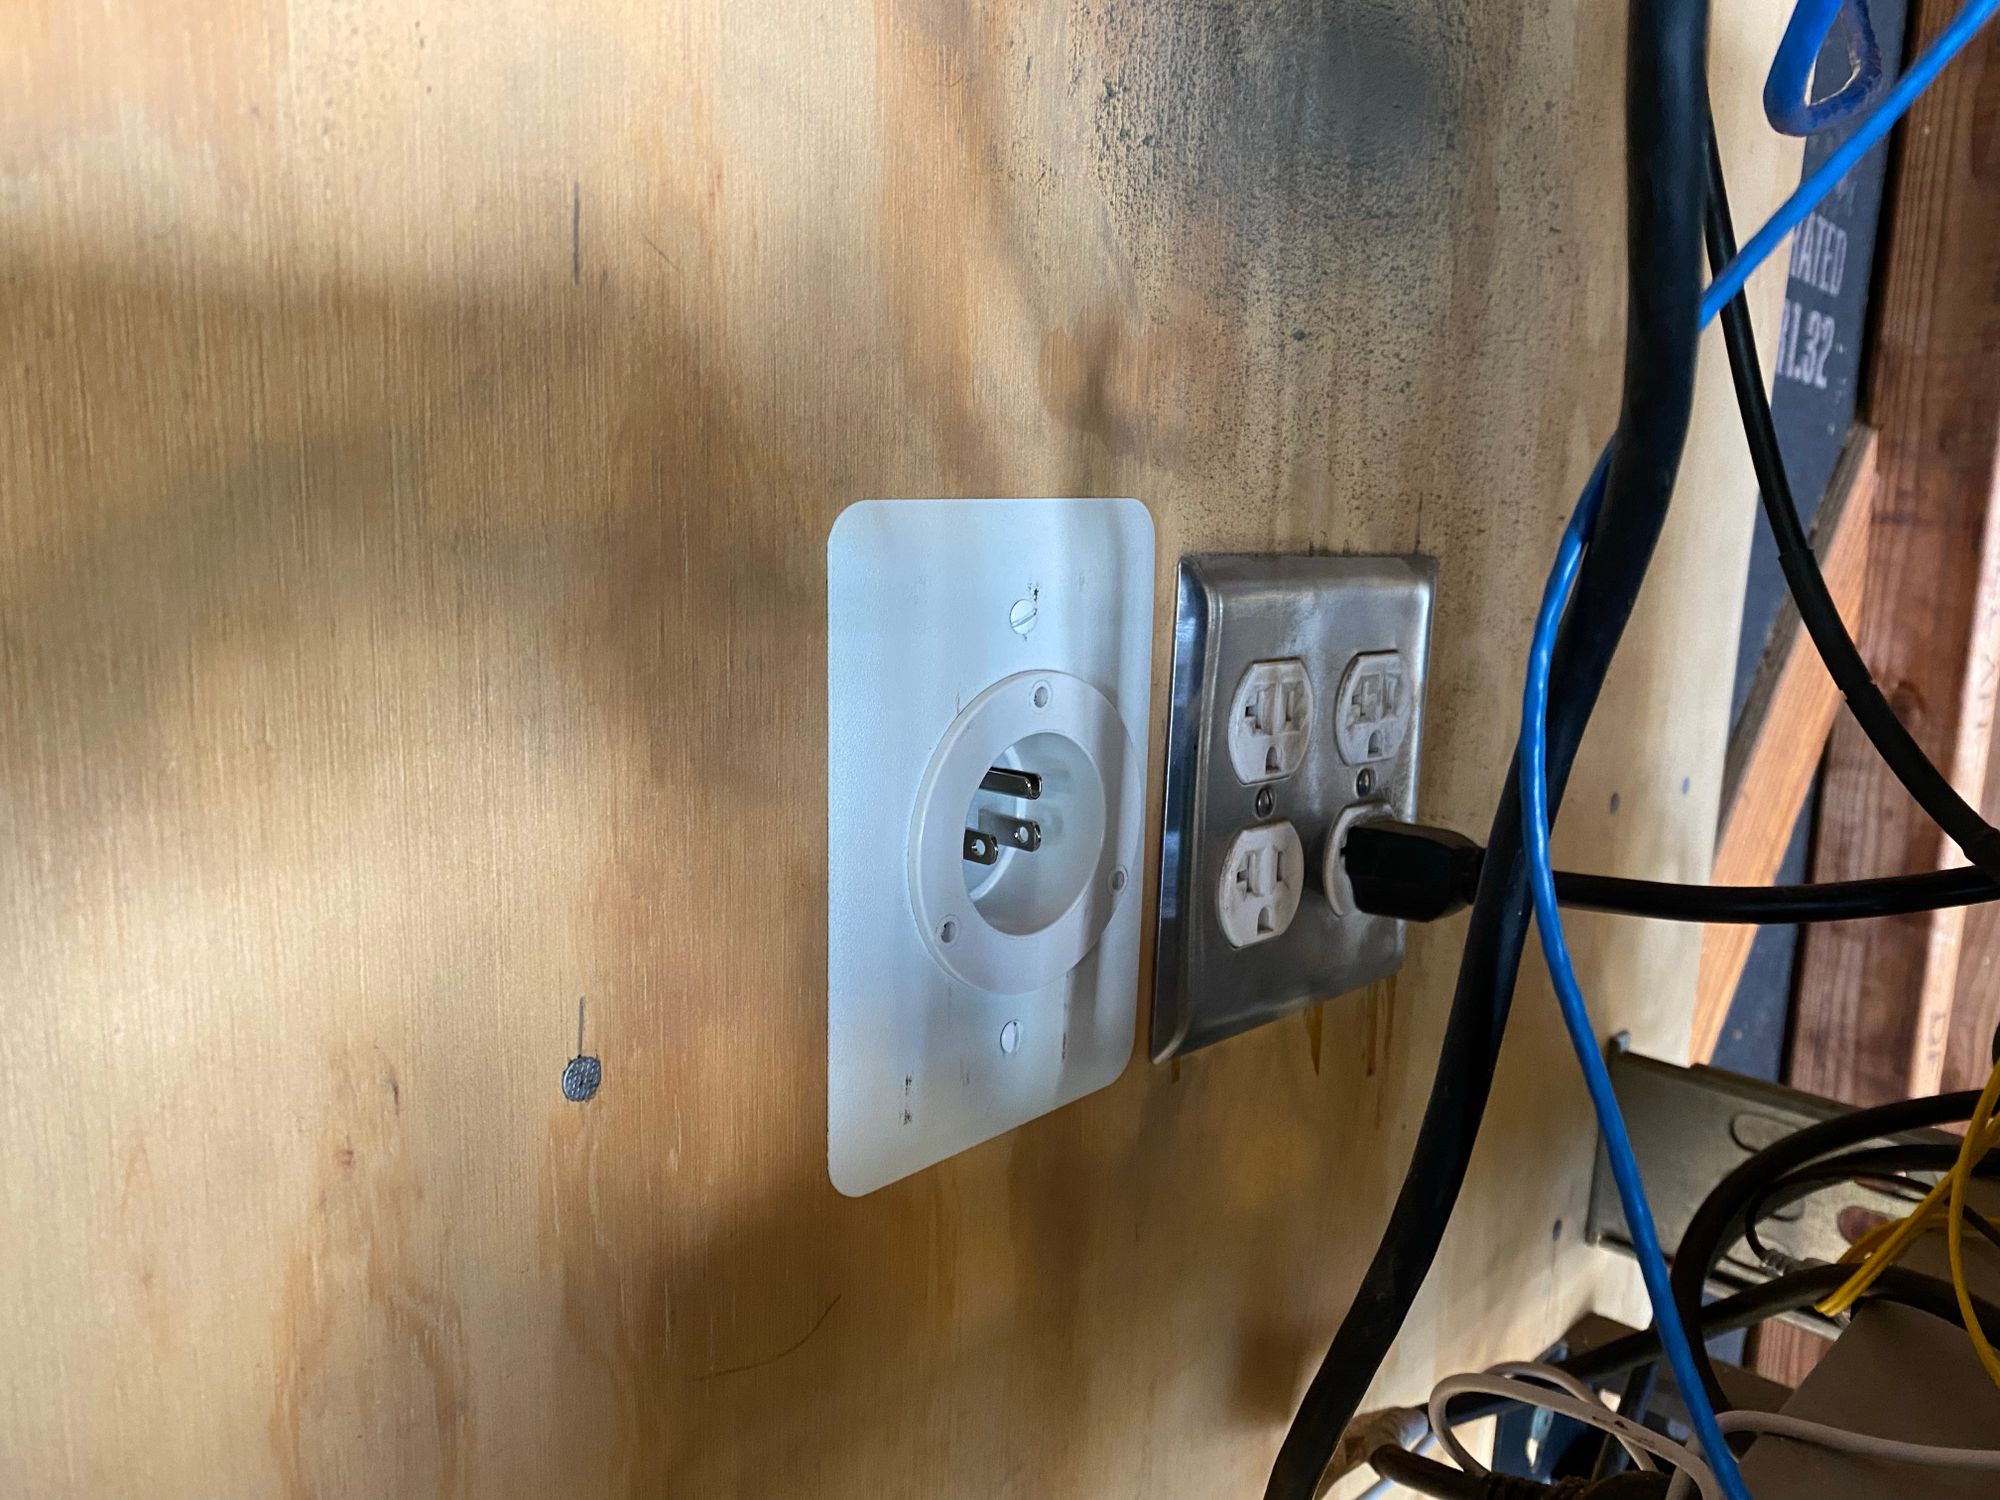
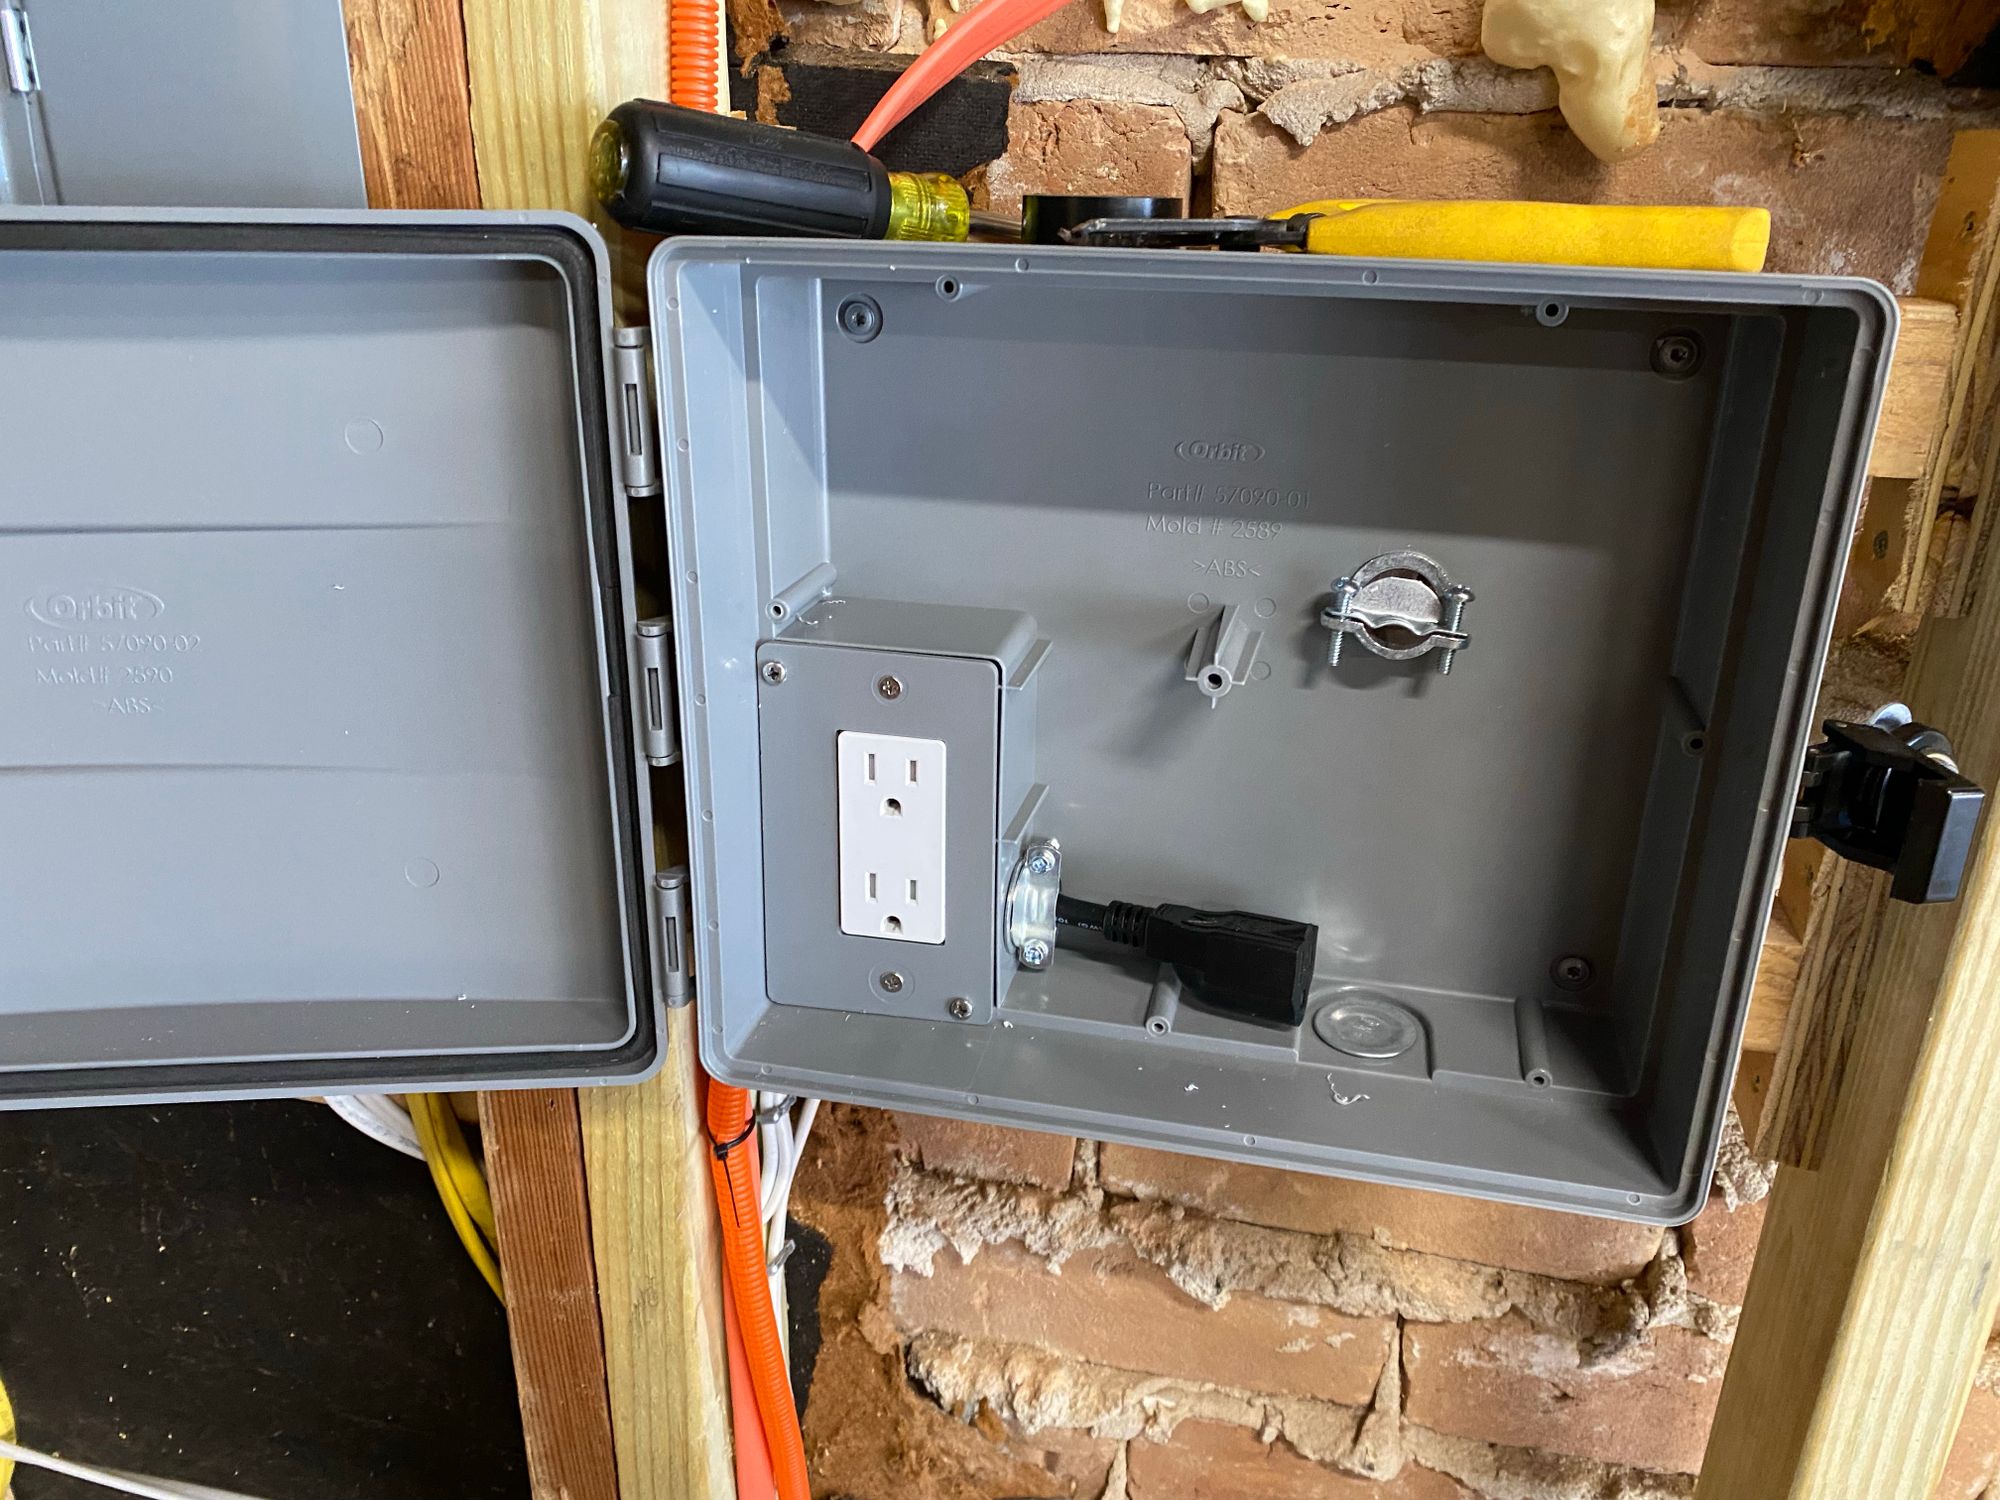
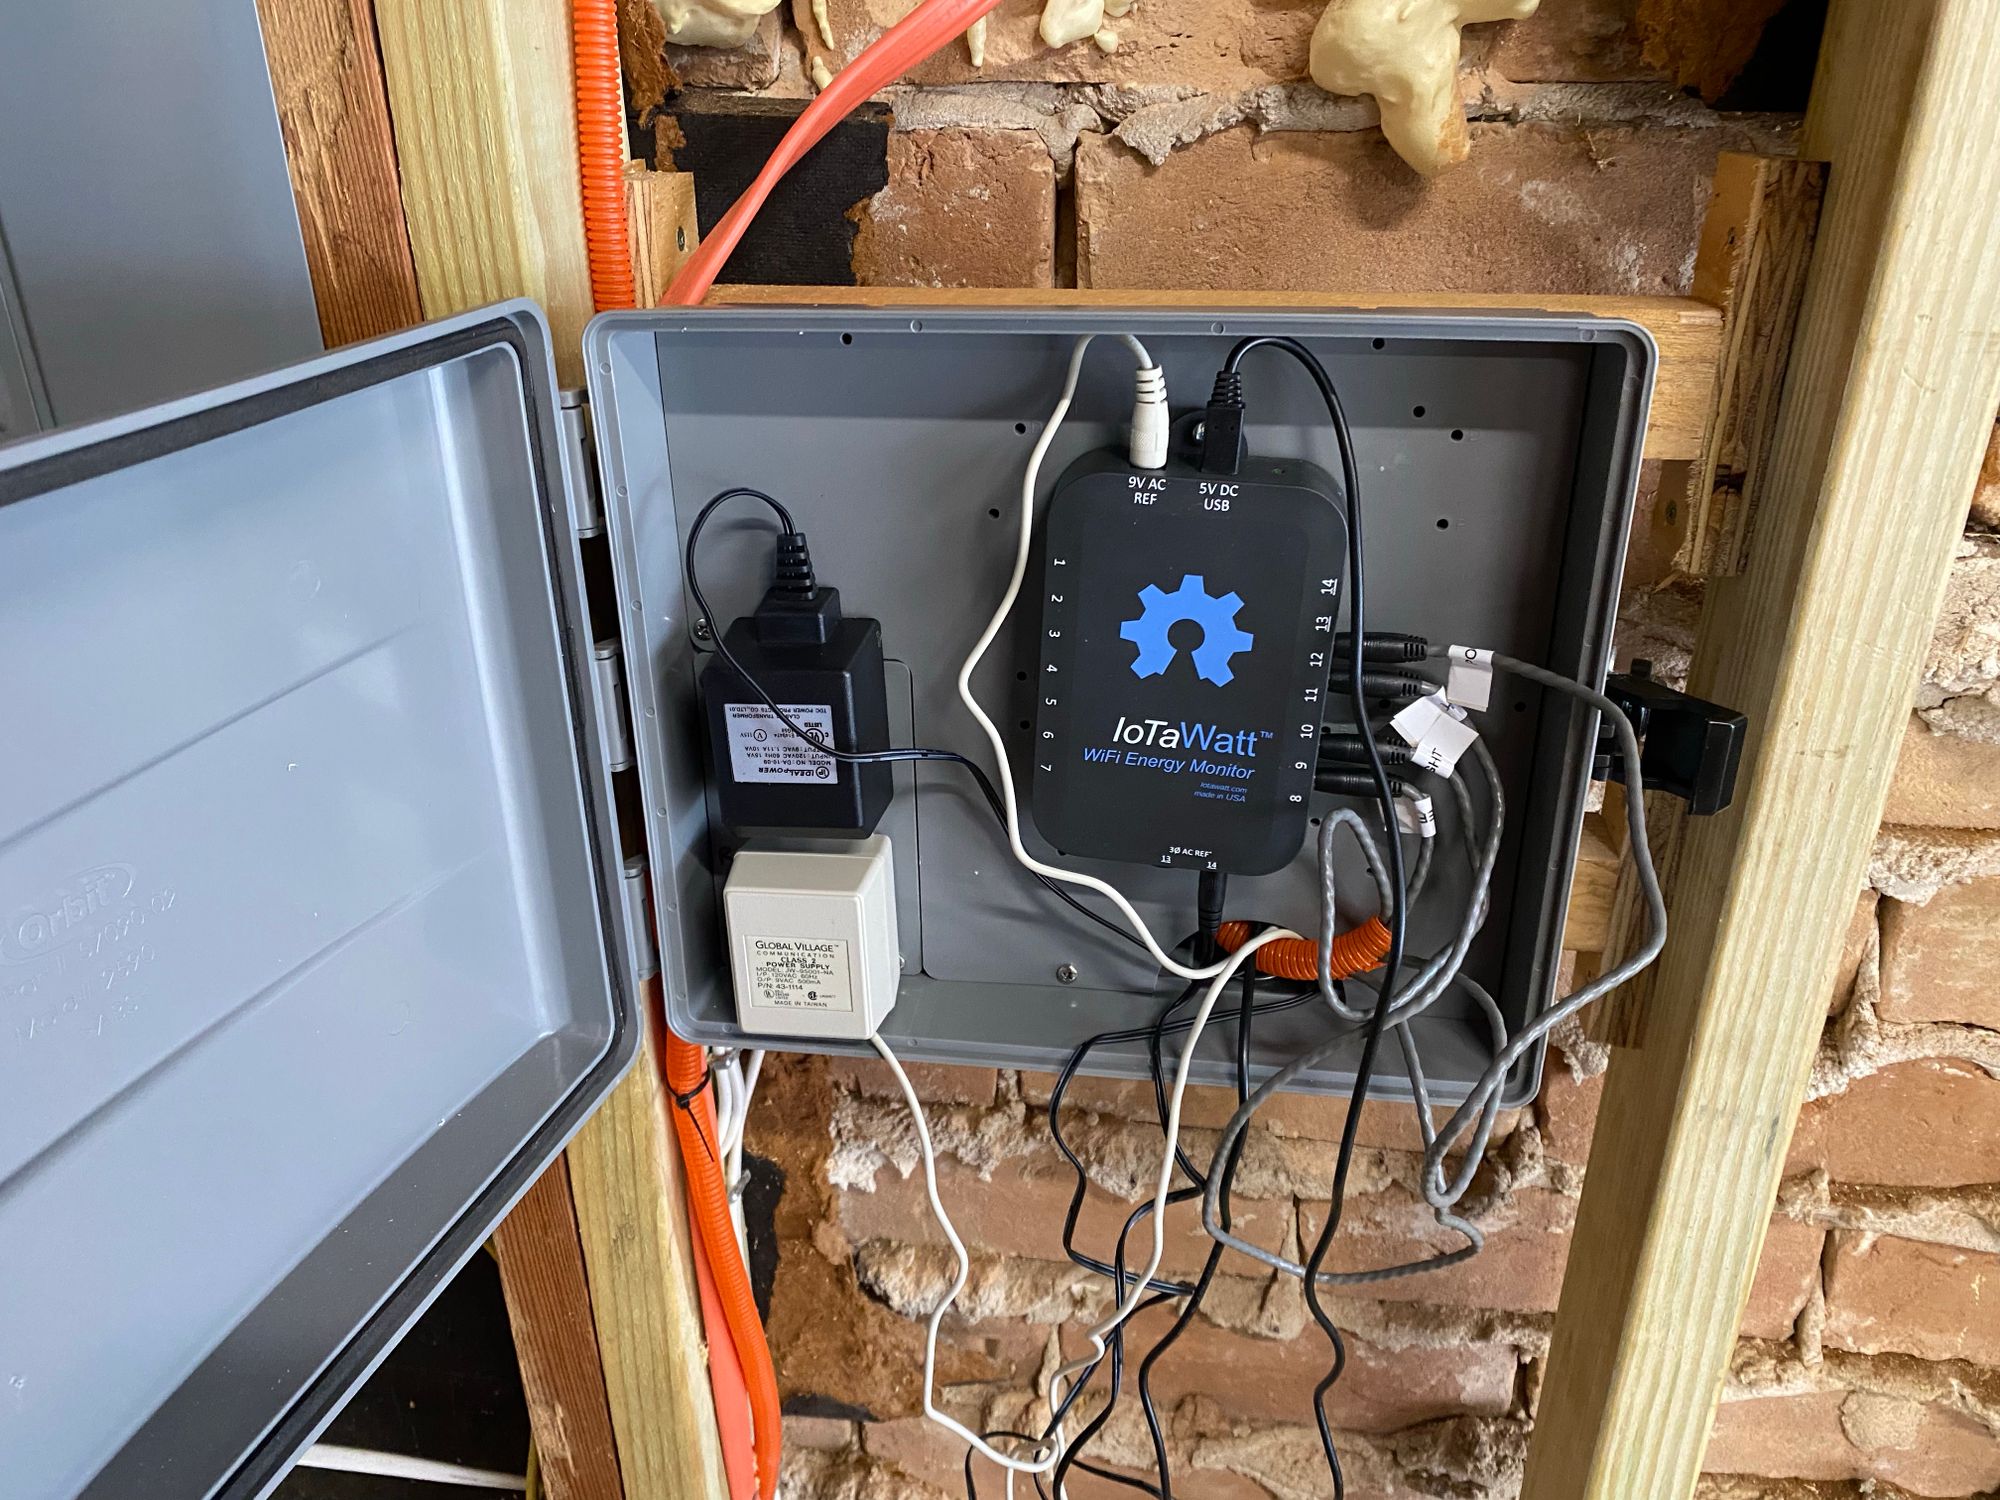
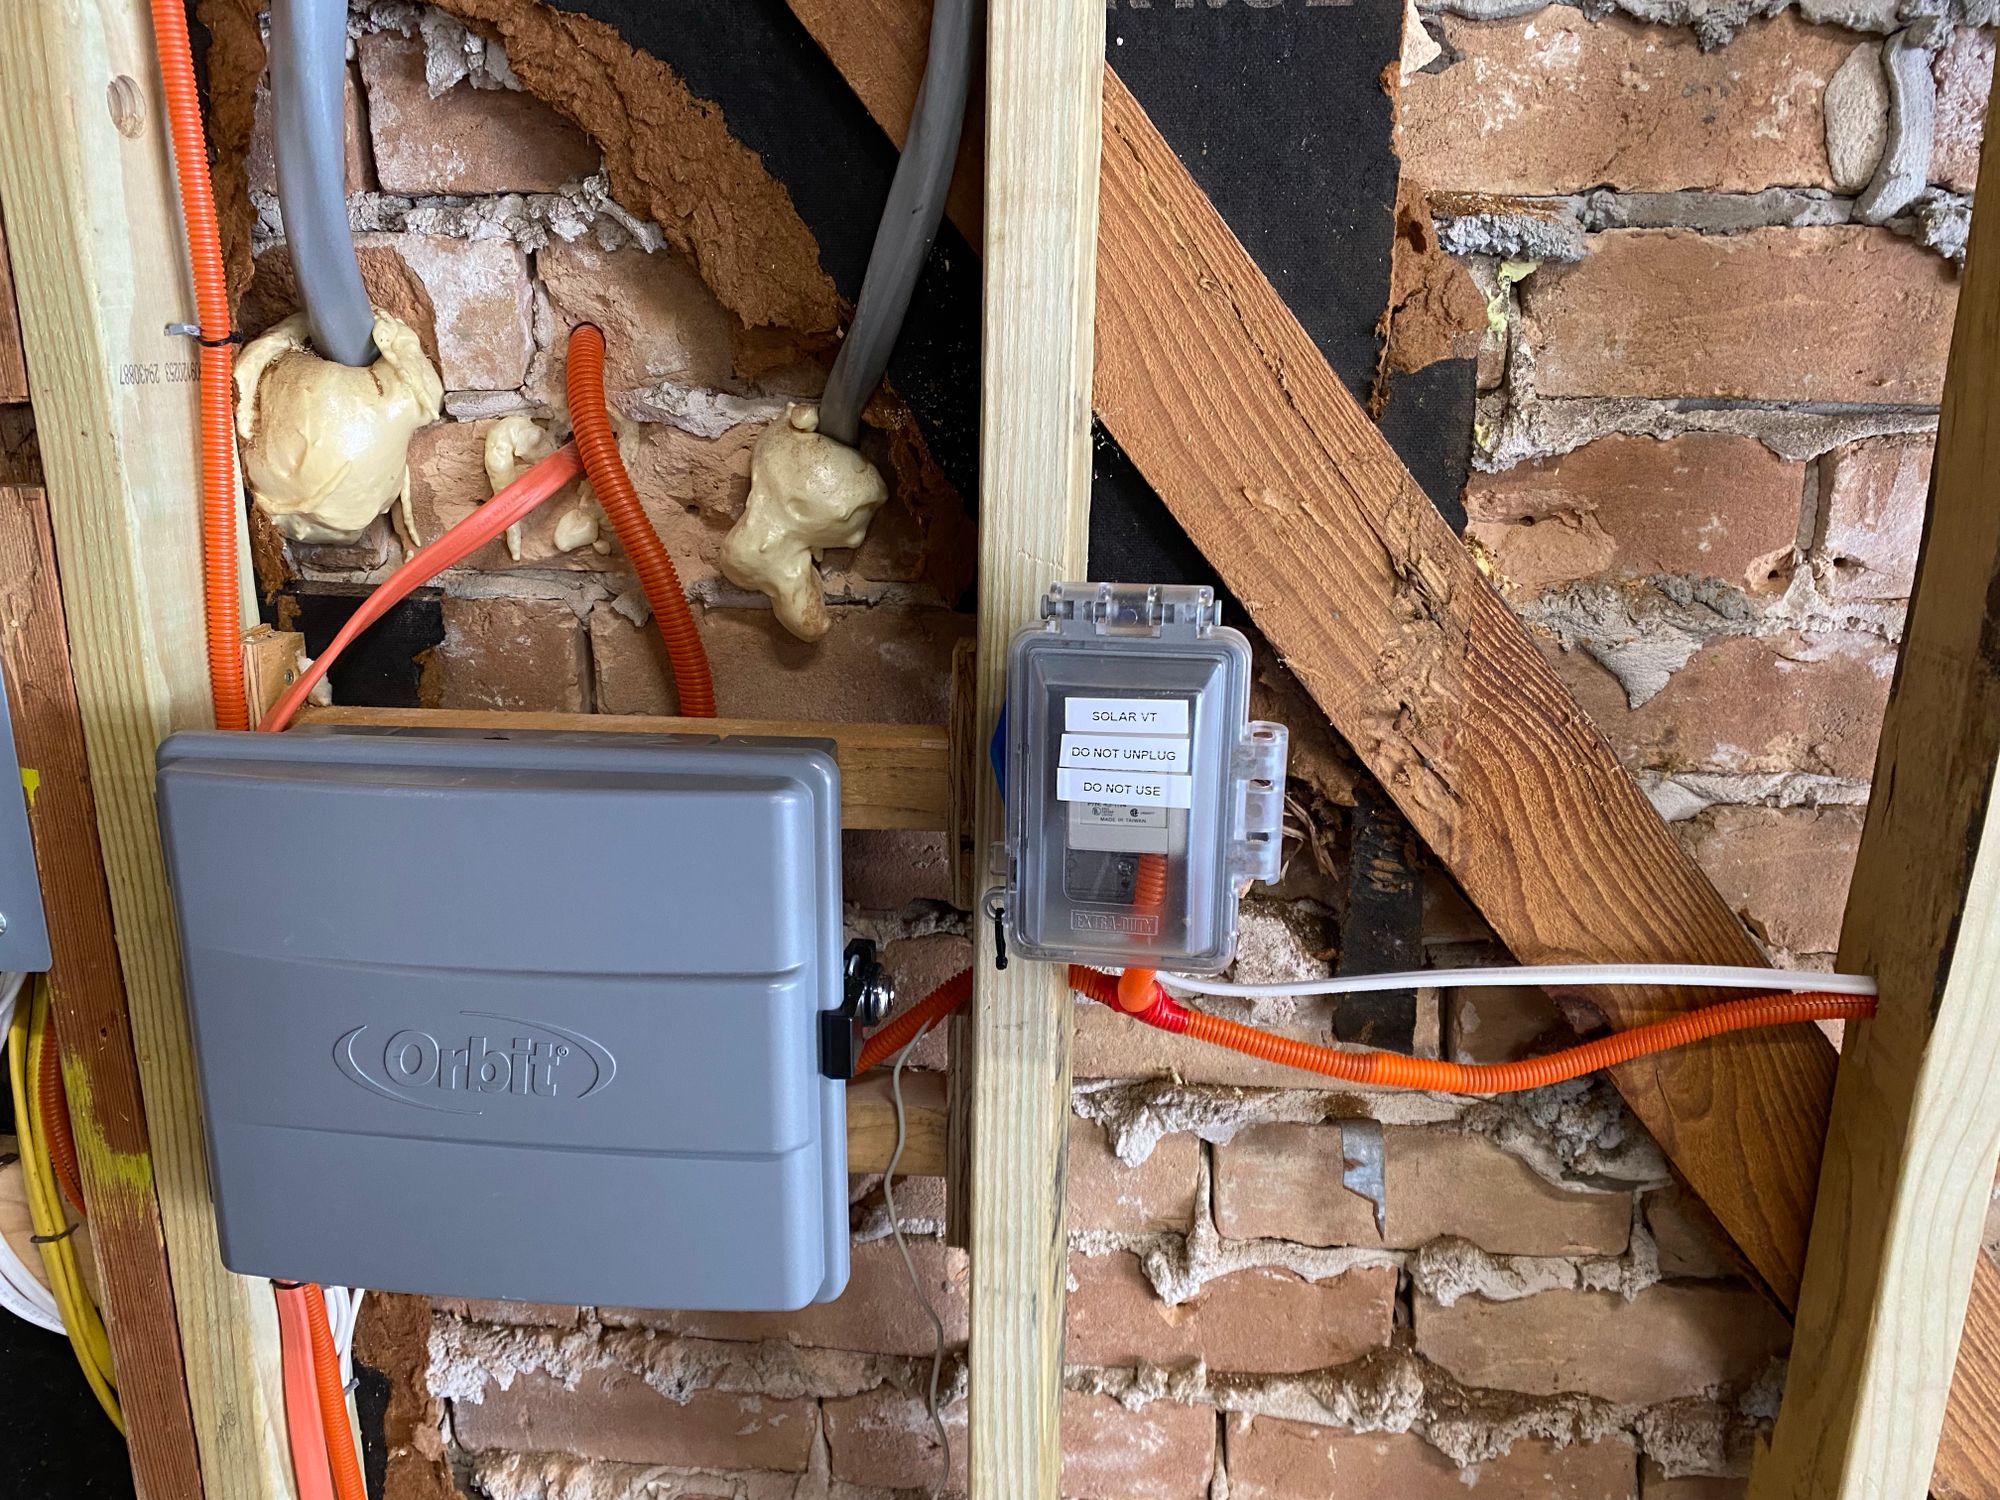
I followed the advice of others IoTaWatt users and bought an Orbit Sprinkler Controller box for the install. It includes a receptacle in the box and has a recessed section behind which is good for routing cables.
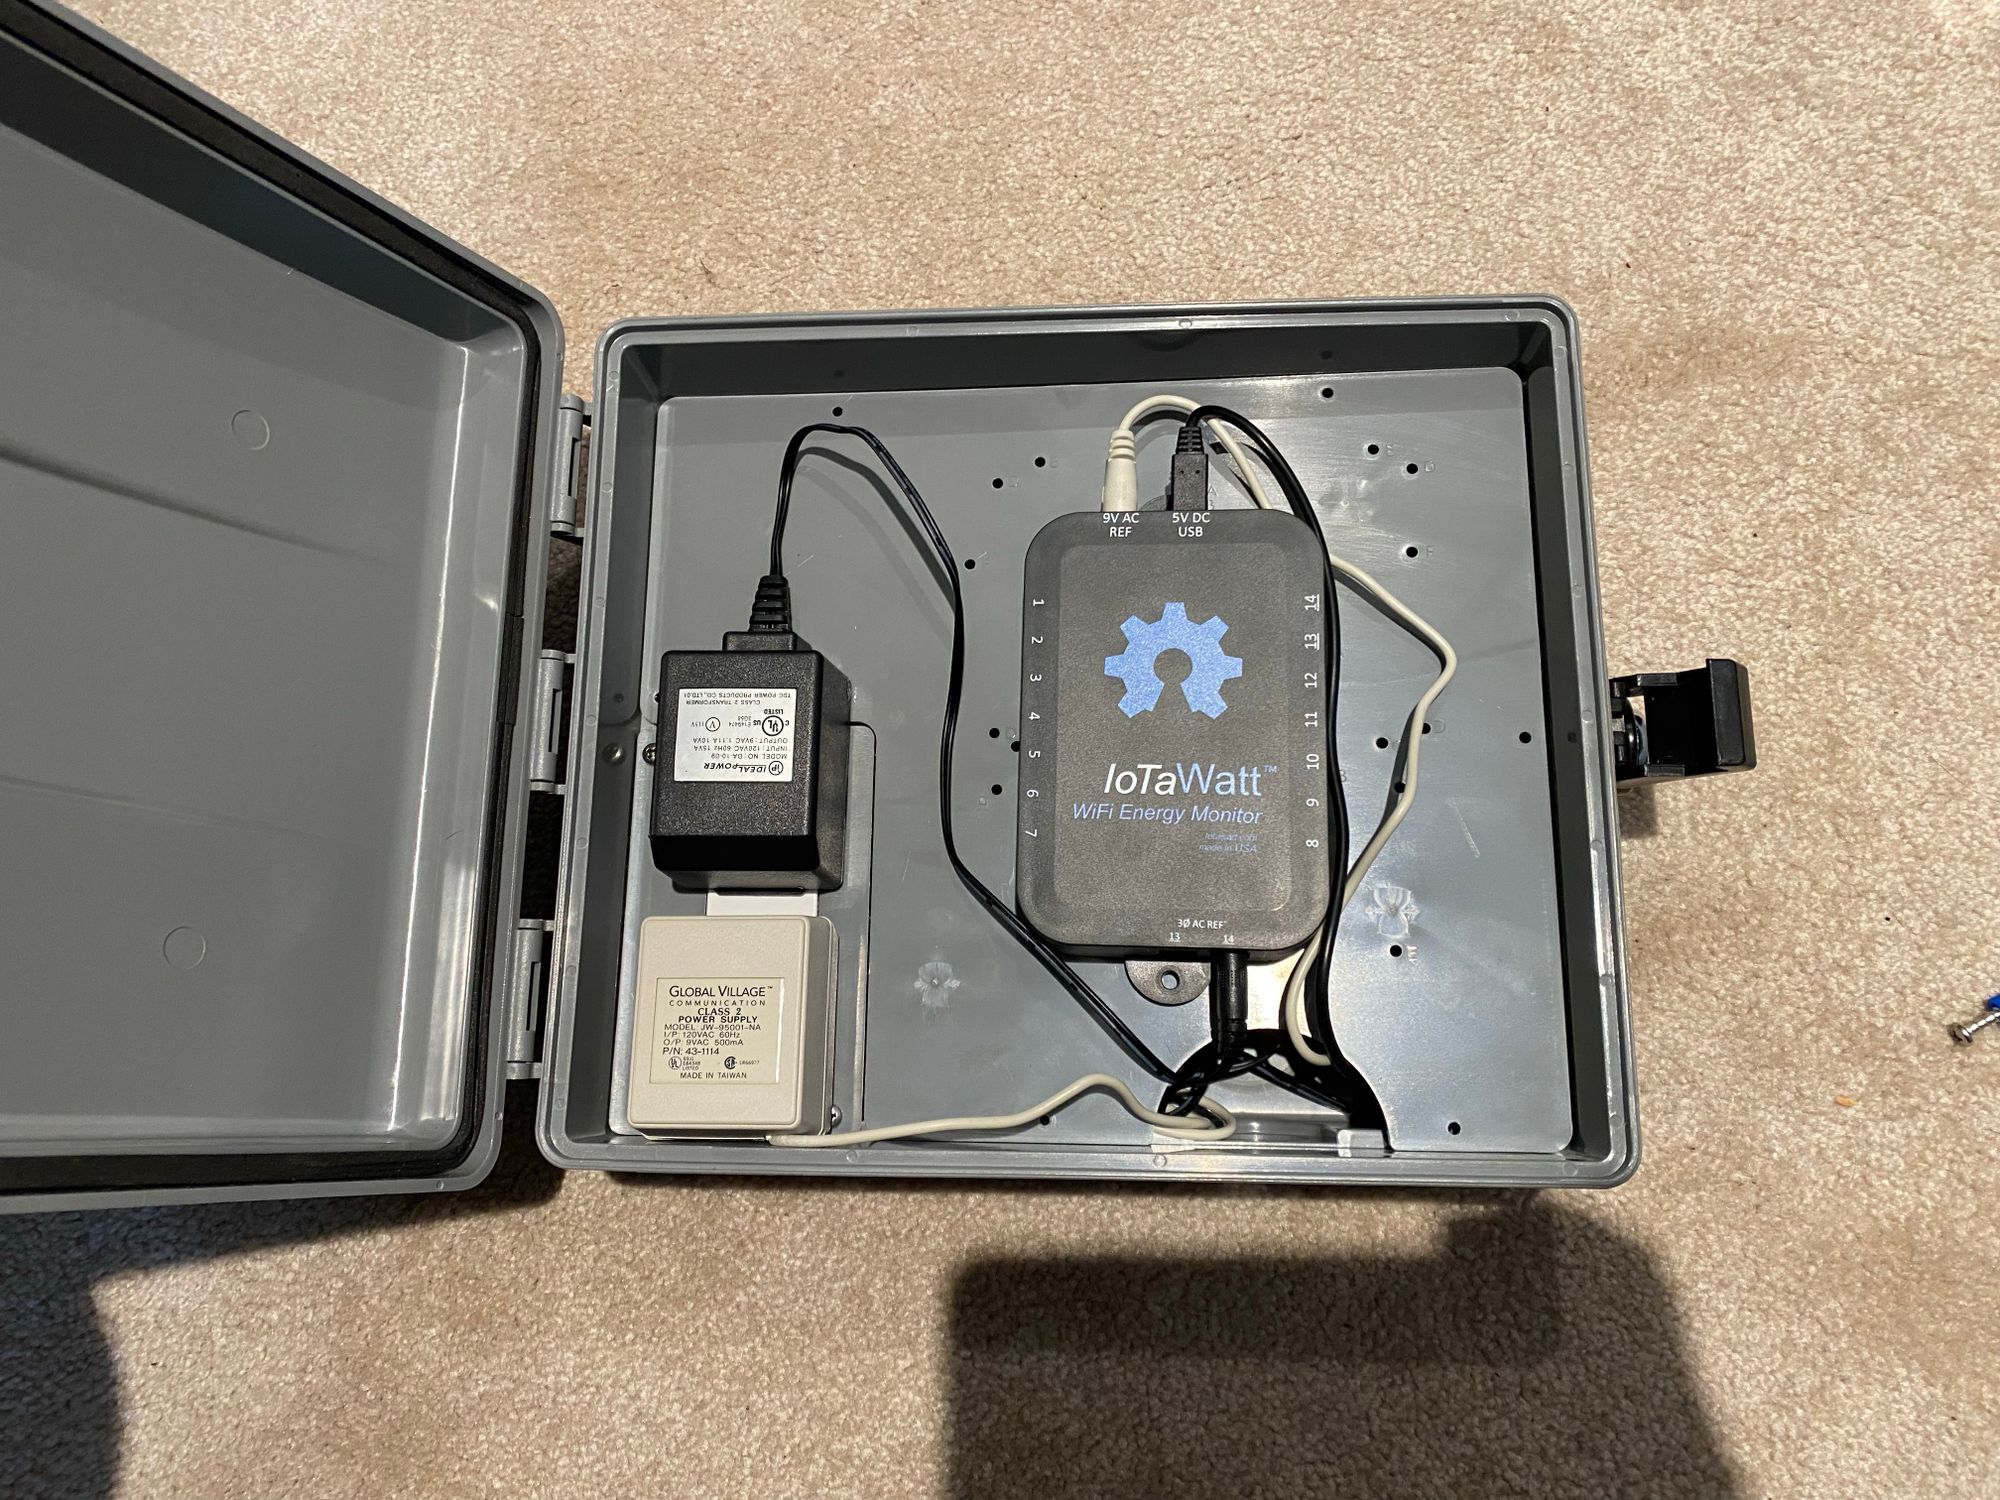
If you looked into IoTaWatt you notice they come with just 1 VT in the kit. This lets you monitor the voltage of just 1 Leg of a US split phase system which has 2 legs. The general idea is that they are usually very close, and a voltage drop on one leg usually means a voltage drop on the other. If you didn't know, a VT is a voltage transformer that converts 120v AC into 9v AC. With some math, you can figure out the input voltage from the output voltage, which IoTaWatt does for you.
But, I decided to get another VT as you can see in the picture. I wanted to see both legs of my service which would give me more accurate voltage measurement, and also let me know if I ever had an issue with a bad neutral which would cause a voltage imbalance.
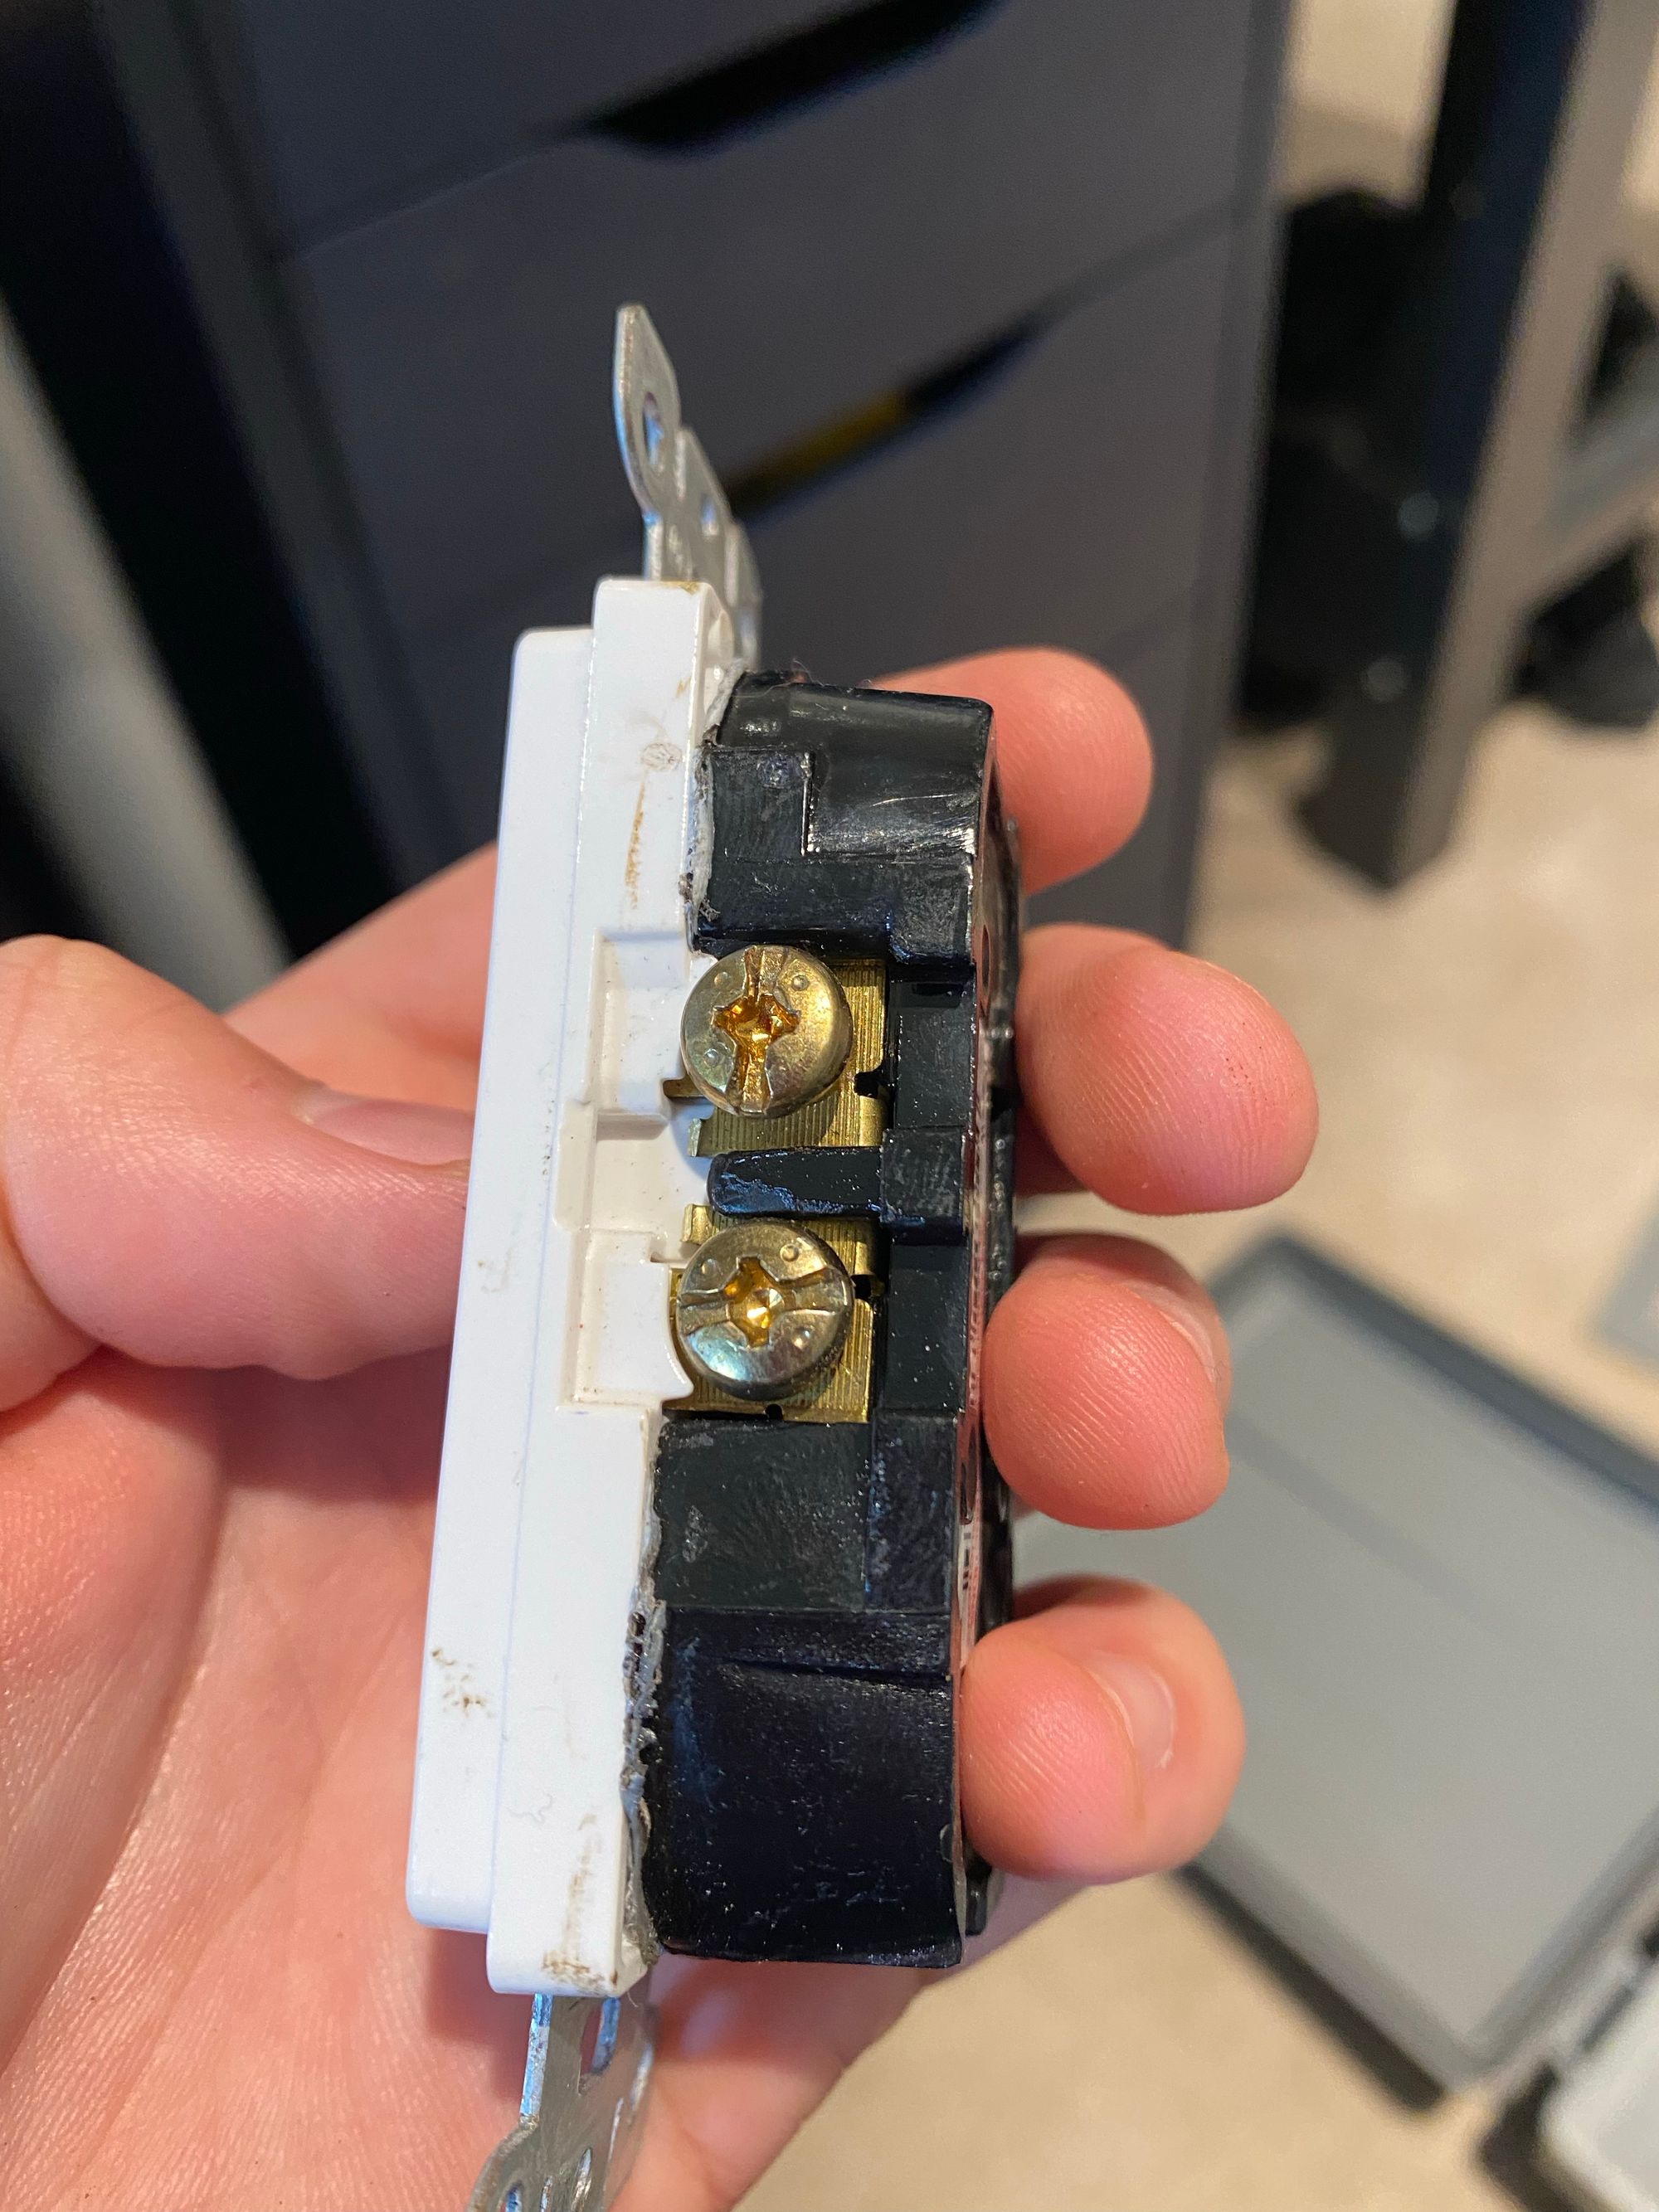
To do this, I removed the bridge connecting the top and bottom of the receptacle, and ran 2 x 15a circuits to it, each being on the other side of the service.
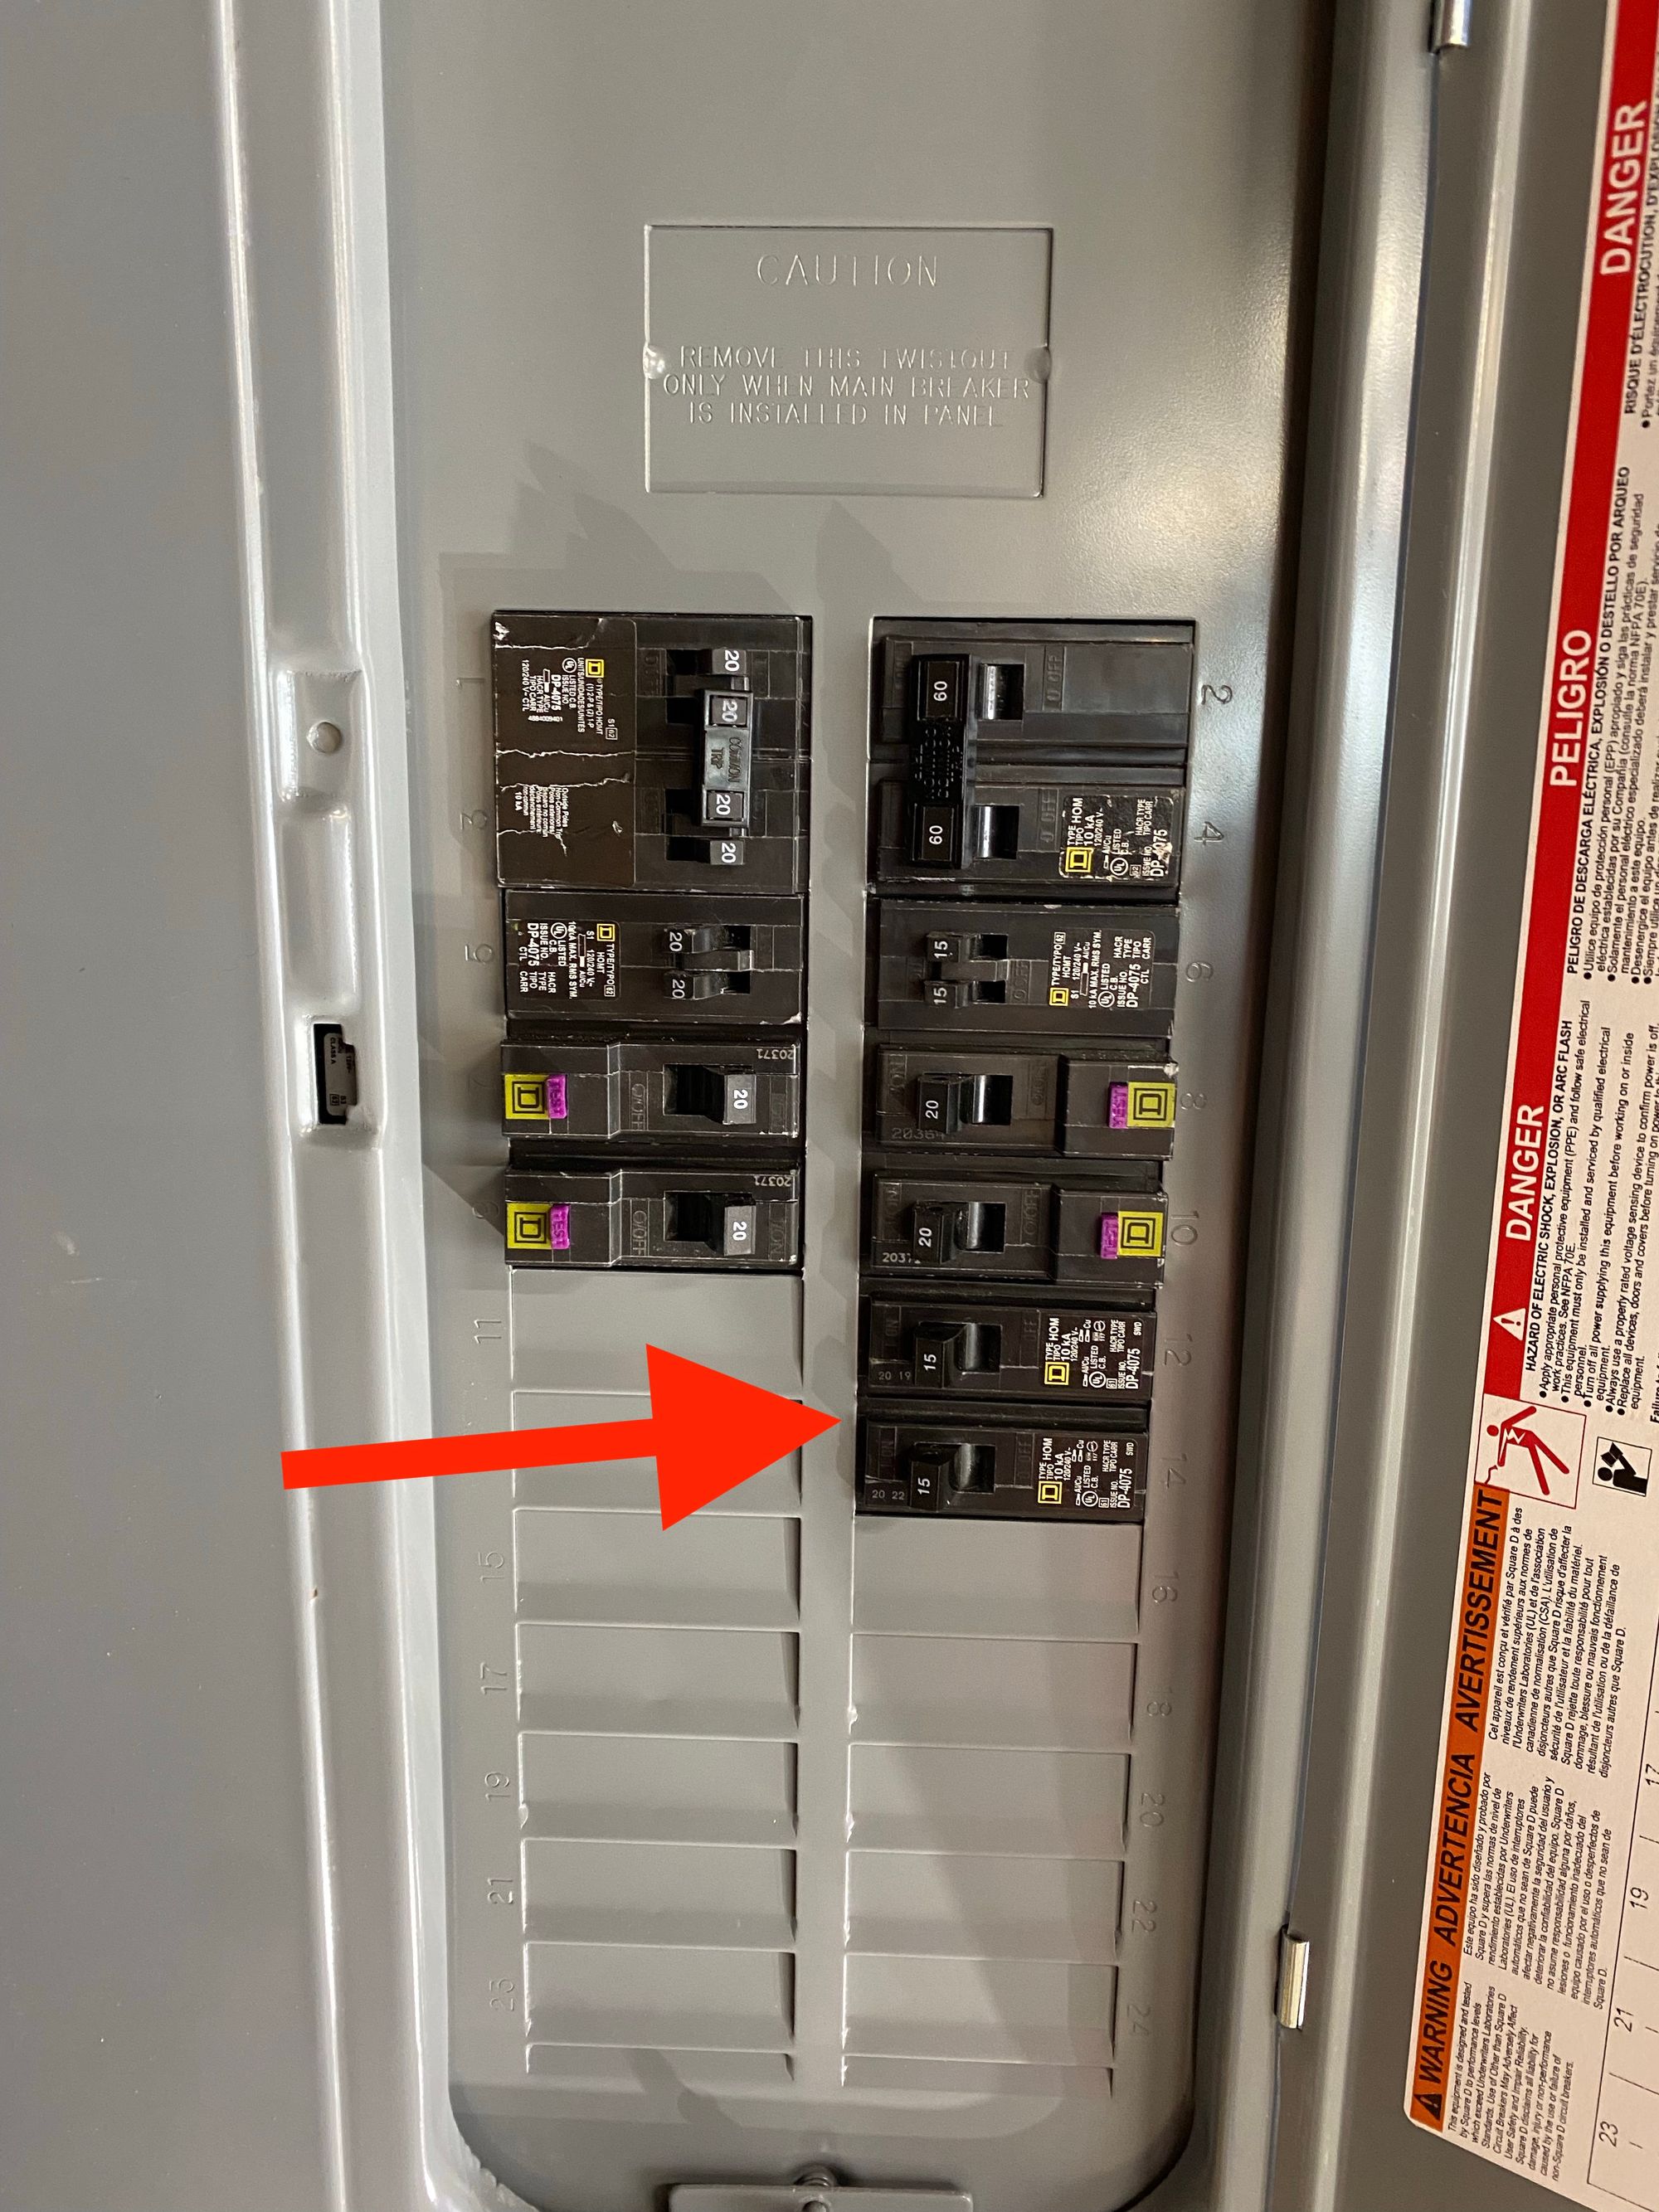
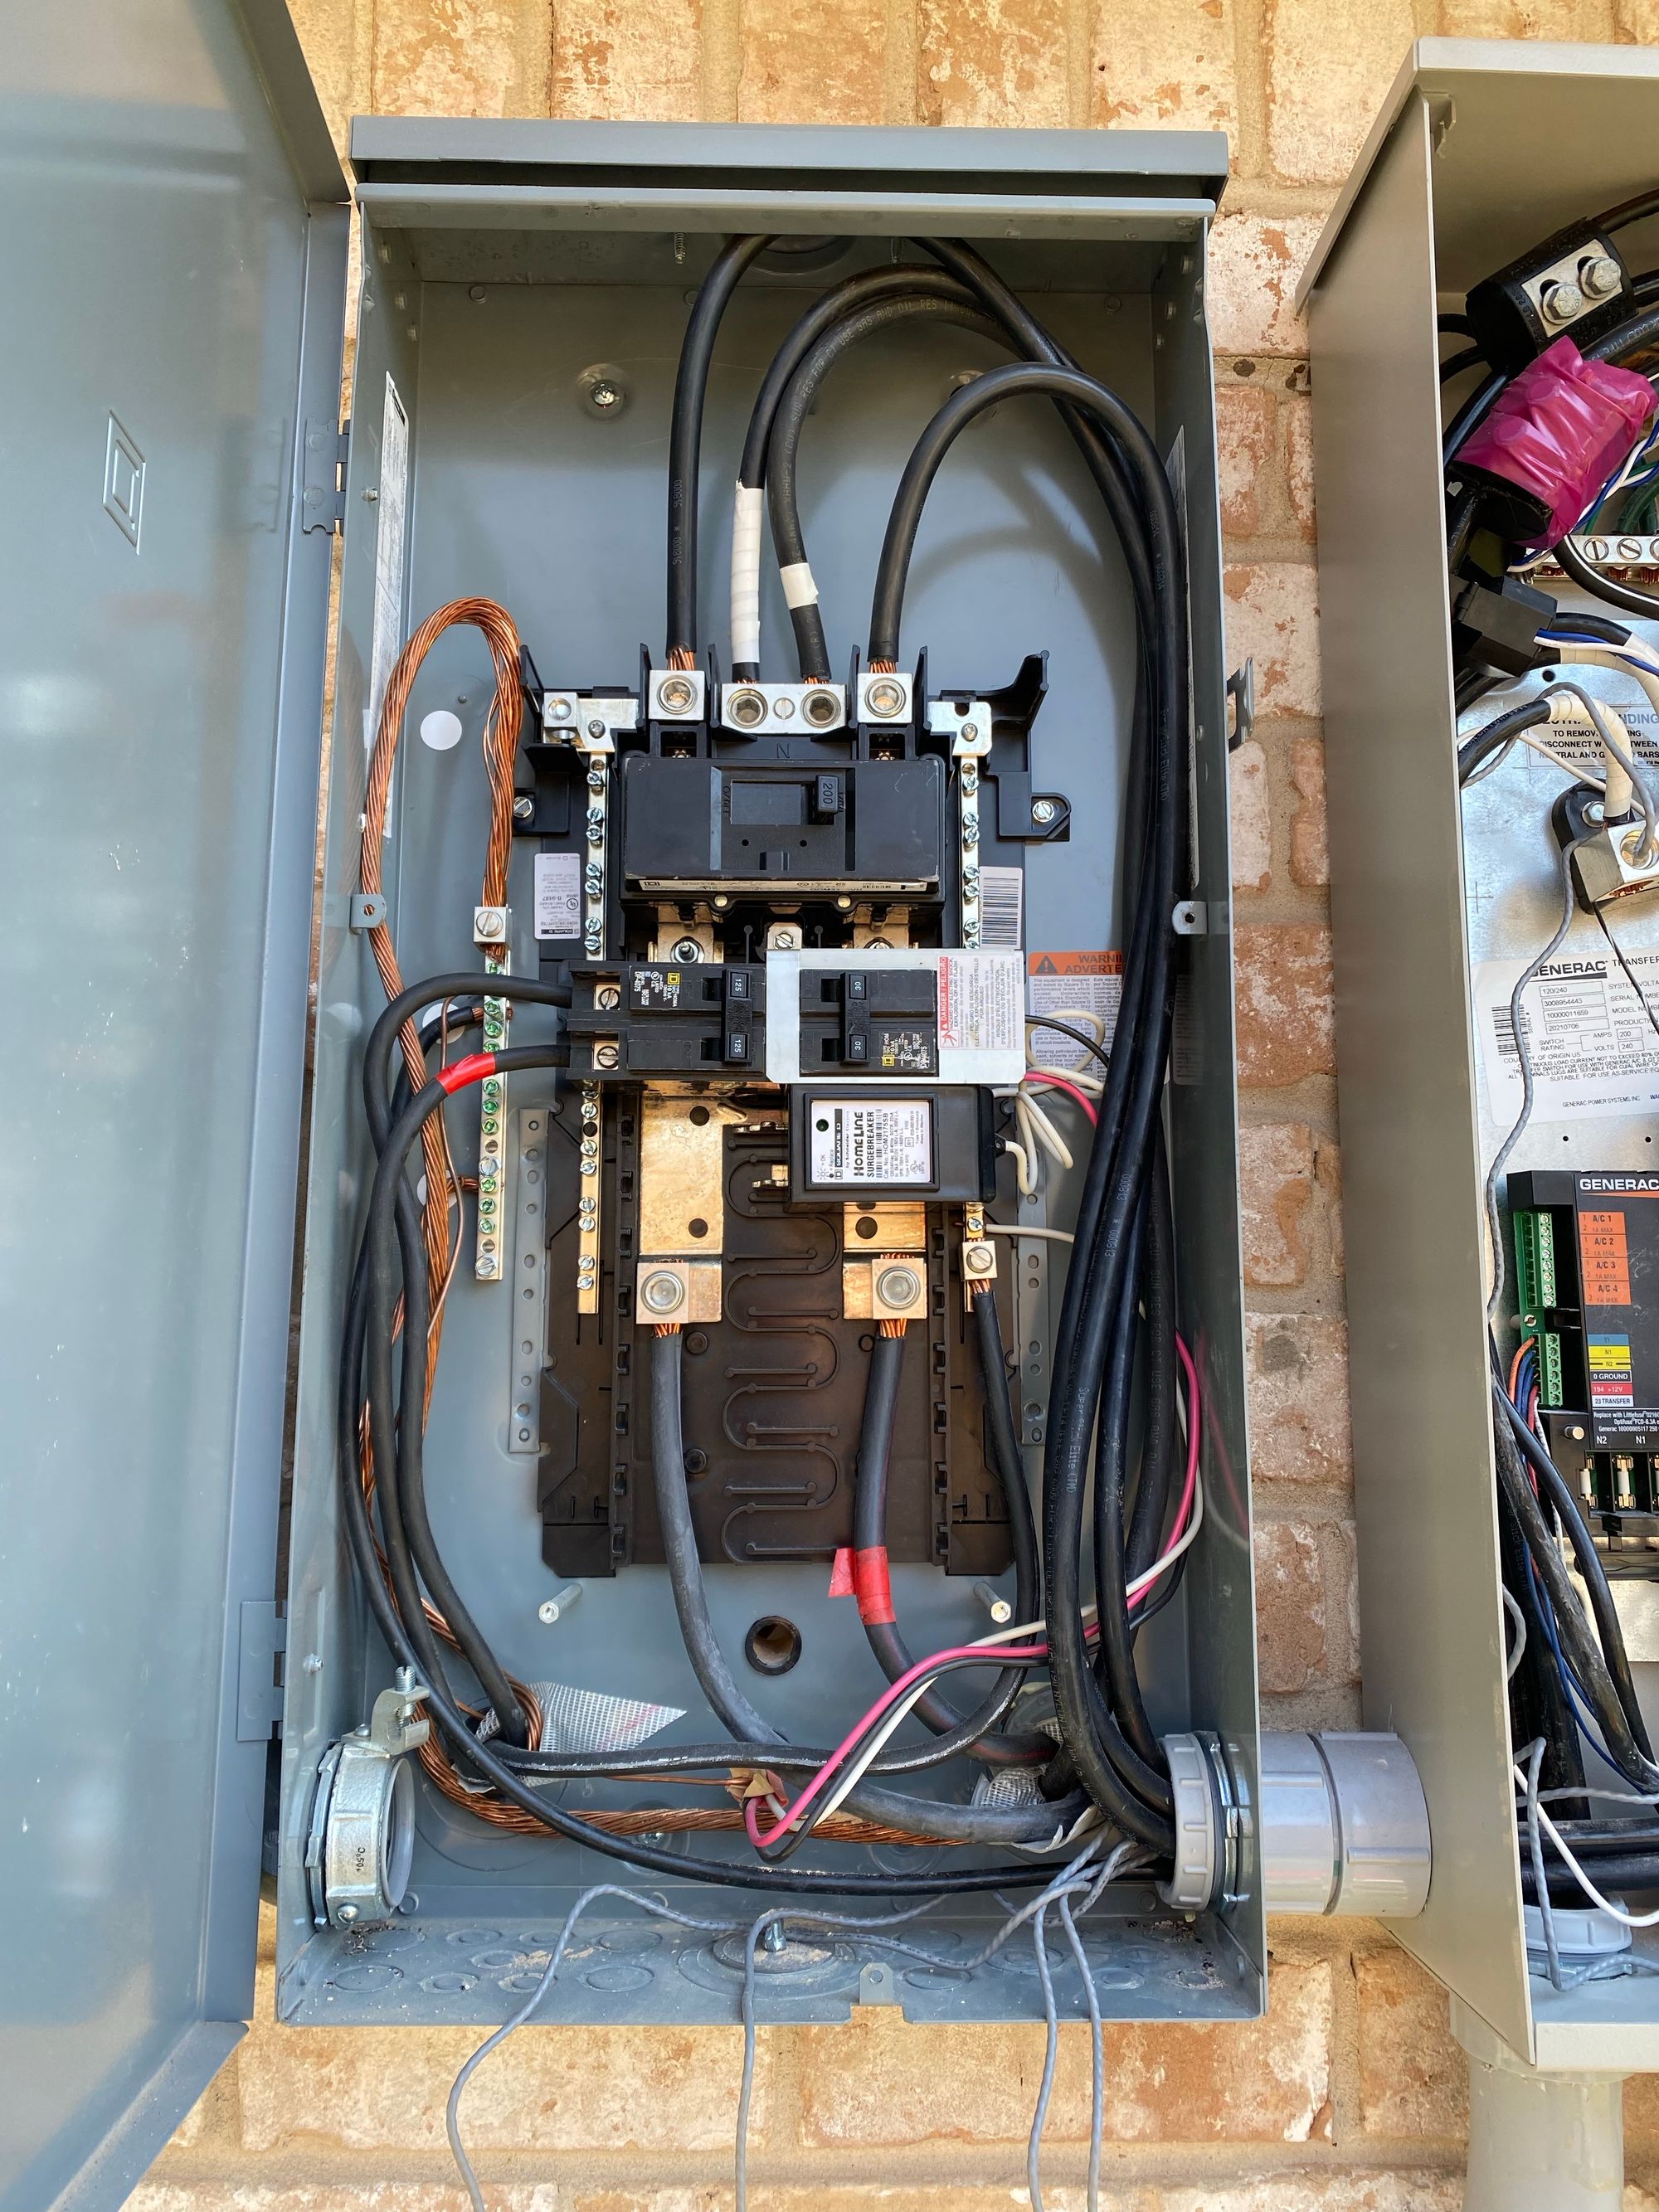
And these are the 2 breakers in my panel. I decided to put the VT's in my garage sub panel, as it's DIRECTLY off the main panel with just 2ft of SER wire, and I have more space in there.
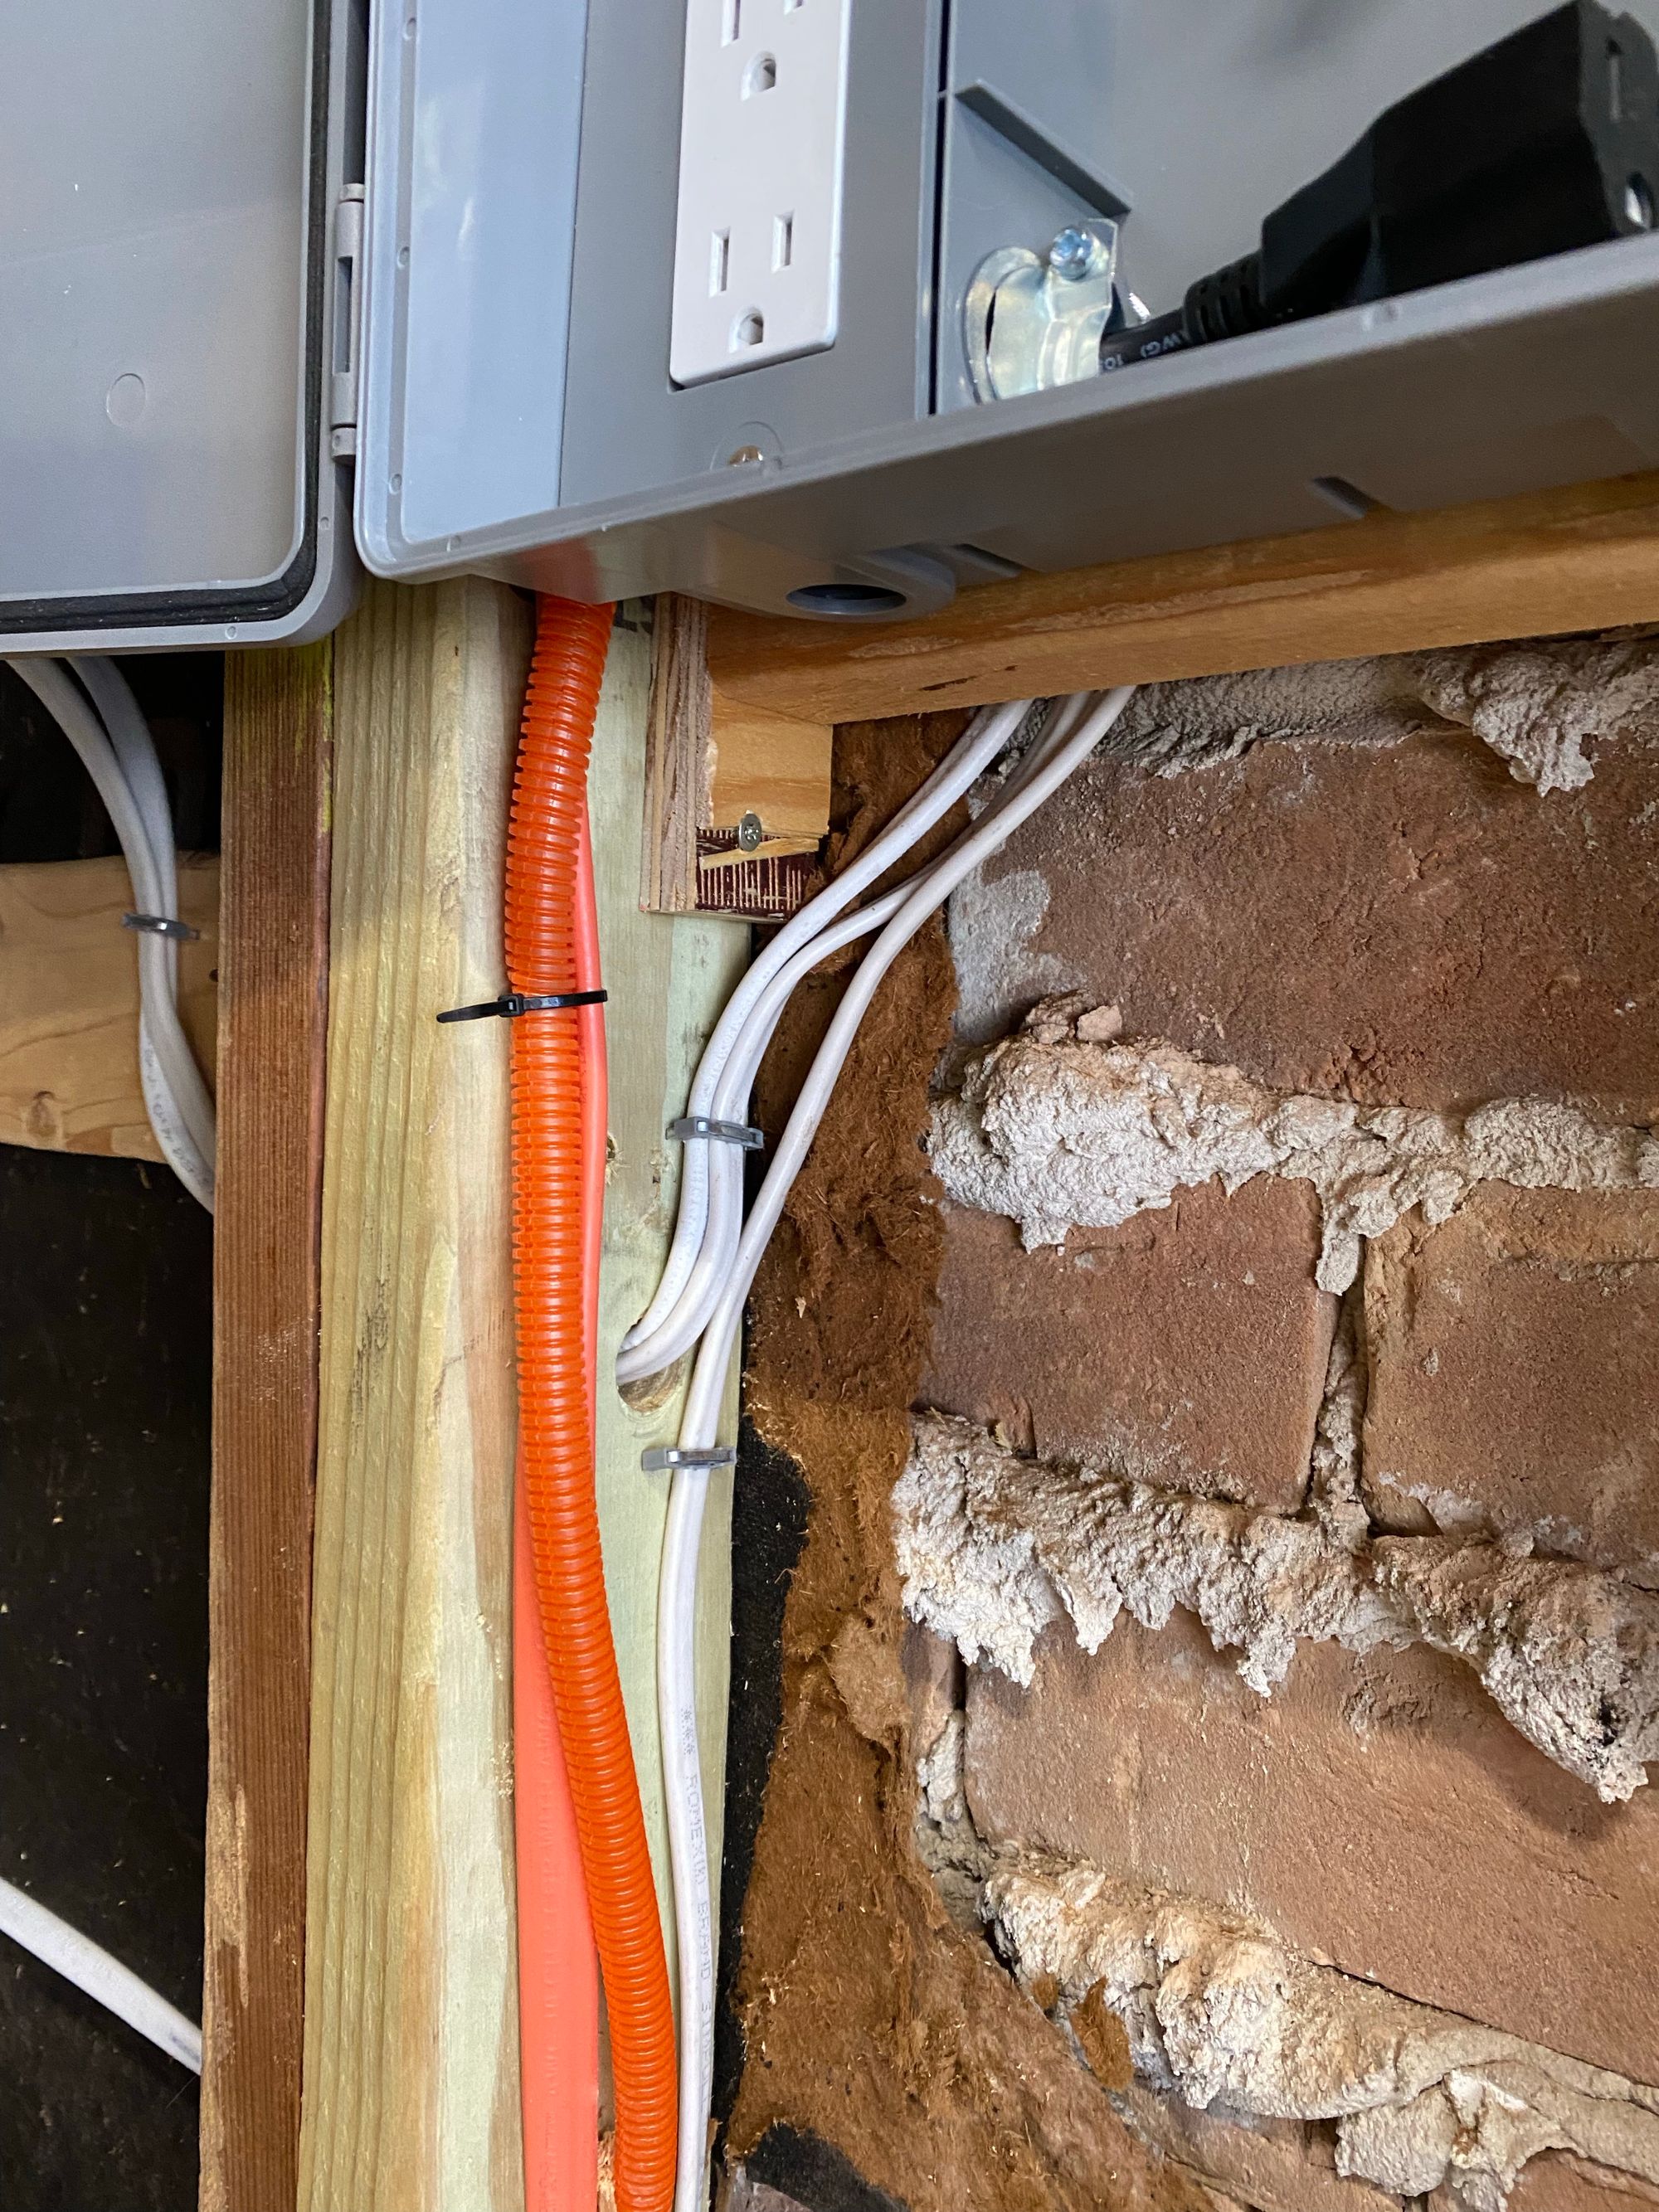
Then I mounted the sprinkler box next to this panel. My main panel is literally on the other side of the wall, you can see the wires going in.
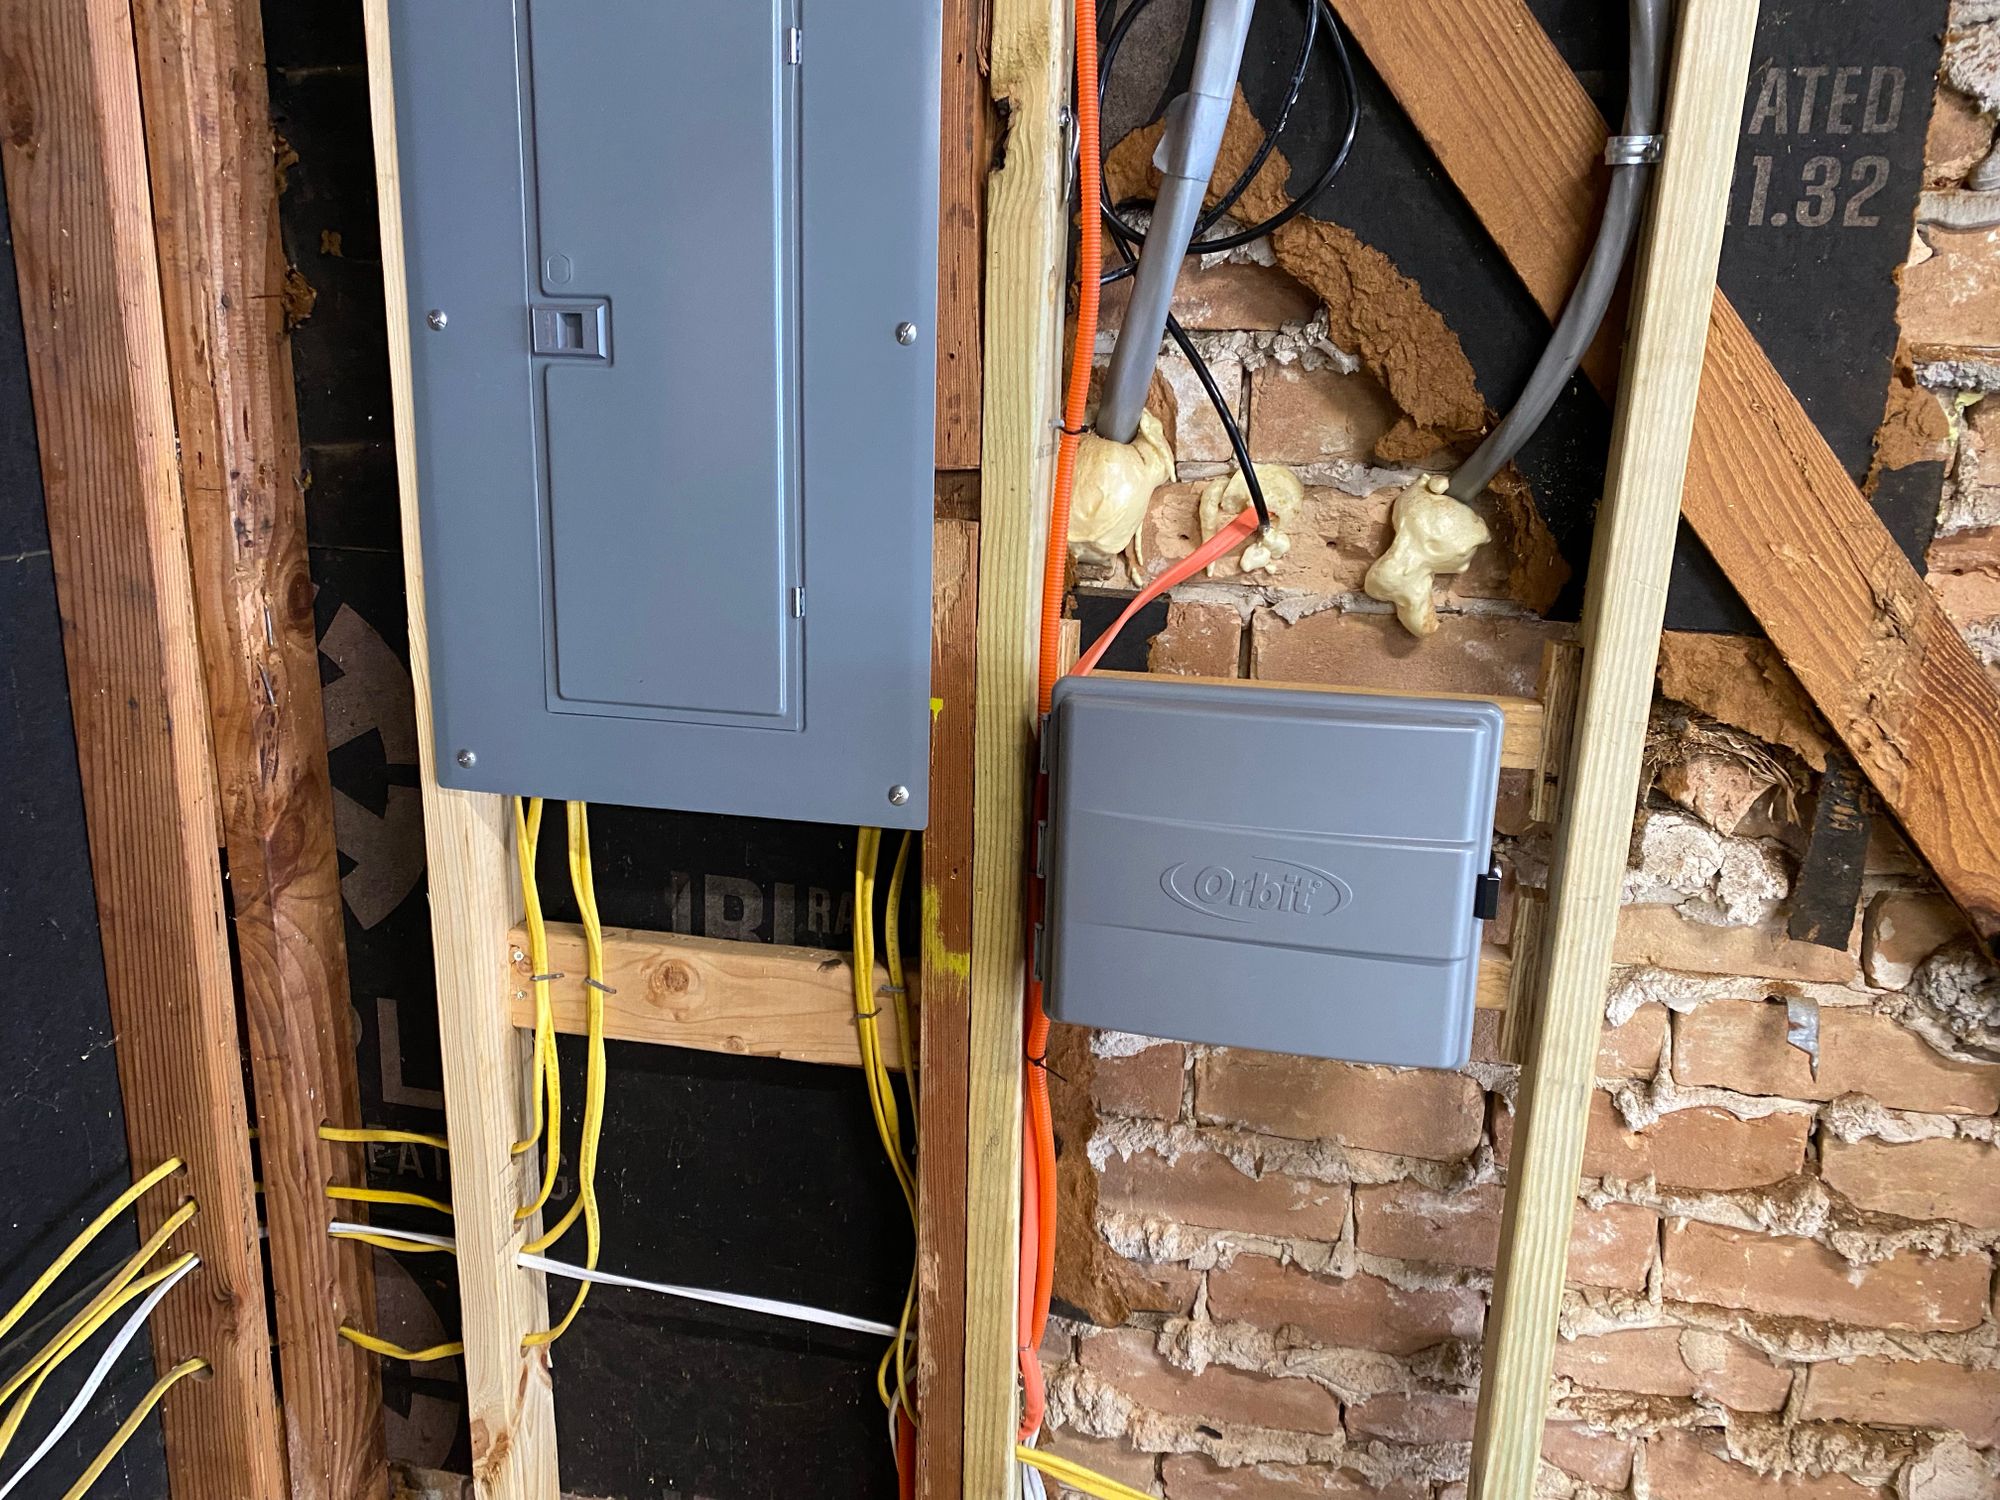

I made it recessed a little bit, but enough I could still have sheetrock around it

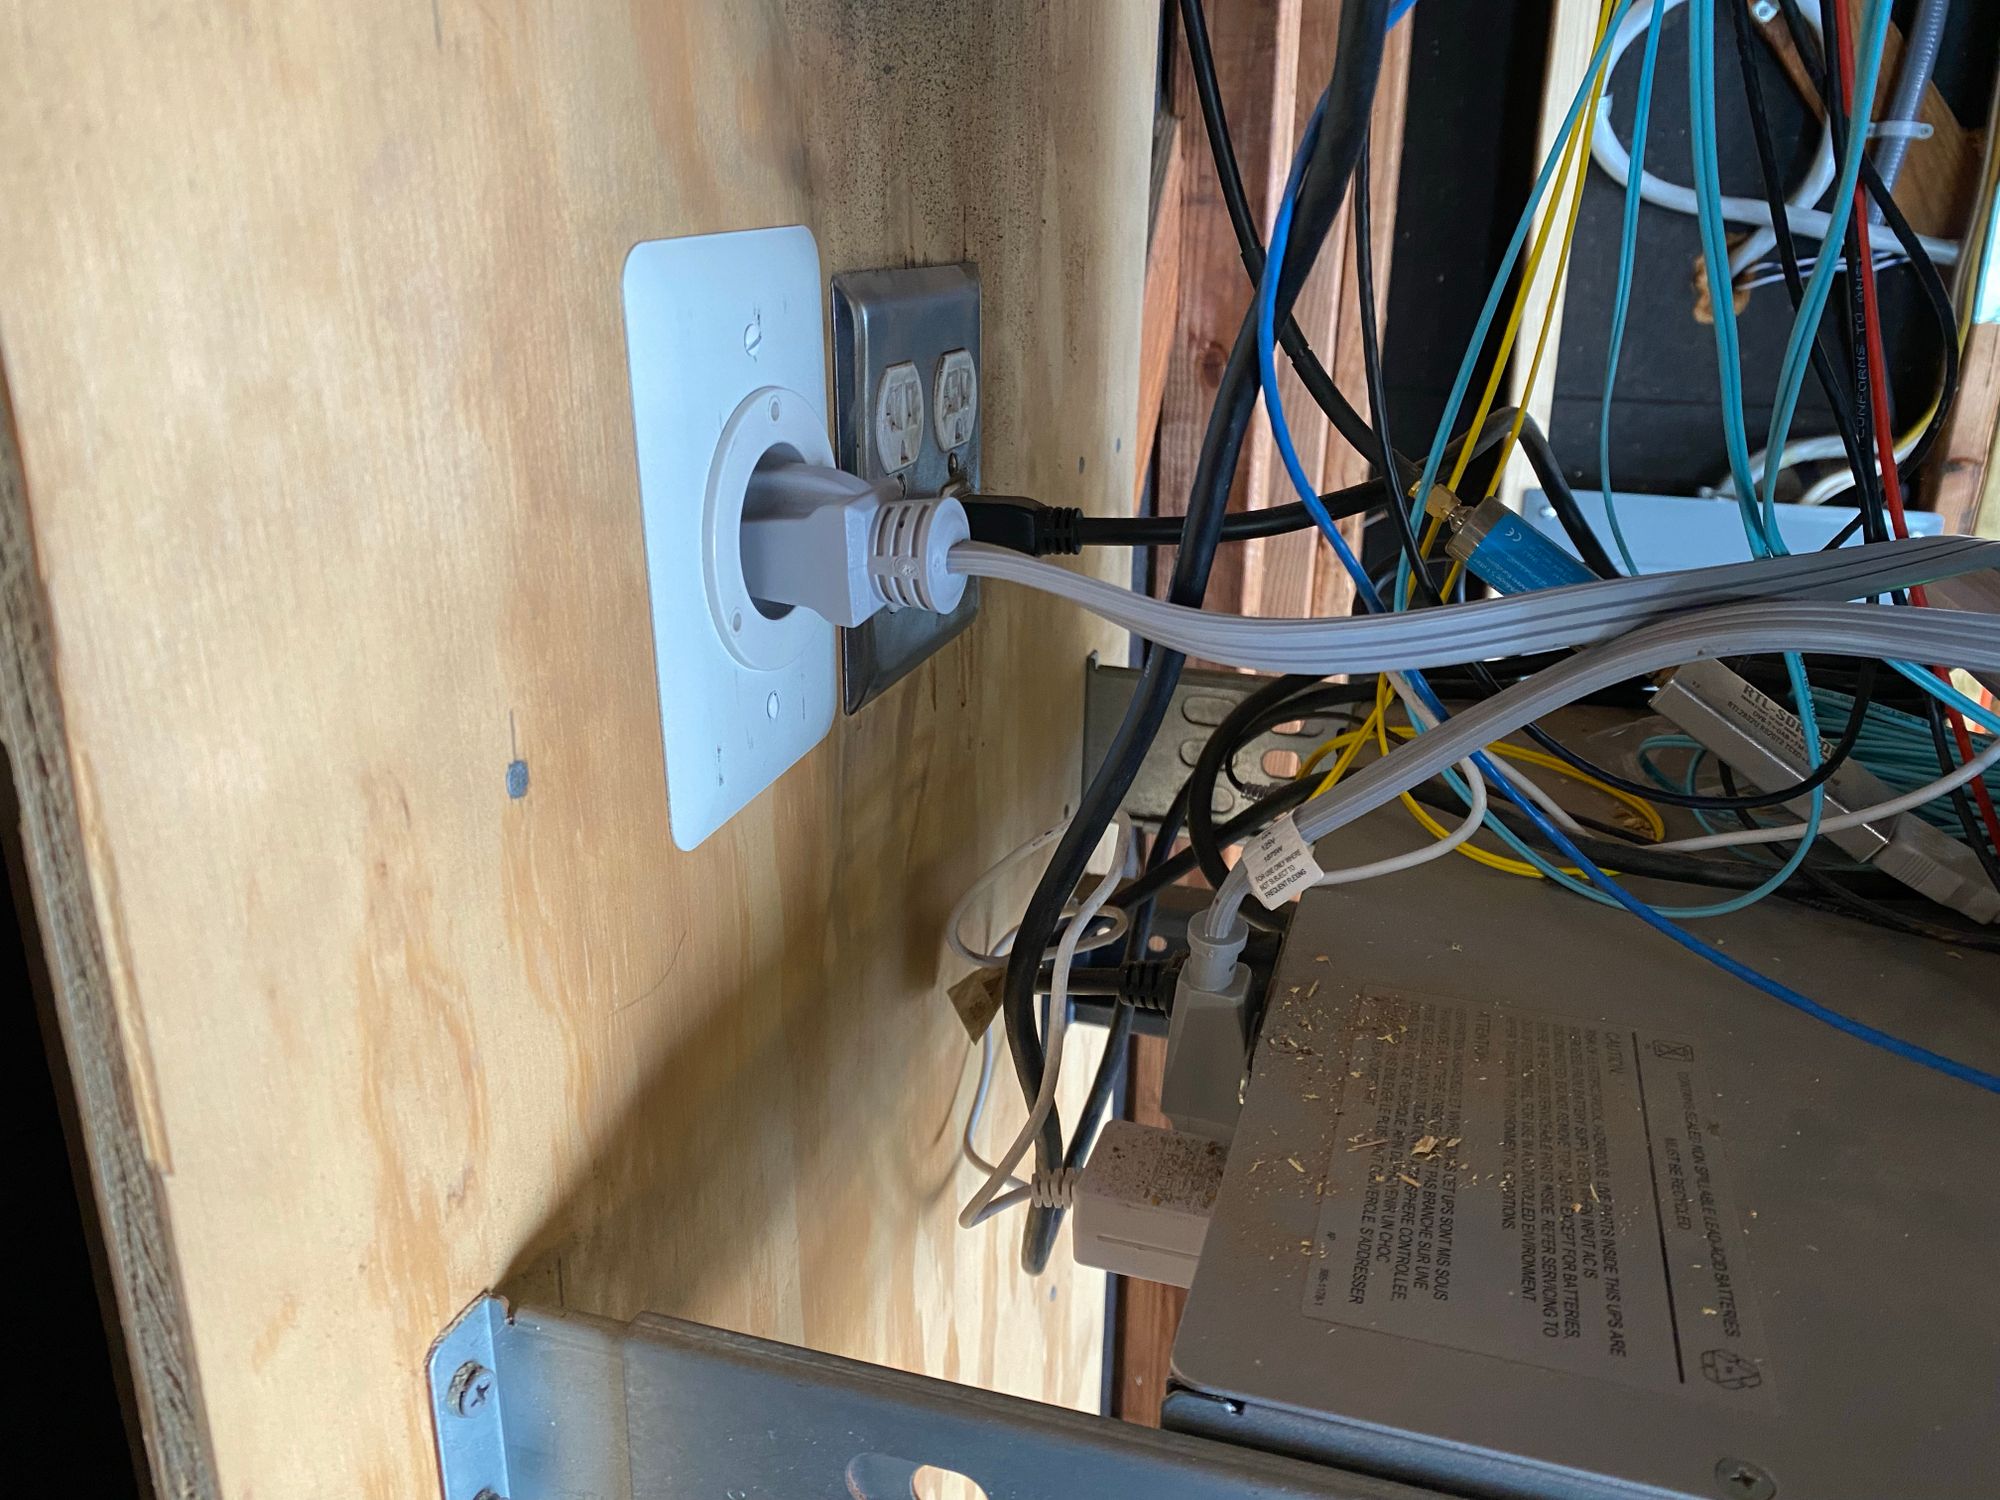
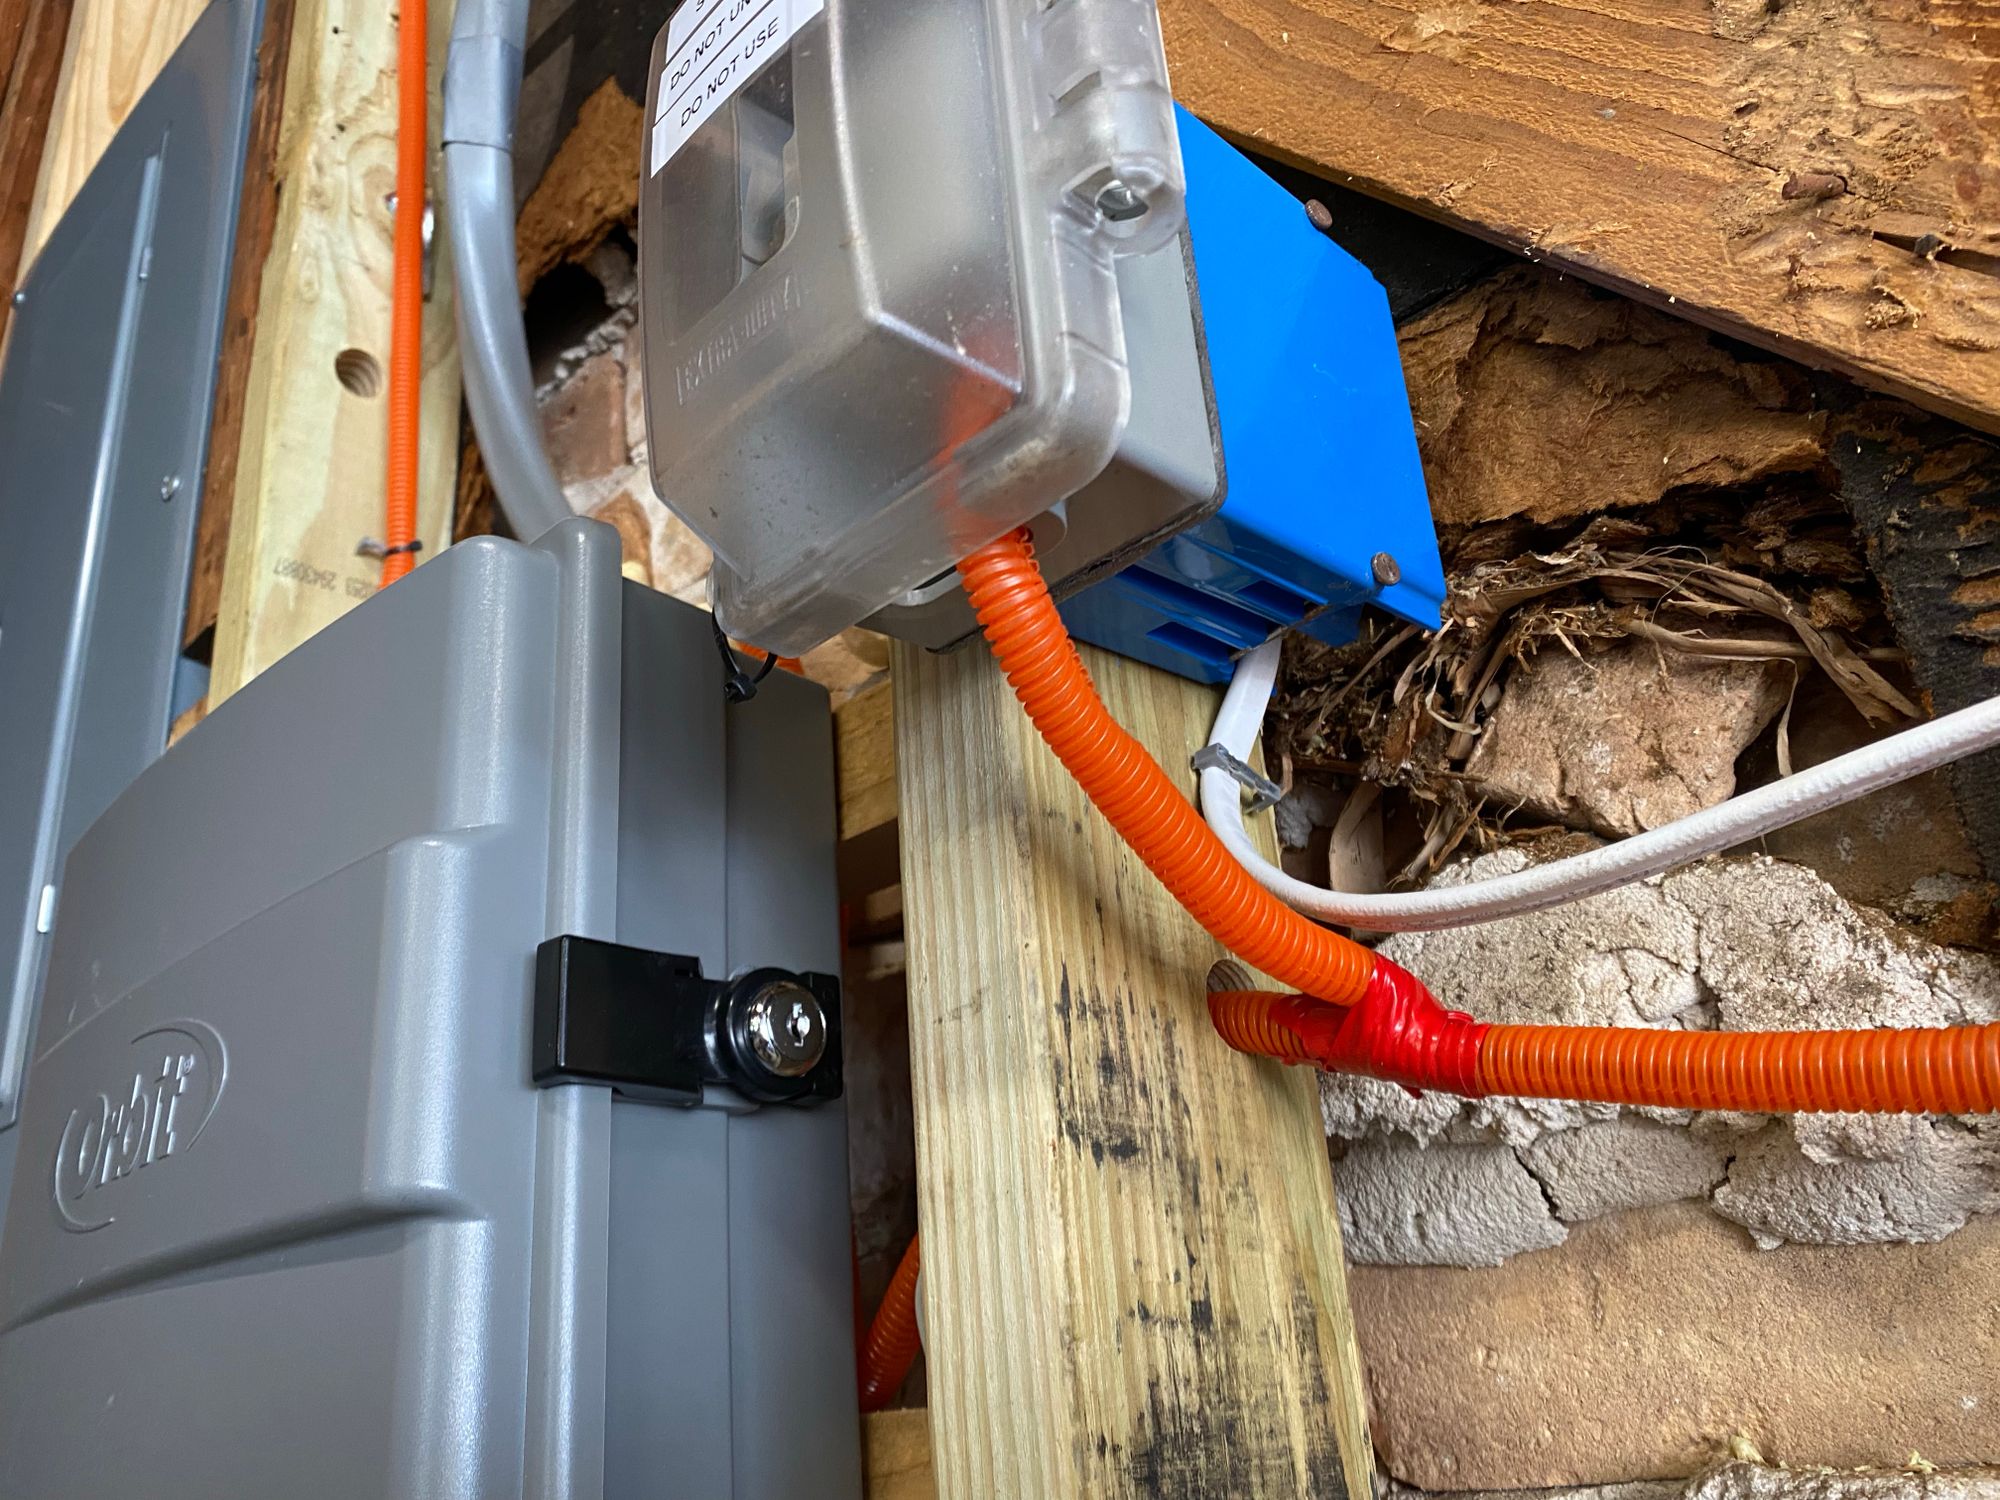
Then I ran the power to it
You'll notice above I have the end of an extension cord hanging out there too, which is odd.
Most people just power the IoTaWatt from mains power. It is powered by USB, and everyone just plugs the USB PSU Into the other plug in the Sprinkler box. Since I'm using both outlets for VT's, I don't have space.
I also decided to not use power from the grid, but instead run a line from my UPS. this will let the IoTaWatt stay powered on ALL the time, even when there is an outage. And this is the information I want the most, I don't want to lose monitoring just when I need to monitor the power...
So, I added the end of an extension cord, and then ran romex into the box which is fed from my UPS.
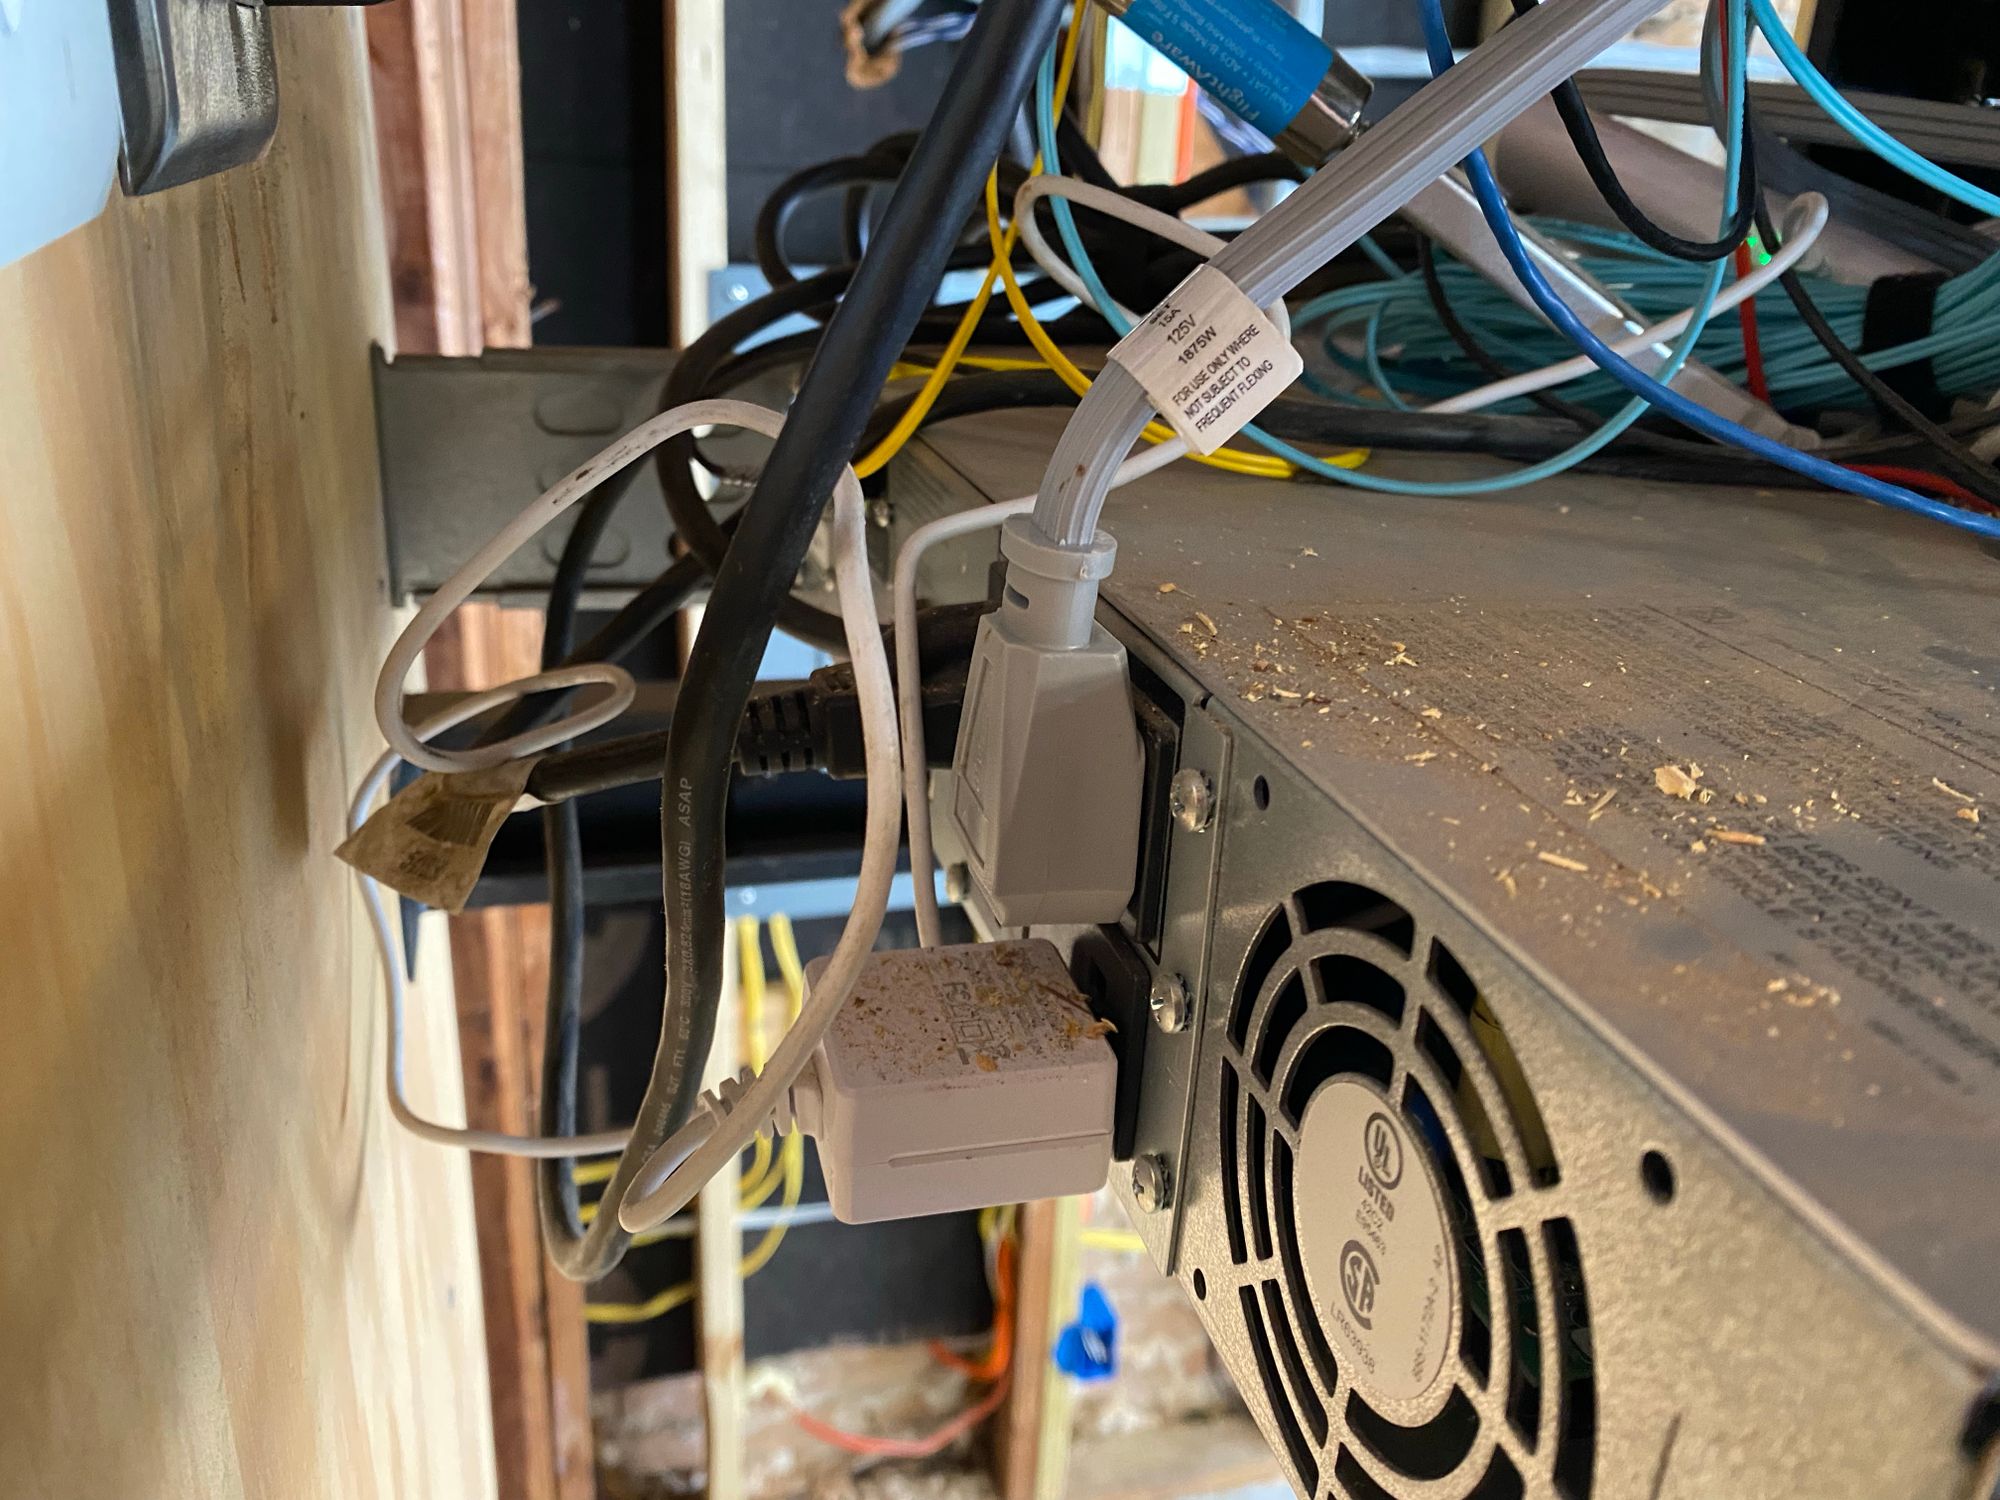
First, I added a power inlet behind my UPS in the garage. Ignore the dust...
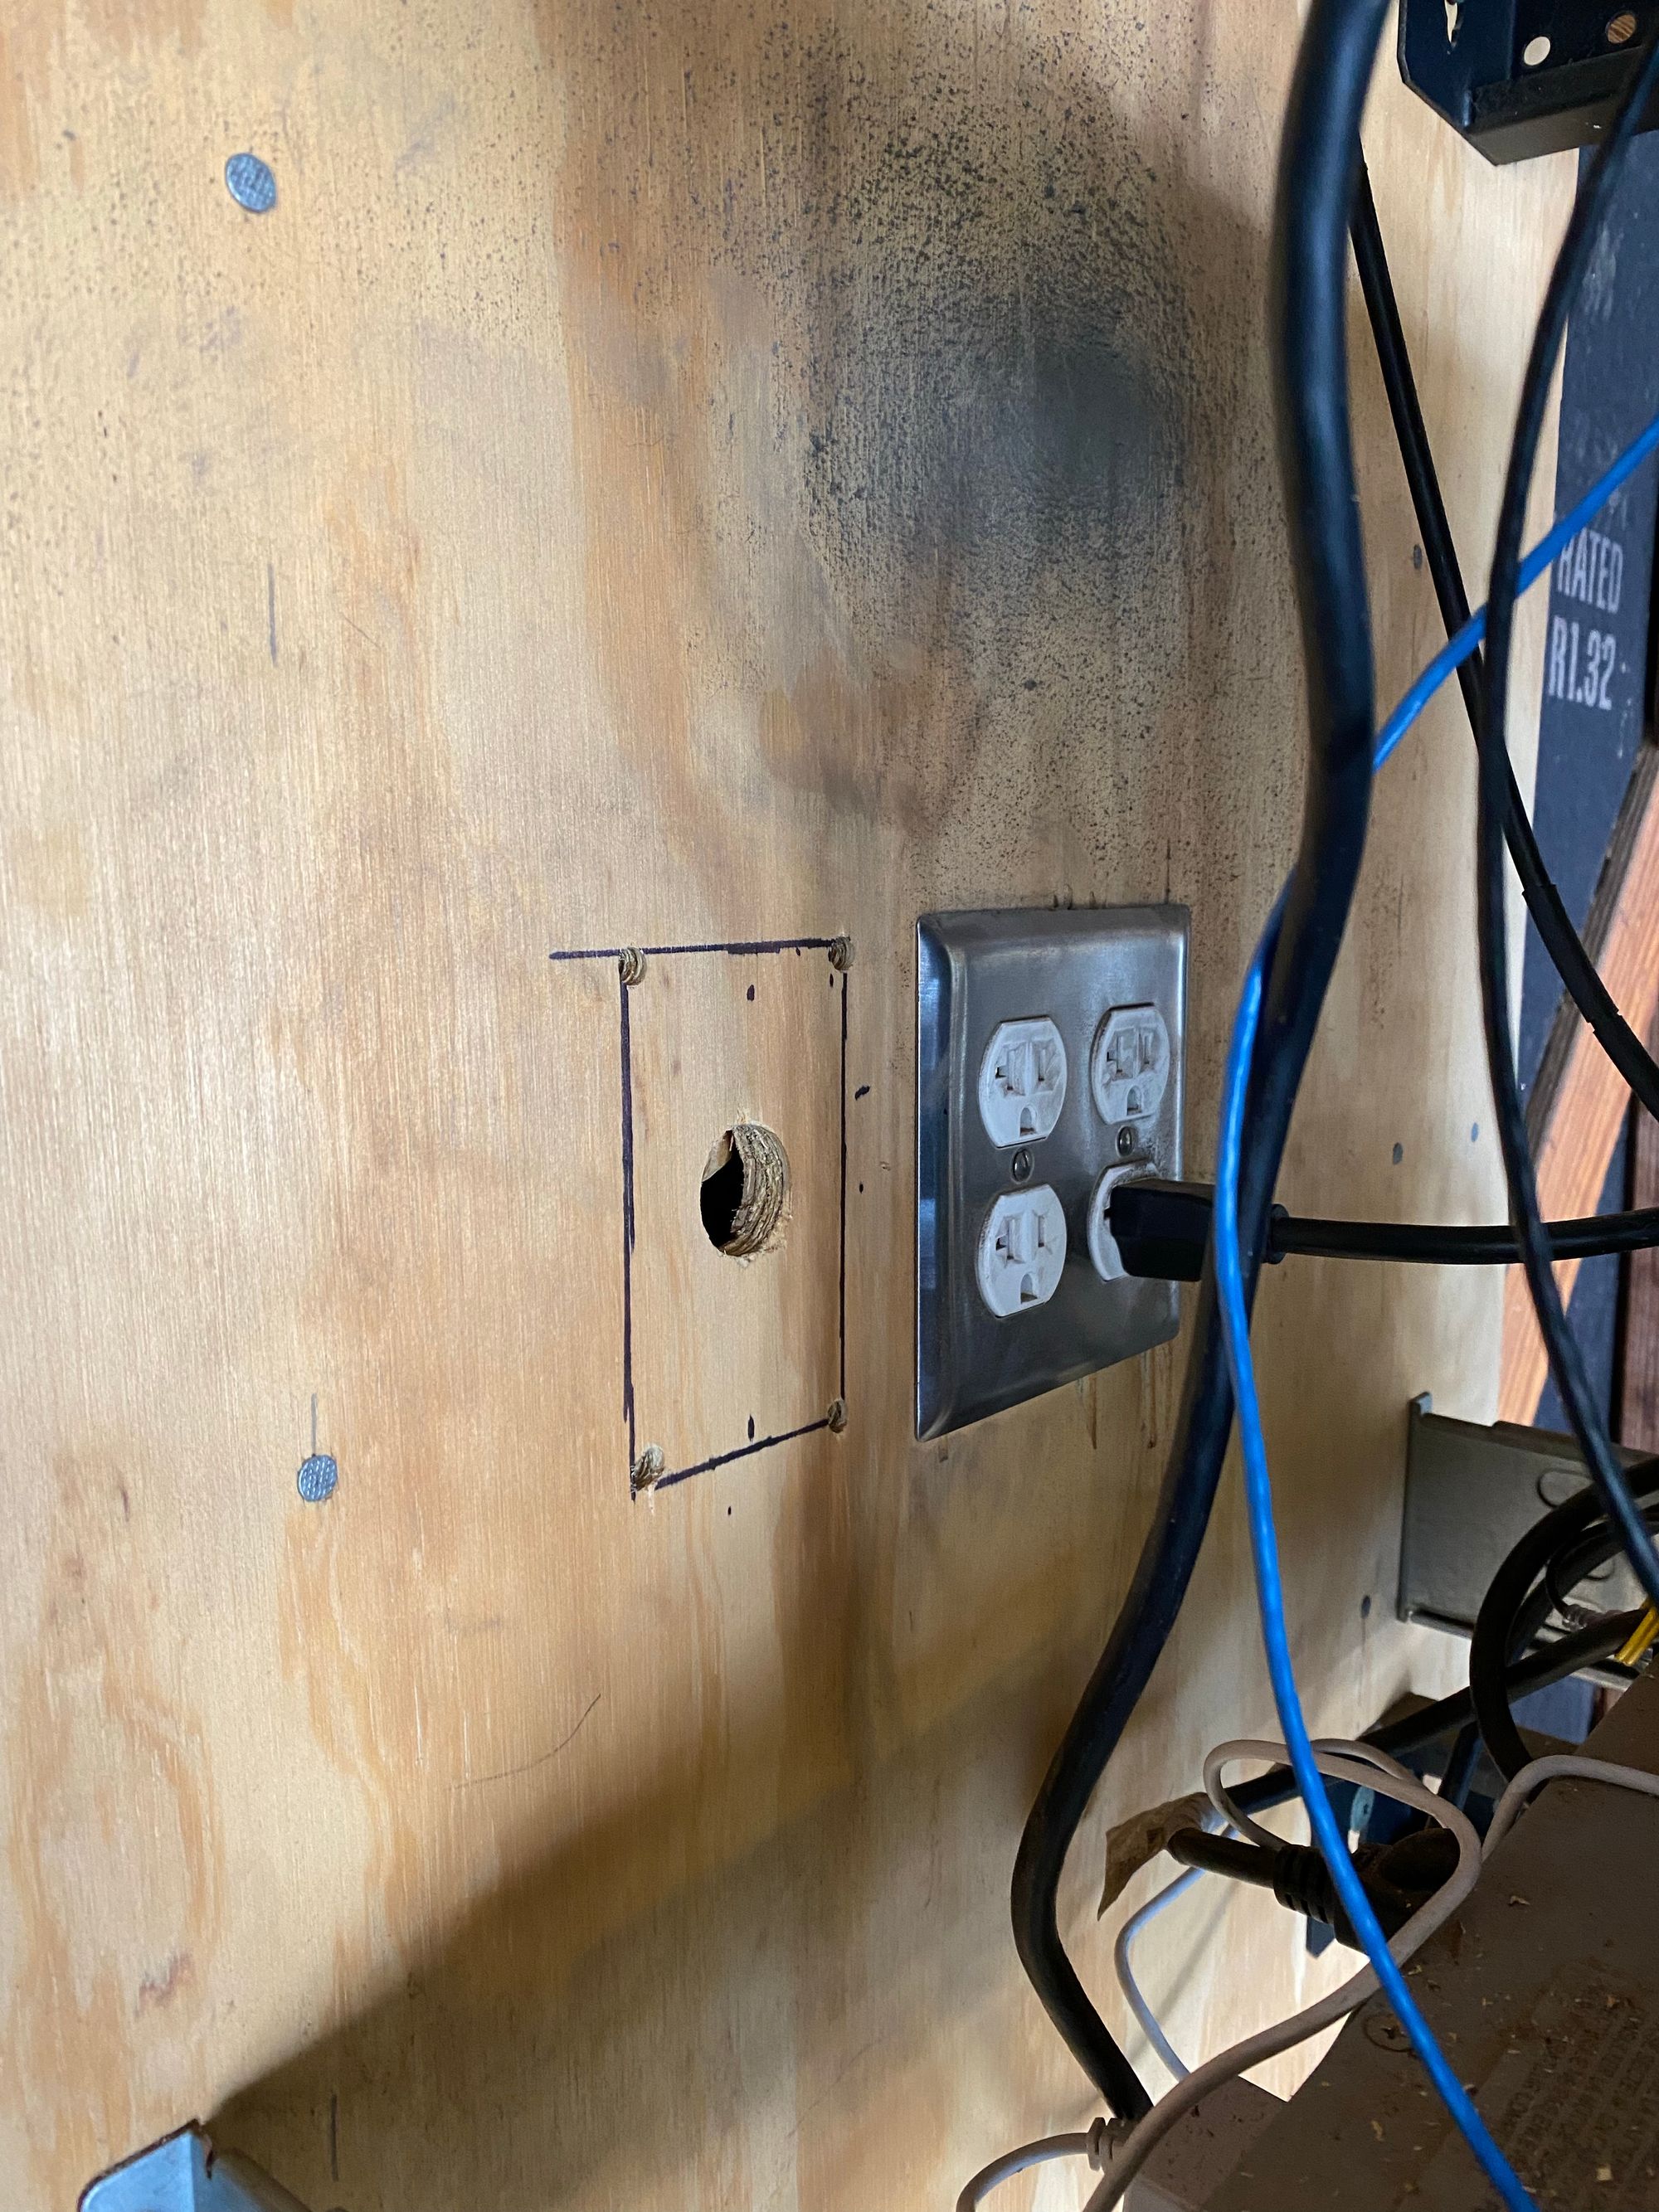
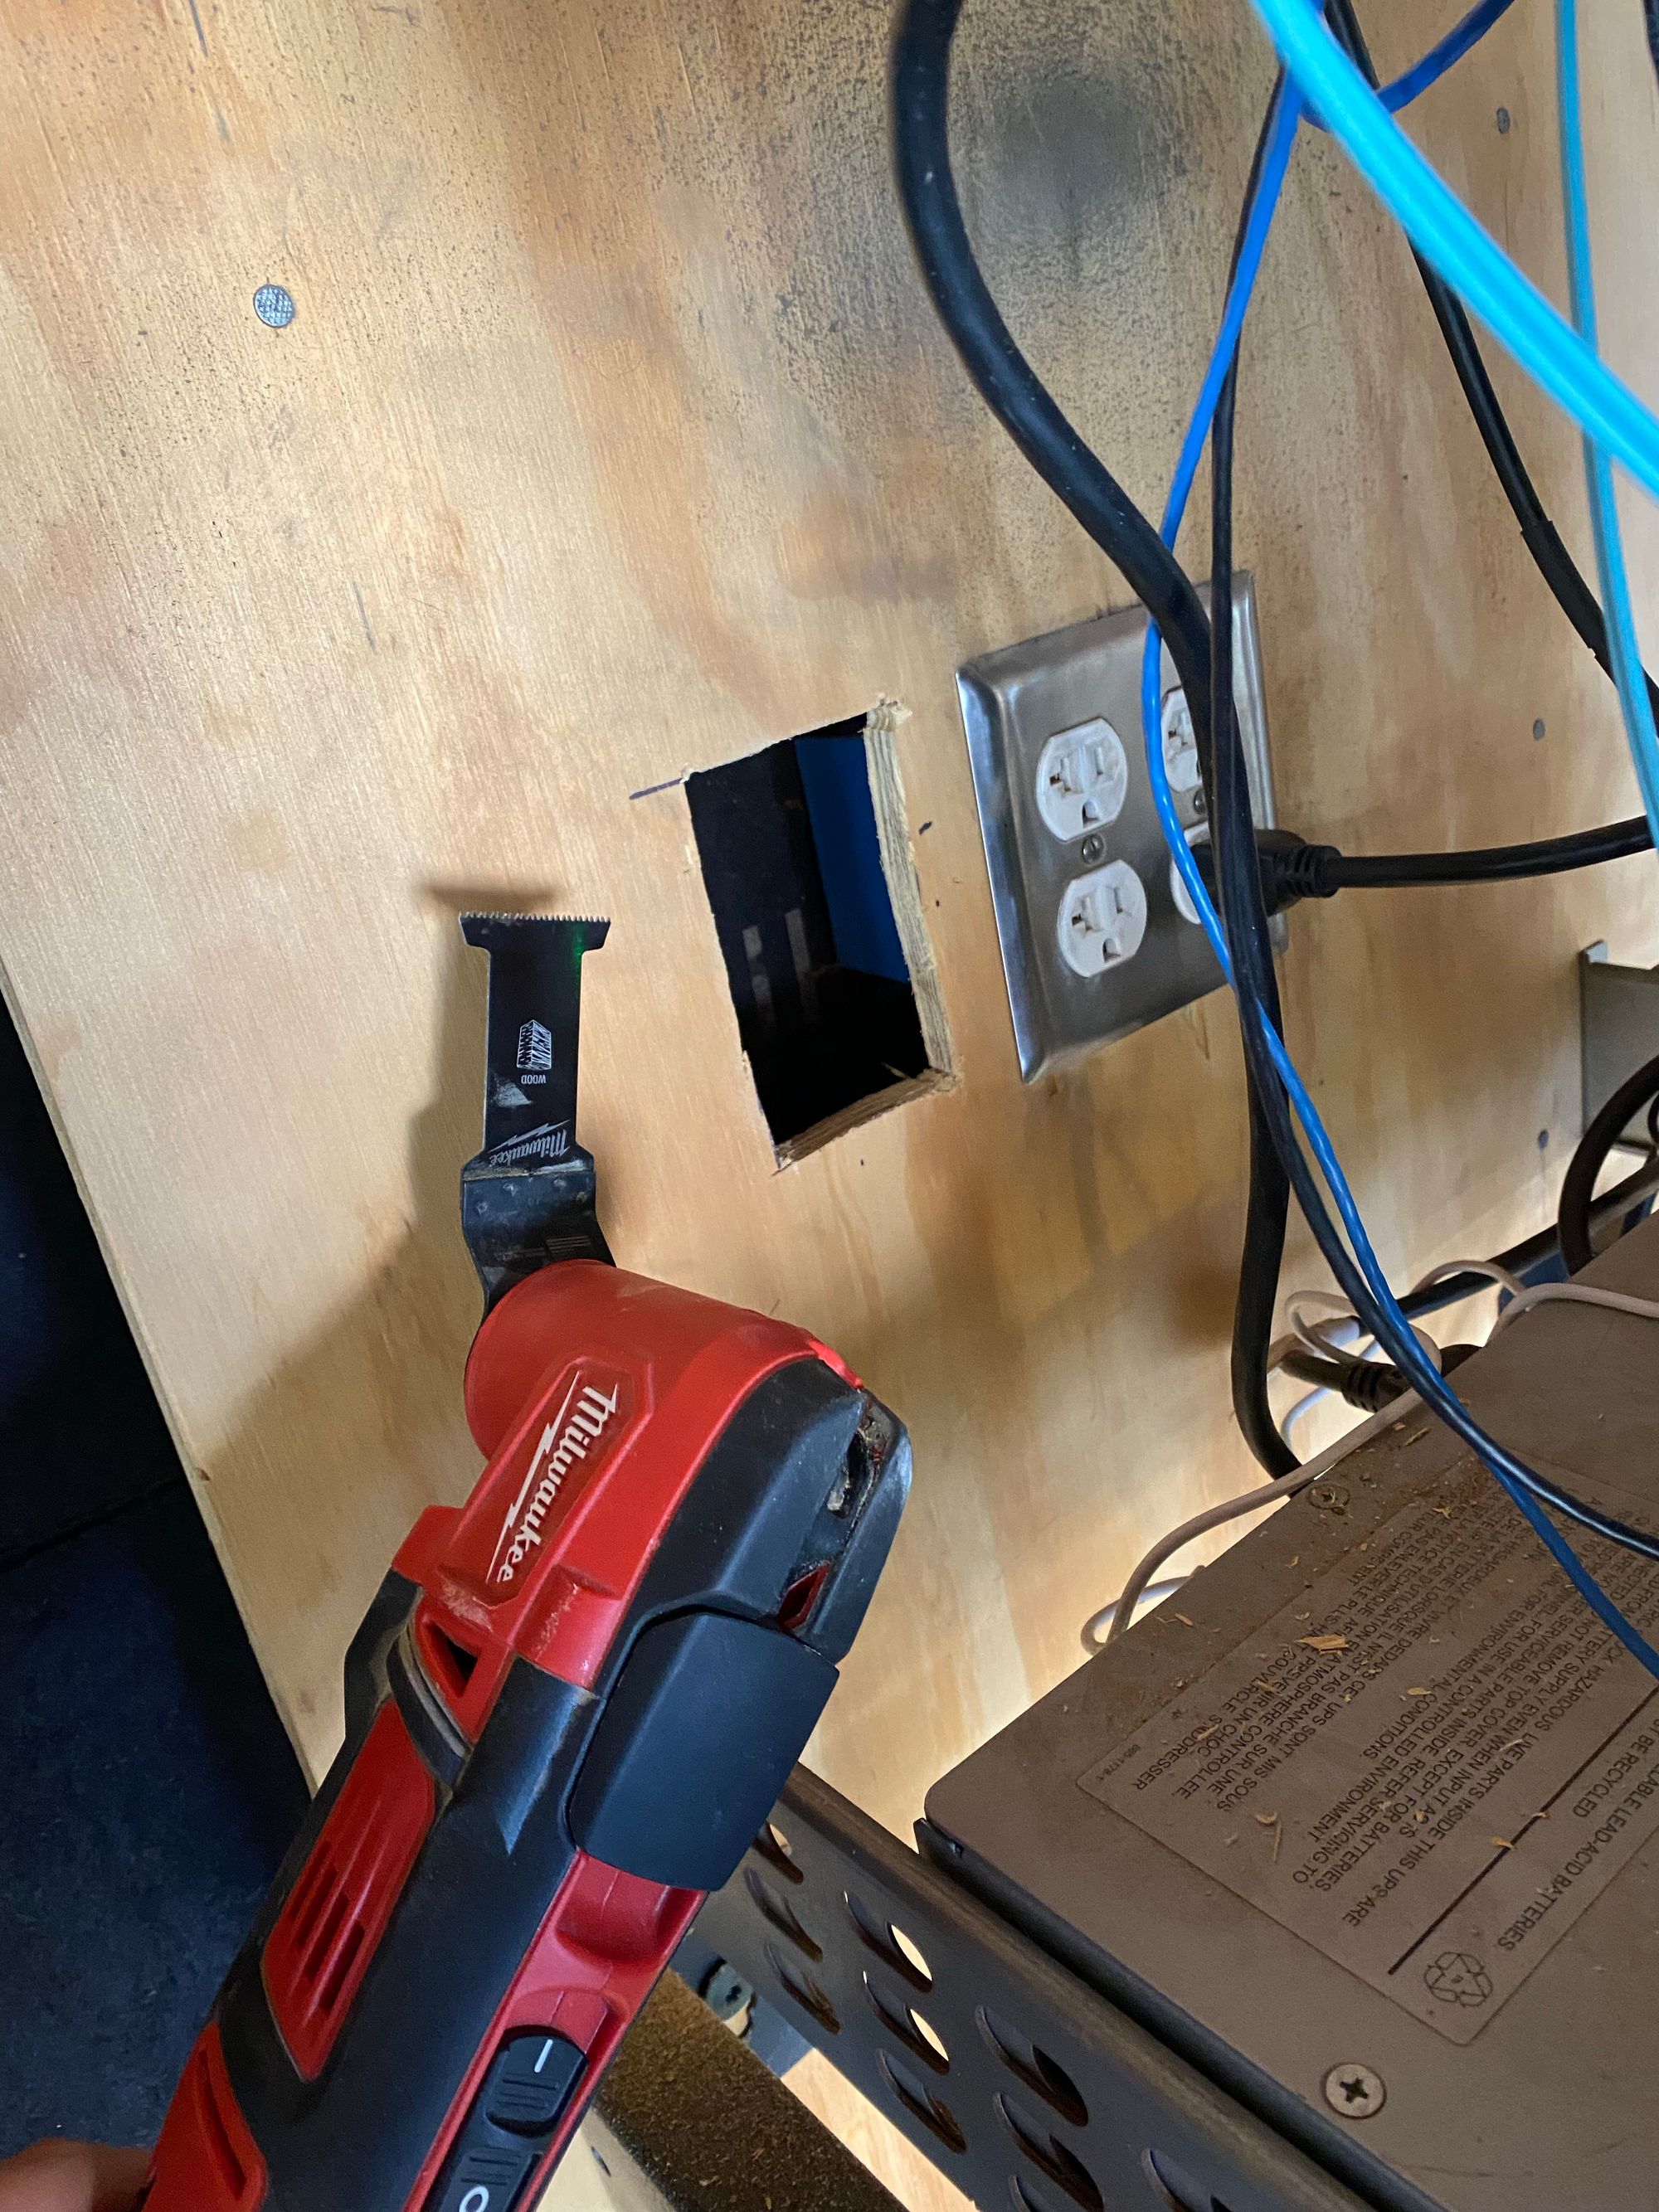

Now, I can connect an extension cord from the UPS to this inlet, and energize the circuit
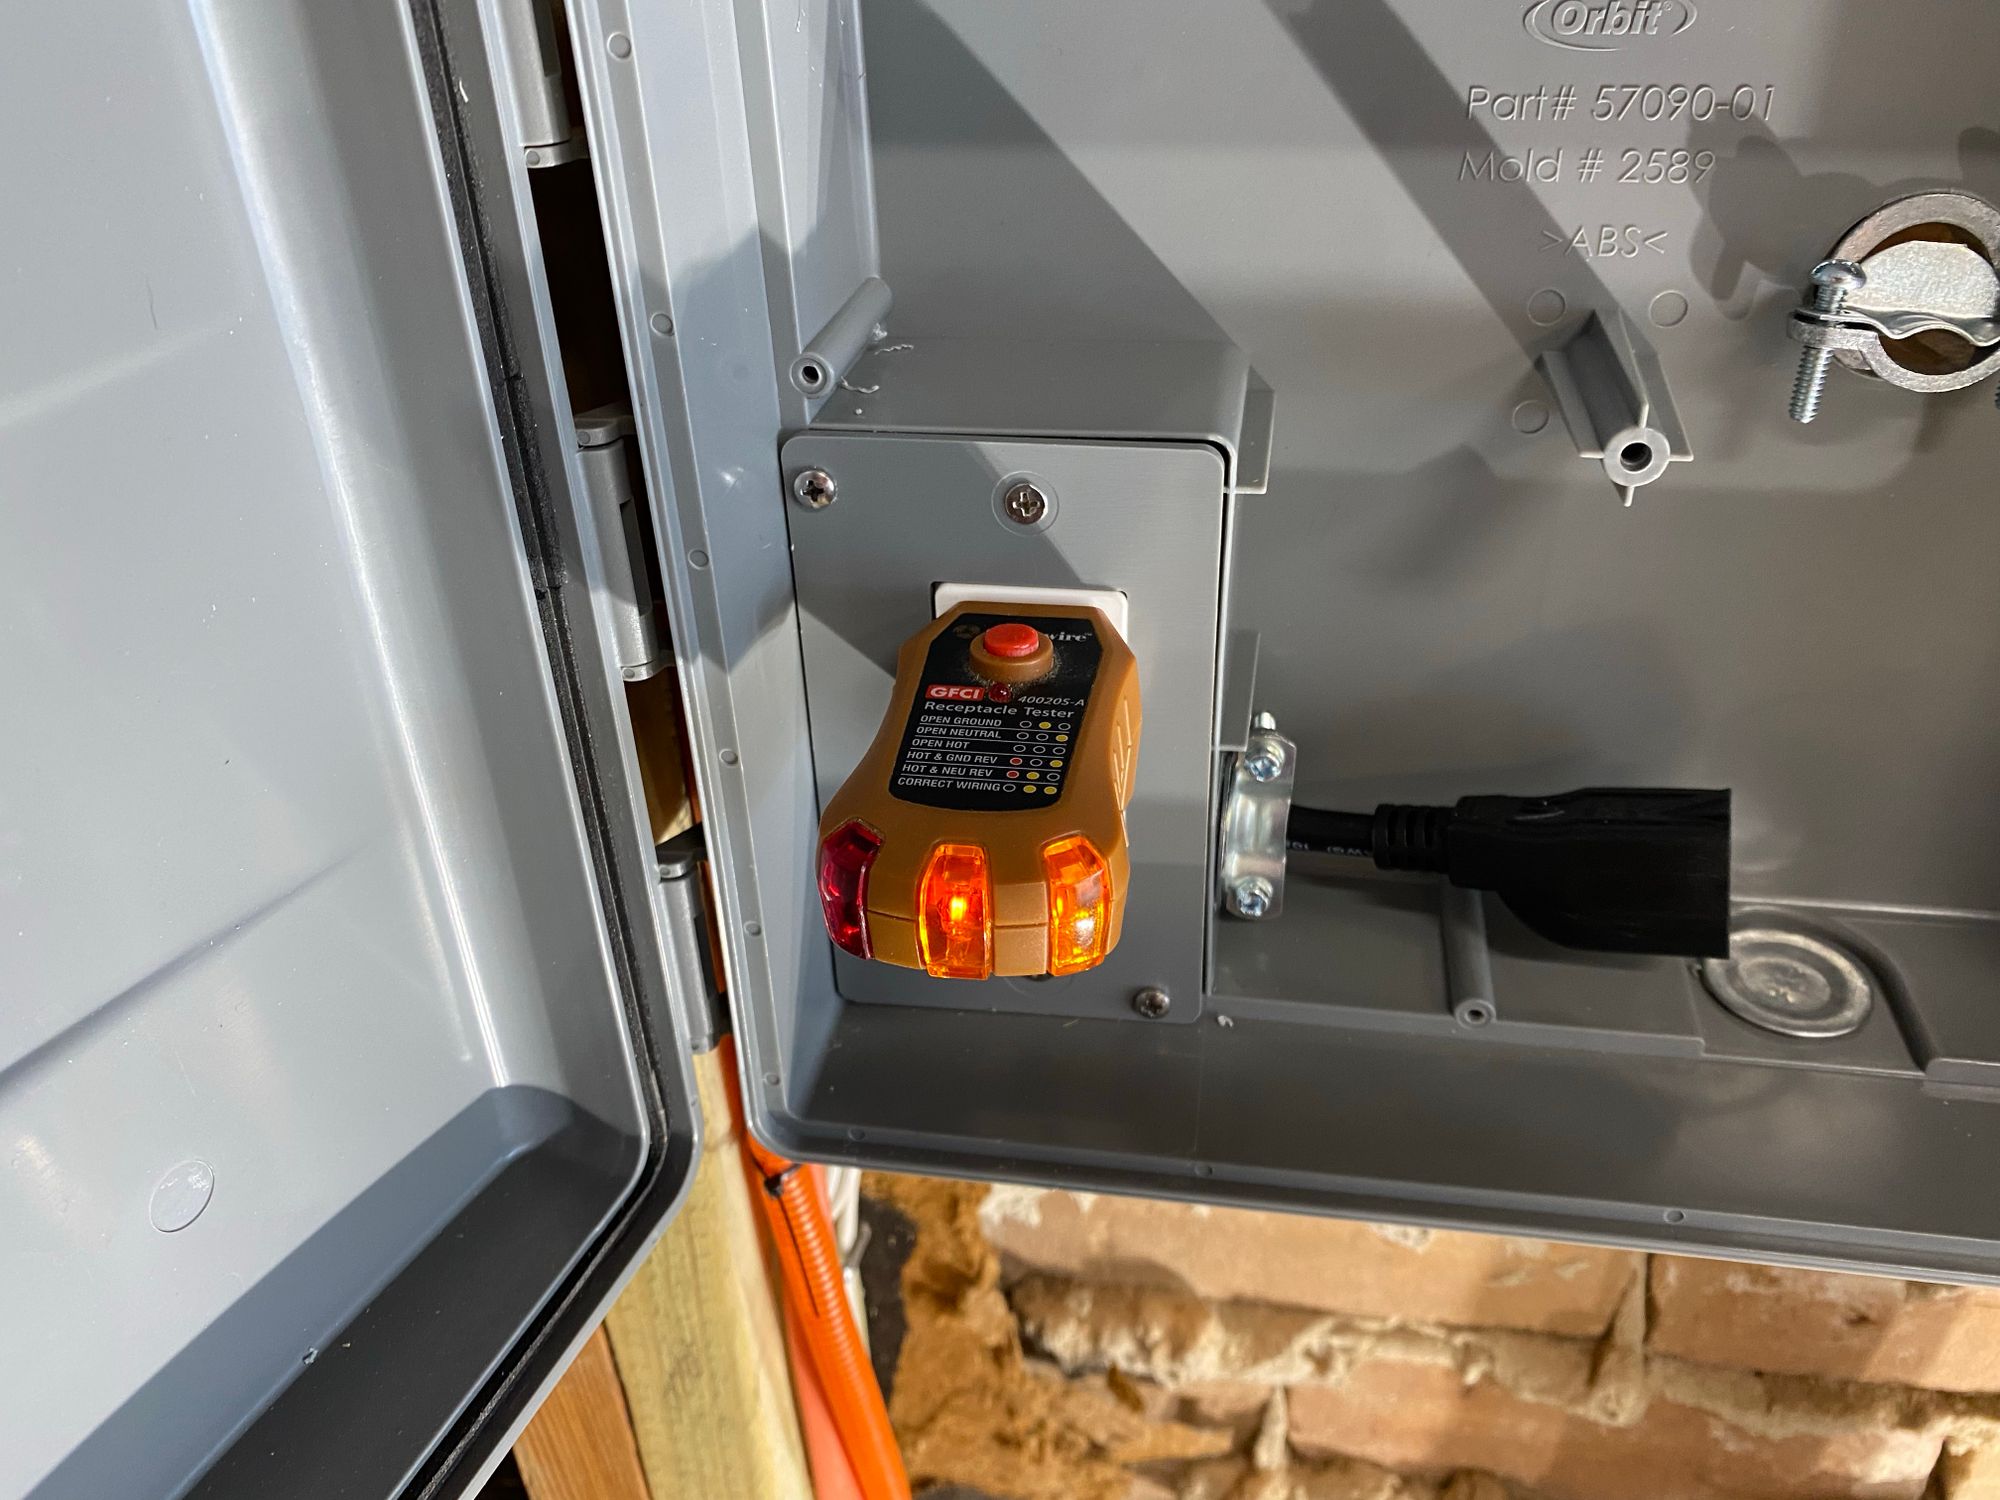
I didn't go directly to the IoTaWatt, I went to a junction box where I added an outlet
Here I can test the voltage and see that I am getting power from the UPS

And here is the outlet, with a sticker telling people not to use it. The UPS is only a 1000VA UPS, so if you plug in some power tools, you could go well over the wattage.
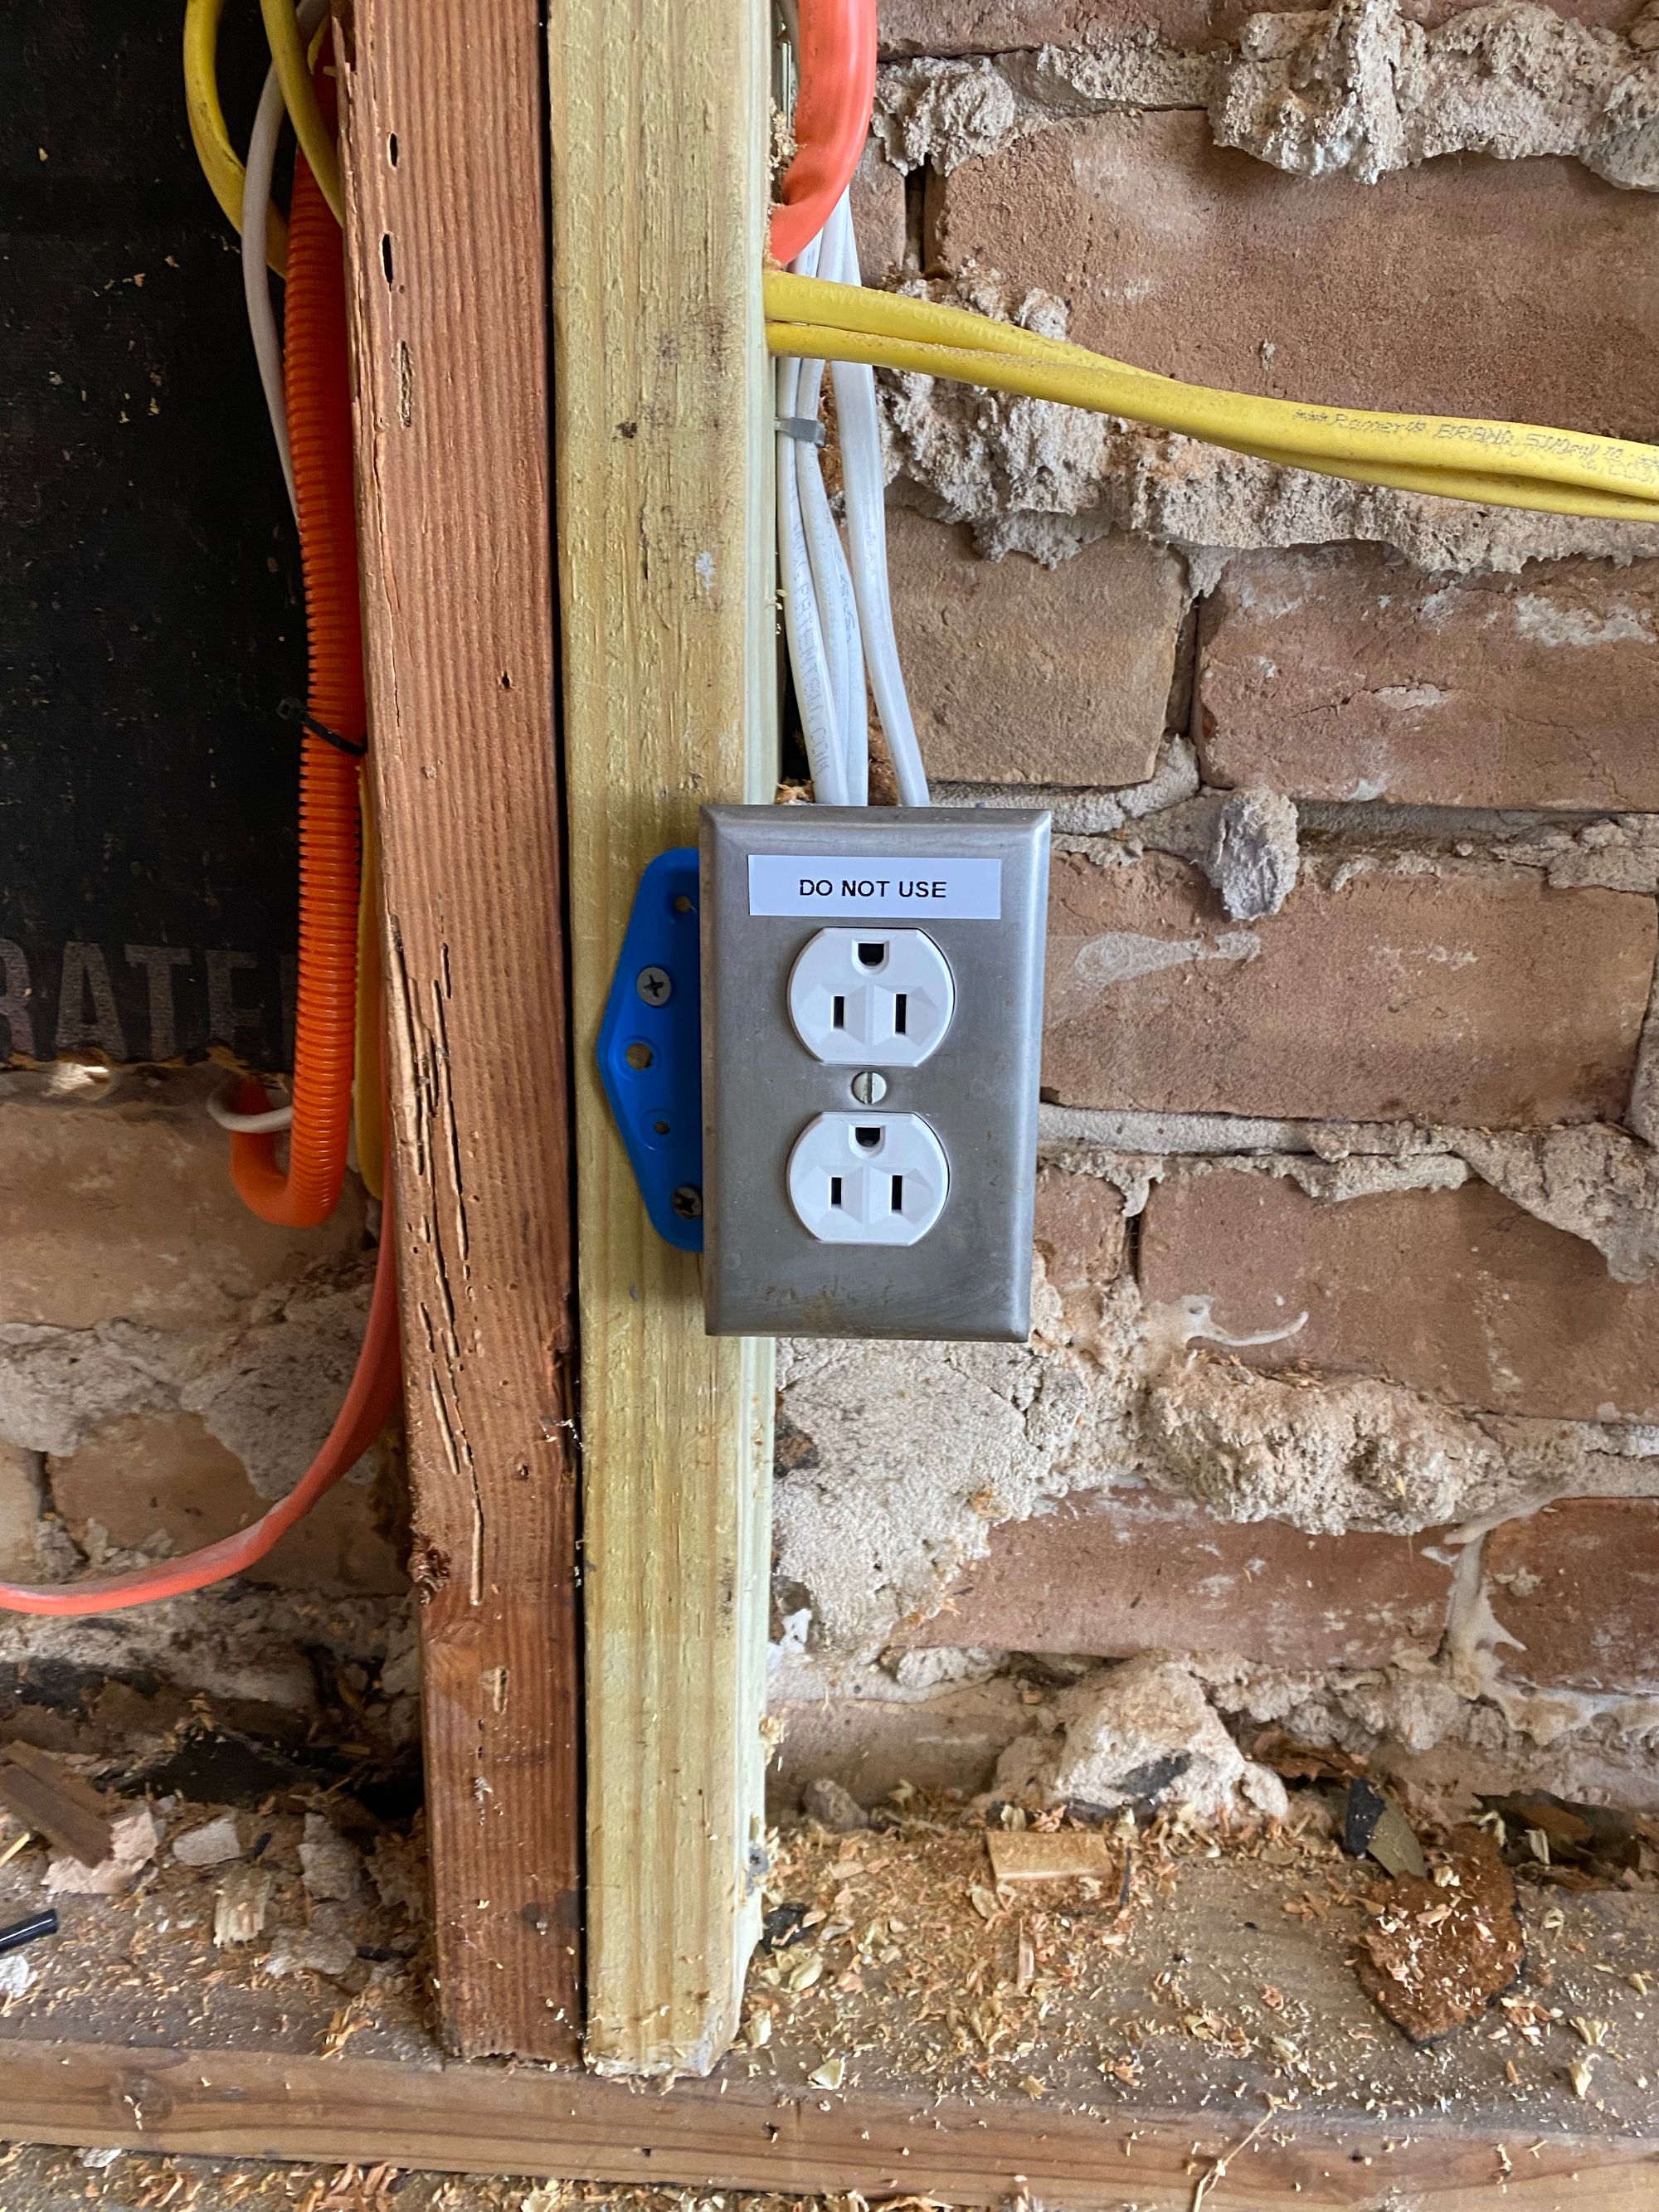
You'll notice there are 3 wires going to that Junction box, one power in, one to IoTaWatt and one elsewhere, that's a future post!
So back to the IoTaWatt. I tested the circuits, and got the UPS power wired in.
I got some circuits in and started testing
I used some orange split loom conduit to protect the CT wires
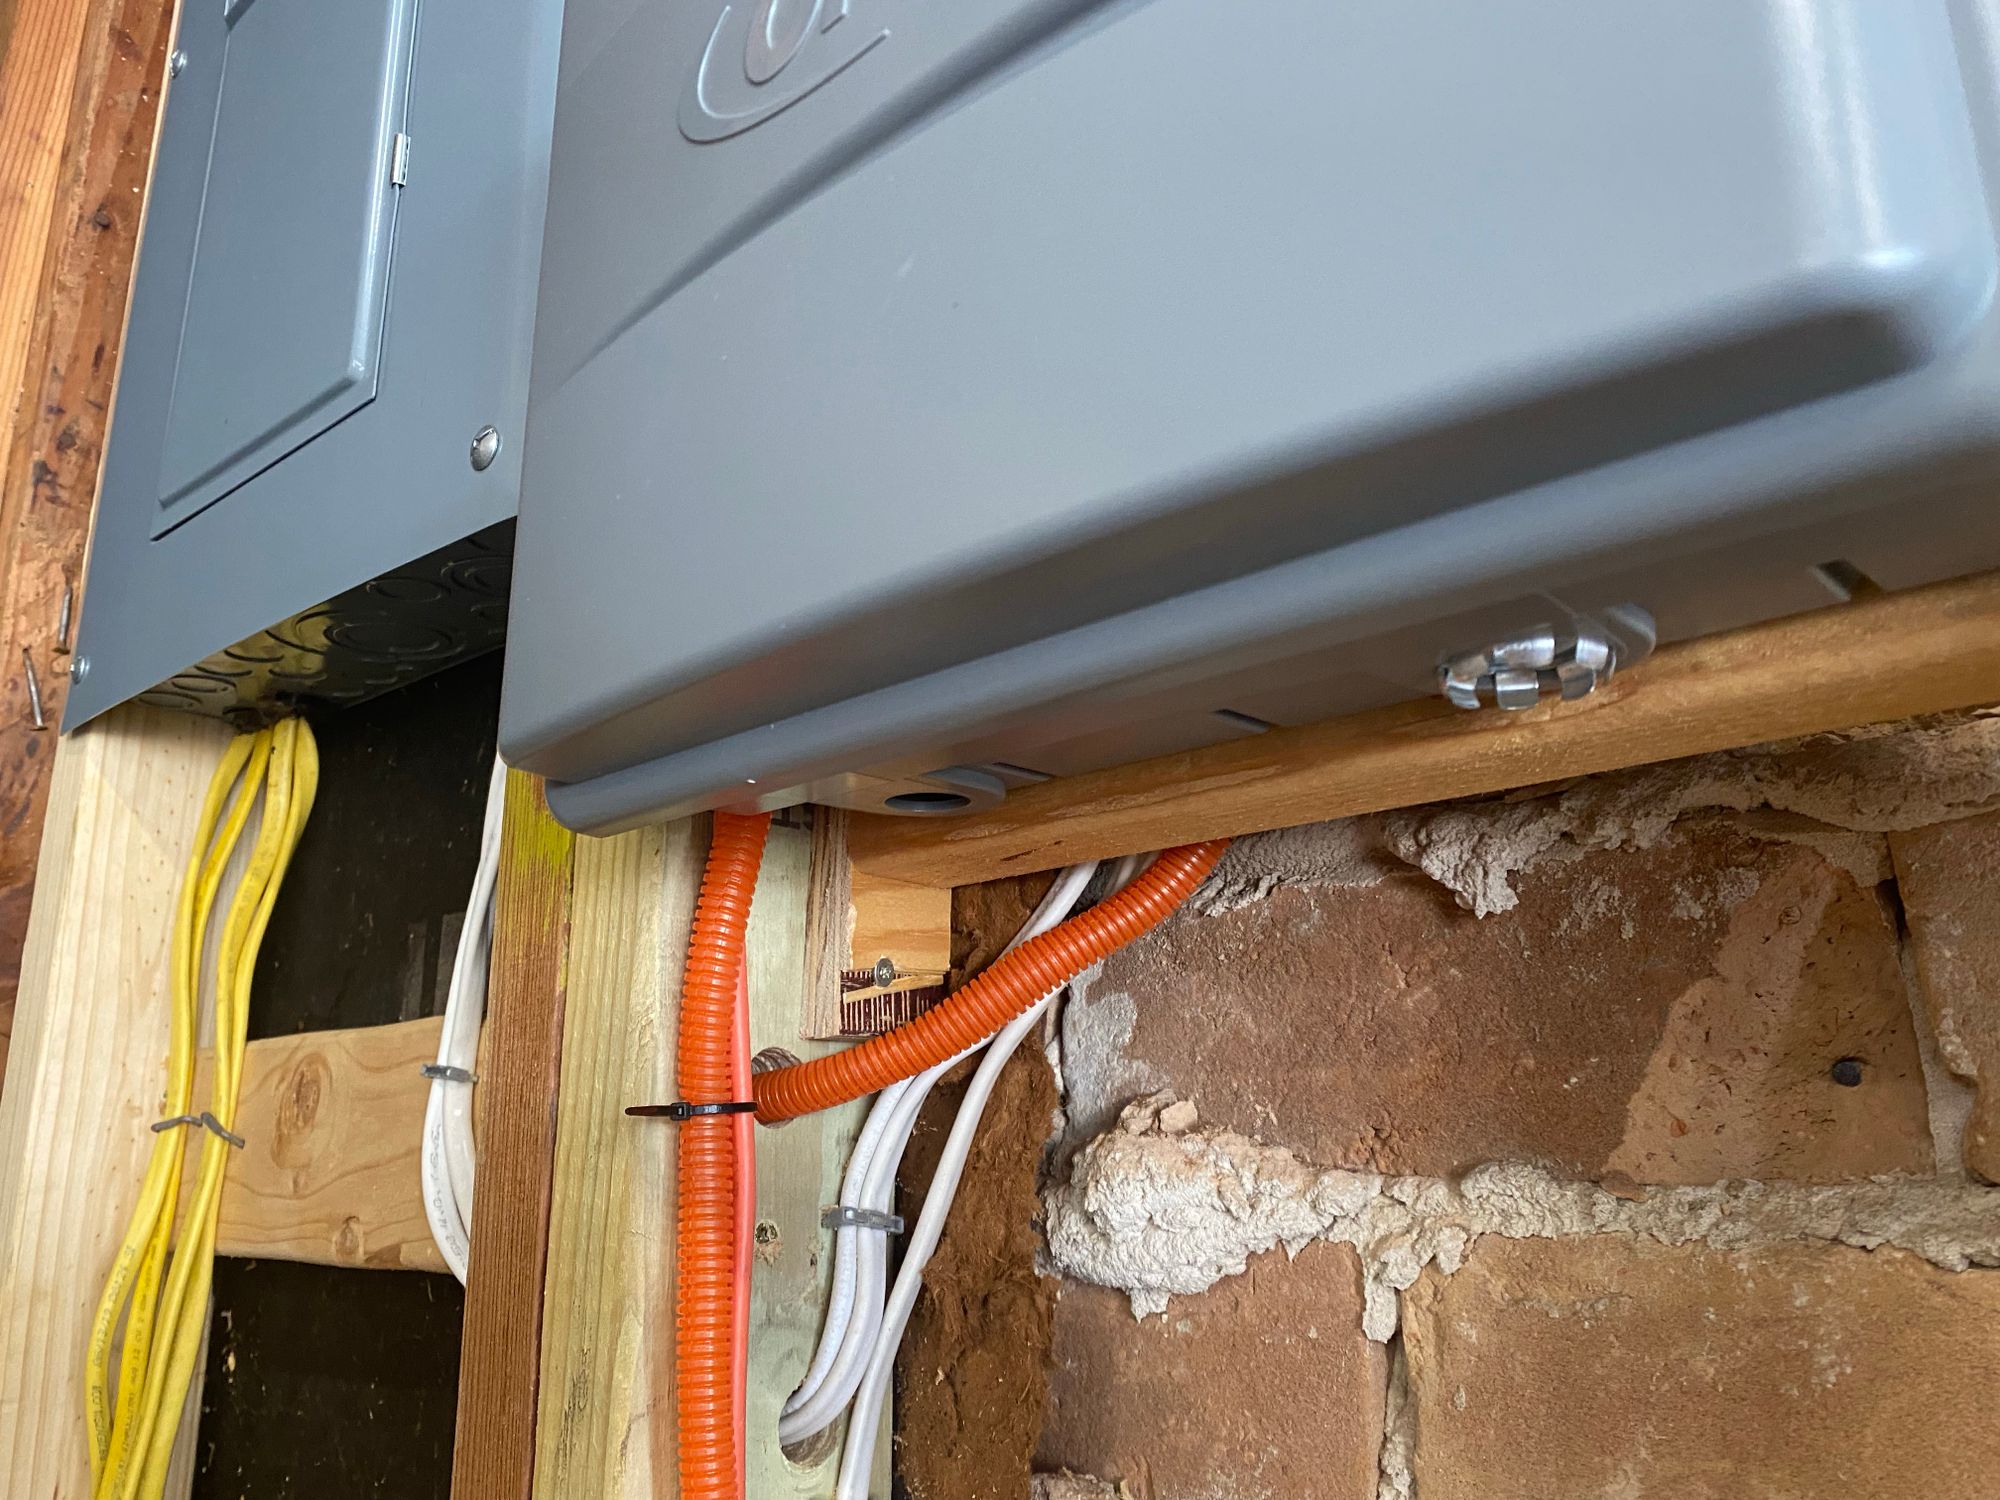
Getting the wires from the Garage Sub Panel was easy, but it was NOT easy getting it from the main panel on the other side of the wall.
So, I drilled A hole through the back of the panel, through the brick, and added a bushing. Might be a little overkill, but it's the best solution I could come up with
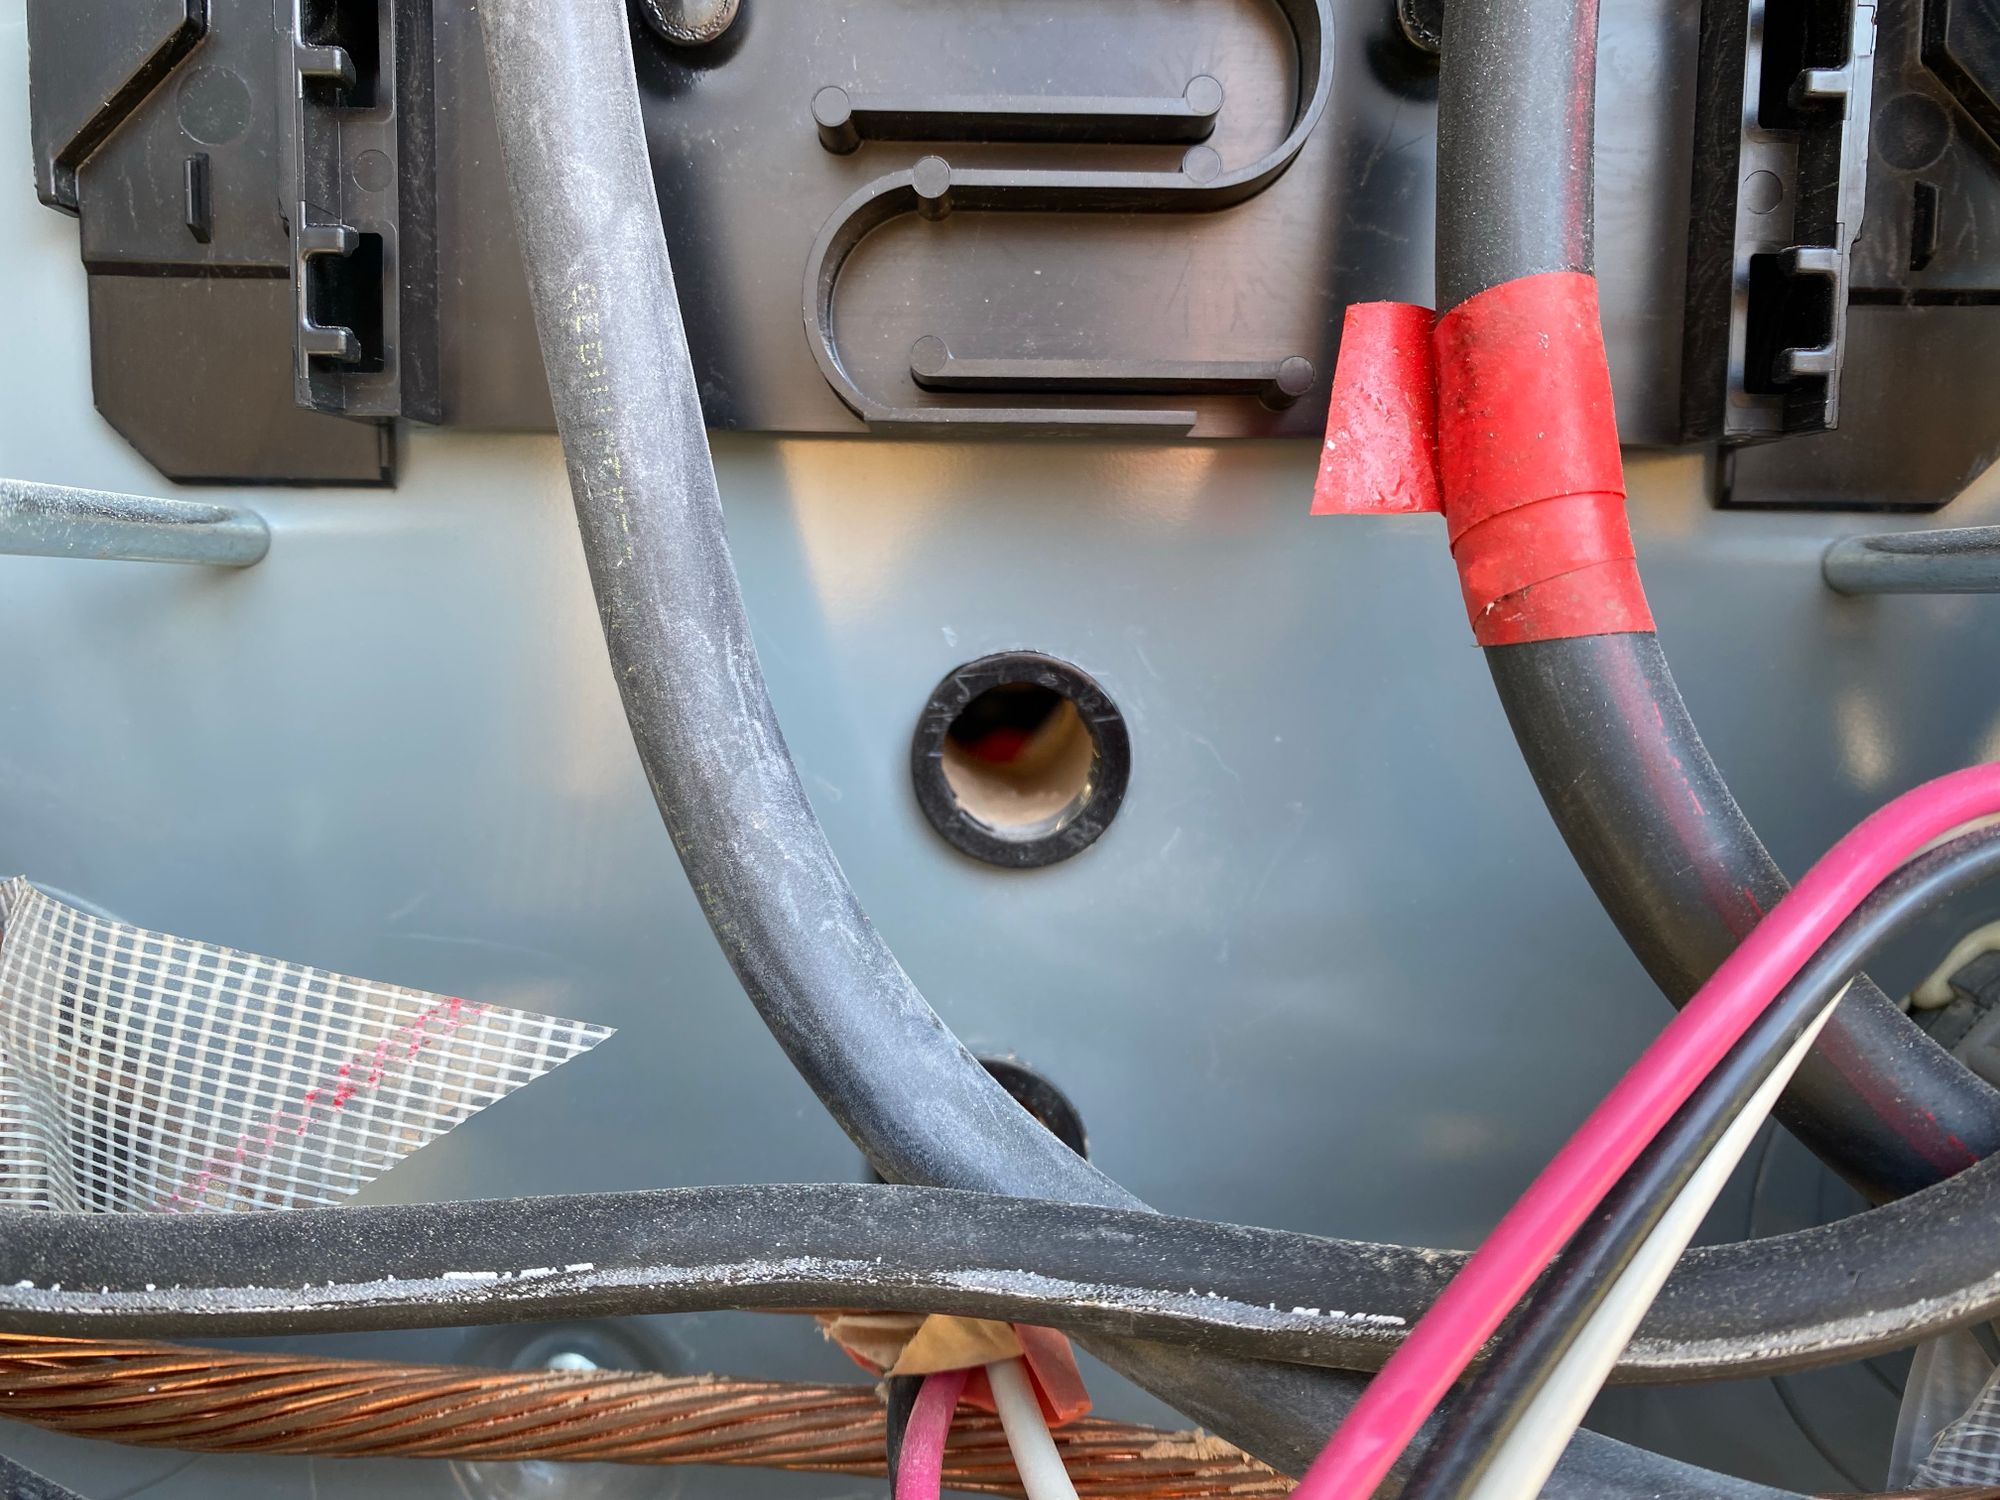
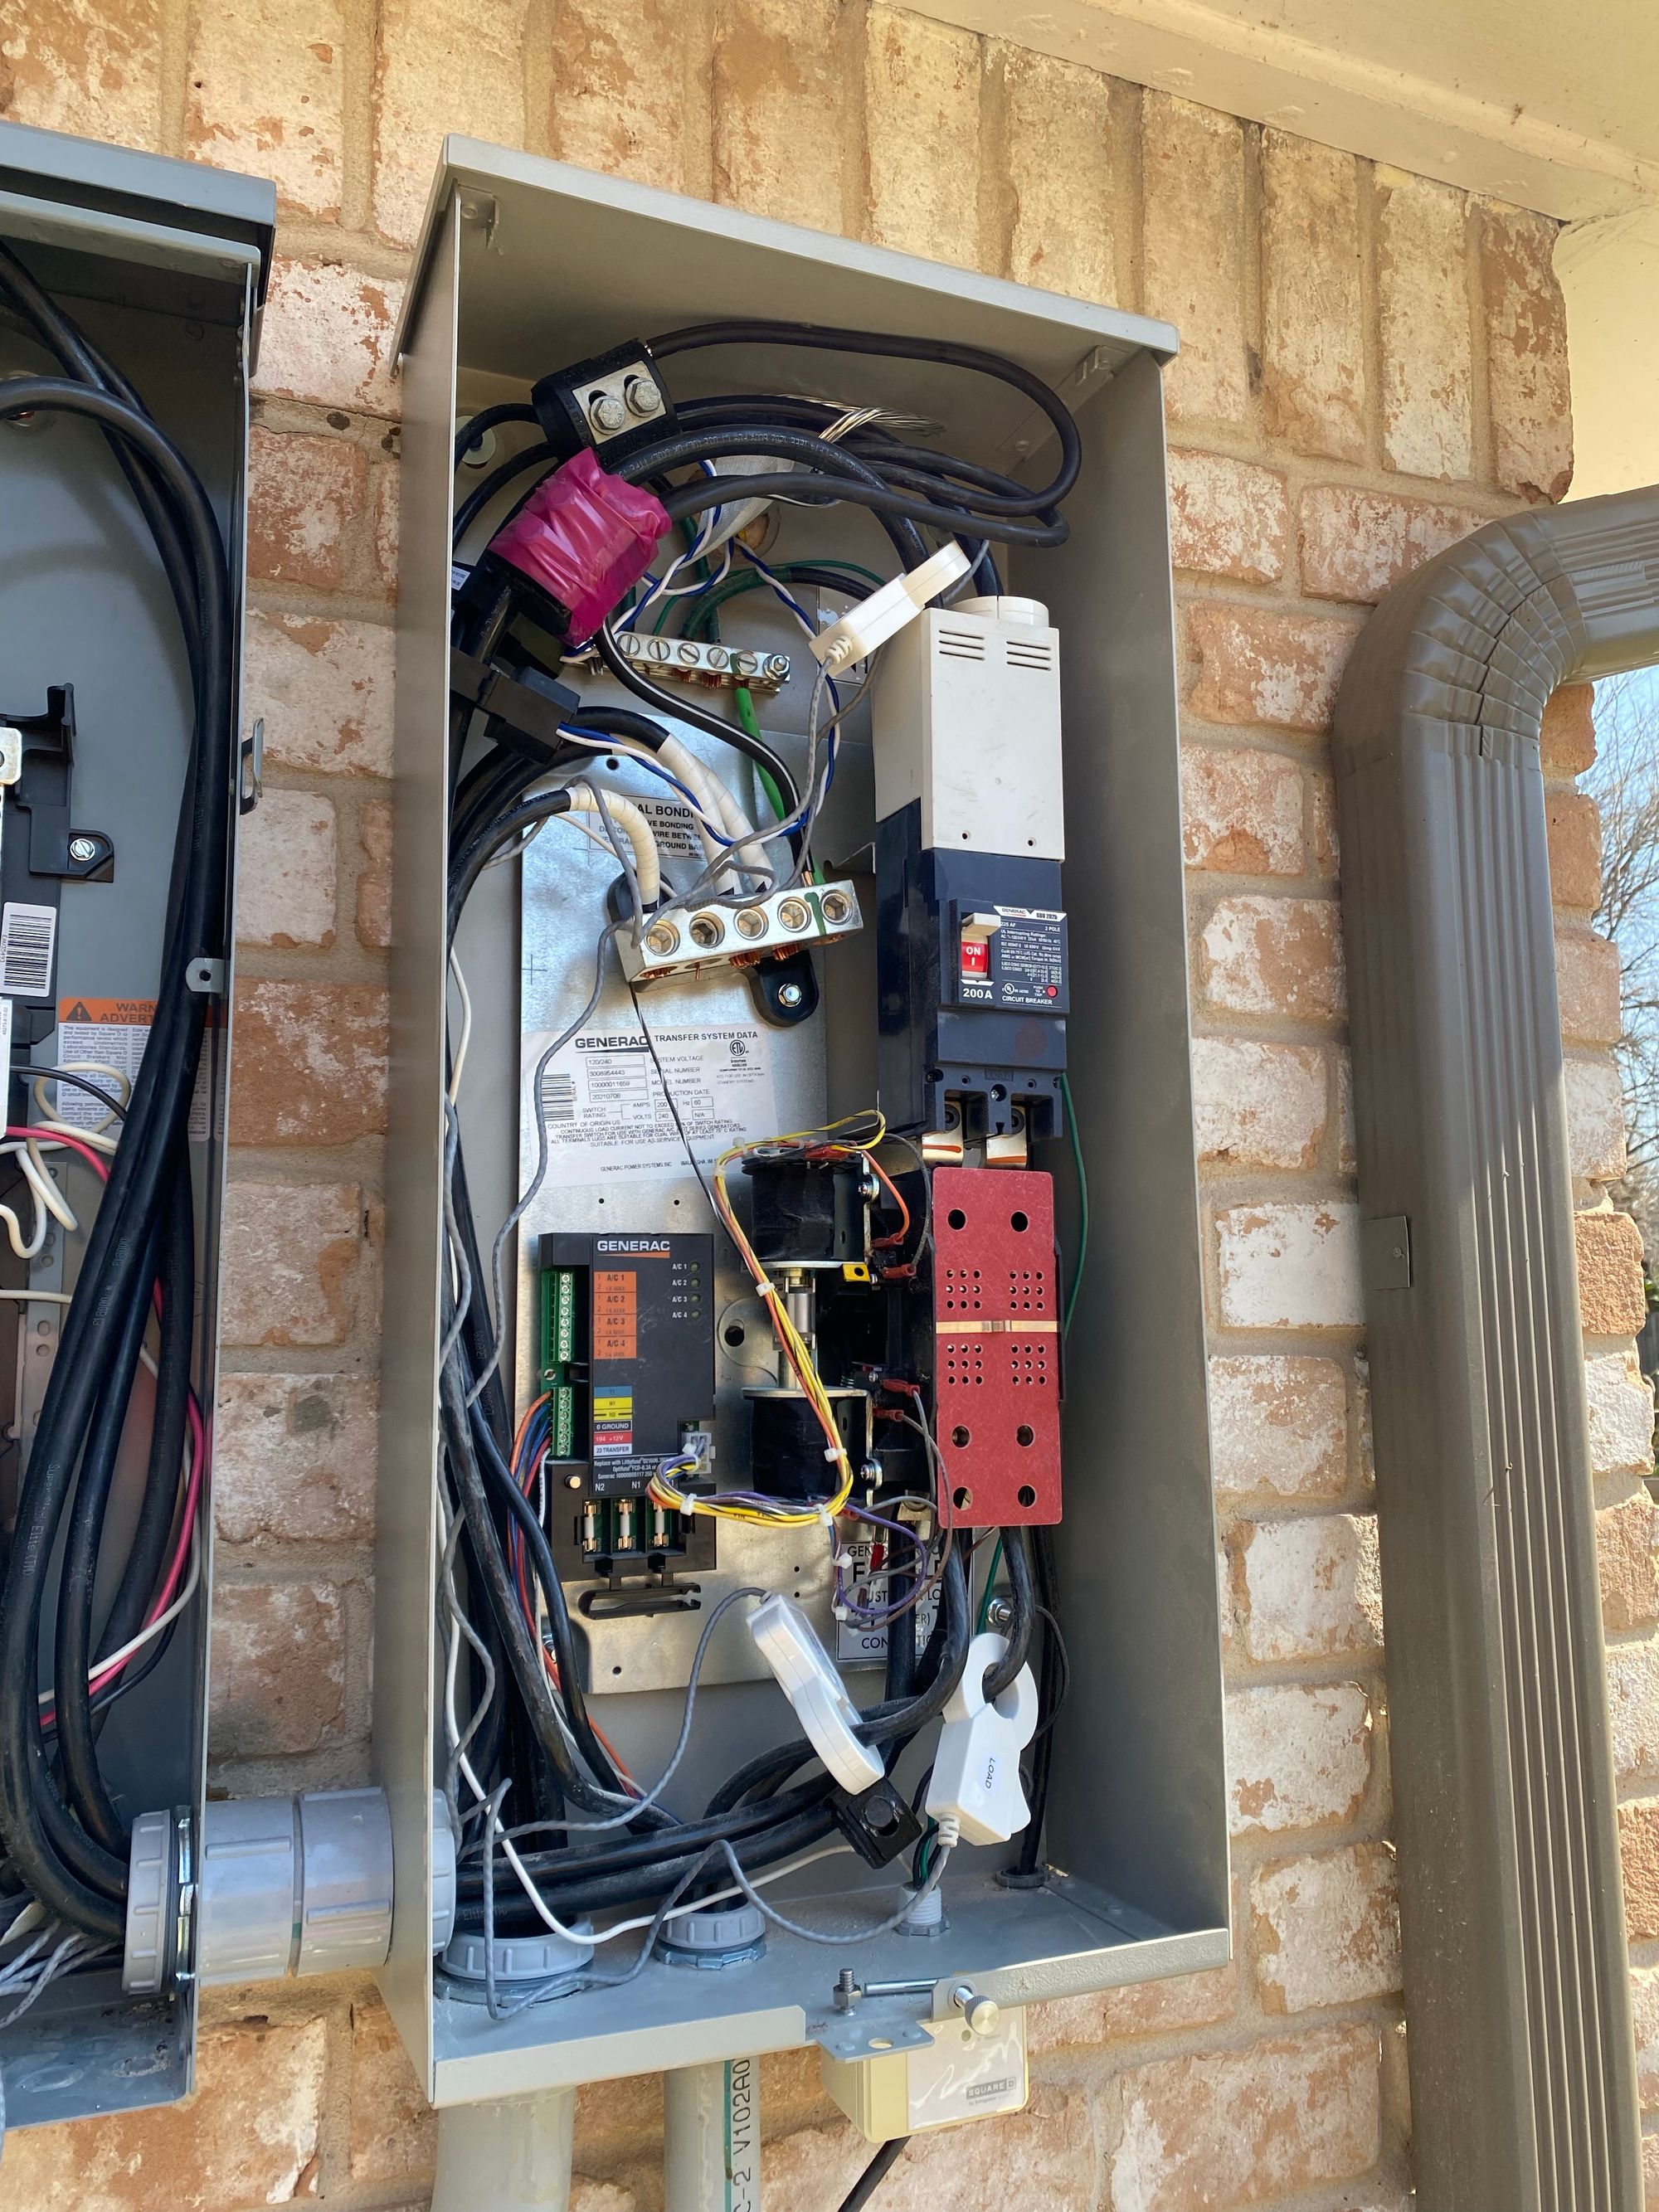
This let me run the CT's from the panel, as well as the Generator ATS. You can see the CT's clamped around the wires here, in white.
Here is all the CT's I have and where
- 2 x 200A CT's on the feed from the grid AFTER my solar taps into it
- 2 x 200a CT's on the feed from my generator into the ATS
- 2 x 100A CT's on the inlet from my portable generator
- 2 x 200A CT's on my Garage Sub panel feed
- 2 x 200A CT's on my House Sub Panel feed
- 1 x 100CT on on the solar feed
You'll notice that for most of them I have 2 x CT's, that's because a US power system has 2 Hots and a neutral. A 240v appliance splits the load evenly between the 2 x hots and does not put any current back on the neutral. But, a 120v load will just load 1 hot and then the power returns on the neutral. So you need to monitor both hots. But for a purely 240v device like my solar inverters, you can just put a CT on one hot, and double it in IoTaWatt, saving a CT and an input
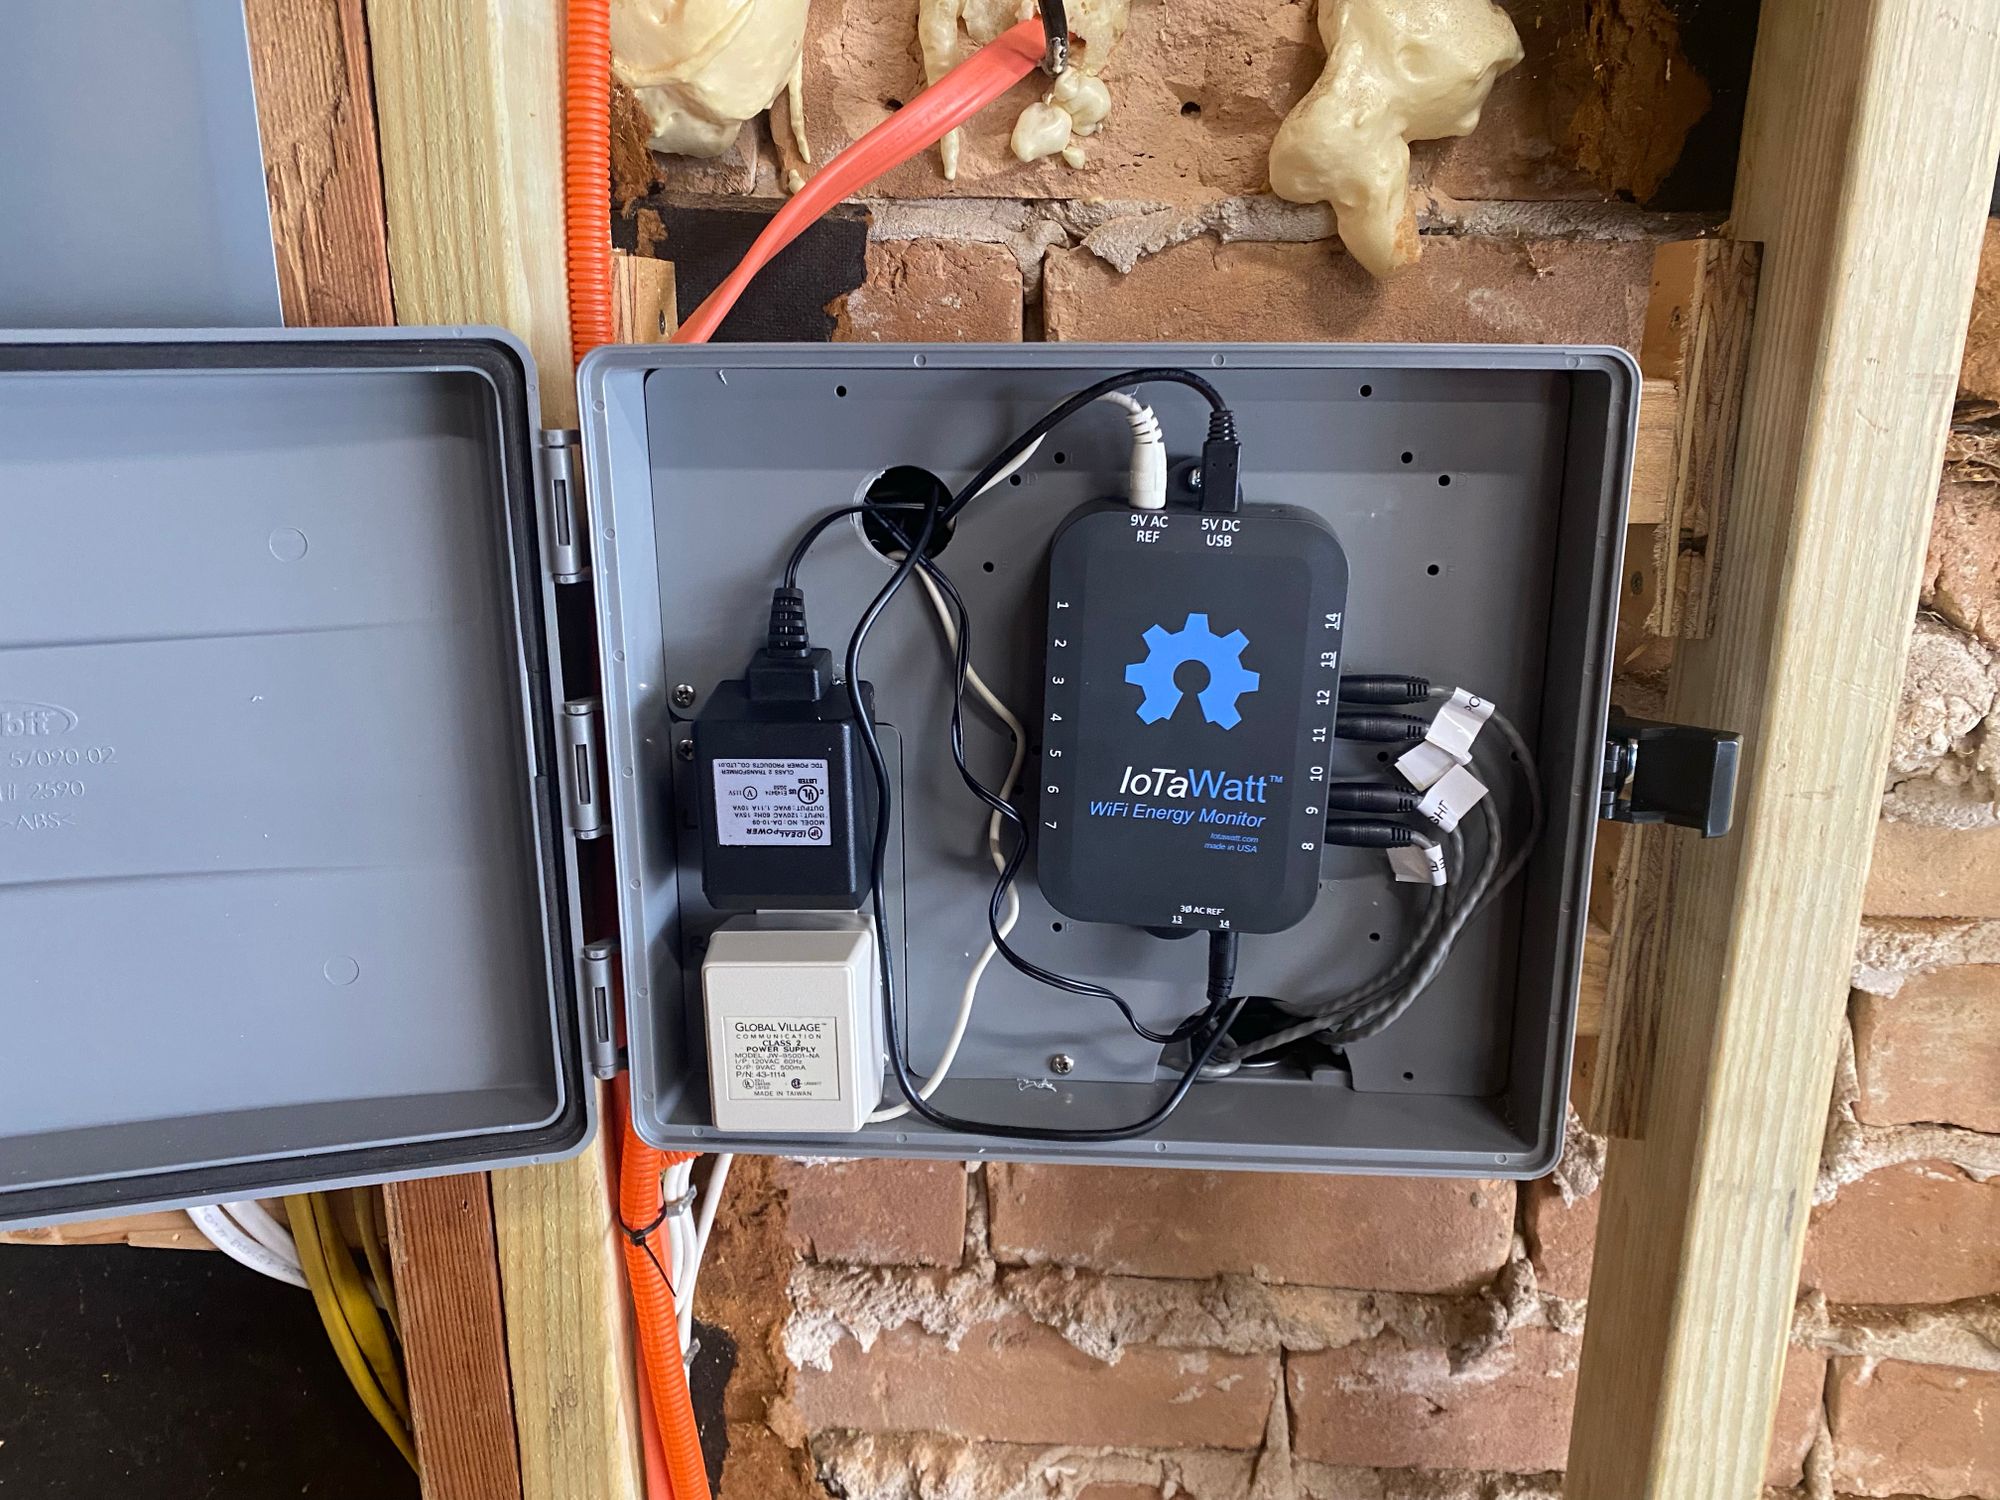
Here is a shot of the IoTaWatt all wired up
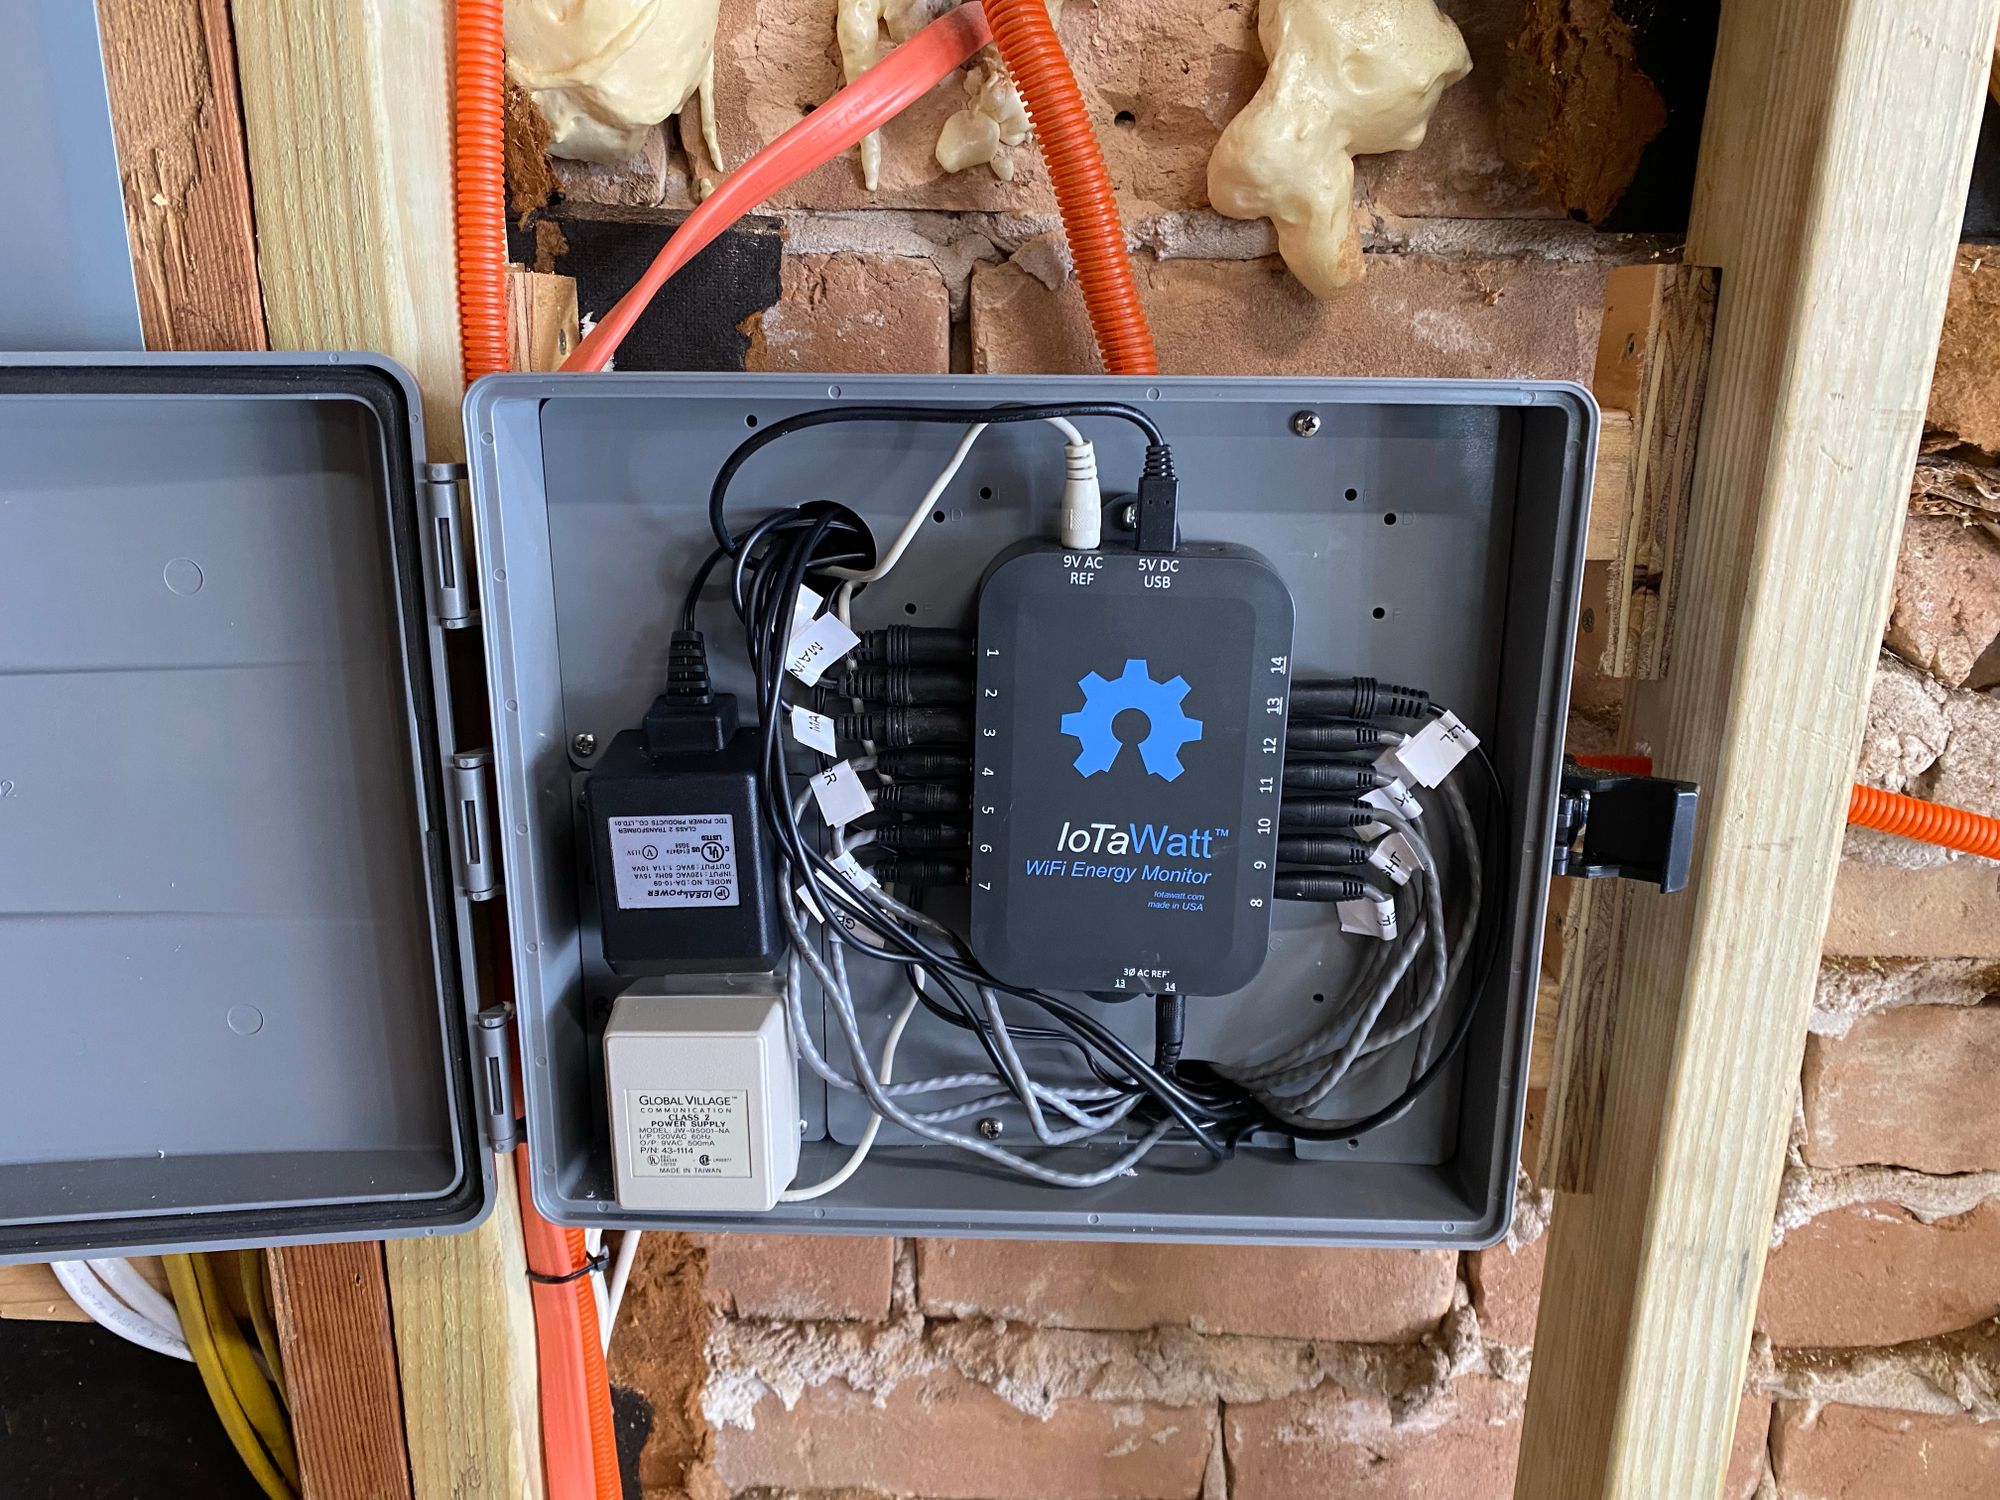
For a few of the circuits, the CT wires were not long enough. So I just used 3.5mm extensions. I use THESE Cable2Go ones and they worked great.
And, I'm glad I did. That box got VERY cramped with all the wires in there. When I was putting back the cover, I accidently ran a screw into a wire and destroyed it
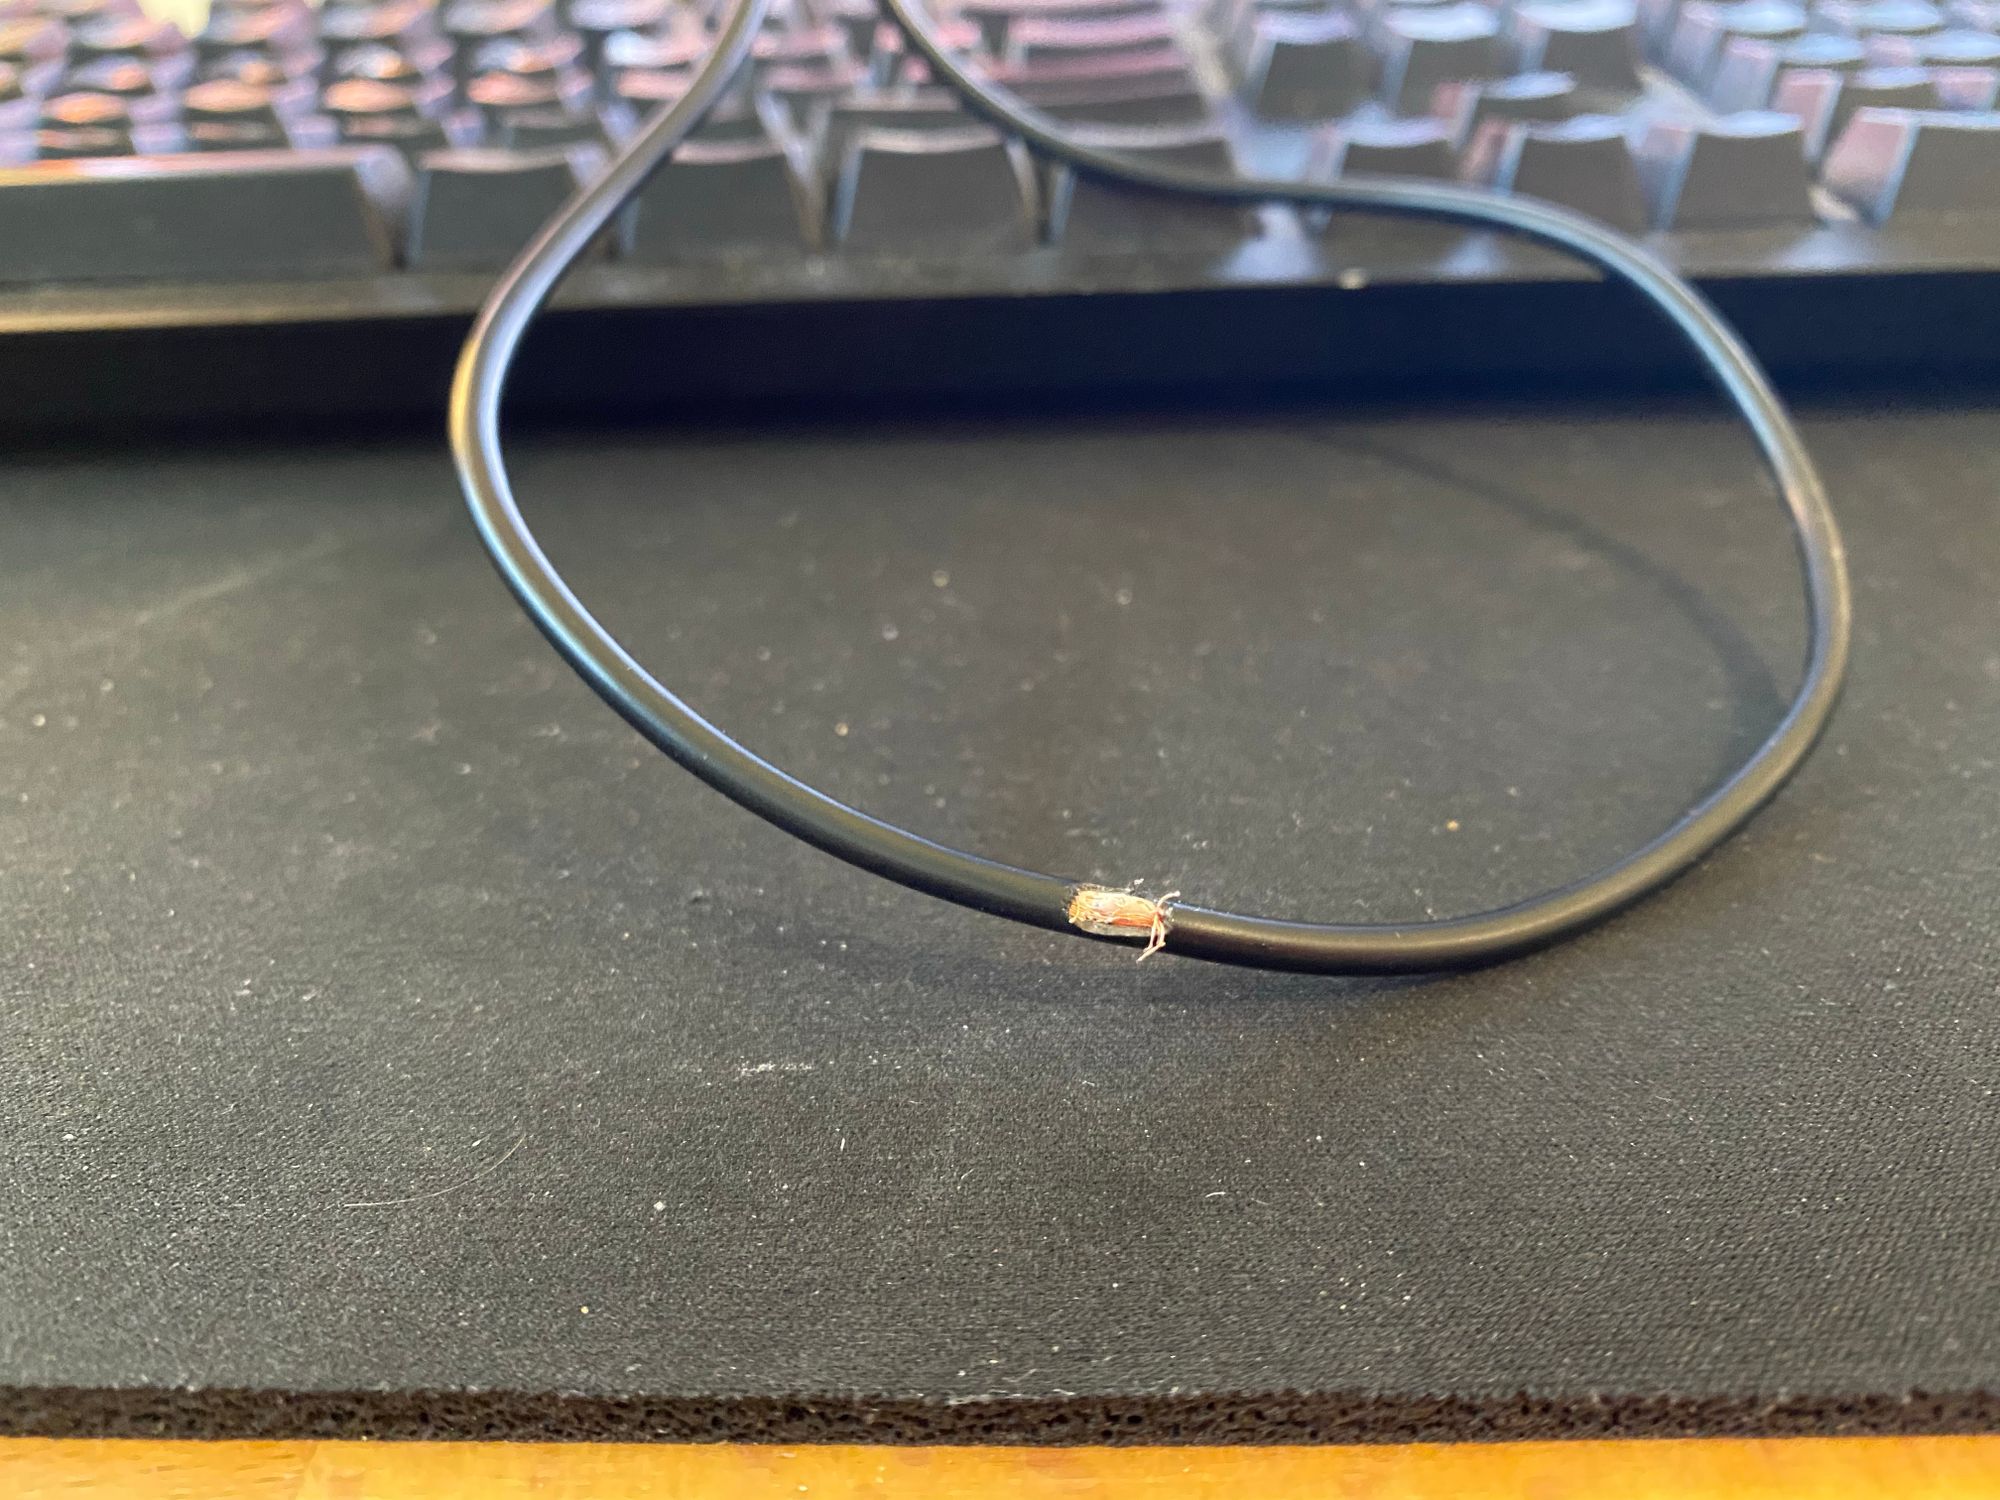
Luckily it was an extension which cost $6, and not a $15 200A CT. I replaced the cord and just was more careful.
Now I had all of my power information in IoTaWatt.
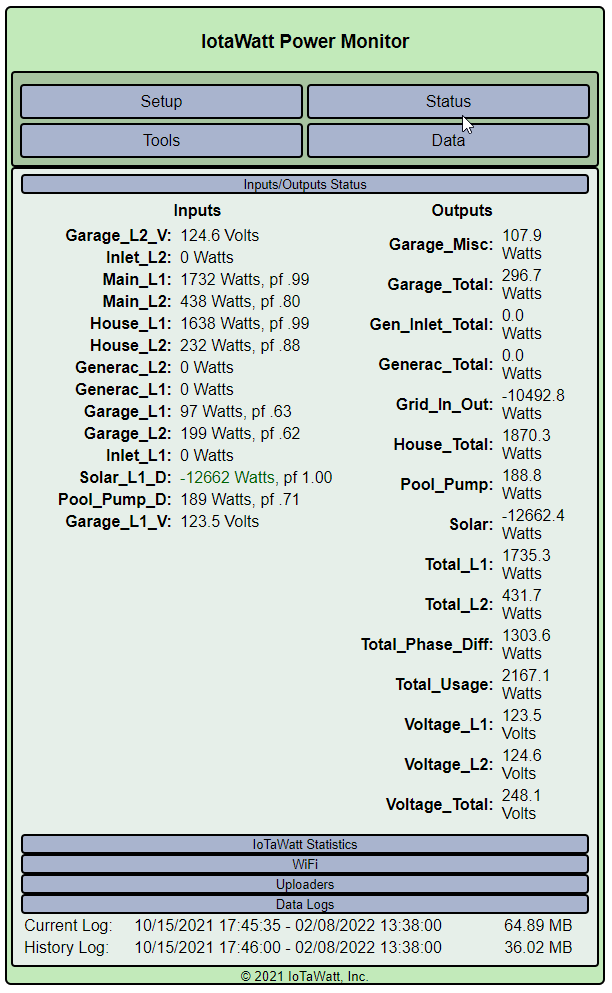
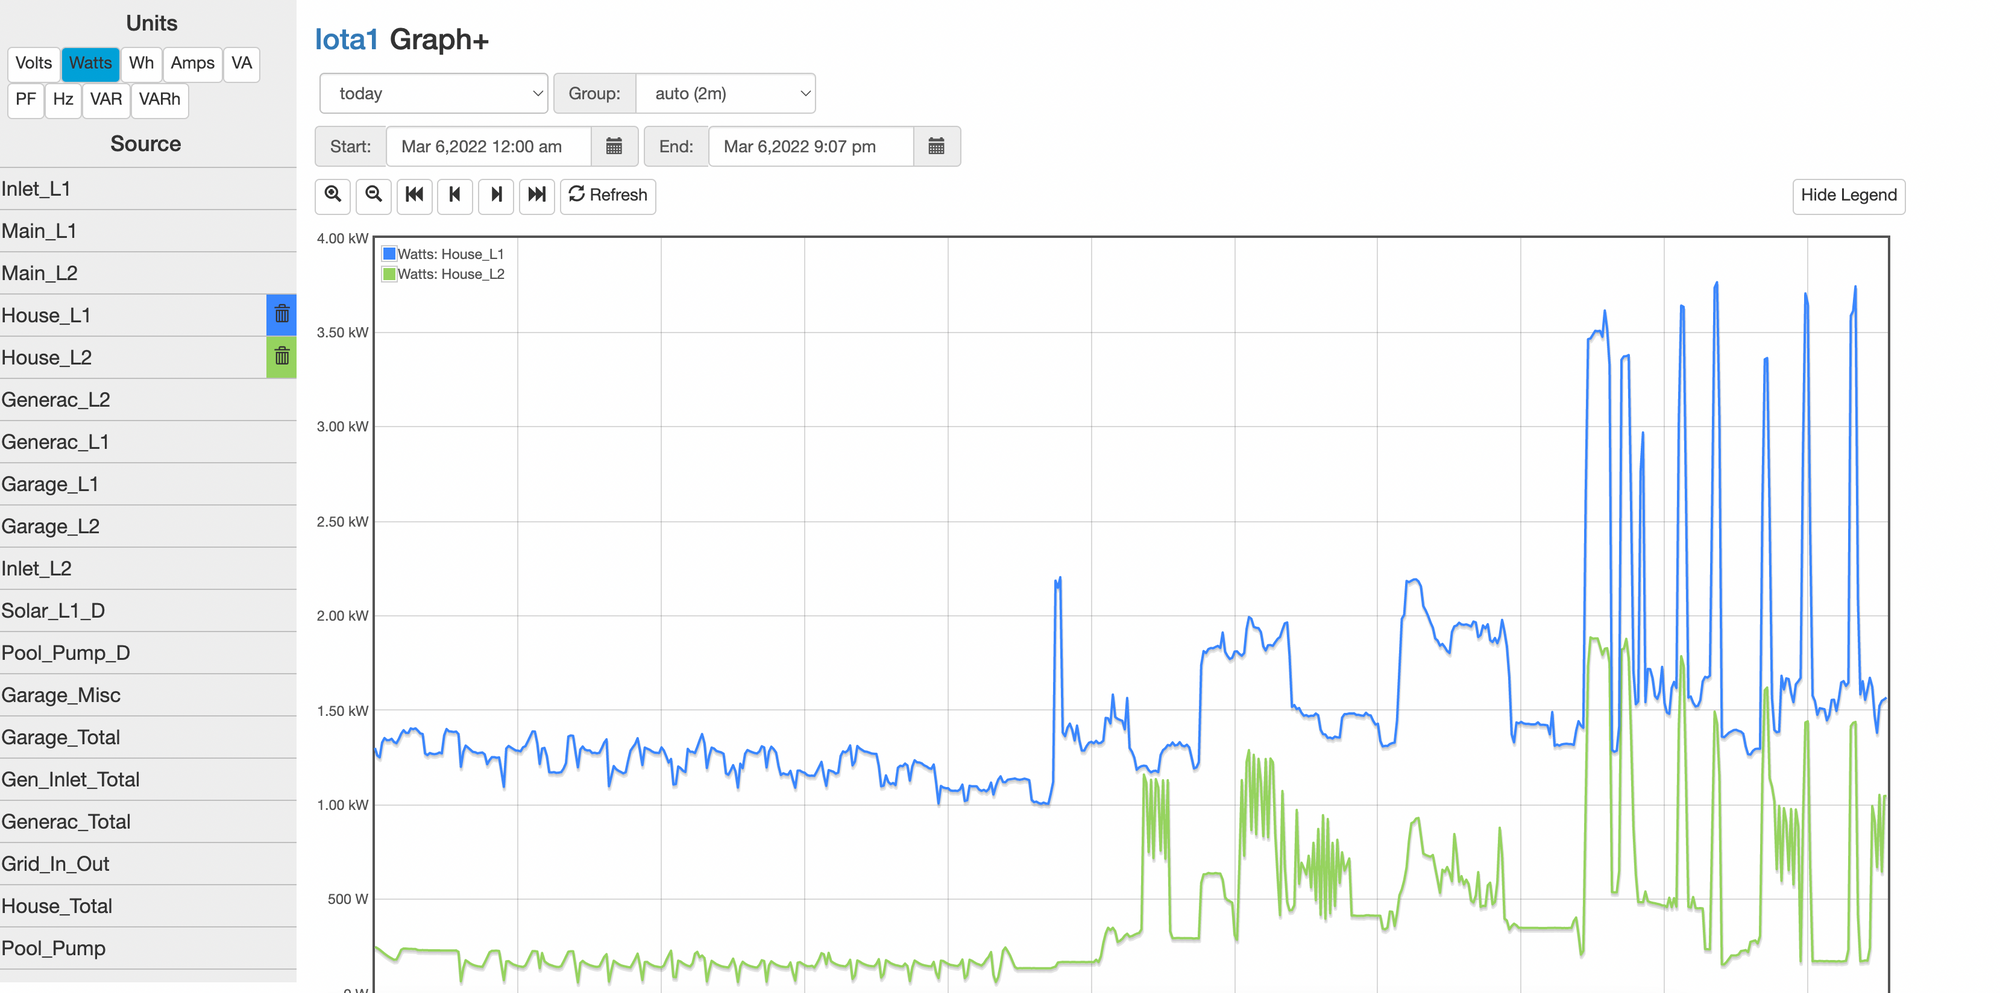
The UI doesn't look great, but it gives you all the information you need. And I have no plans to use this, as I plan to push all the information in Grafana. You can also use the built in Graph+ application to make graphs of everything you need. This application is built into IoTaWatt
So I left it running for a few days and monitored the power. I noticed several odd things which I assumed were issues with IoTaWatt
In ALL cases, it was not IoTaWatt, and it was just in fact odd power usage. I so far have been stunned with how accurate IoTaWatt is, its accurate down to a level I never thought possible.
One example is that when my garage lights came on, it would read my Garage Rack UPS power ever slow slightly lower than before
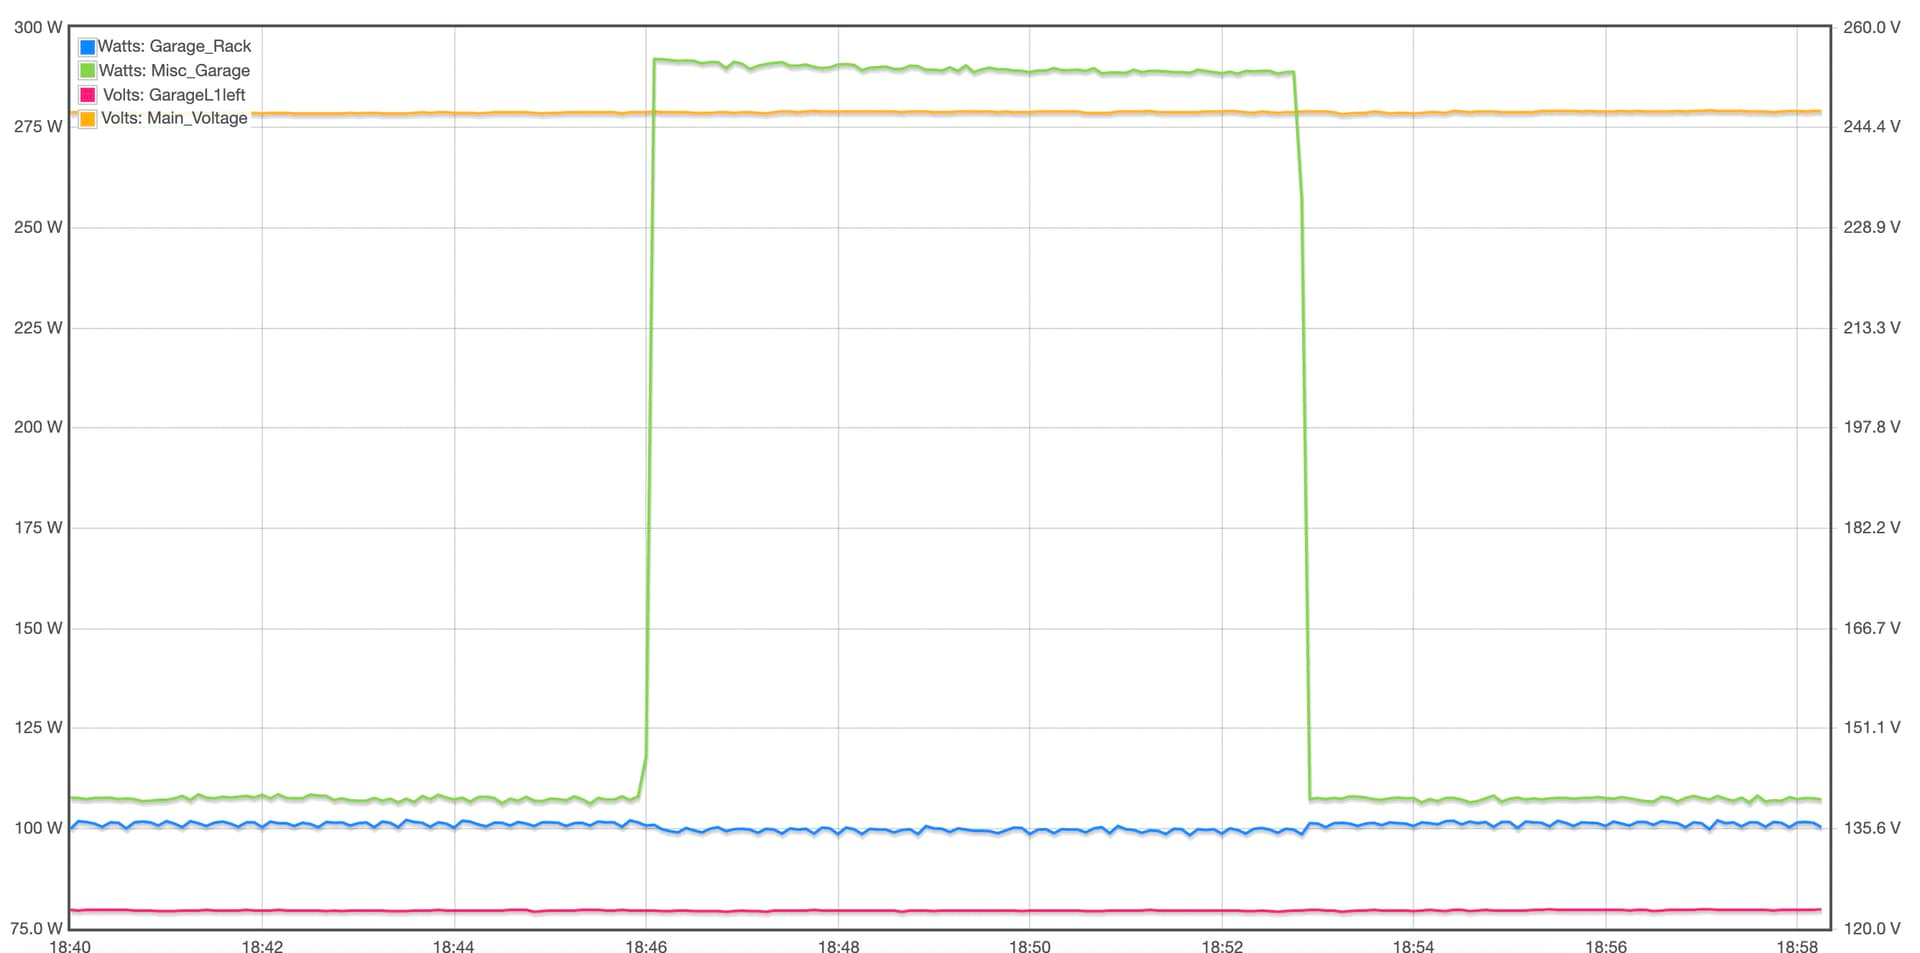
I assumed this was an anomaly with how it was being read. But, as it turns out, it's so accurate that what I am seeing is actually the IR light on my PoE powered IP Camera in the garage turning off when the lights come on. THAT is how accurate this setup is.
Then I noticed that when production fell on my solar panels, I got some really weird readings. The power factor would drop through the floor, and it would read 4a of production, at night...
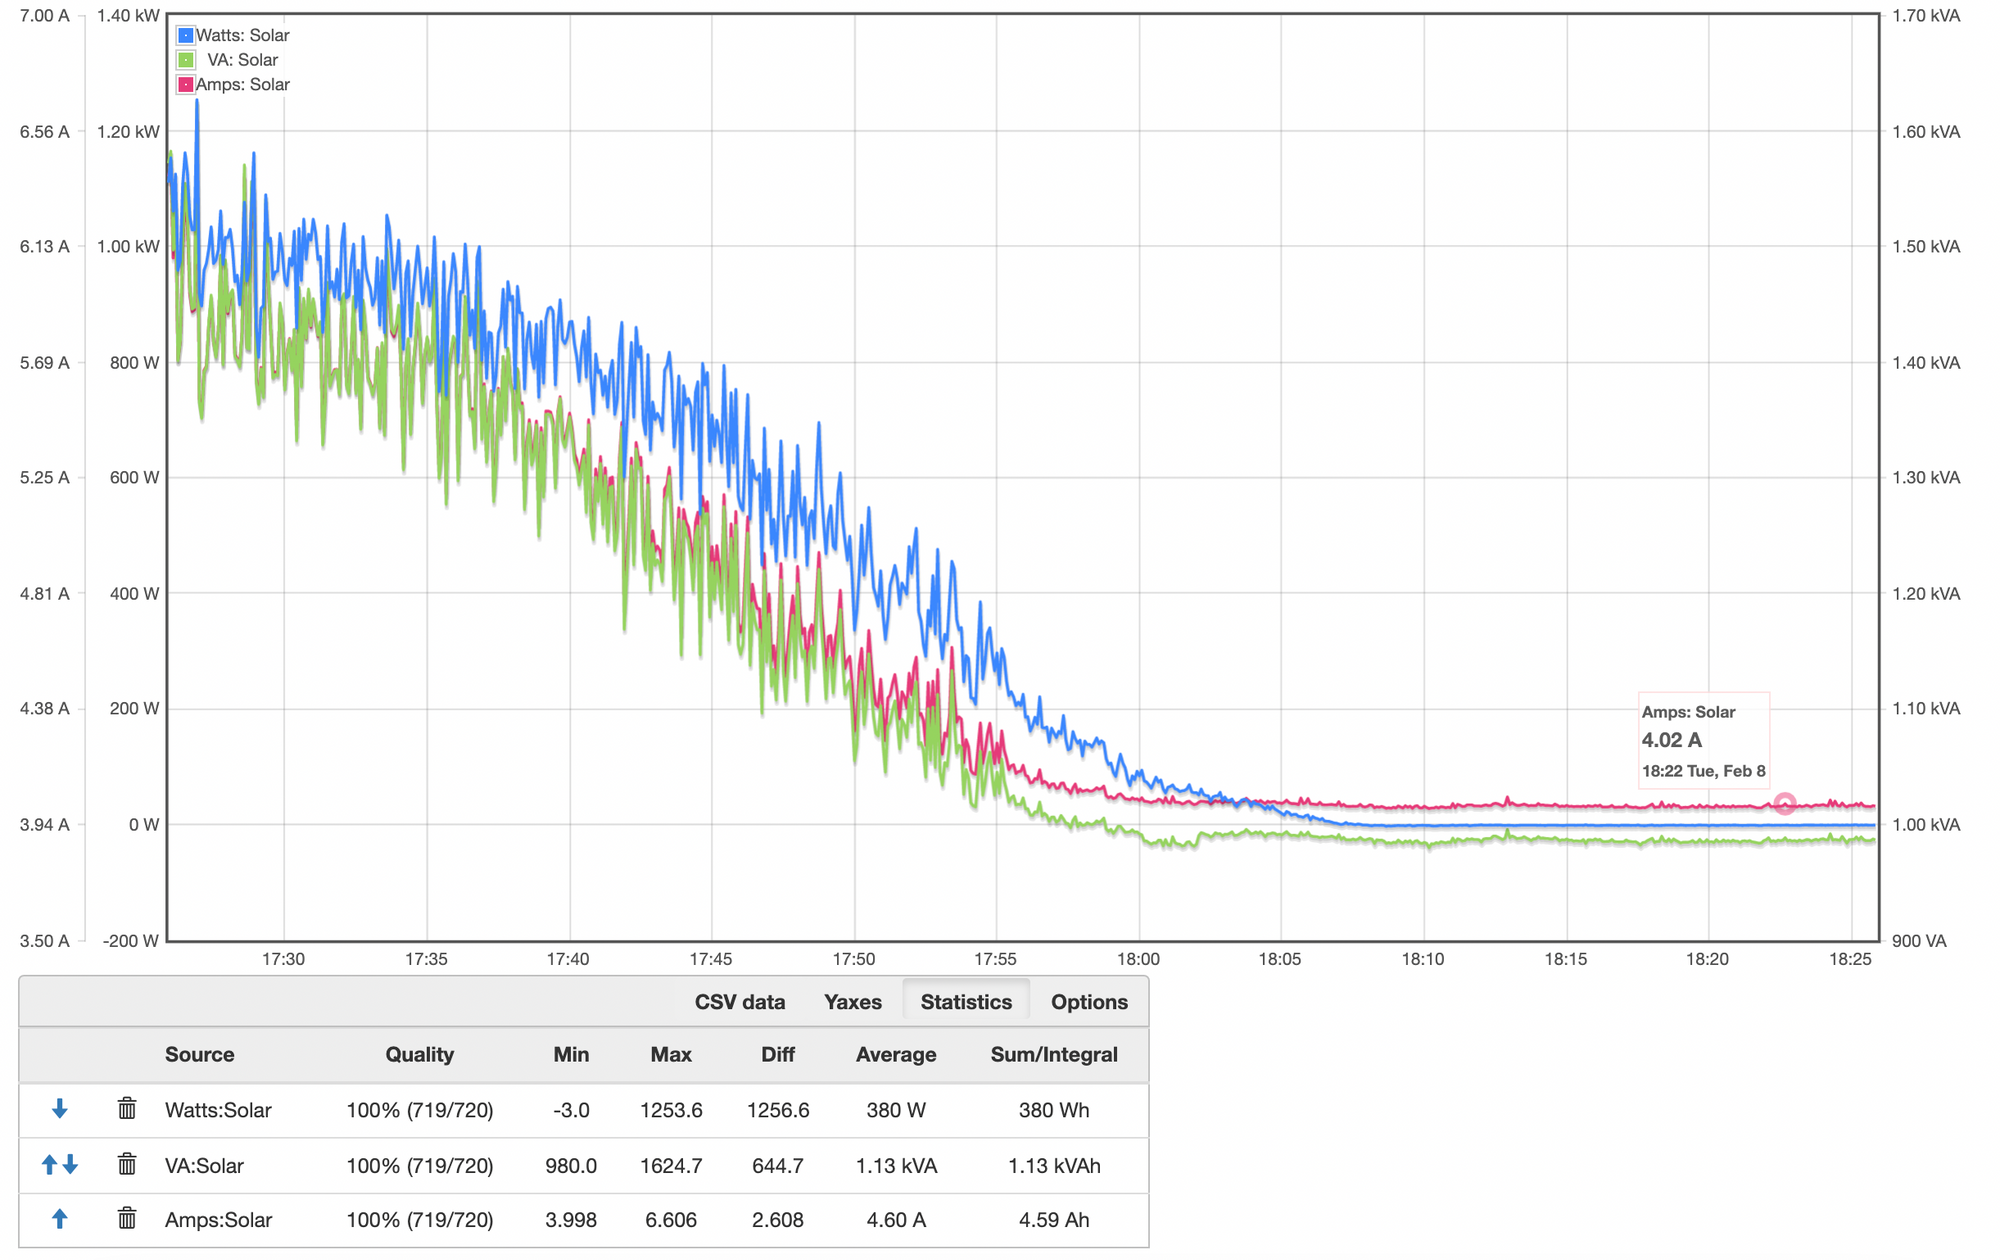
Again, I assumed this was the IoTaWatt reading things wrong. No, I was wrong. It was in fact reading 4a as verified with a clamp meter
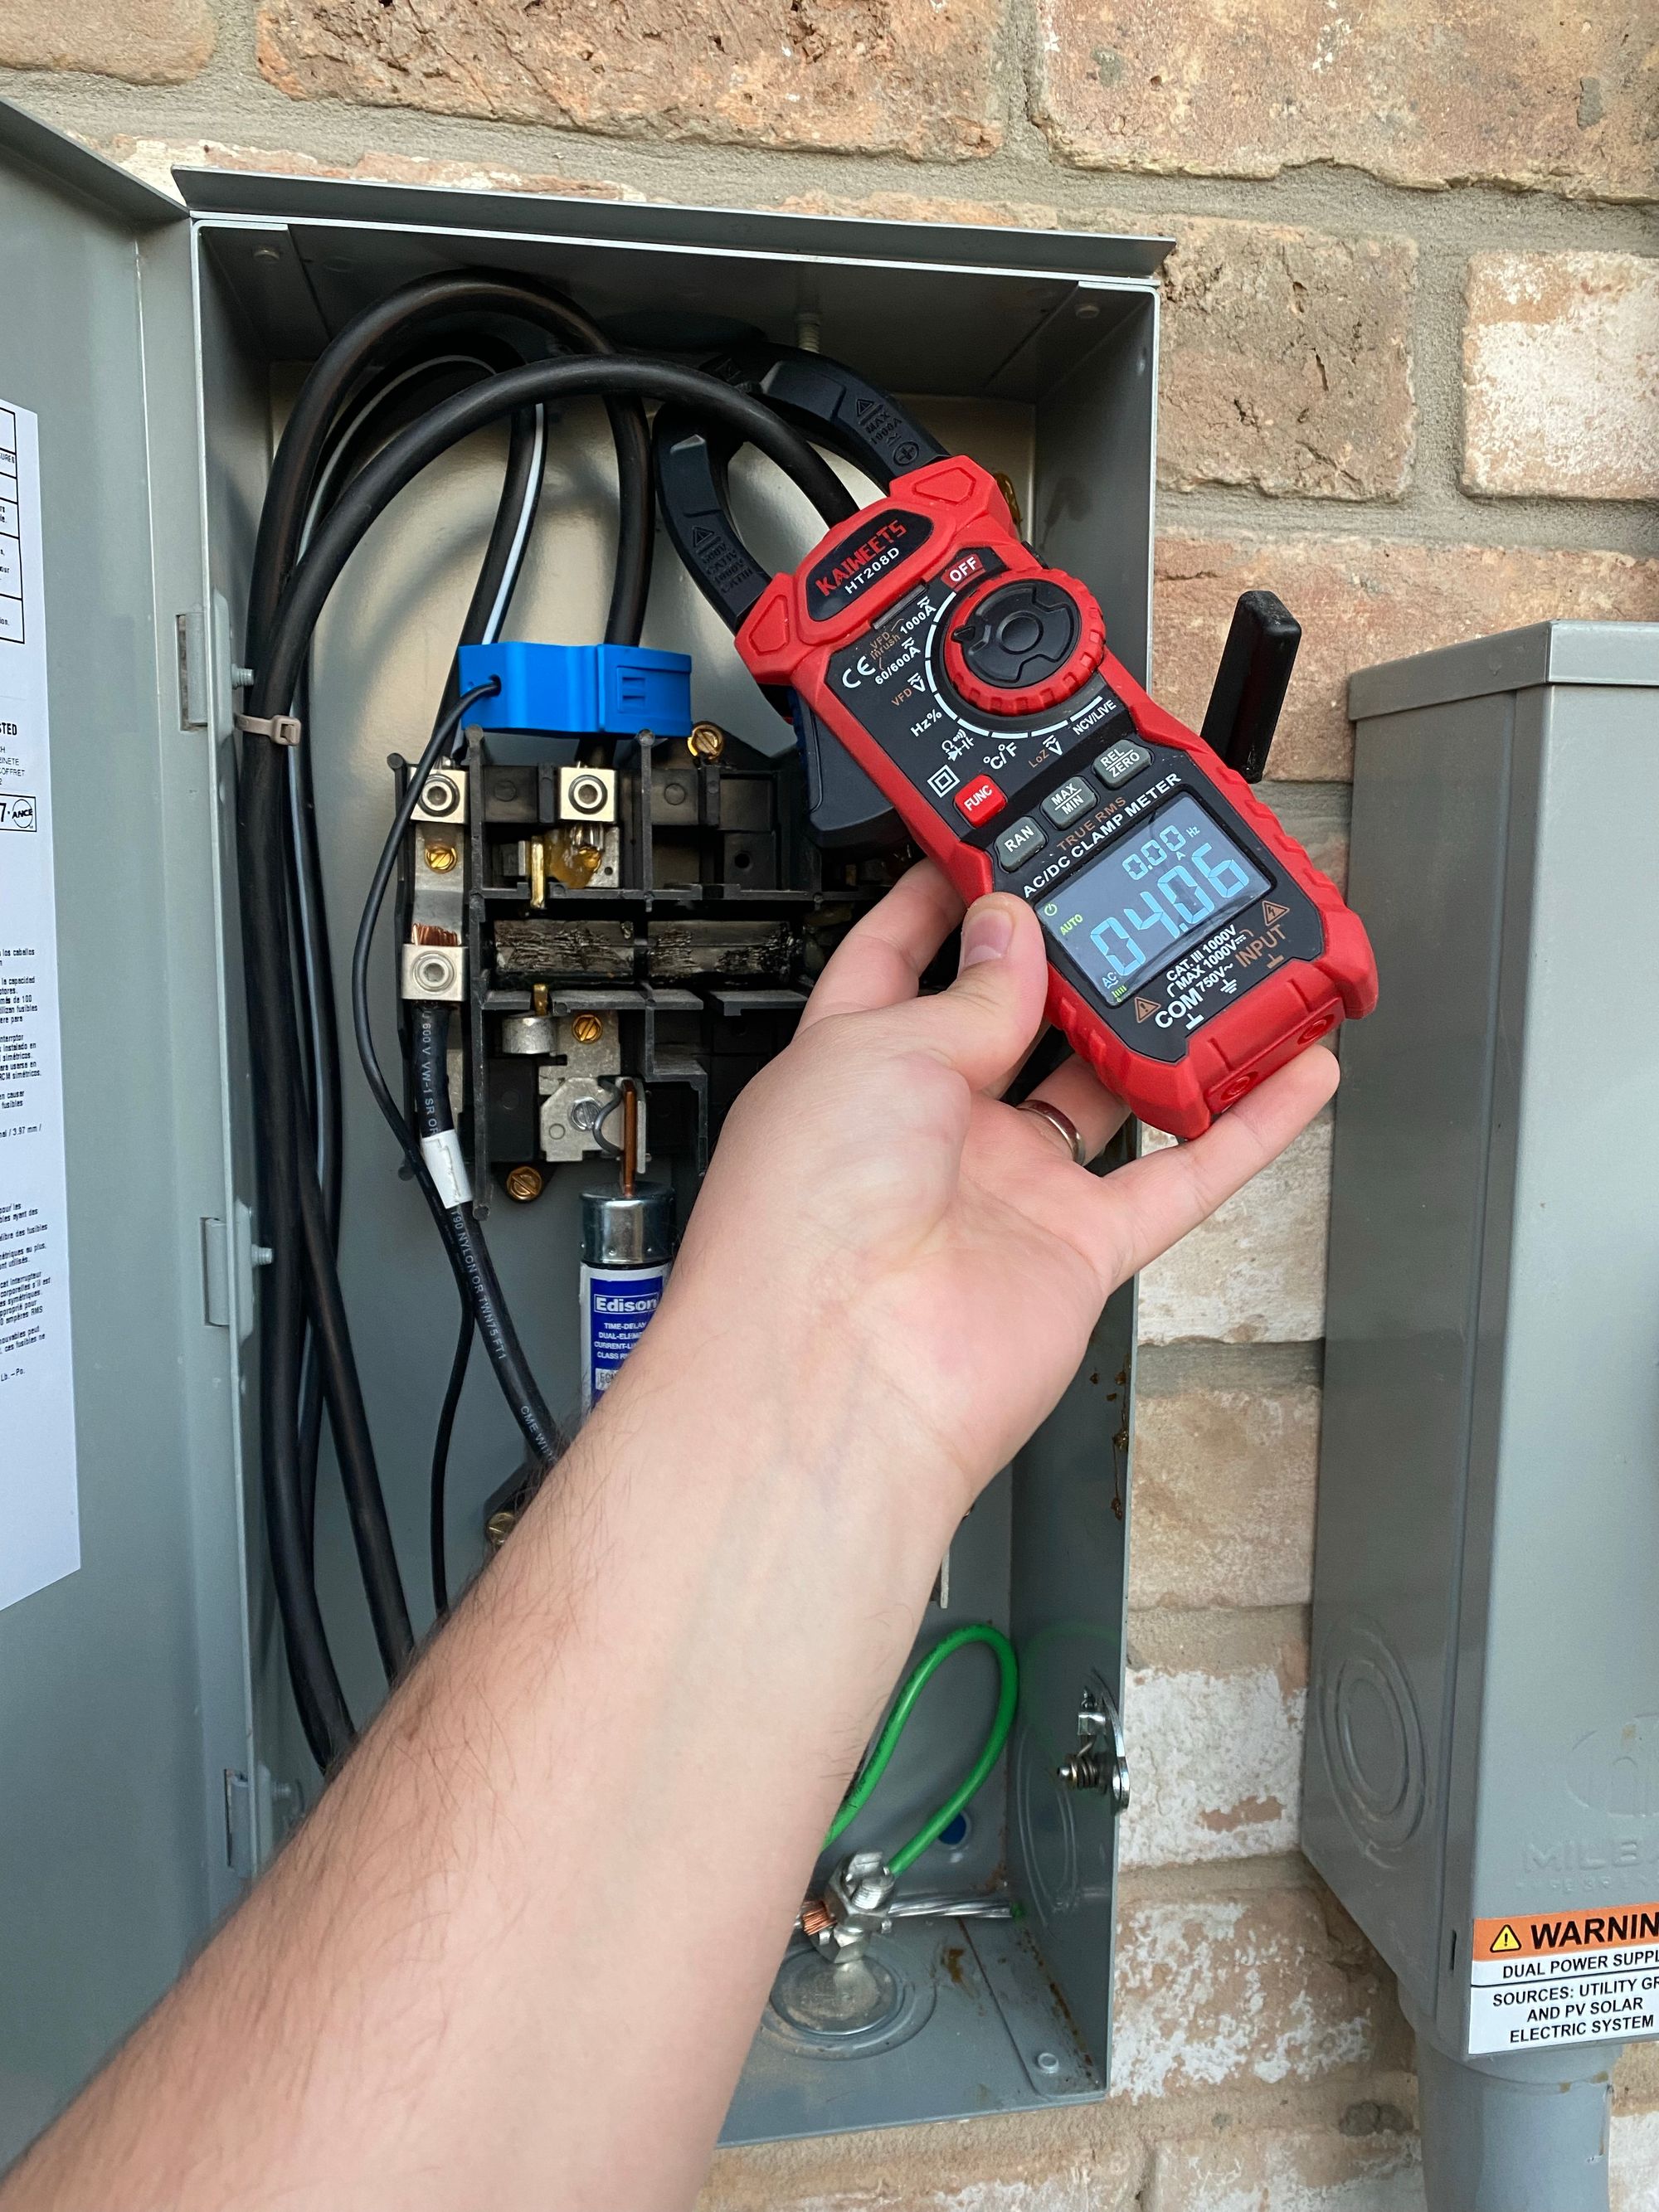
The answer turns out to be that the Enphase Microinverters have a small amount of current each with a VERY low PF that keeps them awake at night. So there really is 4a of current, but the PF is very low, and the real power is very, very low and nothing to be concerned with.
The next thing I saw was very odd, I switched to Generator power, and when I did that my solar output looked very weird.
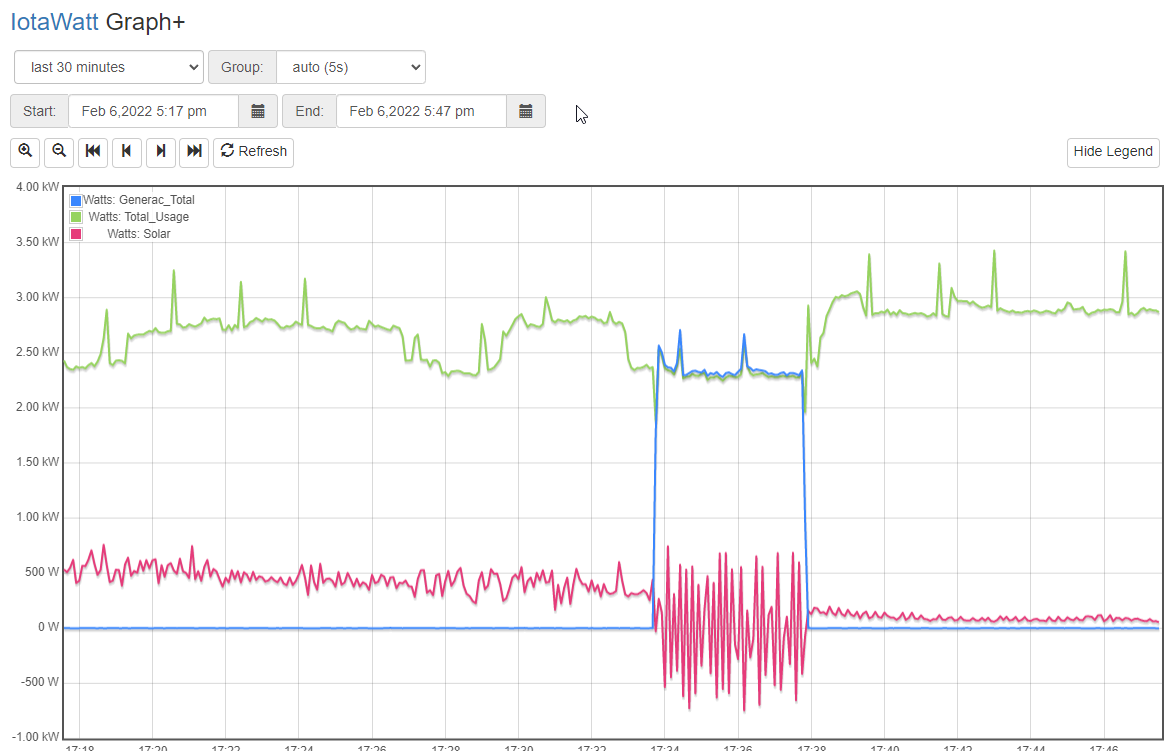
If you read my other posts you will have seen my solar comes in on a line side tap. This means the generator is in no way connected to the solar, so the solar should work perfectly even when I'm on generator power. Which is not what we see here
The answer here is that now my VT's are referencing the generator power, and the frequency is not synced with the grid and solar of course, so the reading is out of whack.
The only fix here is to add an additional VT on the grid, so the solar power measurement can always have a good reference. So that's what I did.
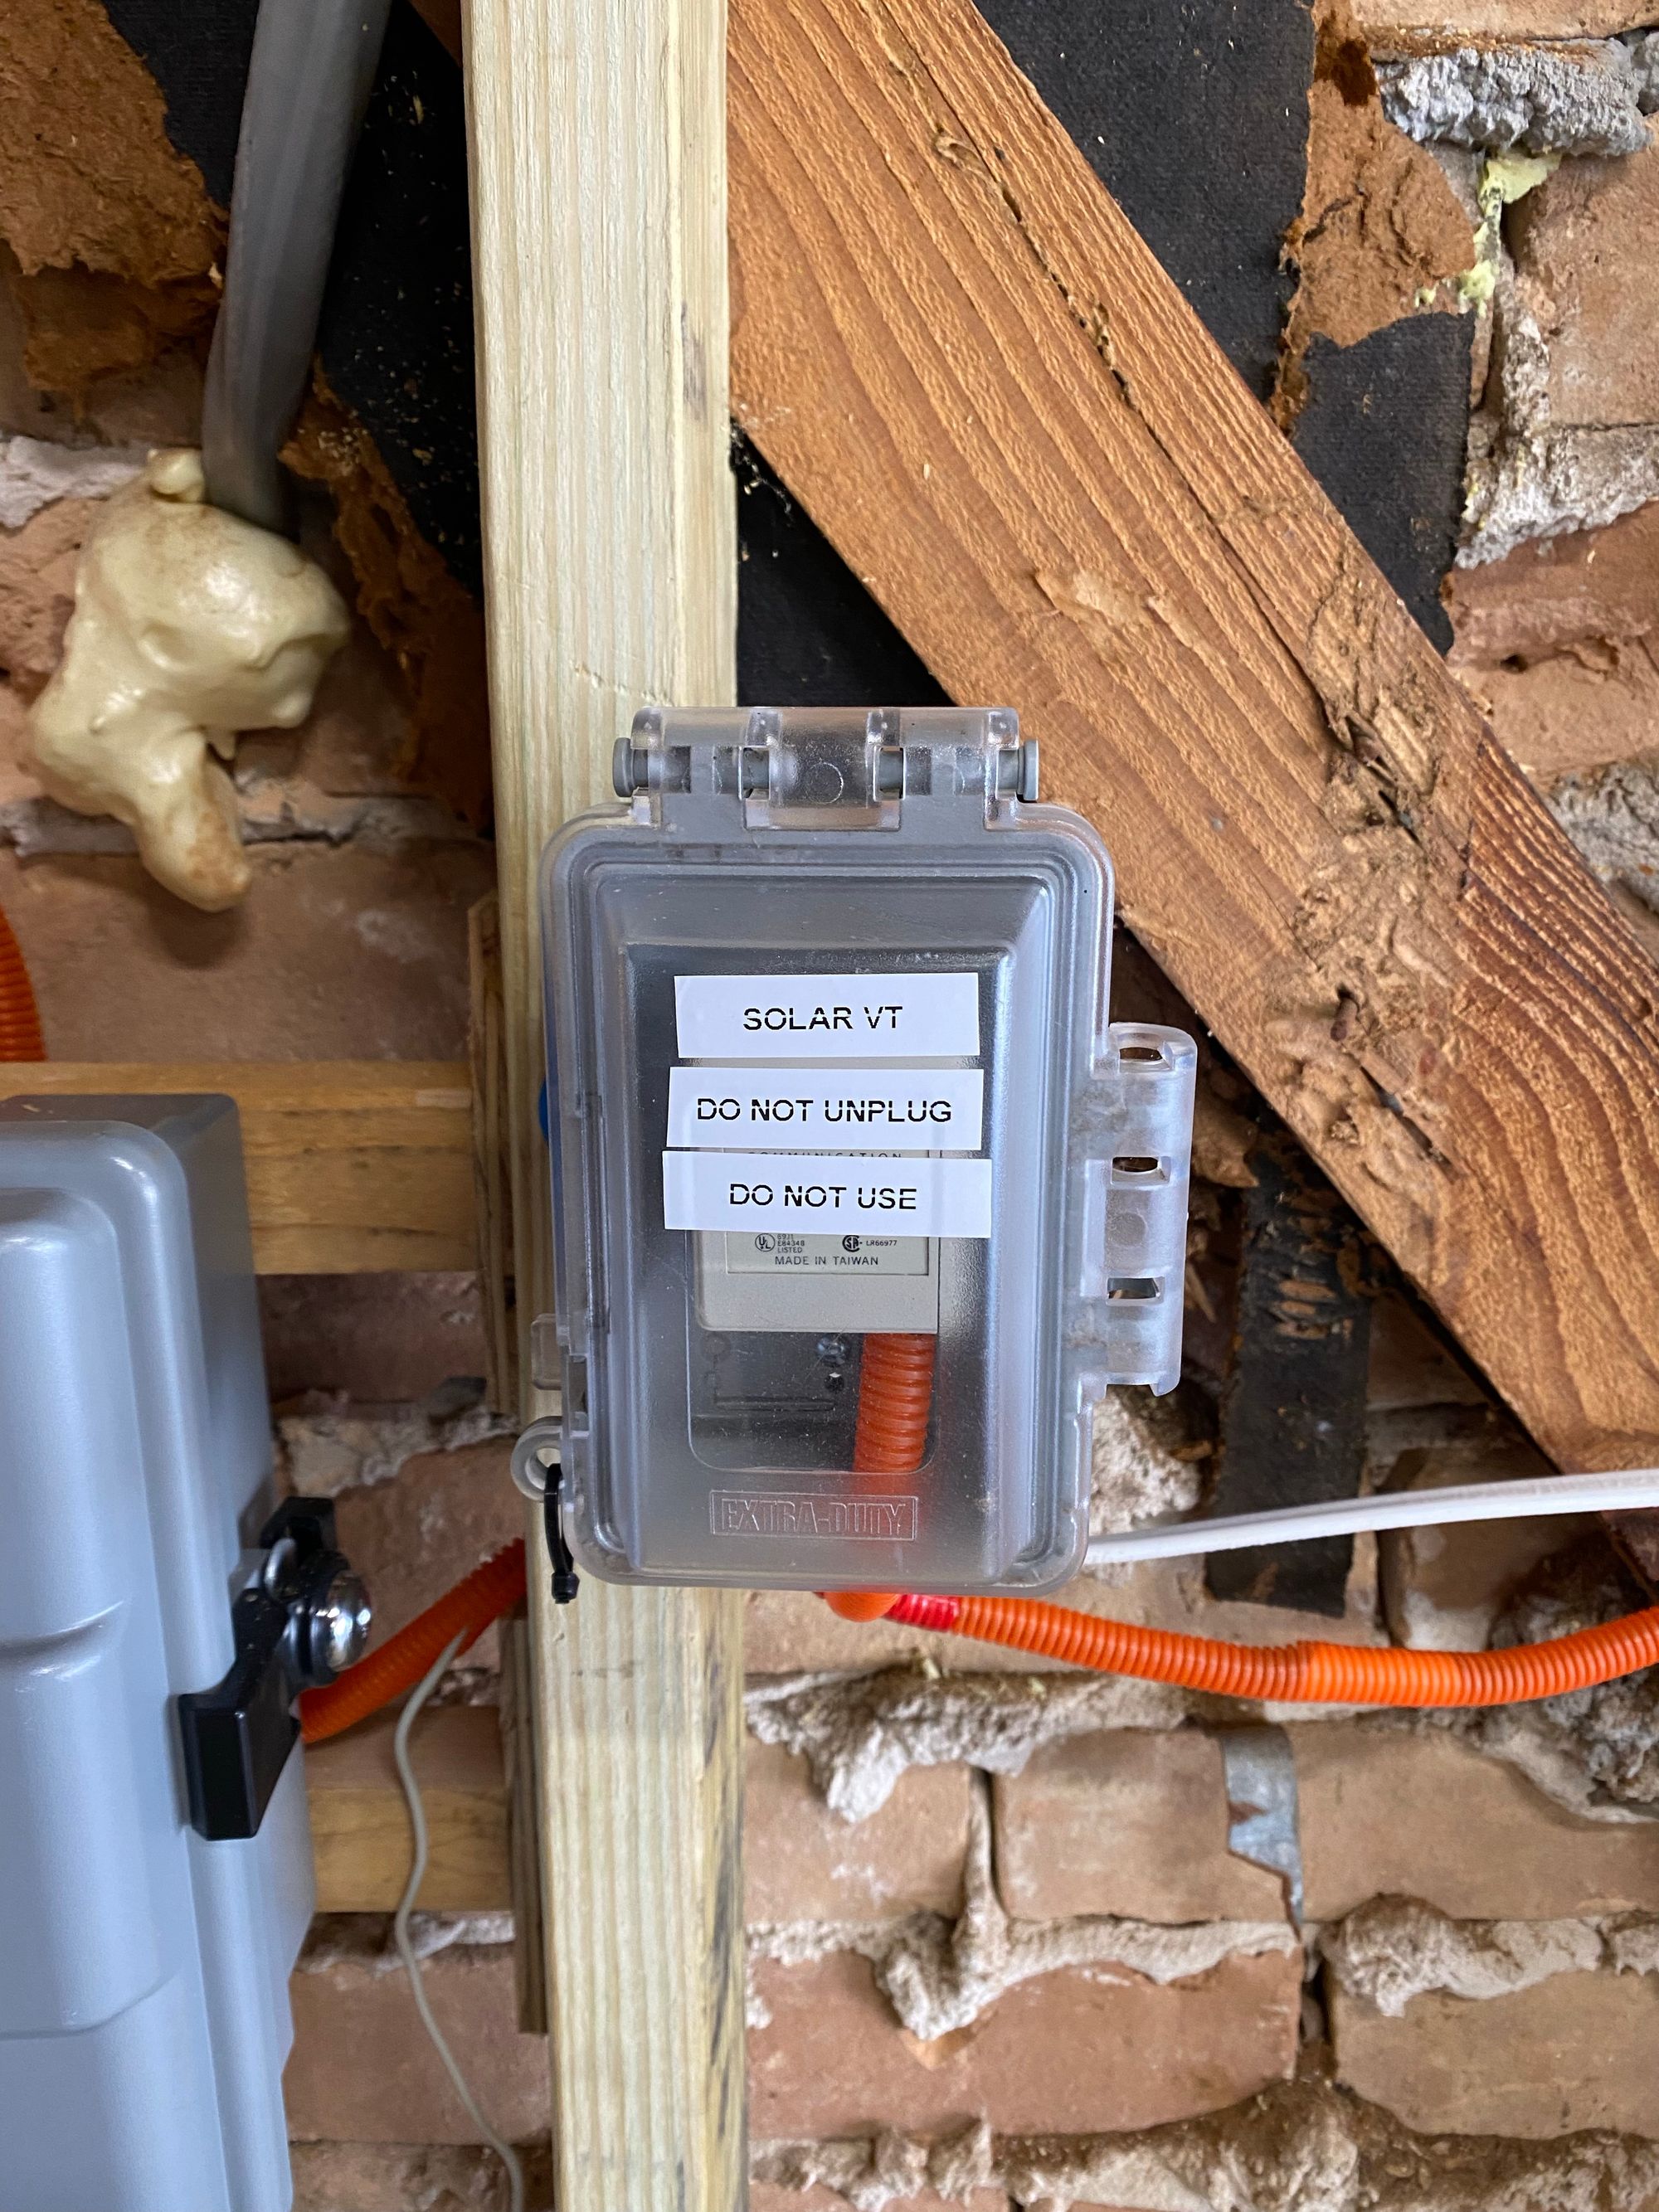
I decided to run this outlet from the 15a breaker in my Enphase Combiner box which powers the Envoy. I just used a Wago and tapped into that circuit. This circuit is now connected to grid power, even when I am on generator power.
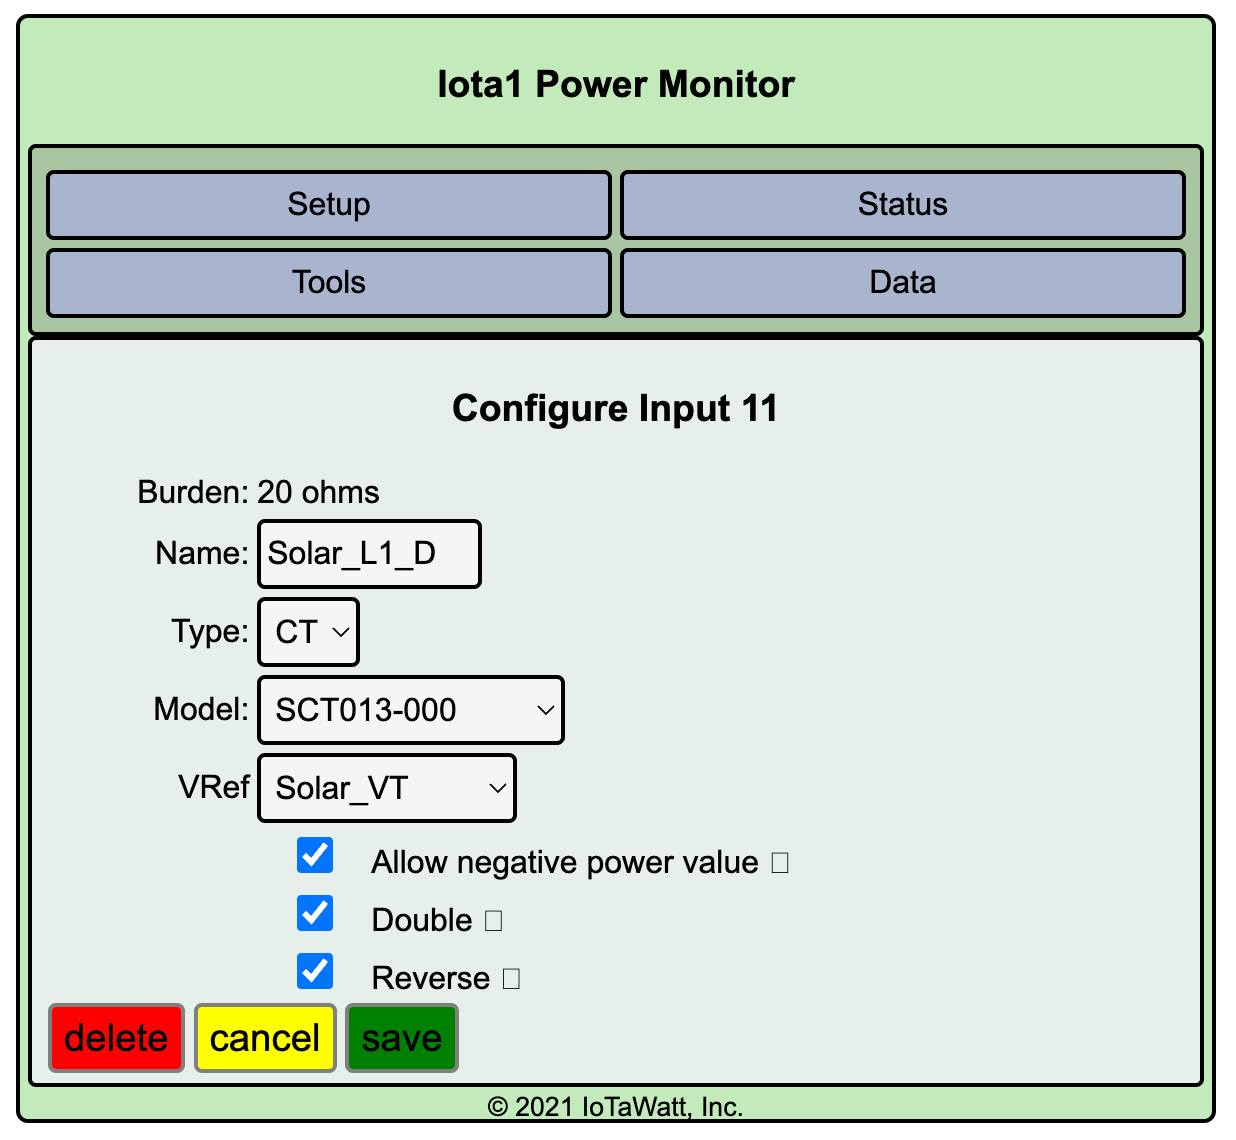
I edited the IoTaWatt config for the solar to use this reference.
I did have a few gripes with IoTaWatt up to this point. First, its WiFi only. I really, really wish it had Ethernet. From what I read though, it would be very tough to get a NIC integrated, so that's why they didn't
The second issue which really bugs me is that it's advertised as being completely local and doesn't rely on the cloud. I love this, however, its not true.
The Graph+ application references several CSS files and fonts hosted by CloudFlare. So, without internet the Graph+ application does not function. In my opinion, this is a serious oversight for a device that apparently doesn't rely on the cloud.
I did however manage to fix it. I went through all of the files in Graph+ and downloaded the referenced stylesheets and fonts, and then repackaged the Graph+ directory with these. If you download the files below and put them on the IoTaWatt using the file browser, you can then go to <youriotawatt>/graphoffline.htm and access Graph+ even without internet

This was important to me, as the main use for IoTaWatt is monitoring generator power when we could have an extended outage during a hurricane, and there is no guarantee the internet would be up.
Other than that, I am happy.
Next, I spun up an InfluxDB Docker container, and a Grafana Docker Container (Step by step guides coming)
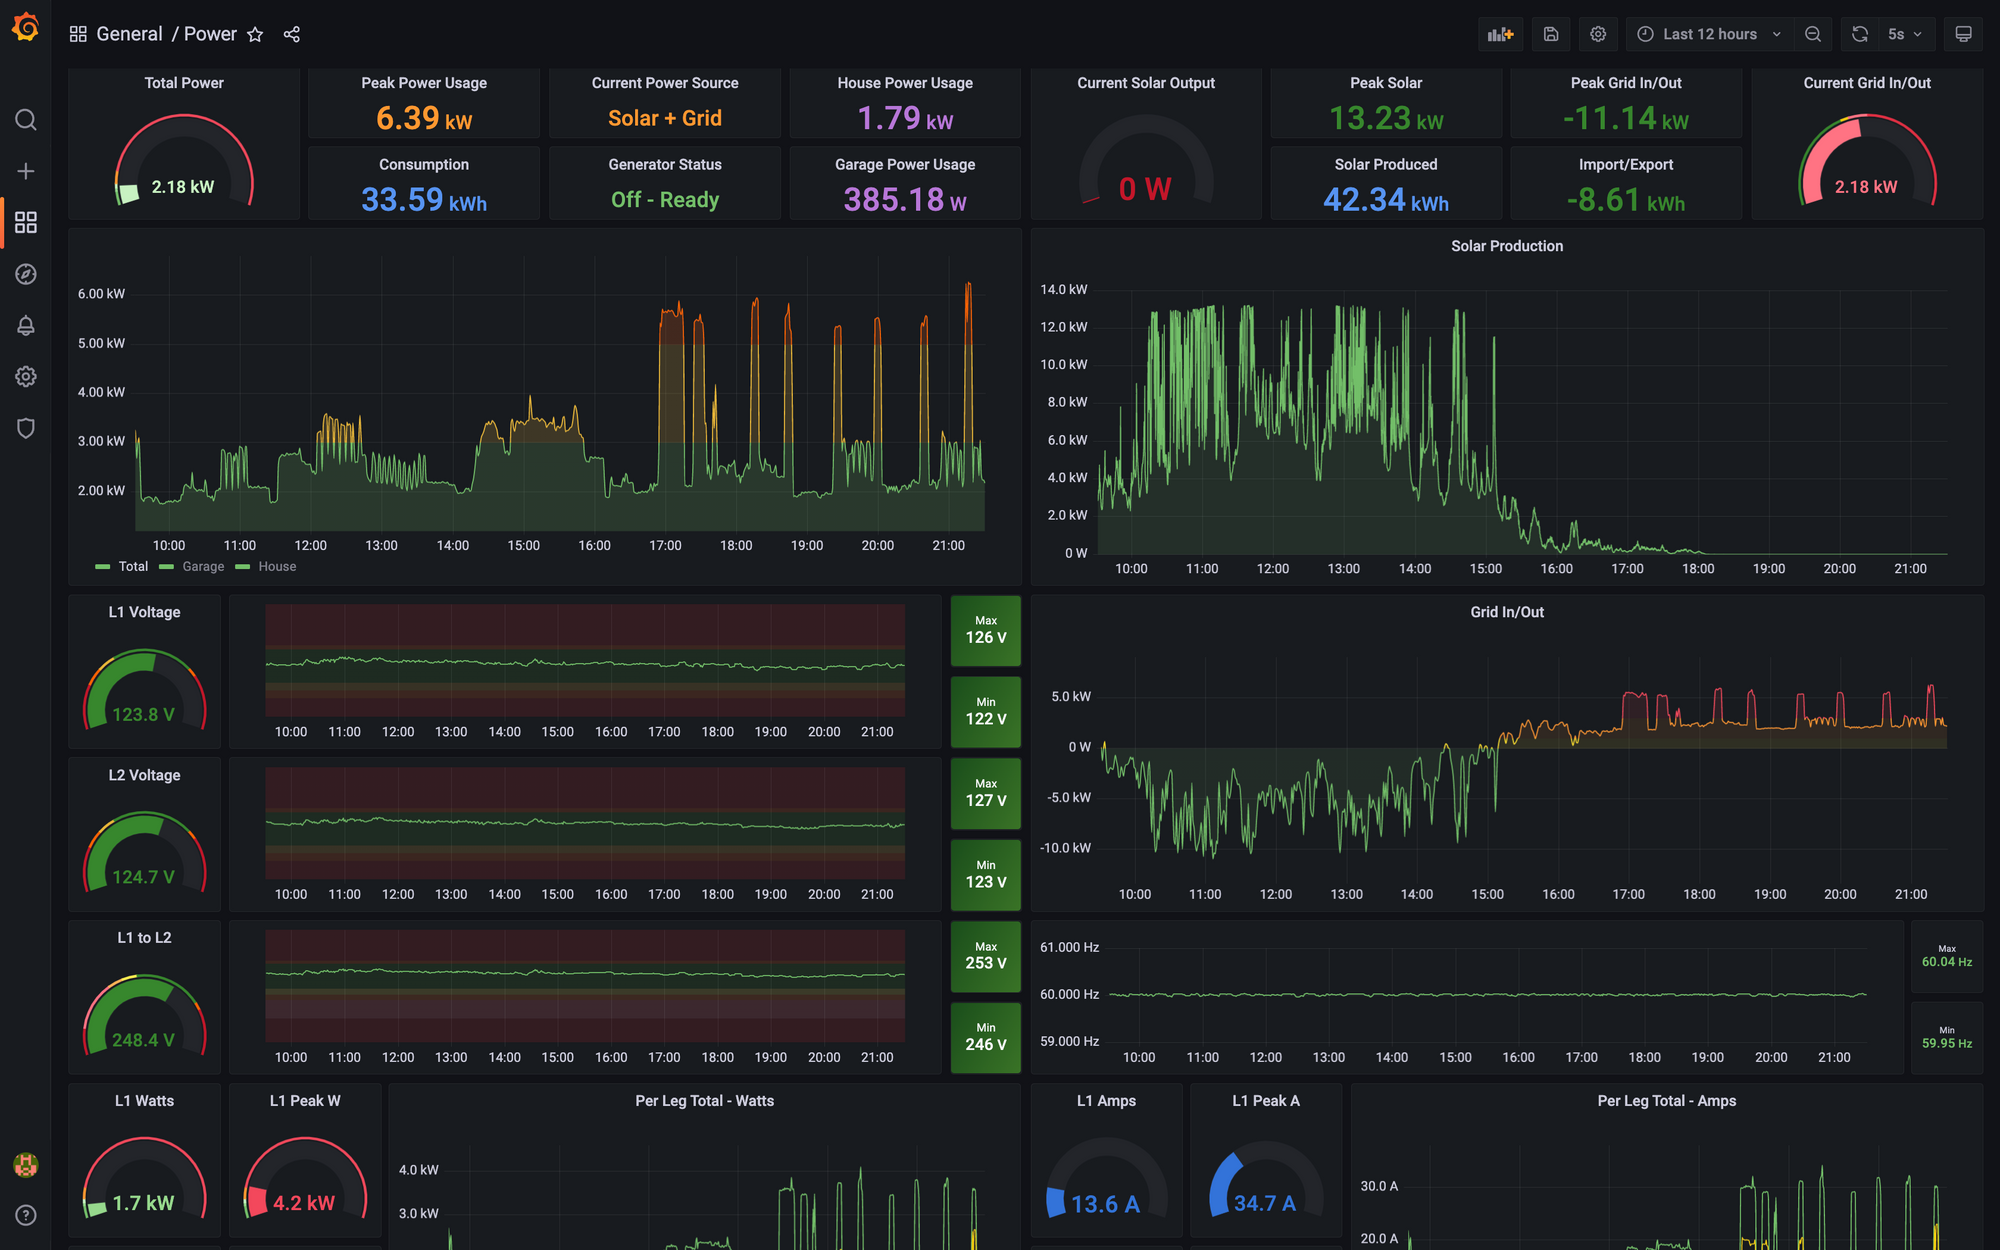
From there, you can make GREAT looking graphs that work completely offline, with all the data you want. Keep in mind these are still a work in progress, so some information like the generator RPM is a little off, but don't mind that. All of the power data is completely accurate

As you can tell from my very poor solar output today, it was very cloudy.
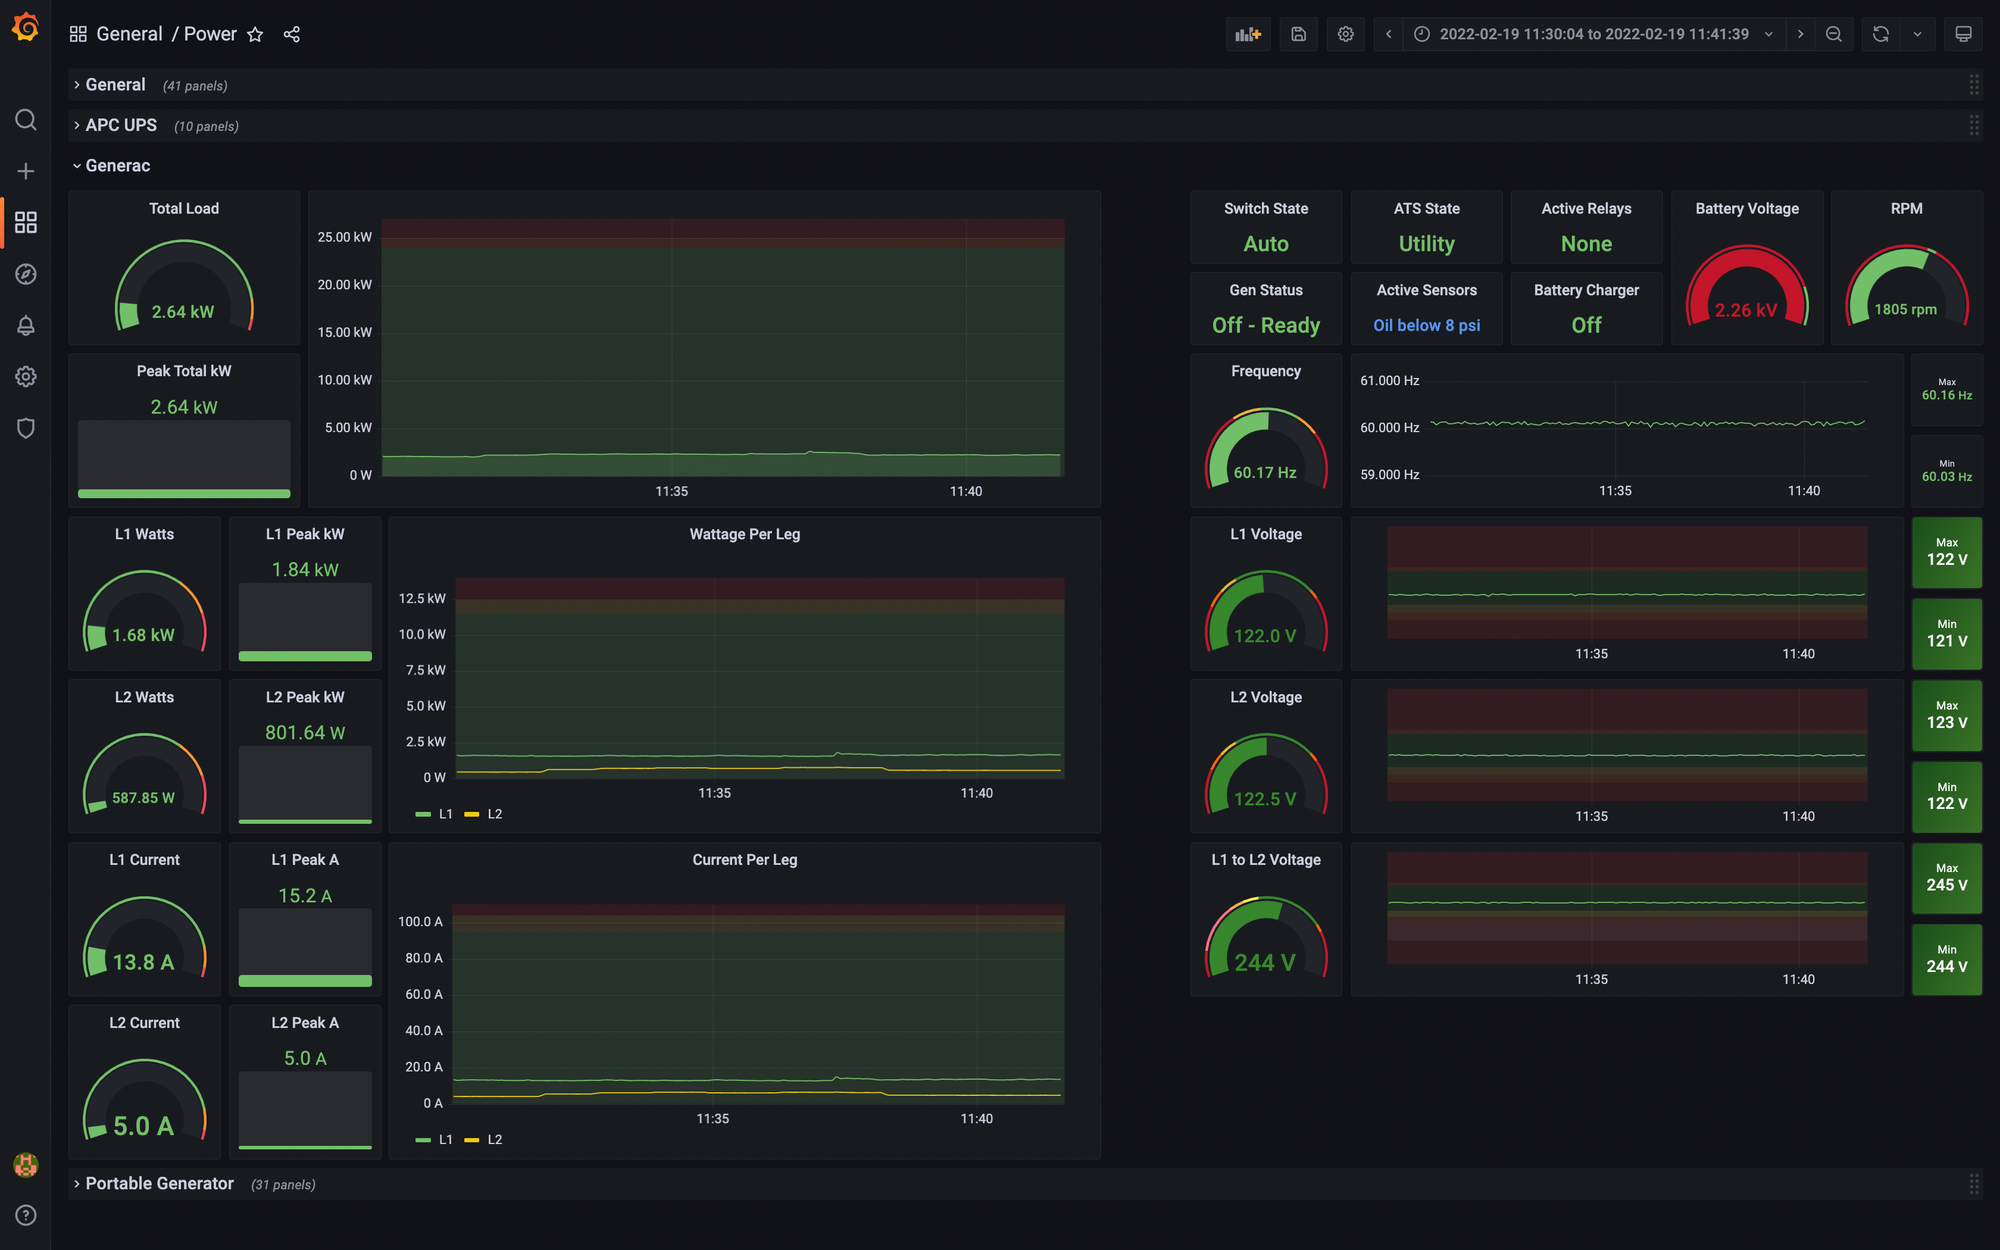
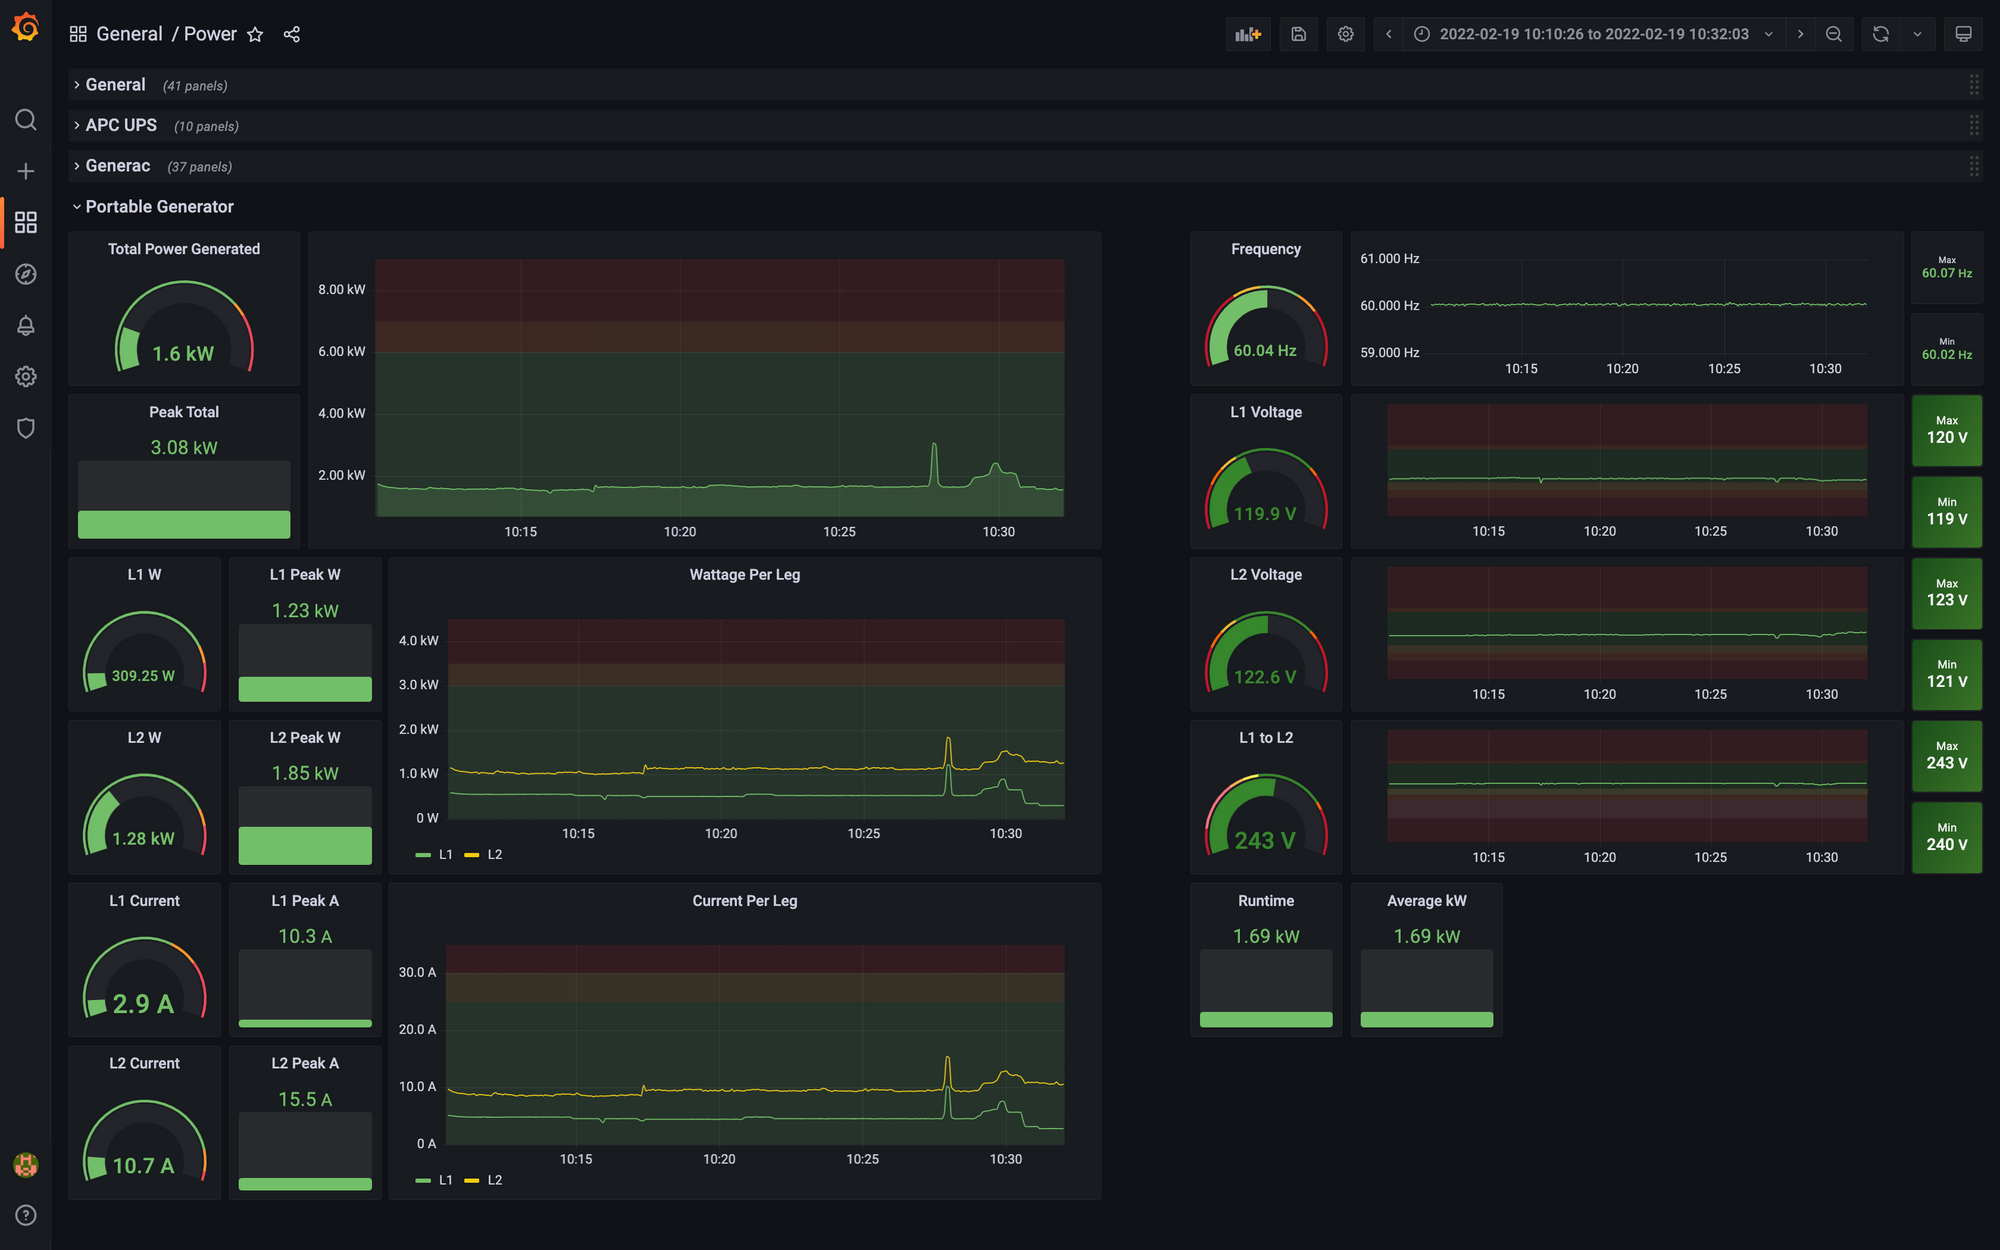
I also made dashboards for my generators. This gives me fantastic monitoring, and historical data of all generator runs, as this data is stored forever
Here is for my Generac (Again, please ignore the displays that don't work...)
And my Portable Generator
Here is a video of me testing my portable generator with the help of this monitoring
This monitoring setup helped me realize a few interesting things. First being that apart from the current from my AC starting, I have never been above 10kw load. My calculations before showed I could hit 20kw, but so far I've never been there. Time will tell though, as I could one day.
5/15/22 Update: Max so far is 13.8kw
The other thing is that I confirmed that batteries as a backup power source absolutely does not work for me. I am constantly pulling more power at night than batteries could provide without spending a monumental amount of money. There are also streaks where I simply do not produce enough solar to cover the night use, and so I would run out of power.
Another thing this helped me realize is that if you plan on using a portable generator, you 100% need to get some kind of monitoring to see which side of the panel your loads are. It just so happened that the majority of my 24/7 load were on just one side, which means when I turned on something like the dishwasher, it was well over 30a on one leg, while the other was very low. So even though I was under the 7kw limit of my generator, I was WELL over the actual 3.5kw + 3.5kw limit of the generator. I moved some breakers around and got this under control. Without this monitoring, I would not have known. Here is an example even after moving some loads around
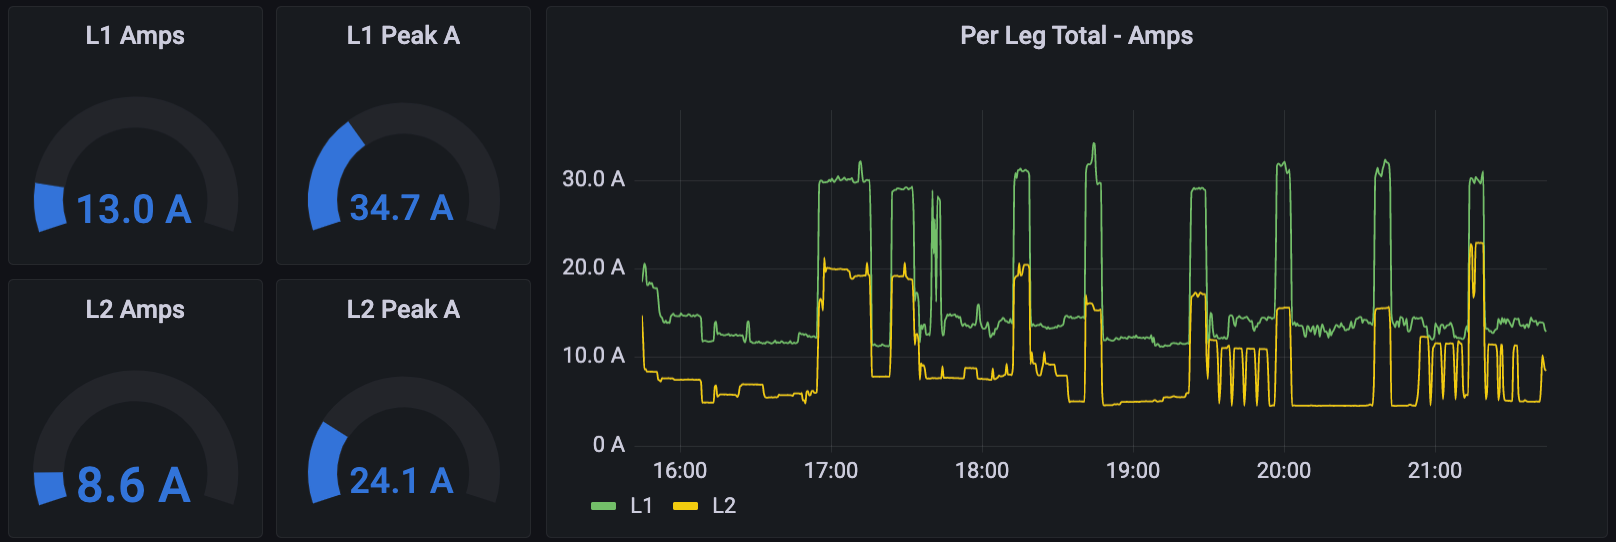
You can see that when some 240v loads kick on, they bump up both legs. And since L1 has a lot more load on all the time, it ends up pushing it above 30a, which is too much. On paper, this amount of load is fine for the portable generator, but as we can see here, its actually not fine.
If you are interested in more information or the JSON of my dashboard see below. If the link stops working please let me know
Thanks for reading