Self Contained Encrypted iSCSI Datastore in VMware ESXi

Hopefully the title made sense. Alternate title could be
- LUKS Encrypted iSCSI SAN in Debian
- LUKS Encrypted iSCSI Target in Debian
- How to share a volume via iSCSI in Debian
You get the idea.
This article is about creating an encrypted ESXi datastore out of existing storage you have in your ESXi server. But the first half is really just how to create an LUKS encrypted LUN in Debian and share it out via iSCSI, so if you just need that, ignore the rest.
The way we configure it will mean you need to enter a passphrase on boot, and from there the system will boot and automatically mount a LUN to be shared out via iSCSI
The reason for me wanting to do this is that I have three virtual machines which contain sensitive data, and really need to be encrypted. If I do full disk encryption on the virtual machines, it blows my Veeam backup sizes up a LOT. Veeam can no longer de-dupe or do changed block tracking. Because I replicate these virtual machines over the WAN to another system in a datacenter with my pathetic 40Mb/s upload speed, this really wasn't something I could give up. The other option is to setup vSphere encryption, but it's a big setup and requires KMS servers, a bunch of messing around with certificates.
I decided to use Debian for this as its what I am used to. I used to use Ubuntu but it took a turn for the worst with version 18, so I made the switch to Debian 9 which has been great. So far its almost 100% the same, but without the crap. So if you are using Ubuntu, these steps should work fine.
How to do it
First, create a virtual machine in ESXi for Debian 9. I gave it 6 vCPU's, 512MB of RAM, an 8GB Thin disk along with a VMXNET3 NIC. The RAM could be even lower, I suspect you would have no issues with 256MB. I added a few more CPU cores because when I was hitting the VM hard with some vMotion the CPU load did ramp up a little, and since I have dual E5-2680 V2's, it means I have 40 threads laying around. I suspect you could get away with 4 vCores with no issue
We will add a second drive to share out via iSCSI later on. So skip that for now
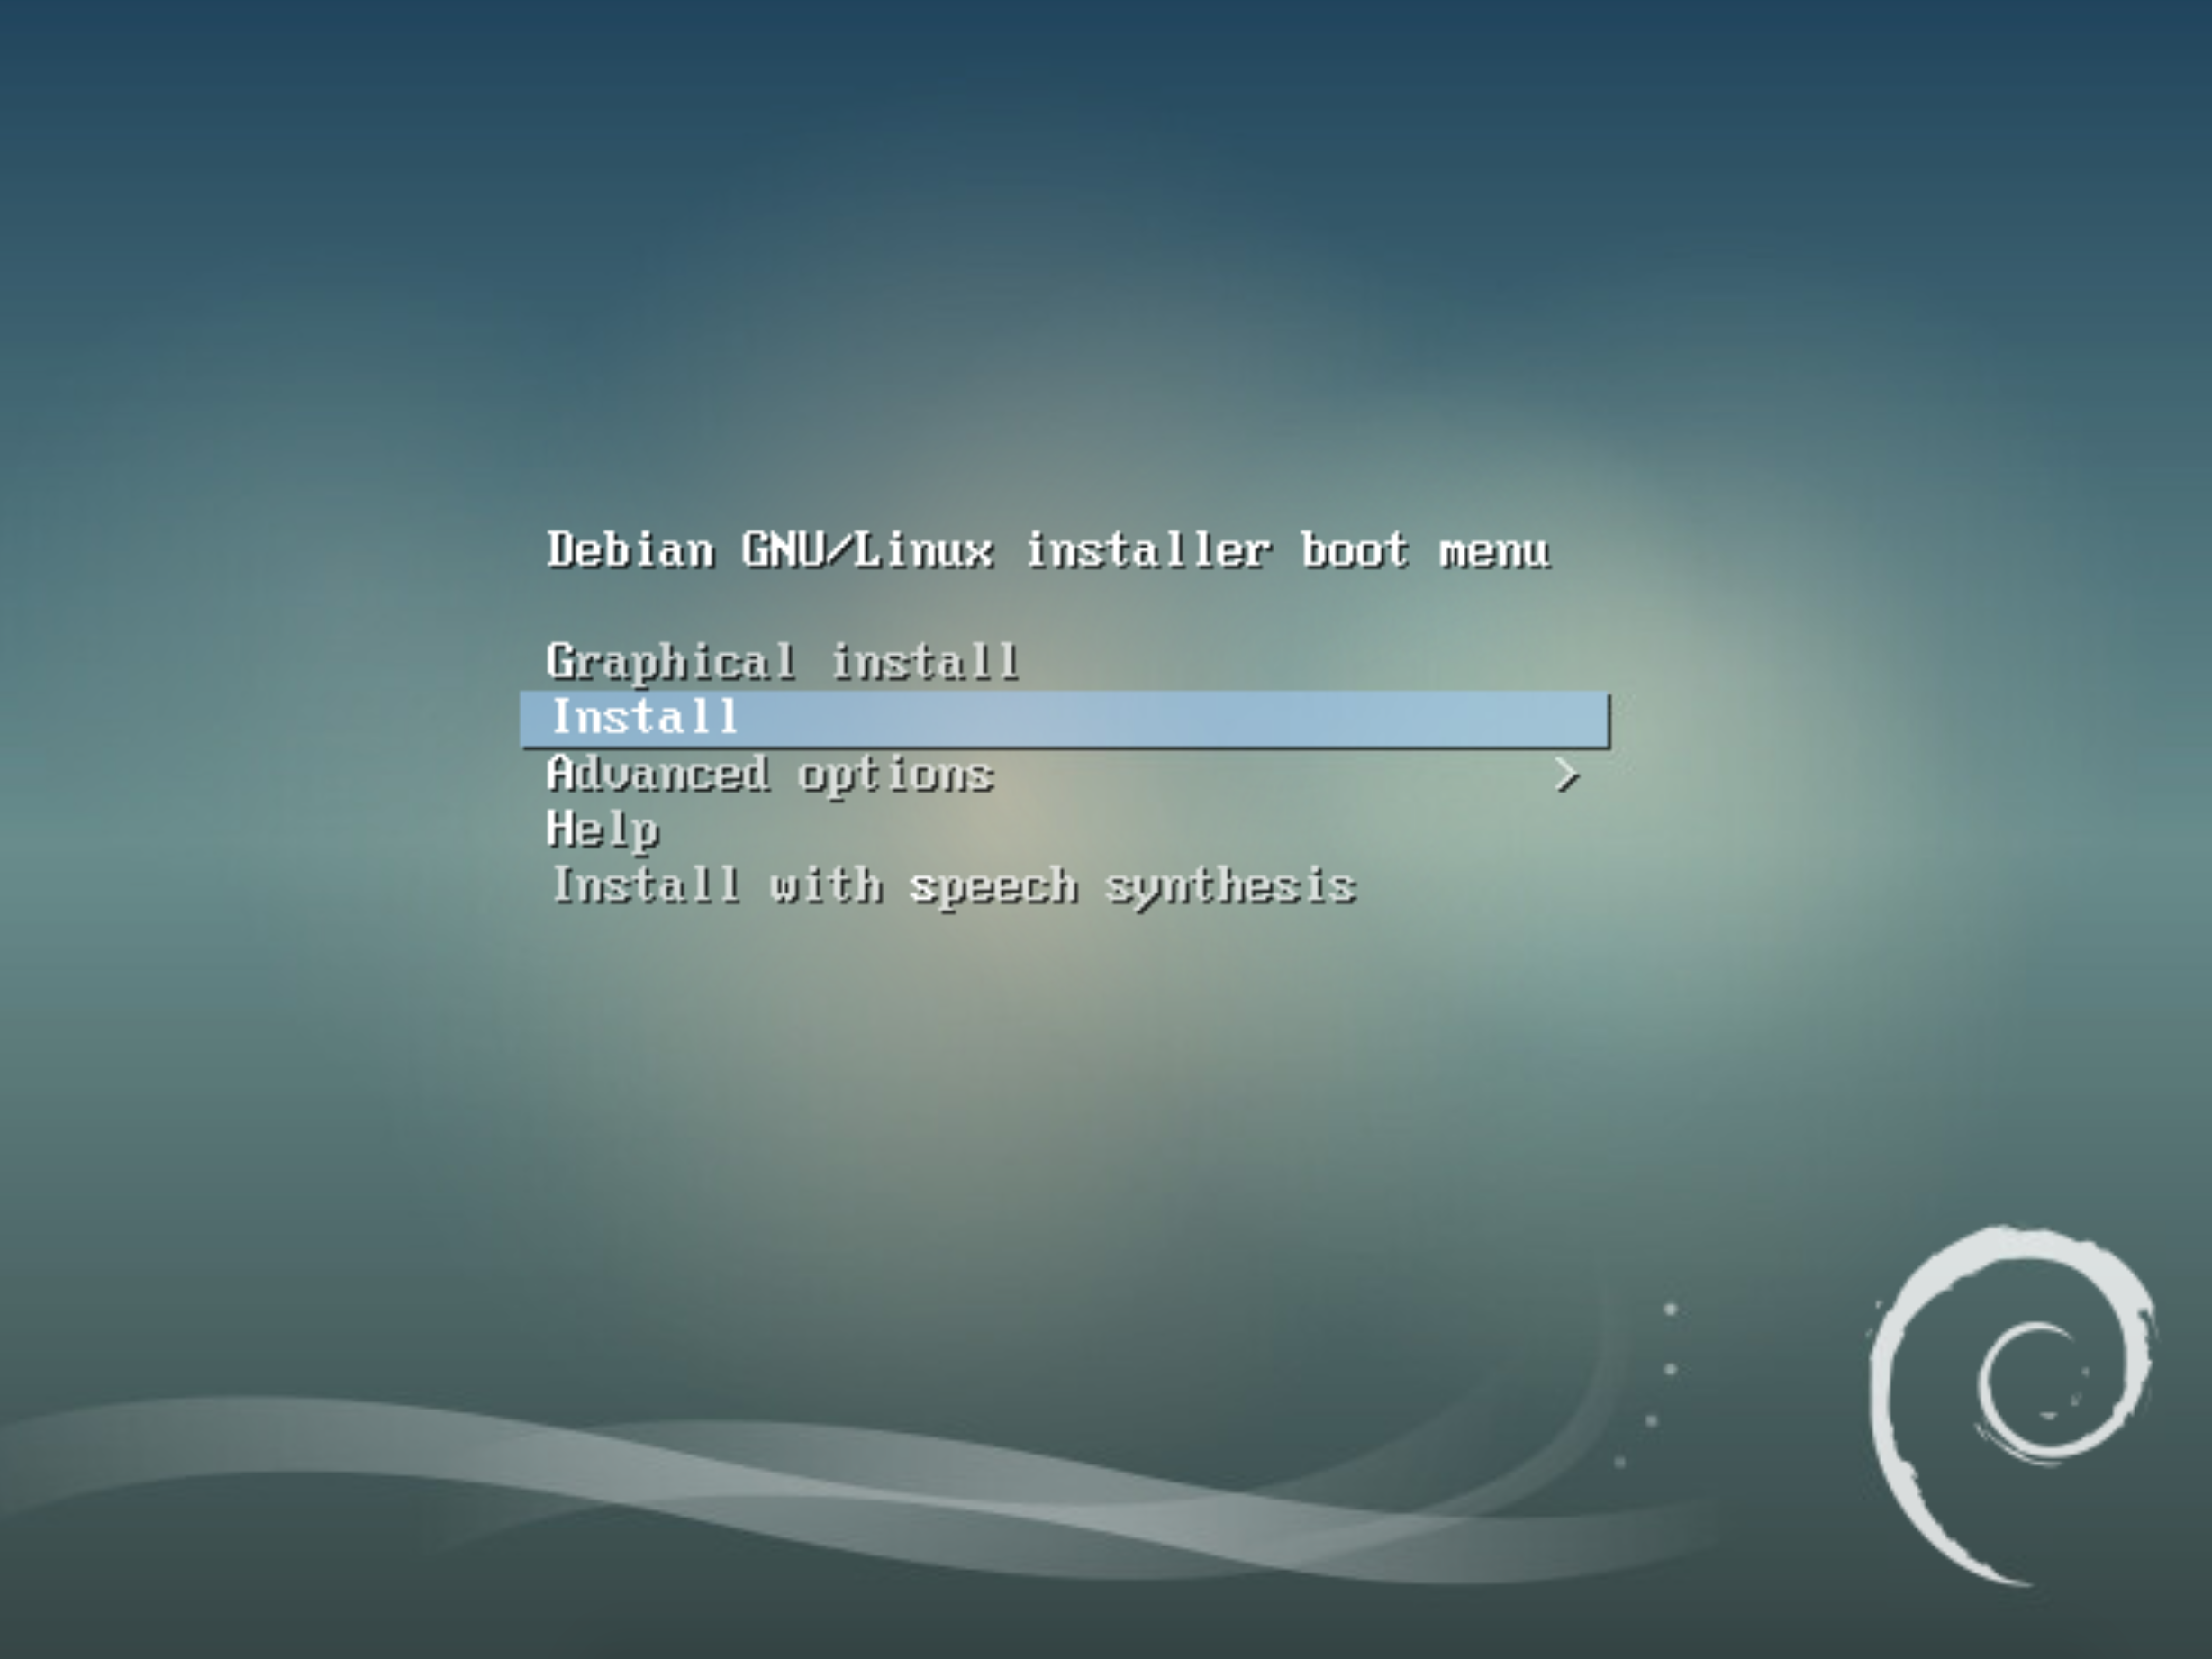
Once you have created the VM, attach the Debian 9 netinstall ISO and boot to it. Select the regular Install option, and not the Graphical install
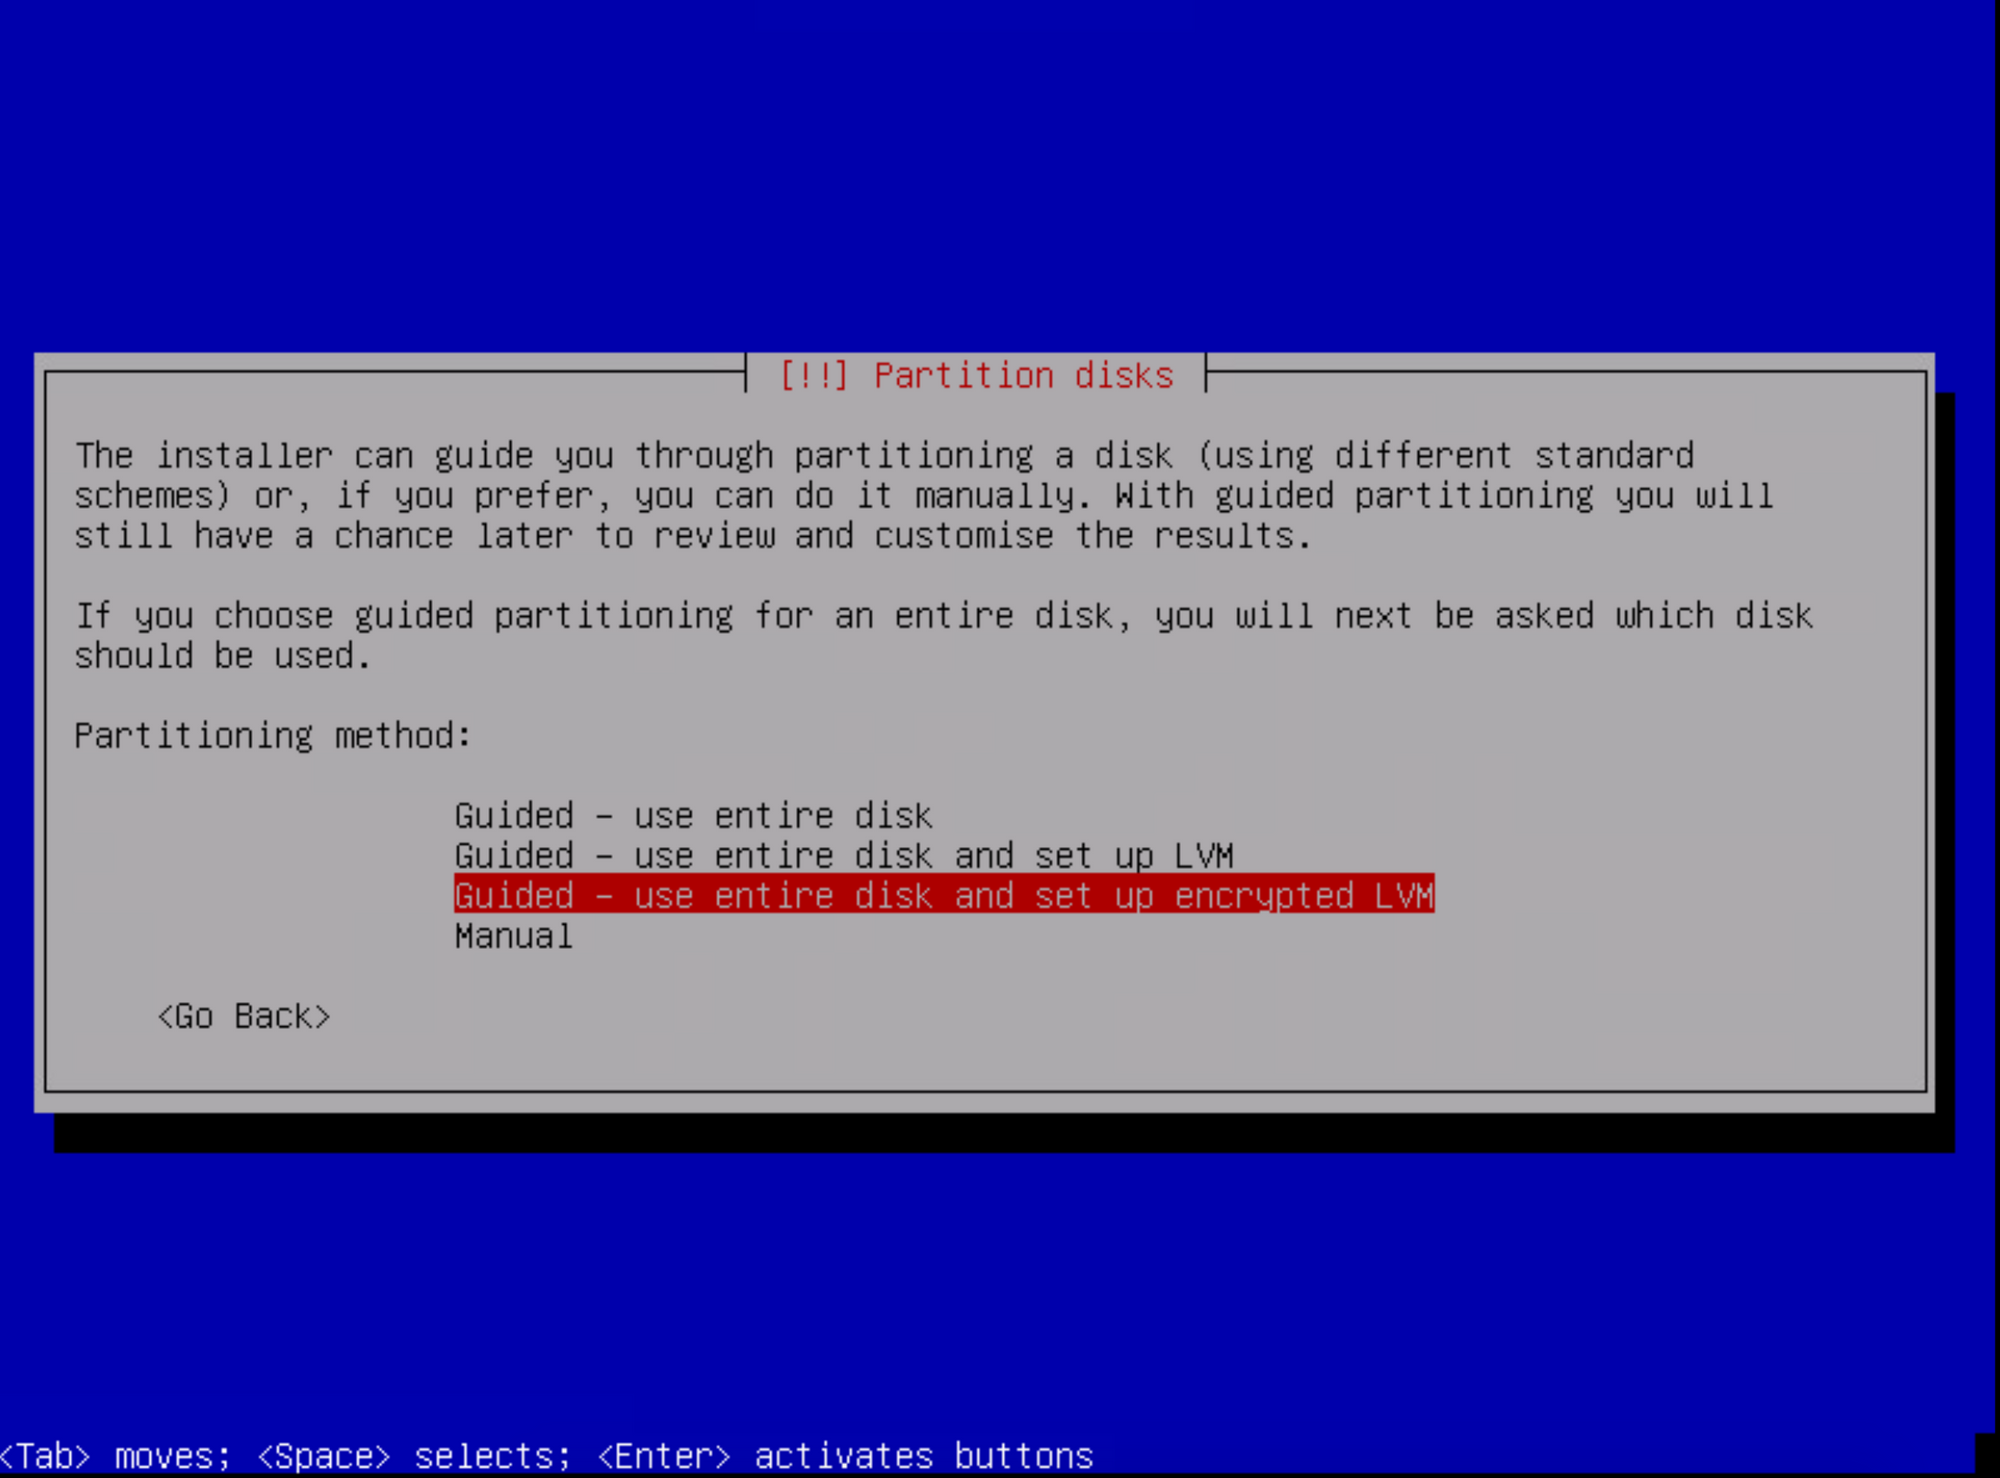
Now just run through and select all the usual stuff like keyboard layout, timezone, hostname etc. Eventually you will get to the storage options. You want to select the option to use encrypted LVM
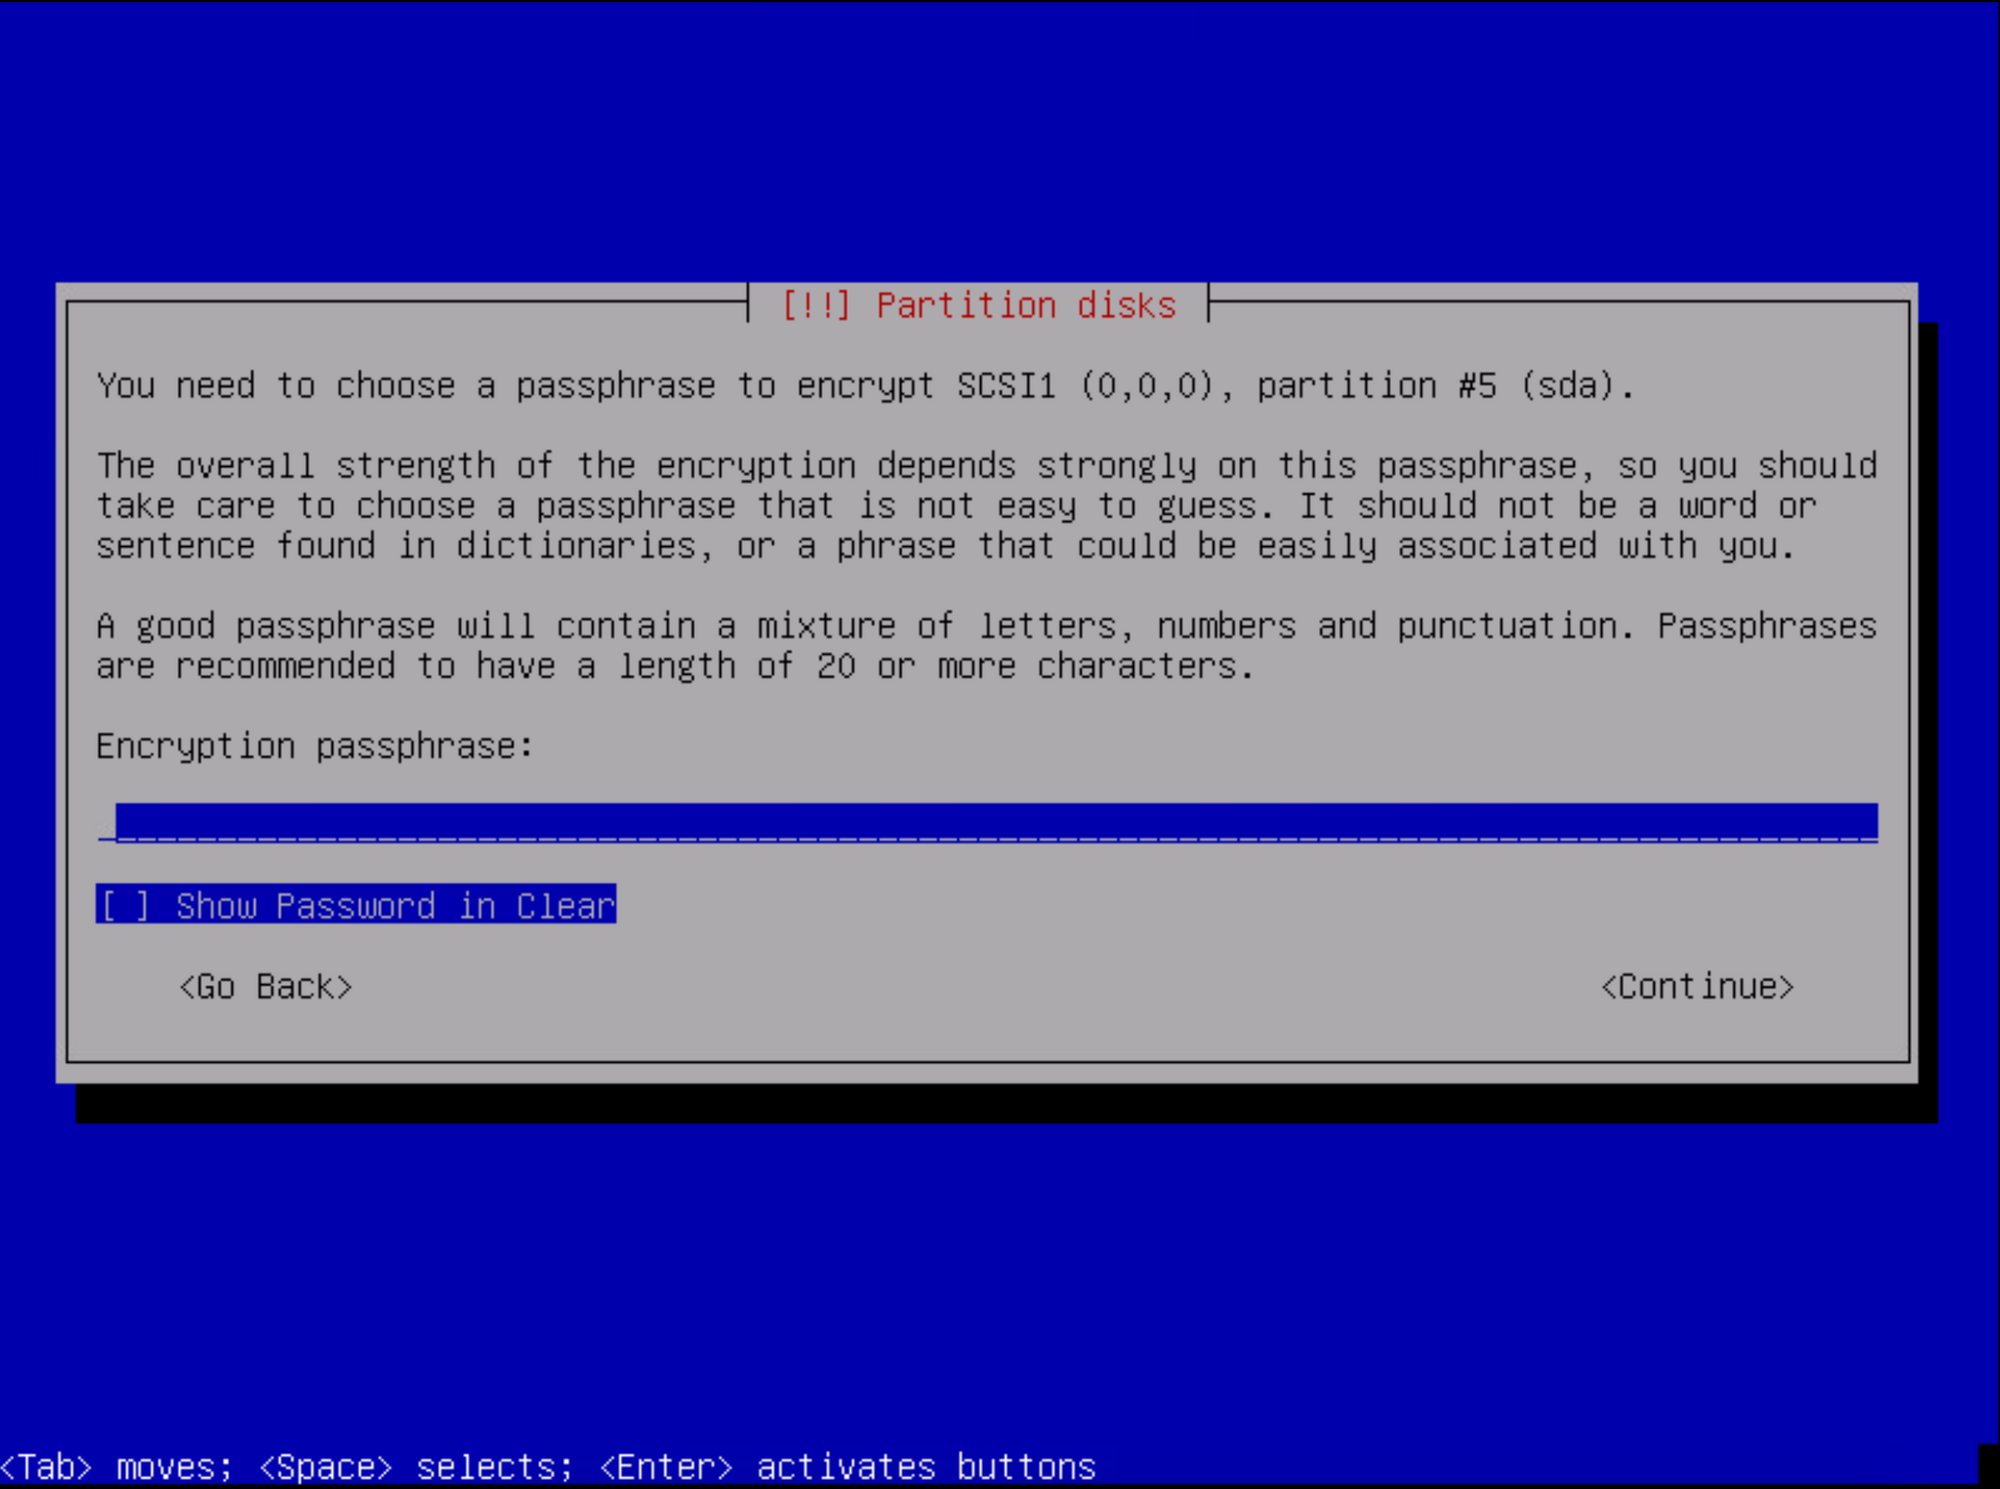
Move along selecting the default options and write the changes to LVM. When you reach the point of entering a passphrase, make sure its a good one!
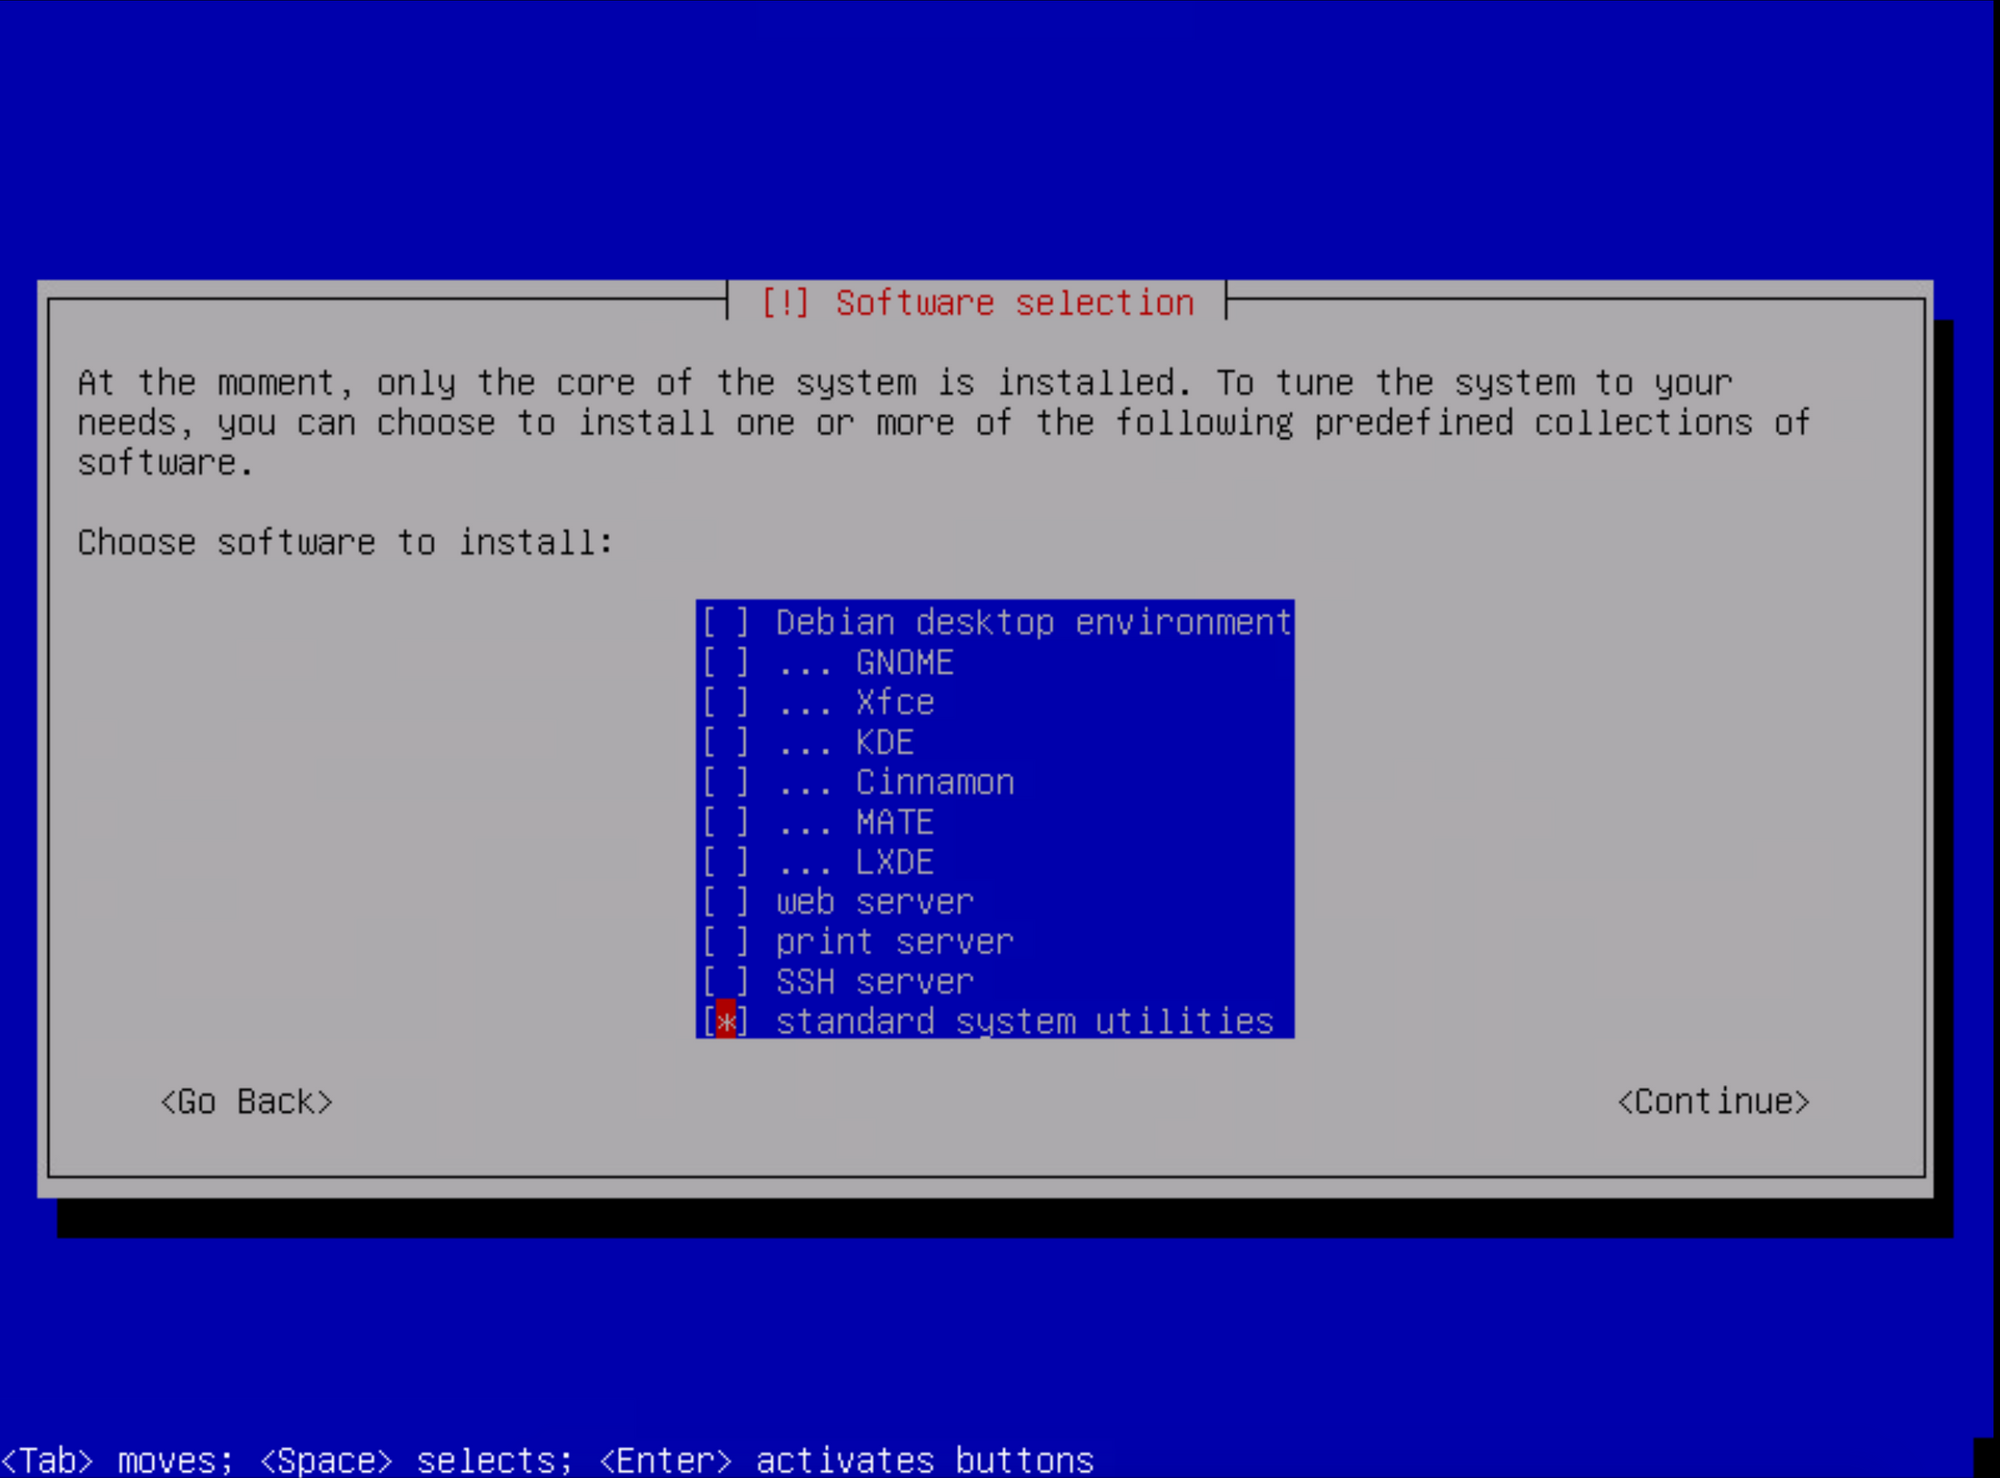
Move along with the setup and write the changes to disk. When you get to the software selection page, unselect everything but standard system utilities
From there finish the setup using the default options, or whatever options you want.
As soon as it reboots, it's going to prompt for your encryption key which it will do from now on
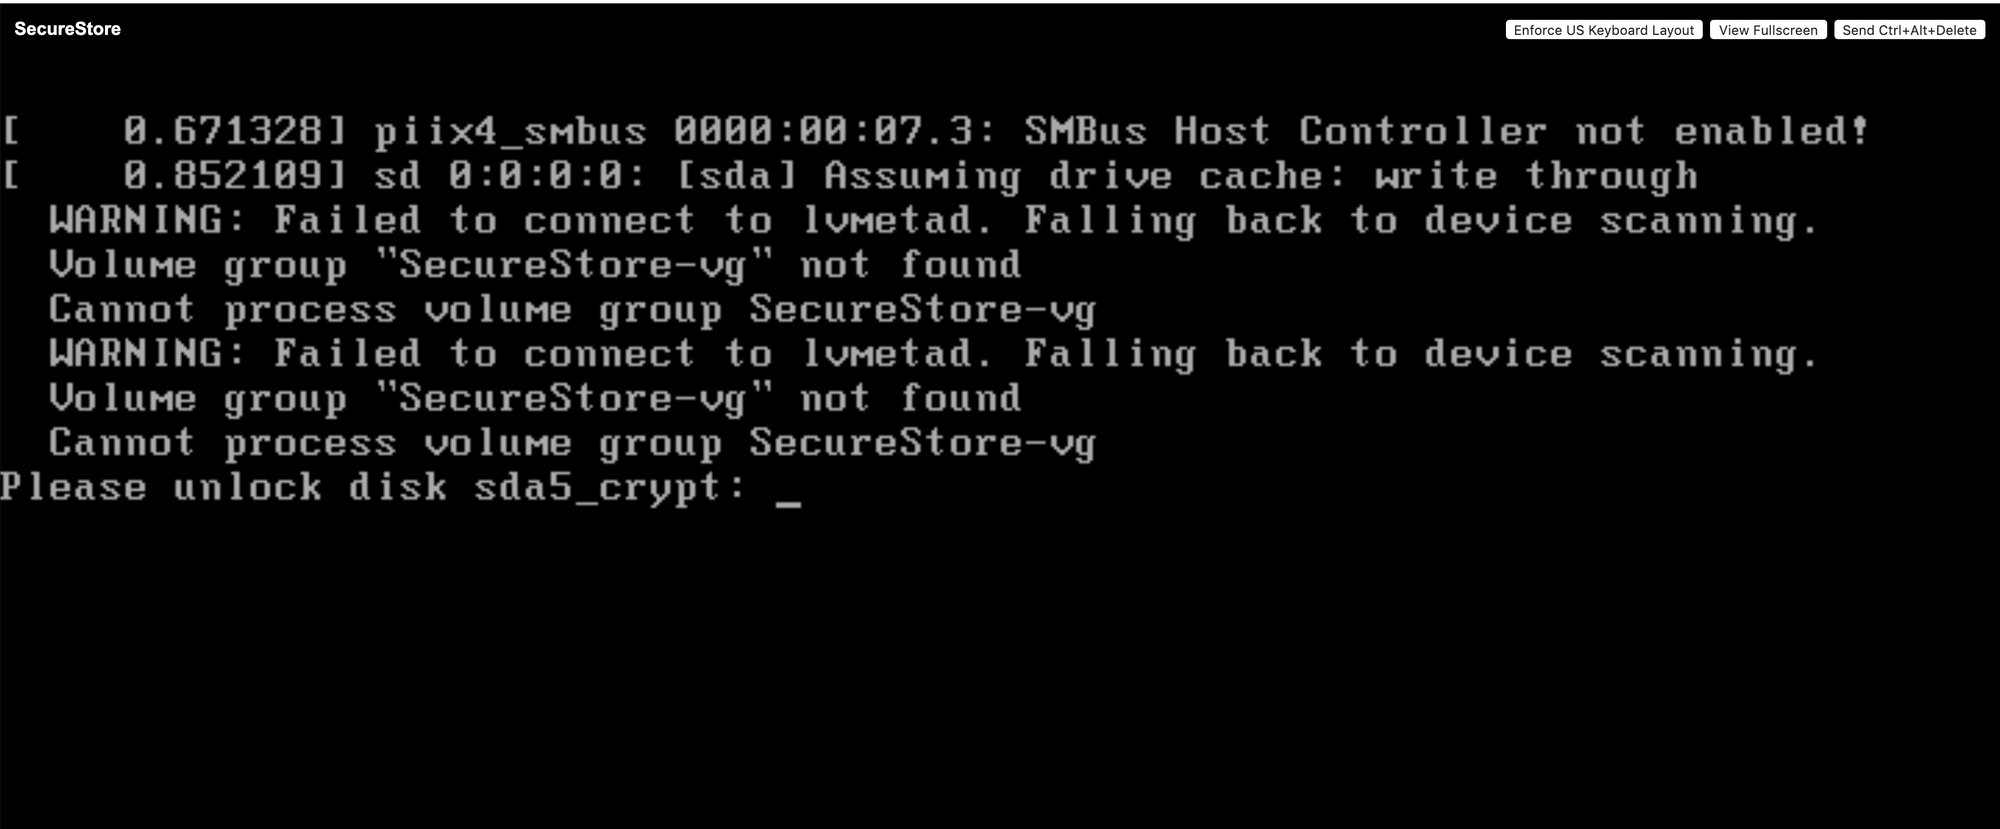
Enter your passphrase, and then log in as root
You'll want to update the system first
apt update
apt dist-upgrade -y
apt autoremove
apt clean
From there we want to install tgt, open-vm-tools, htop, ufw, sudo and the openssh server
apt install openssh-server open-vm-tools htop sudo ufw -y
Then go ahead and add your user to the sudoers group
usermod -aG sudo usernameyouchoseoninstall
Now go ahead and reboot, and then connect to the VM via SSH.
Once you connect, we should render the root account useless since we won't need it anymore. Run the following to set the hash to an impossible value, meaning you can't login. If you do need to login, just reset it or access it via su
sudo usermod -p ! root
Now its all updated and you have the base configured, we can go ahead and add the additional virtual hard drive which will end up being shared out. Shut down the VM
sudo shutdown -h now
Now edit the VM, and add a thin disk of whatever size you want. Then power it back on, unlock it with your passphrase and SSH back in
Now run lsblk to see the location of your new drive you added. As you can see, mine is sdb. which makes the full location /dev/sdb
lsblk

NAME                             MAJ:MIN RM  SIZE RO TYPE  MOUNTPOINT
sda                                8:0    0    8G  0 disk
├─sda1                             8:1    0  243M  0 part  /boot
├─sda2                             8:2    0    1K  0 part
└─sda5                             8:5    0  7.8G  0 part
  └─sda5_crypt                   254:1    0  7.8G  0 crypt
    ├─iscsi--secure1--vg-root    254:2    0  5.8G  0 lvm   /
    └─iscsi--secure1--vg-swap_1  254:3    0    2G  0 lvm   [SWAP]
sdb                                8:16   0  400G  0 disk
sr0                               11:0    1 1024M  0 rom
Now go ahead and create a volume group, you should see the confirmation output below. I name my volume group "fs-secure_iscsi"
sudo vgcreate fs-secure_iscsi /dev/sdb
  Volume group "fs-secure_iscsi" successfully created
And now create a logical volume. I named mine "fs-secure_lun1" and told it to use 100% of the free space
sudo lvcreate -l 100%FREE -n fs-secure_lun1 fs-secure_iscsi
   Logical volume "fs-secure_lun1" created.
If you run lvs, you should see it
sudo lvs

  LV             VG              Attr       LSize   Pool Origin Data%  Meta%  Move Log Cpy%Sync Convert
  root           fs-secure-vg    -wi-ao----   6.76g
  swap_1         fs-secure-vg    -wi-ao----   1.00g
  fs-secure_lun1 fs-secure_iscsi -wi-a----- 400.00g
Now we want to encrypt that volume we just made, run the following. You can see the naming convention you need to use.
sudo cryptsetup -v -y luksFormat /dev/mapper/fs--secure_iscsi-fs--secure_lun1
If you are unsure, you can go to /dev/mapper and list the contents and you should see the volume name in full.
cd /dev/mapper

ls -al


total 0
drwxr-xr-x  2 root root     160 Apr 11 19:47 .
drwxr-xr-x 18 root root    3200 Apr 11 19:47 ..
crw-------  1 root root 10, 236 Apr 11 19:47 control
lrwxrwxrwx  1 root root       7 Apr 11 19:47 fs--secure_iscsi-fs--secure_lun1 -> ../dm-0
lrwxrwxrwx  1 root root       7 Apr 11 19:47 iscsi--secure1--vg-root -> ../dm-2
lrwxrwxrwx  1 root root       7 Apr 11 19:47 iscsi--secure1--vg-swap_1 -> ../dm-3
lrwxrwxrwx  1 root root       7 Apr 11 19:47 sda5_crypt -> ../dm-1
sean@iscsi-secure1:/dev/mapper$
After you run the above cryptsetup command it should give you a warning to type YES in caps, and enter the passphrase
  WARNING!
========
This will overwrite data on /dev/mapper/fs--secure_iscsi-fs--secure_lun1 irrevocably.

Are you sure? (Type uppercase yes): YES
Enter passphrase:
Verify passphrase:
Command successful.
Now the volume is encrypted, but you can't actually see the encrypted volume anywhere. You now need to mount the volume which will give you a NEW volume which is encrypted. This will be what you share out via iSCSI
We won't mount it just yet, we will dive directly into auto-mounting the second volume on boot. This is perfectly secure as we still need to unlock the OS drive before this will ever take place
We will now generate a key for the auto-mount process to use. First create a folder somewhere
sudo mkdir /etc/luks-keys
Now generate random characters for the key file
sudo dd if=/dev/urandom of=/etc/luks-keys/disk_secret_key bs=512 count=8
Now its created, we need to add that keyfile to the encrypted volume. After entering the first line, it will prompt for your passphrase you set when creating it, and then add the keyfile
sudo cryptsetup -v luksAddKey /dev/mapper/fs--secure_iscsi-fs--secure_lun1 /etc/luks-keys/disk_secret_key
Enter any passphrase: passphrase
Key slot 0 unlocked.
Command successful.
Now we can verify the key works by actually mouting the volume
sudo cryptsetup -v luksOpen /dev/mapper/fs--secure_iscsi-fs--secure_lun1 iscsi_crypt --key-file=/etc/luks-keys/disk_secret_key

Key slot 1 unlocked.
Command successful.
After this, you will have a new device at /dev/mapper/iscsi_crypt. This is just temporary, we will now close it
sudo cryptsetup -v luksClose iscsi_cryptNow we know the key works, we need to configure the volume to mount on boot. First we need to find the UUID of the volume, so run the following
sudo cryptsetup luksDump /dev/mapper/fs--secure_iscsi-fs--secure_lun1 | grep "UUID"
UUID:          	2a2335bf-5662-343c-a468-fbe3454659c85
Make a note of the UUID. and open the file /etc/crypttab
sudo nano /etc/crypttabMake a new line under the existing entry, and enter the following. Remember to change the UUID, and if you want the encrypted volume named something else, change the iscsi_crypt text.
iscsi_crypt UUID=2a2335bf-5662-343c-a468-fbe3454659c85 /etc/luks-keys/disk_secret_key luks
Save the file and exit nano
Now go ahead and reboot the system. When it comes back up go to /dev/mapper and see the contents. You should see your mounted volume listed.
cd /dev/mapper
ls -al

total 0
drwxr-xr-x  2 root root     160 Apr 11 19:47 .
drwxr-xr-x 18 root root    3200 Apr 11 19:47 ..
crw-------  1 root root 10, 236 Apr 11 19:47 control
lrwxrwxrwx  1 root root       7 Apr 11 19:47 fs--secure_iscsi-fs--secure_lun1 -> ../dm-0
lrwxrwxrwx  1 root root       7 Apr 11 20:16 iscsi_crypt -> ../dm-4
lrwxrwxrwx  1 root root       7 Apr 11 19:47 iscsi--secure1--vg-root -> ../dm-2
lrwxrwxrwx  1 root root       7 Apr 11 19:47 iscsi--secure1--vg-swap_1 -> ../dm-3
lrwxrwxrwx  1 root root       7 Apr 11 19:47 sda5_crypt -> ../dm-1
Now we can move on to
iSCSI Target Configuration
This part is actually very easy. We already installed tgt in the first few steps, so we just need to make the configuration.
Enter the following to make the config file. You can name it whatever you want
sudo nano /etc/tgt/conf.d/secure_iscsi.confIn the file, we need to enter the configuration
<target iqn.2018-02.iscsi-secure1:lun1>
     backing-store /dev/mapper/iscsi_crypt
     initiator-address 10.0.50.14
     incominguser username password12345
</target>
- The first line contains the target name. This is just the name of the iSCSI target, just enter an arbitrary date and name in the same format as I have done
- The next line is the backing for the iSCSI target, this should be the encrypted LUN we mounted.
- Next is a line for security, we can tell it to only accept connections from this address. If you want, you can remove the line. We can always come back and change this configuration
- The next line is for CHAP authentication. Enter a username and password here. But watch out, it must be a LEAST 12 characters for the password, and no more than 16! It also must not contain special characters
Now save the file and exit nano. Restart tgt to make the configuration take effect
sudo service tgt restartNow its restarted, we can verify the LUN shows up
sudo tgtadm --mode target --op show

~~~snip~~~~

        LUN: 1
            Type: disk
            SCSI ID: IET     00010001
            SCSI SN: beaf11
            Size: 429490 MB, Block size: 512
            Online: Yes
            Removable media: No
            Prevent removal: No
            Readonly: No
            SWP: No
            Thin-provisioning: No
            Backing store type: rdwr
            Backing store path: /dev/mapper/iscsi_crypt
            Backing store flags:
    Account information:
        user
    ACL information:
        10.0.50.14

~~~snip~~~~
We are now completely finished configuring the Debian VM. I went ahead and set key based authentication for SSH and a few other security pieces, but those are up to you
Next we need to mount it in ESXi, if you are mounting it somewhere else, we are done!
Mounting the iSCSI LUN in ESXi
This will be done from ESXi 6.7, so if you are using a different version it may be a little different.
If your ESXi box has a single NIC, then you can just bind the software iSCSI initiator to your usual VMK port group. If you have multiple, you probably want to create a seperate iSCSI network.
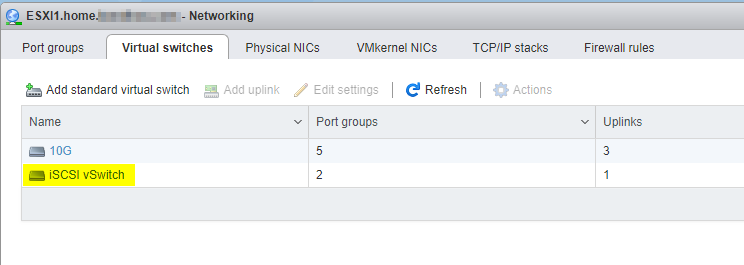
I split off a single 1G NIC from my usual setup, and made a new vSwitch called "iSCSI vSwitch"
I then added a new VMK NIC for this traffic. You do not need to add any services to it. Make sure its using your new iSCSI vSwitch.
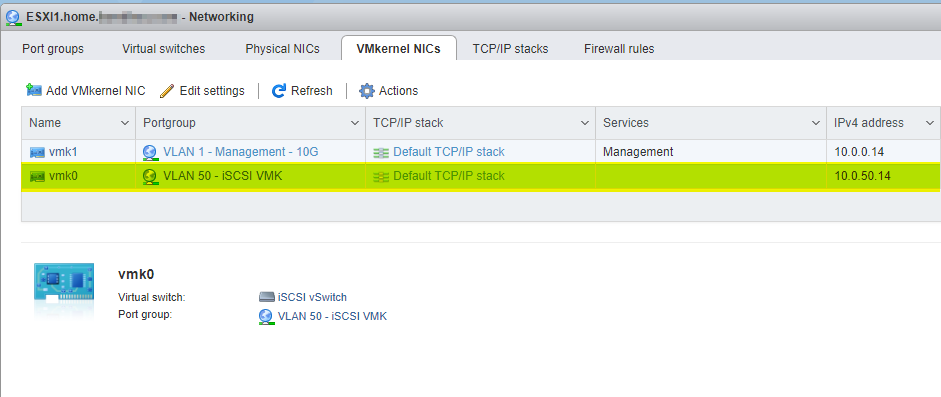
If this new iSCSI VMK will be on the same subnet or VLAN as your usual ESXi network, then select the default TCP/IP Stack when creating it. If not, you need to create a new TCP/IP stack via CLI for it, and configure the correct gateway
Now move over to port groups and create a port group for virtual machines on the same vSwitch. We are going to move the Debian VM to this port group so that iSCSI traffic is all on the same vSwitch, and does not have to go onto the physical network
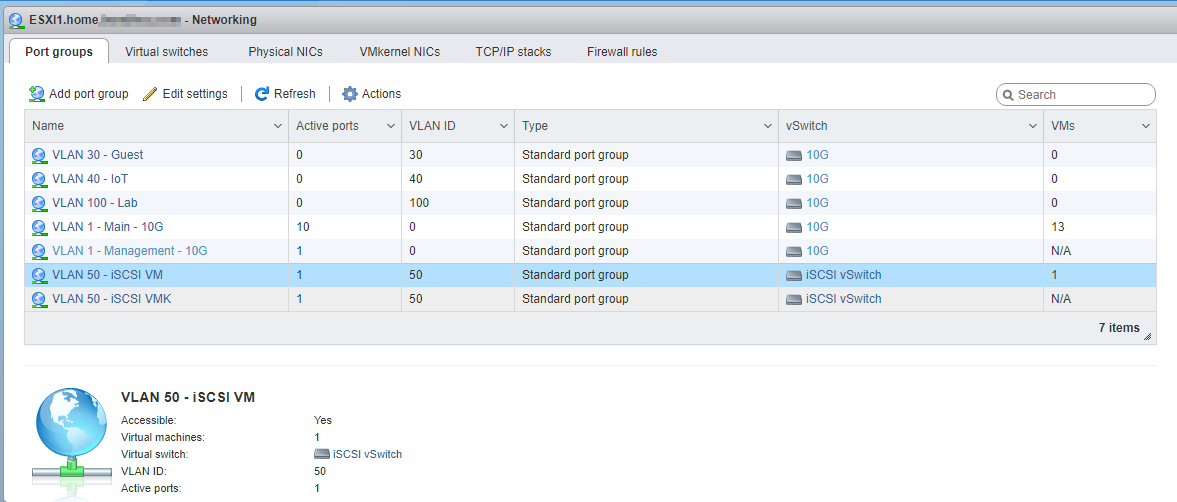
Now just edit the VM and add it to this port group. Even though this vSwitch is backed by a 1G NIC in my case, I get well over 20Gb/s within ESXi because its all on the same vSwitch and never leaves the host.
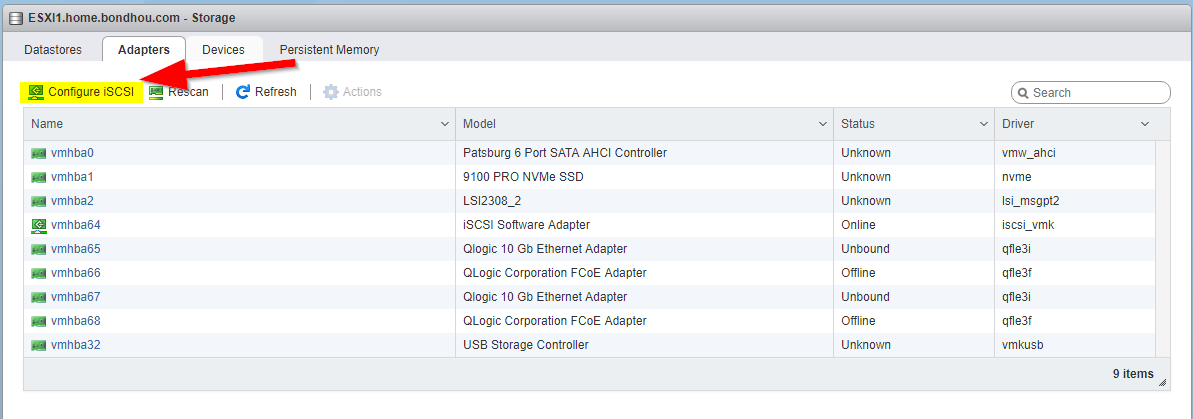
Go over to storage, adapters and click on Configure iSCSI
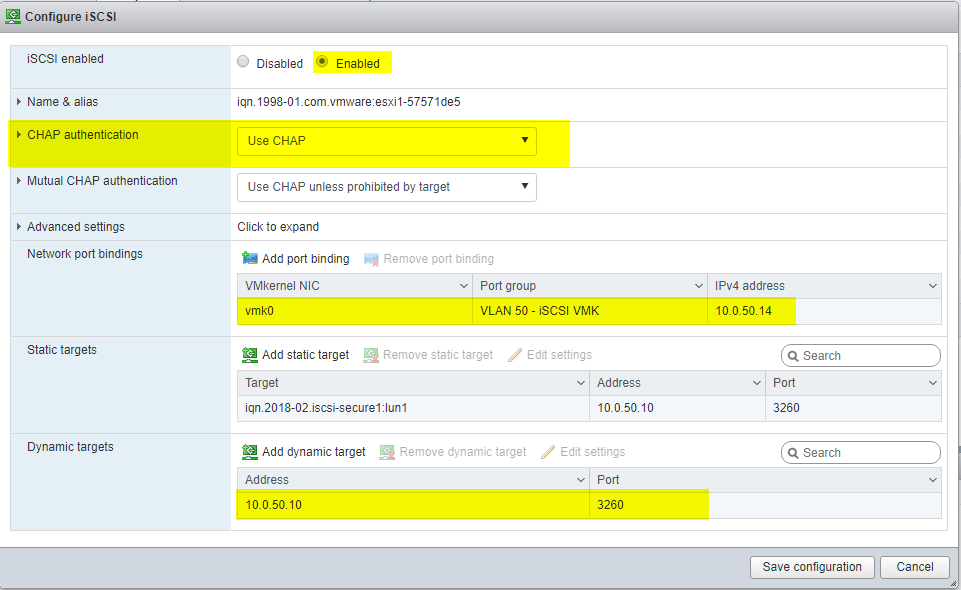
Now make sure its enabled, enter the chap configuration (Make sure to enter credentials on the drop down arrow), make sure its bound the correct port, and then at the bottom enter the IP address of your Debian VM.
Once you have done that and clicked Save, it will automatically populate the target
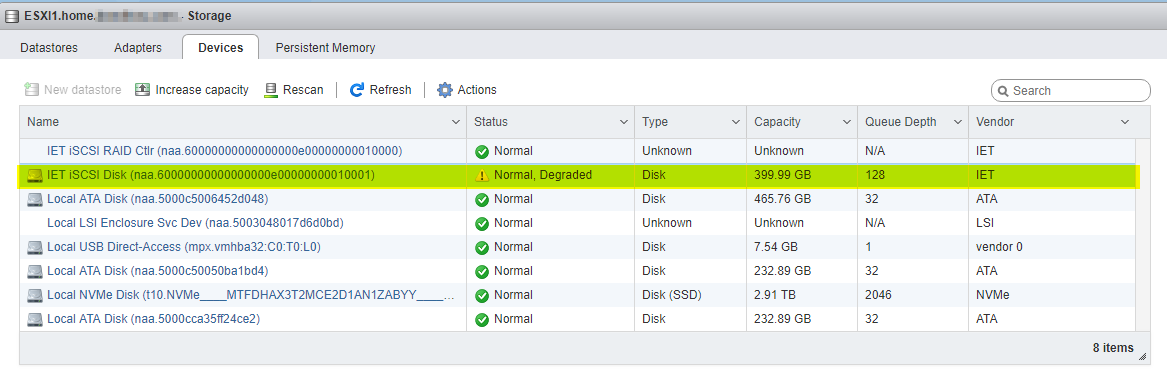
Now just go into devices, and create a new datastore! It will show as degraded because it only has one path, you can ignore this.
Just be sure to make the Debian VM boot first, and set the VM's that reside on it to not automatically start. When you reboot your ESXi host they will show as orphaned because the storage is not available. After a few moments, it will show up in ESXi and you can start them as normal
Hopefully this was helpful!