Generac Maintenance, Oil Report and more Genmon Changes

I could roll this into more than one post, but I'm not sure at what point there is too many generator posts. This post will go over some changes to Genmon (The FINAL CHANGES!) and some notes on maintenance, and the Blackstone Labs Oil Report.
First, Genmon. I think I've finally figured out the BEST way to install Genmon in a Generator. For those Unaware, Genmon is an open source third party software you install on a Raspberry Pi and connect to the generators controller for much greater control and data collection.
If you've not read the past post where I installed it initially, I would suggest you do:
 SpookyGhost
In that post I go over my initial thoughts. In the end, I settle on running OM3 Fiber to the Generator and powering the Pi via the 12v battery in the generator.
I did however run into some problems there. A week or so after I posted that, I started a new journey for a better way to power it.
First problem, if I ever needed to remove and replace the battery, I'd need to shut down Genmon first. Not a huge deal, but annoying.
Second and most importantly, is that I noticed right away the battery charger was on almost 24/7. I'd see the charger turn off, and then just a few hours turn back on again. The Raspberry Pi and Media converter despite drawing such limited power, was draining the battery VERY fast, much faster than they should. This did lead me to finding out that my generator has a much smaller, crappy battery which I replaced in this post:
SpookyGhost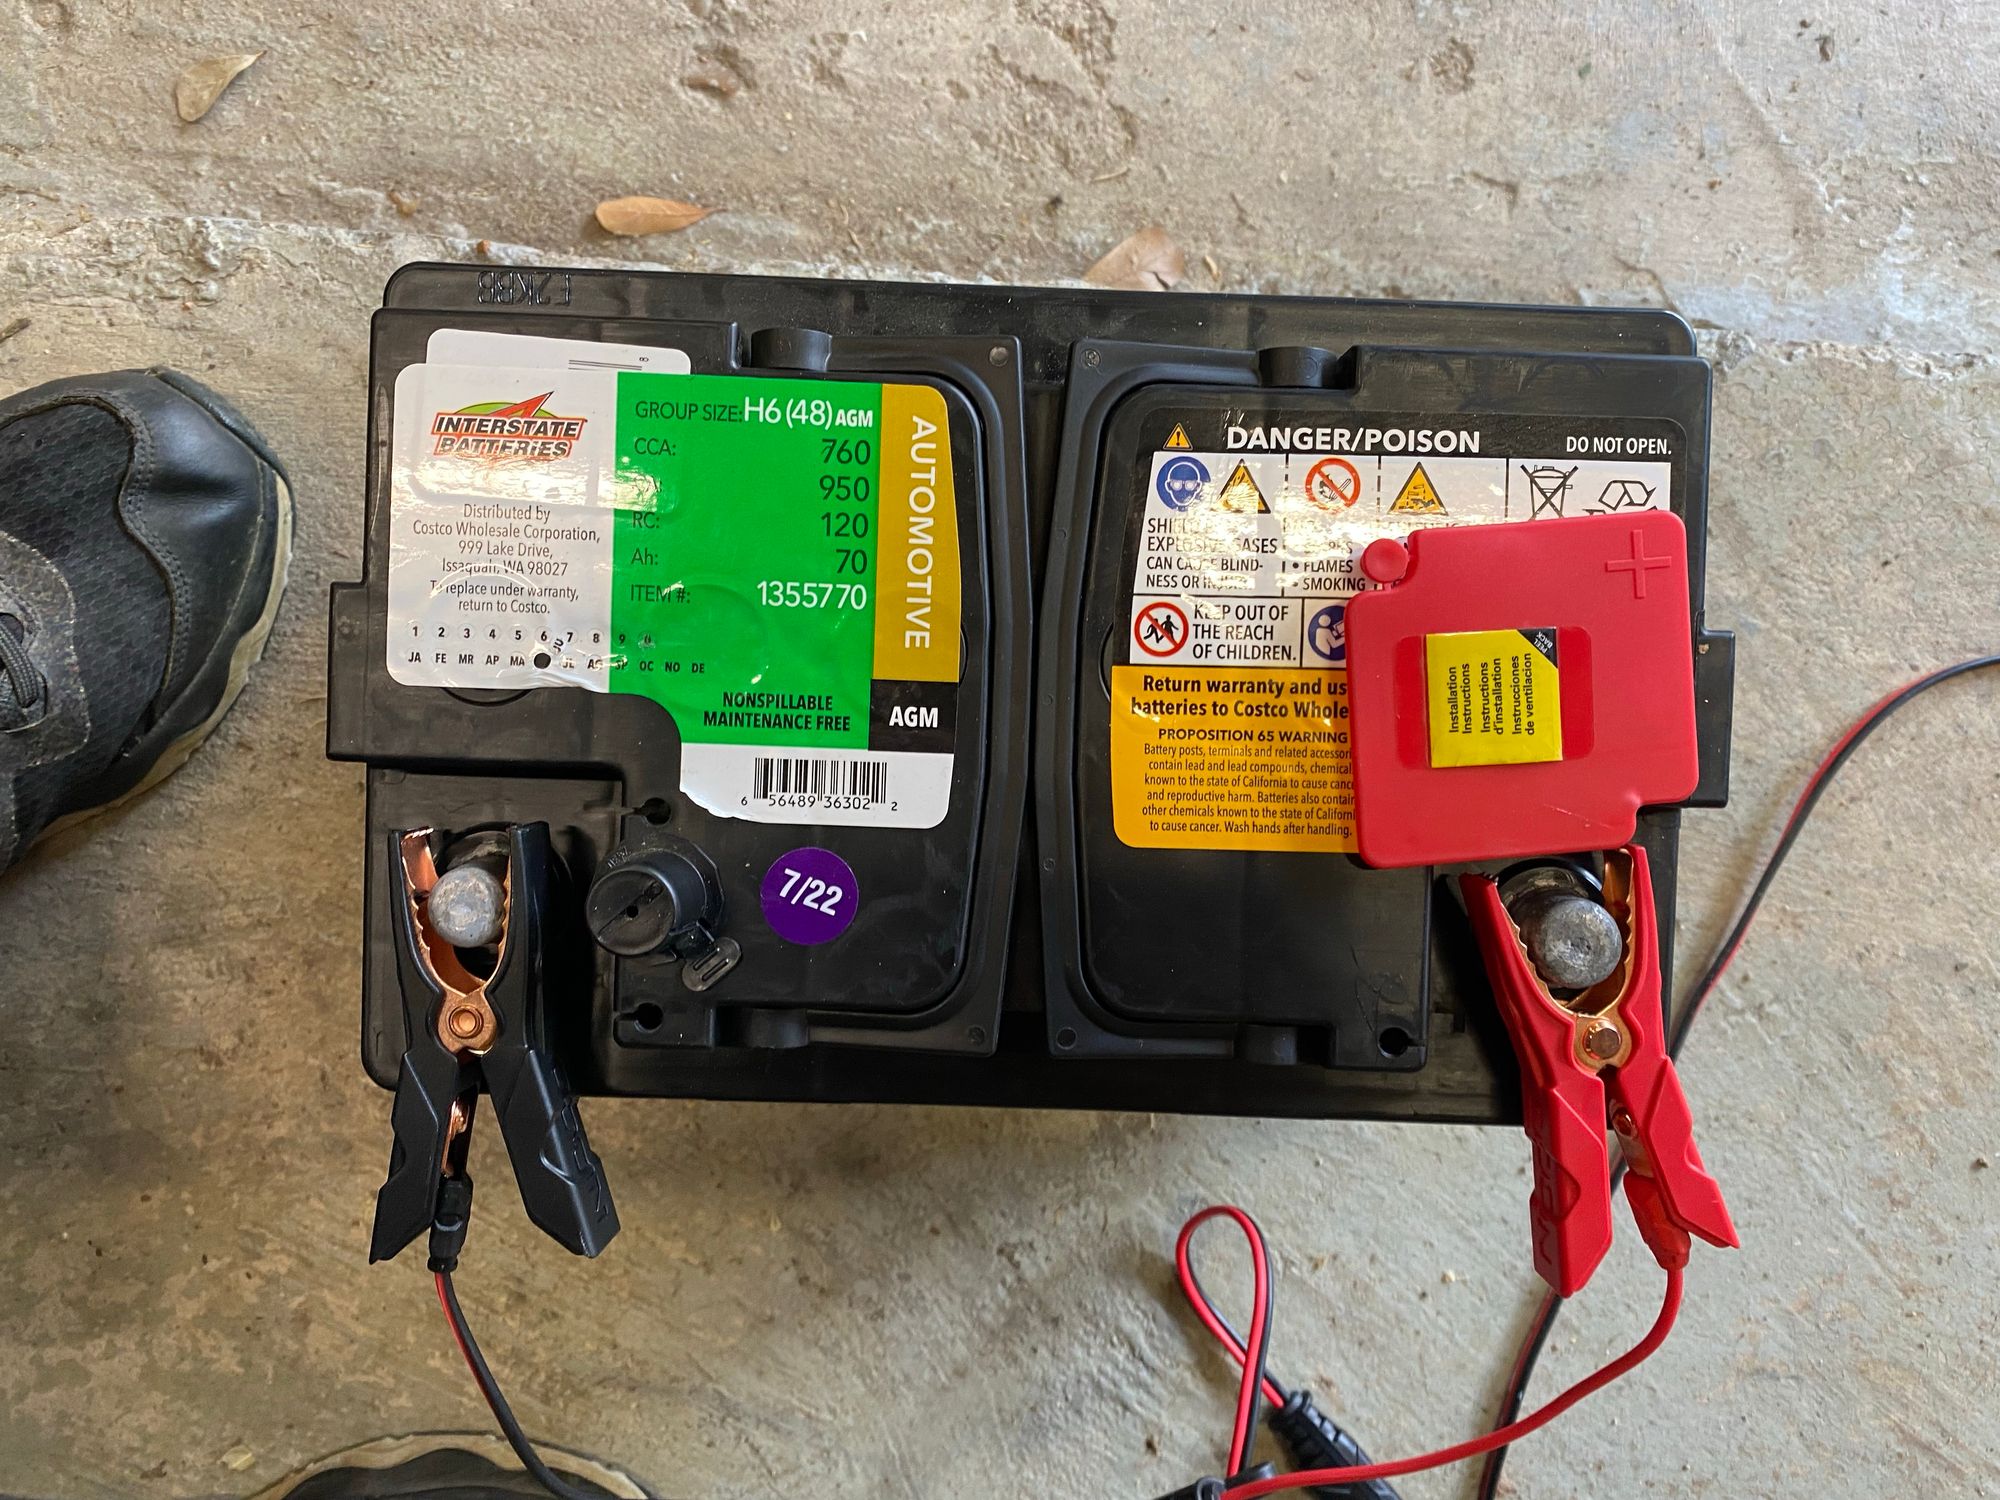
But I decided that because the battery charger on these units is built into the controller, I should probably work on getting it to run as little as possible, as replacing it is not a DIY friendly job at all, and its probably the last thing you want to go wrong.
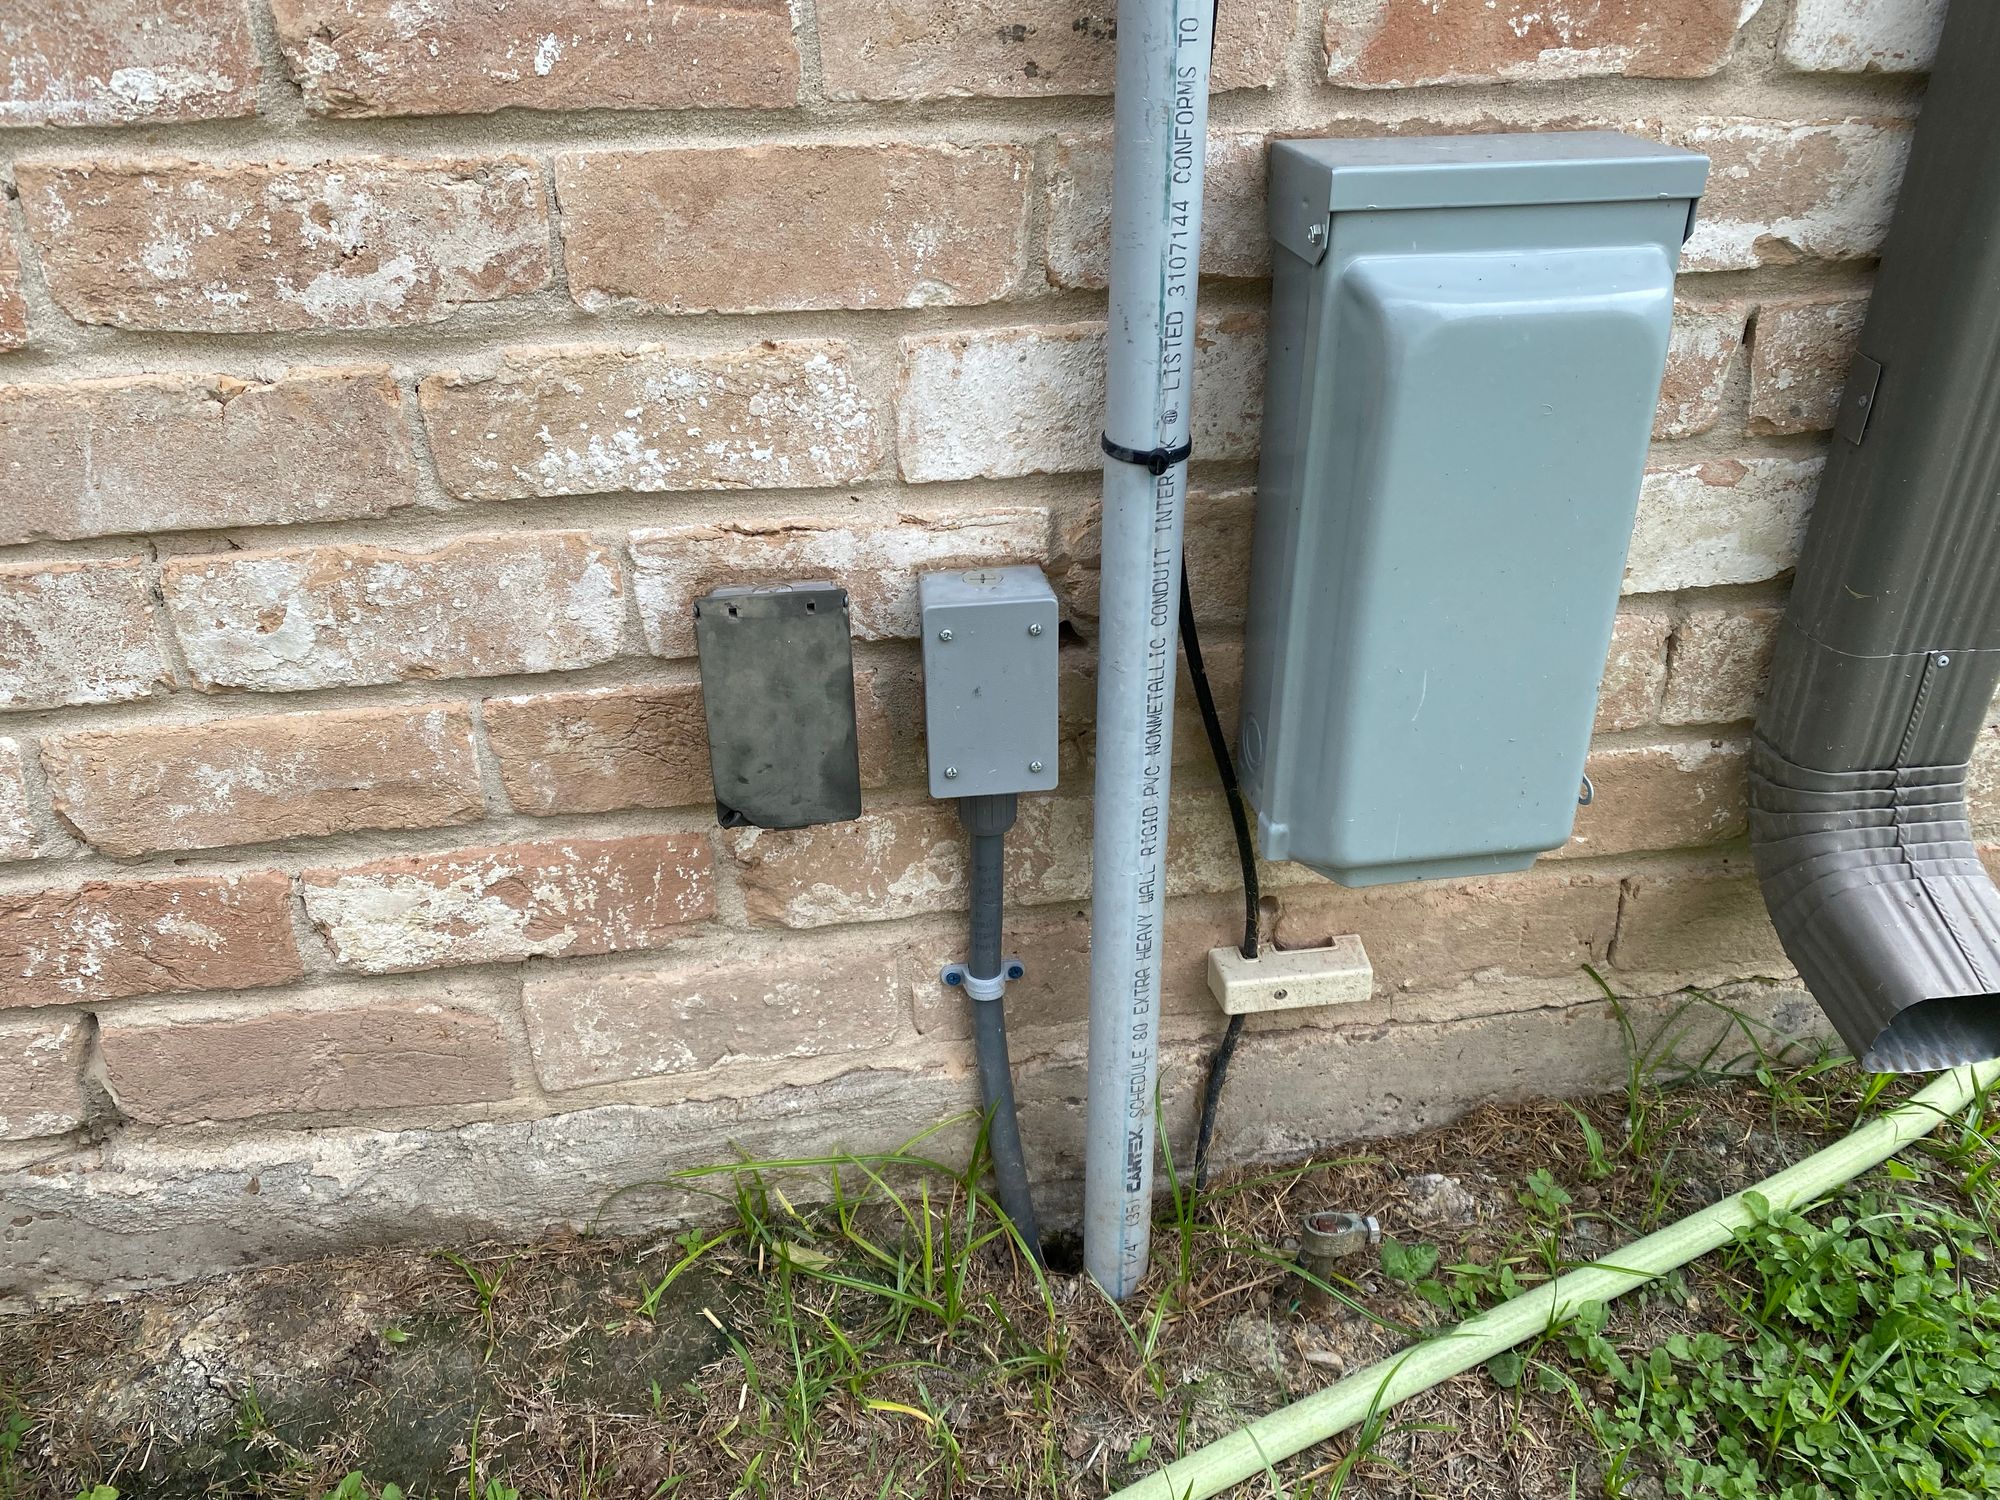
This project lined up PERFECTLY with my Power Monitoring project. In that post, I ran a 120v circuit from my Garage UPS to a receptacle and my power monitoring. At the risk of linking too many past posts, here it is. But I'll include pictures if you don't want to go read that.
SpookyGhost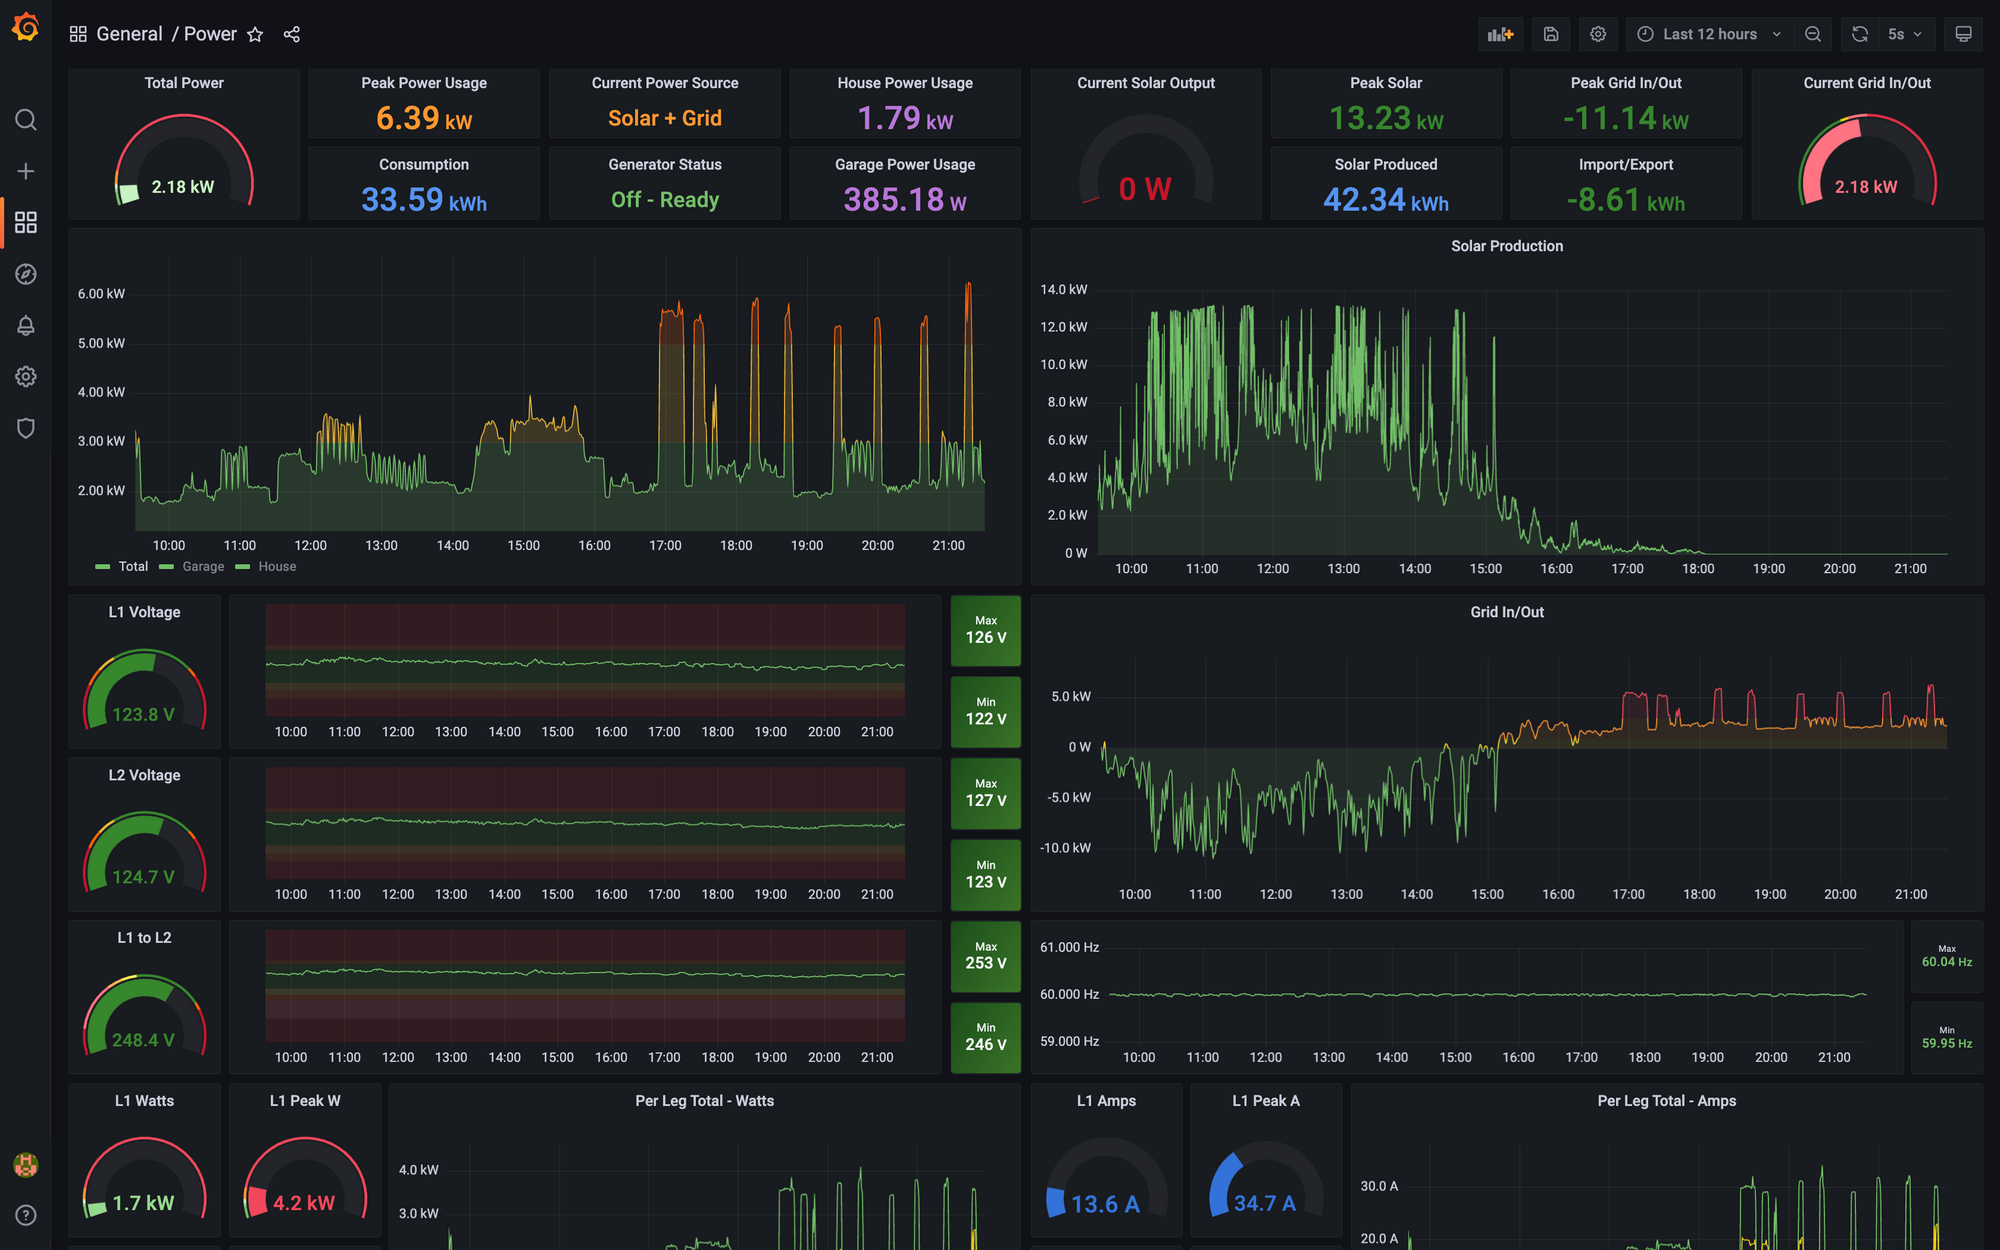
Now I had 120v UPS backed power right where the fiber went into the wall to end up at the generator. That got me thinking, why don't I just run more wire from this junction box, and install a UPS backed outlet INSIDE THE GENERATOR? Well, that's what I did.
Here you can see the Inlet near the UPS

That travels along to this receptacle which is UPS backed. I put the "Do not use" sticker on so if I ever have contractors working in the area, they HOPEFULLY don't plug something like a circular saw into it... I may put a cover on there in the future to limit that.

From there, one run of 14/2 Romex goes into my power monitoring setup to keep that turned on 24/7, and then other goes into a junction box on the exterior of my garage where the fiber enters to the conduit to the generator.
Here you can see that I terminate the Romex to some THWN wire which goes into the conduit along with the fiber, and a spare pull cord.
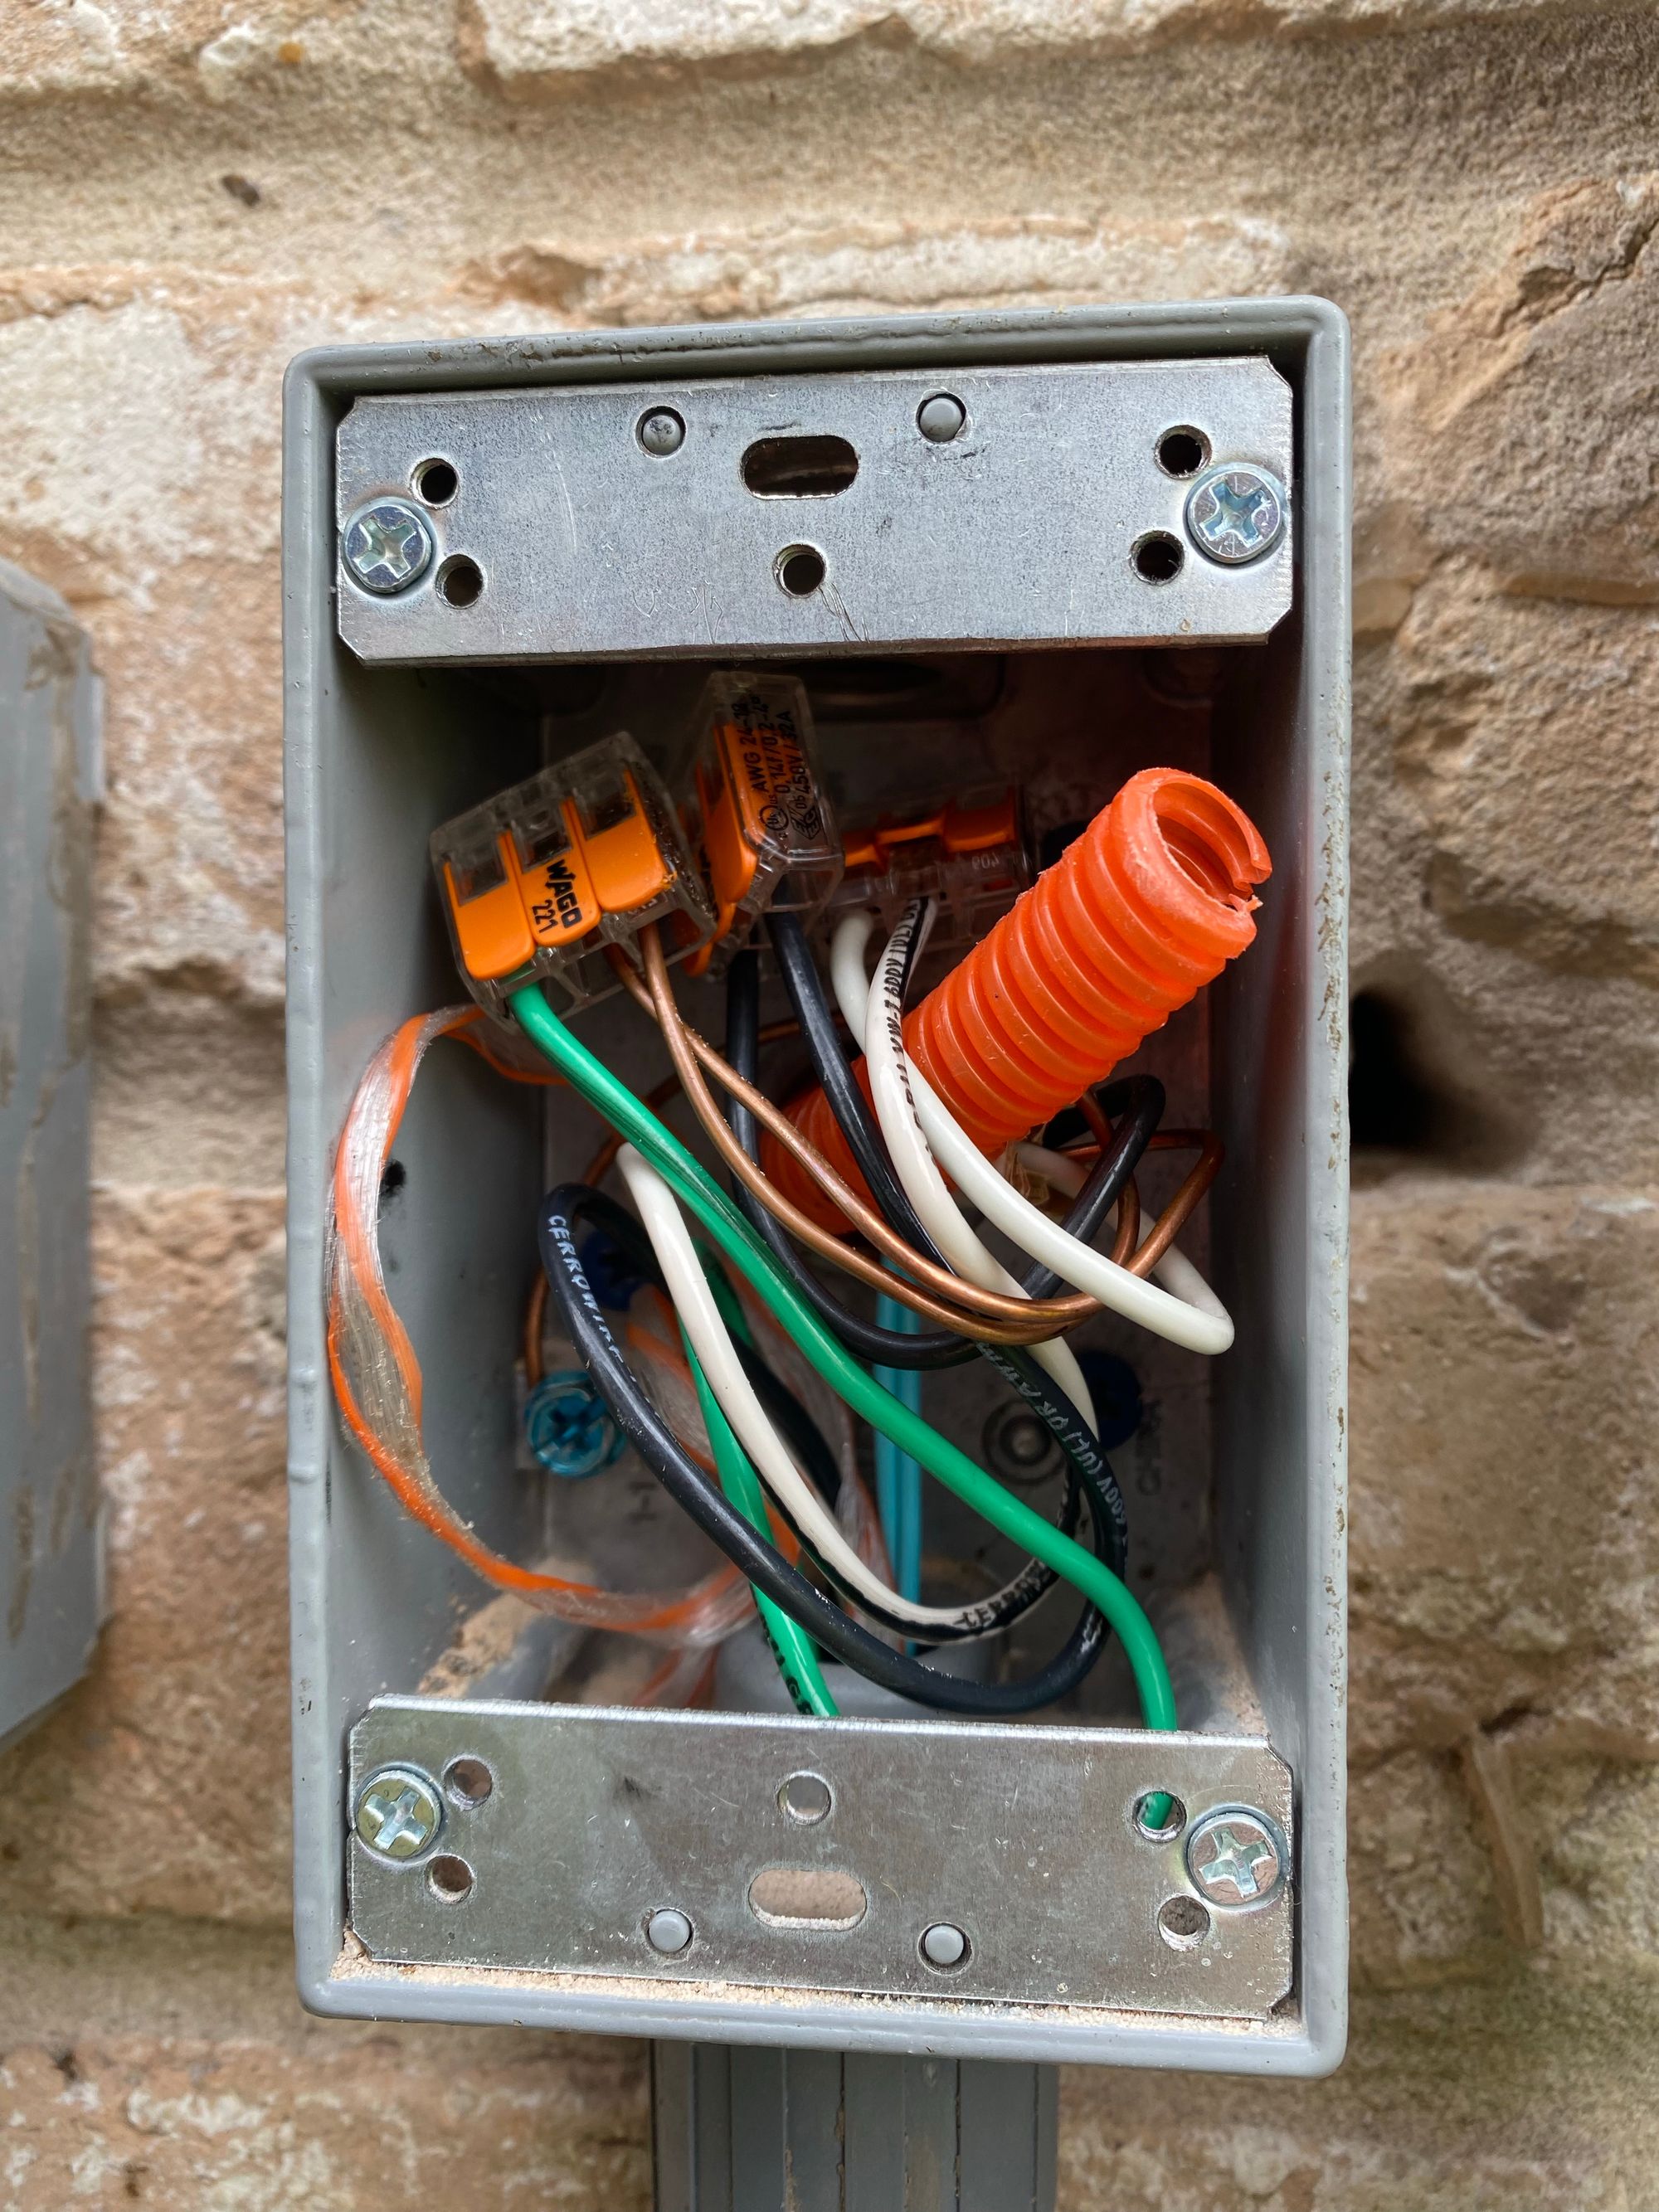
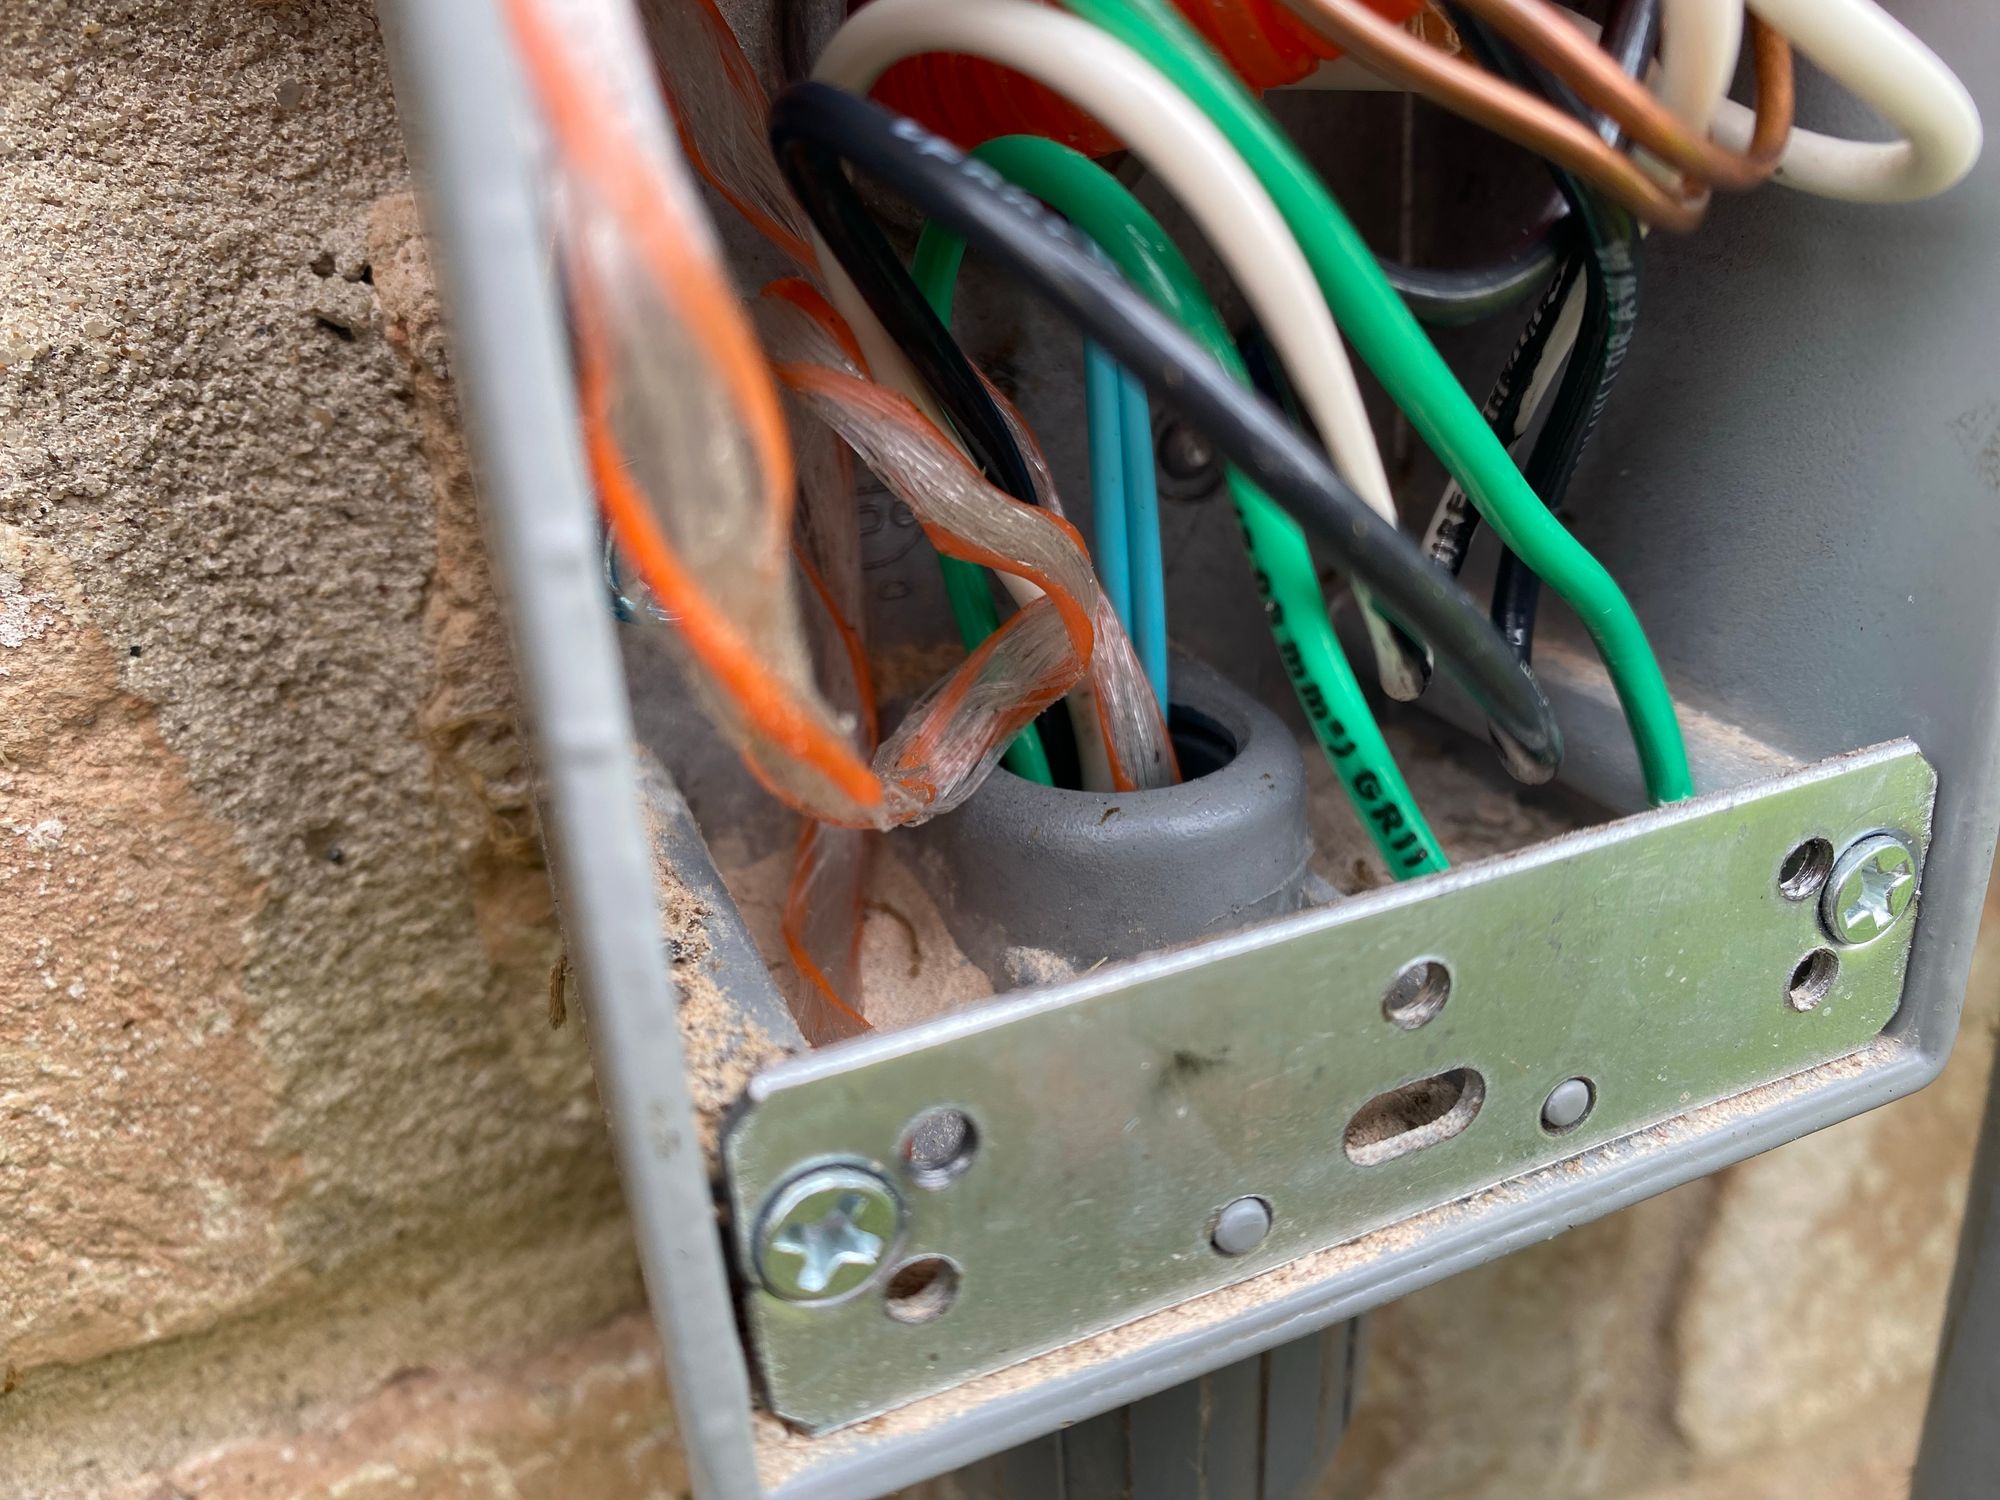
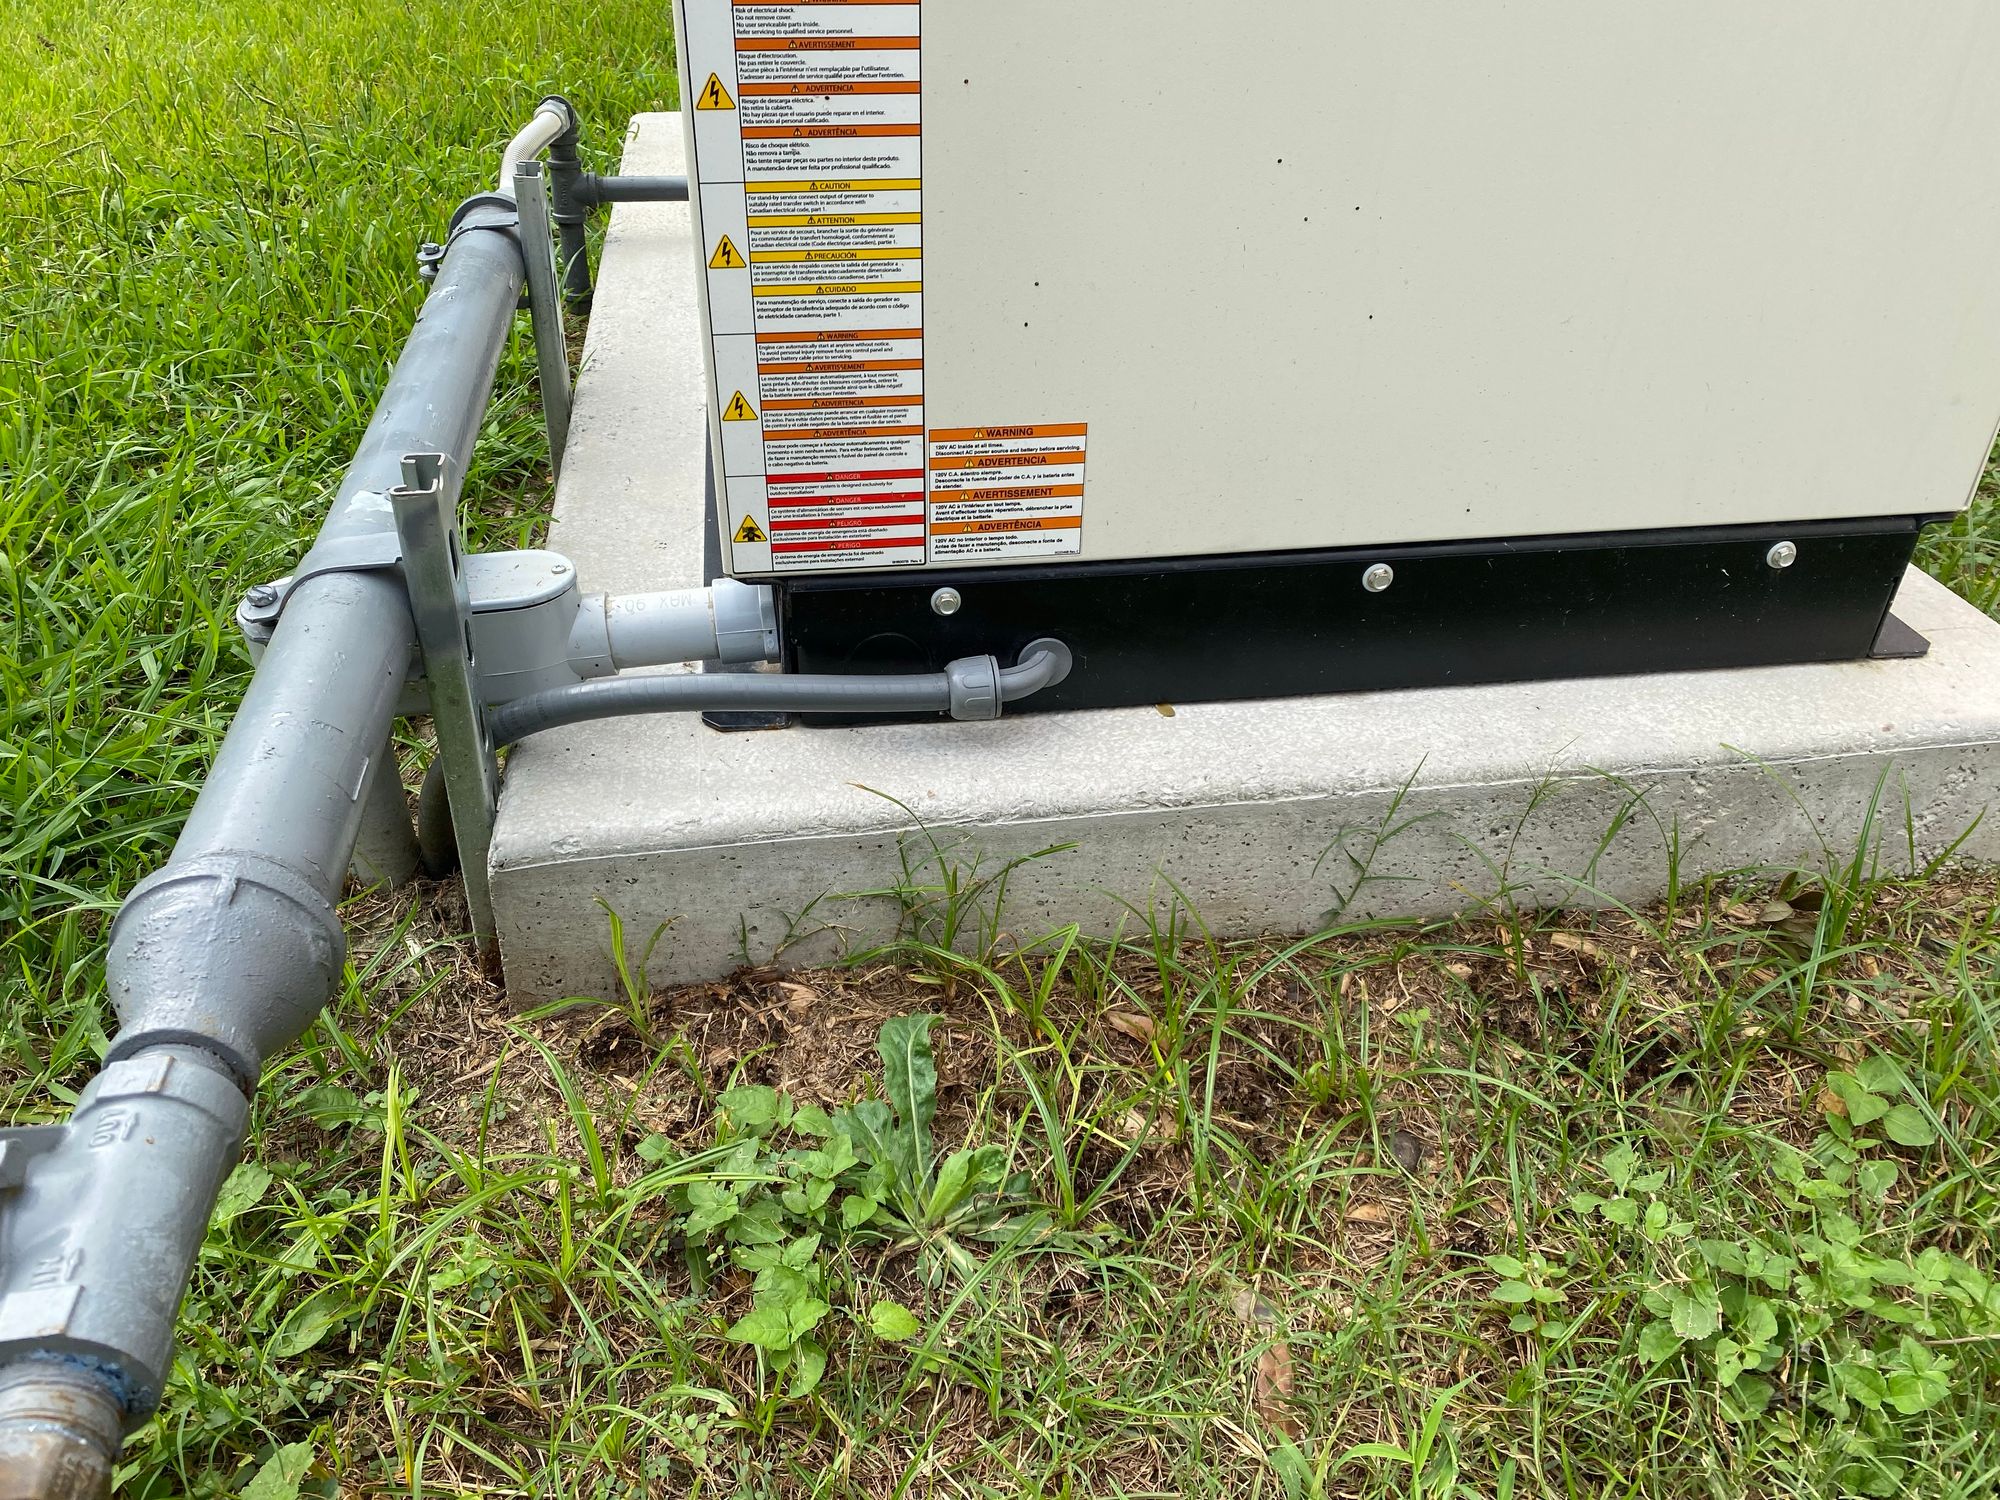
From there, both the fiber and the power go through the conduit, into the generator
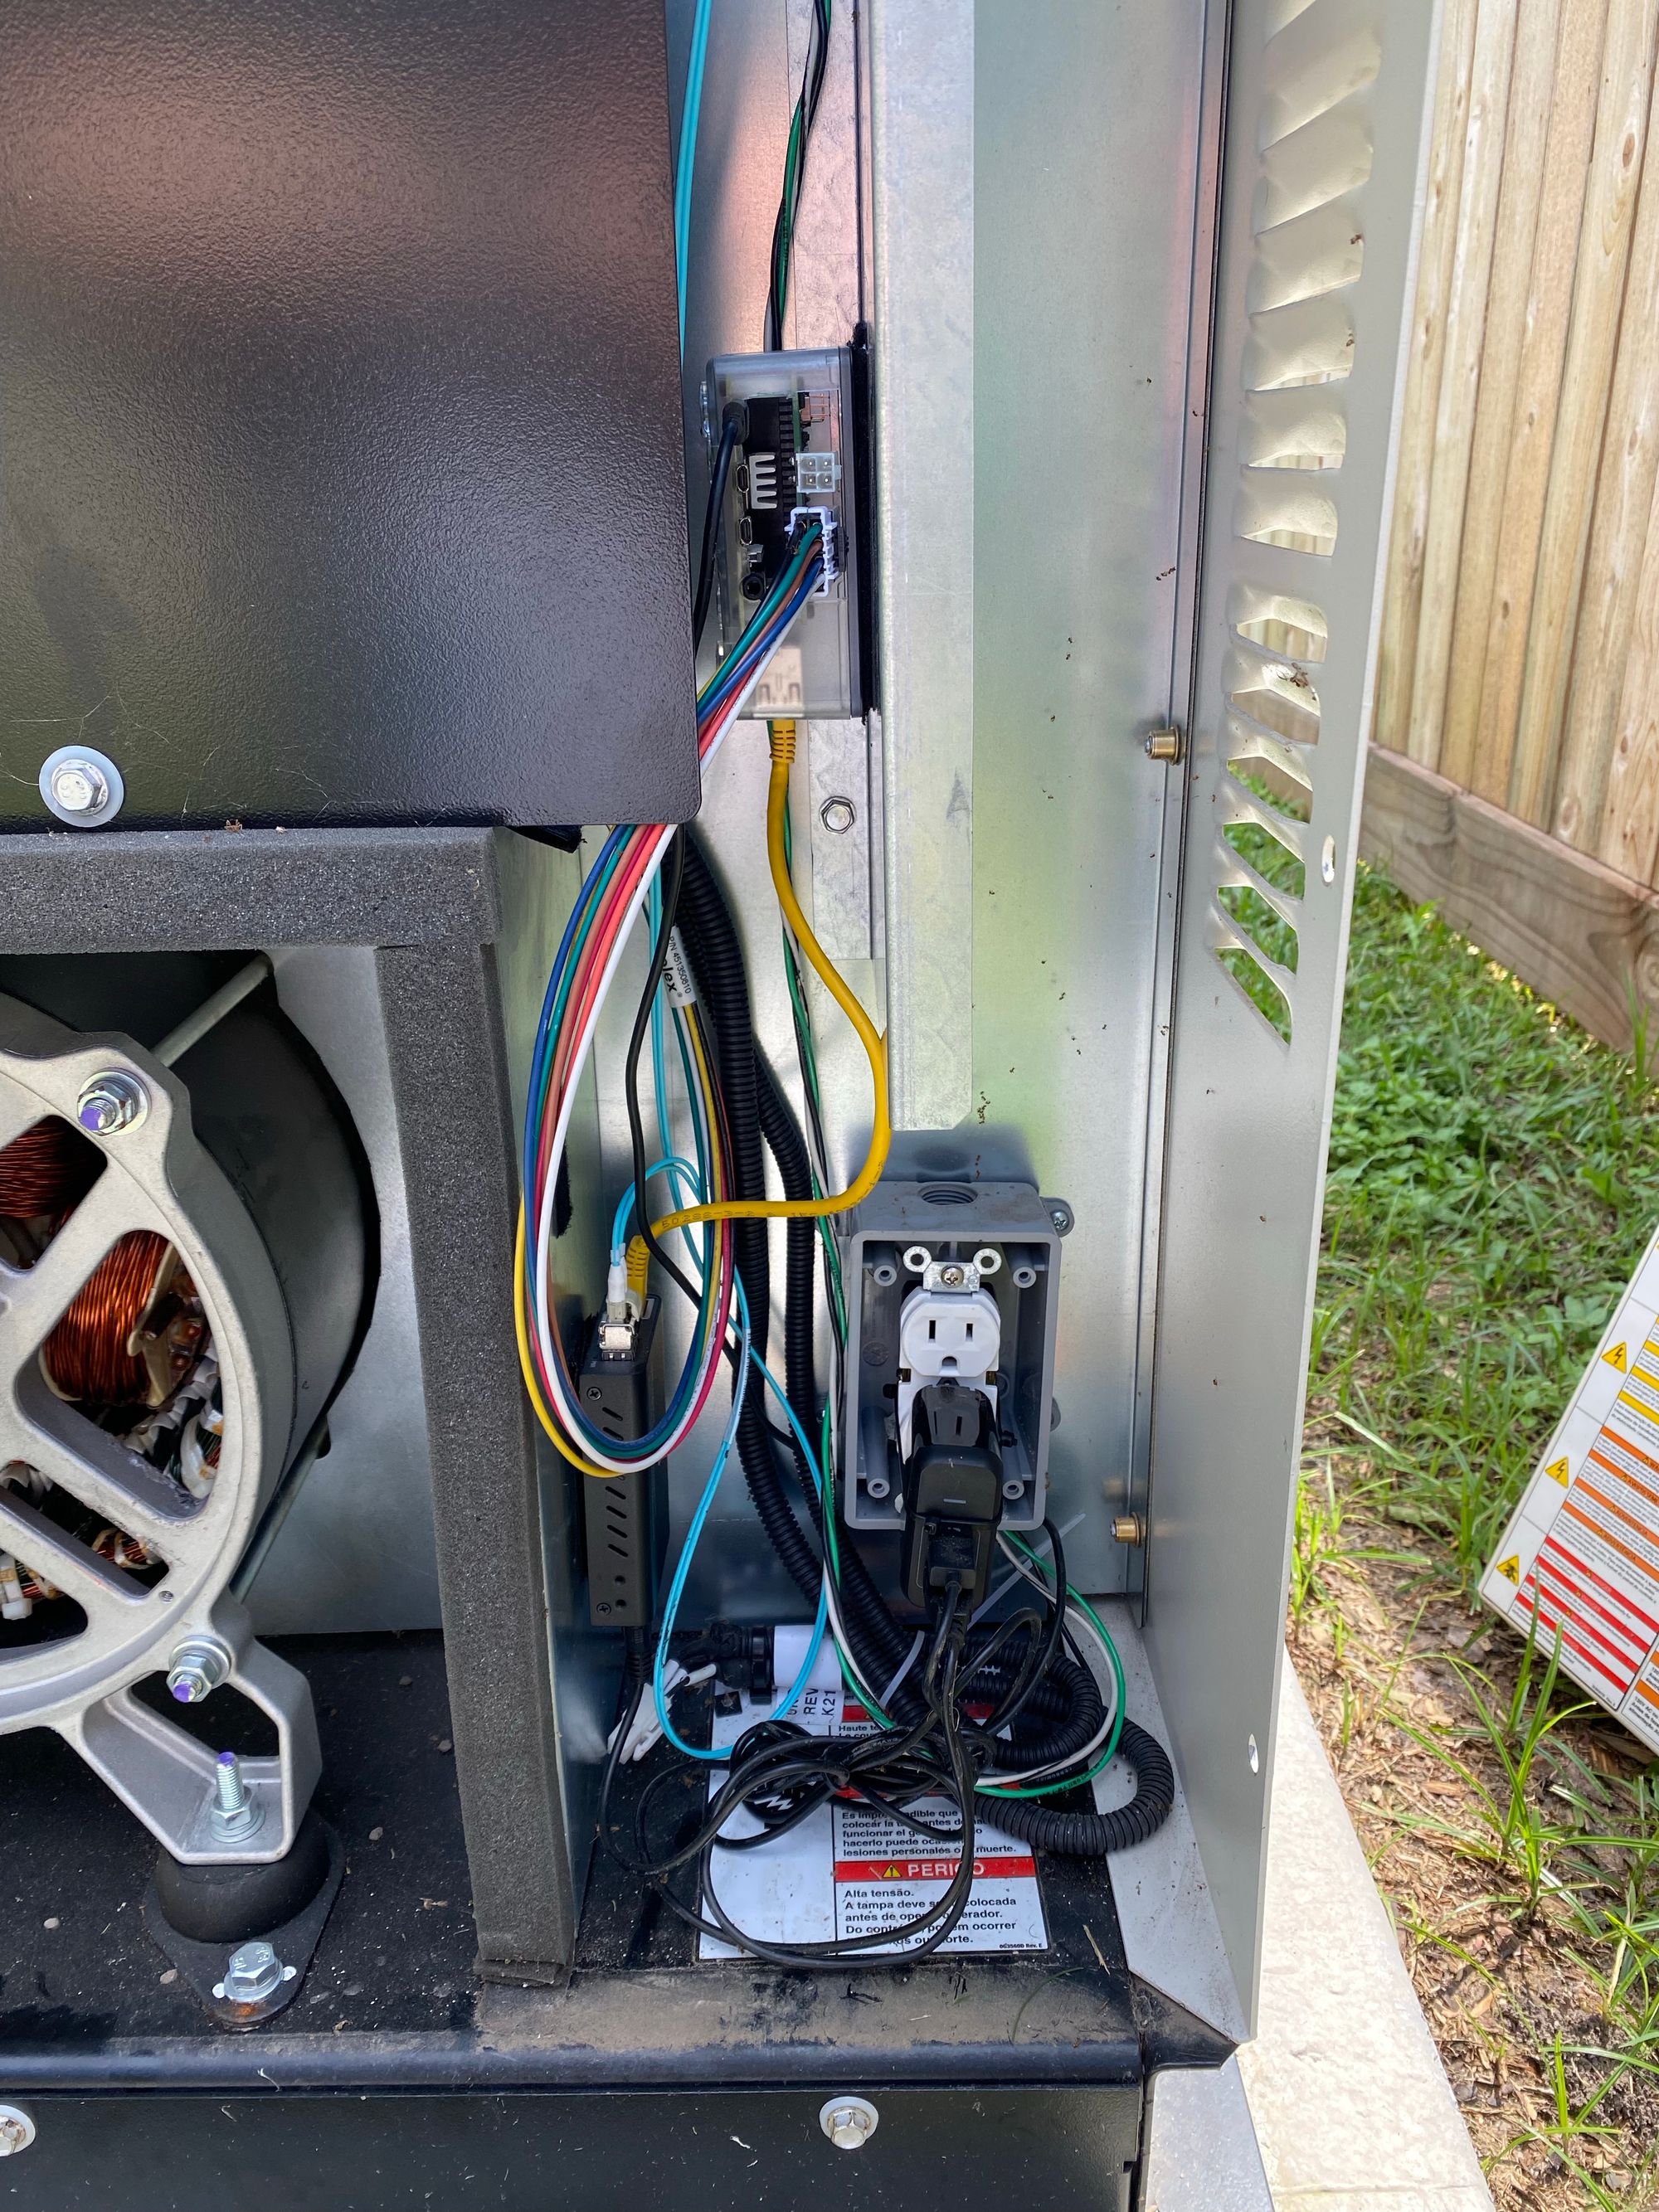
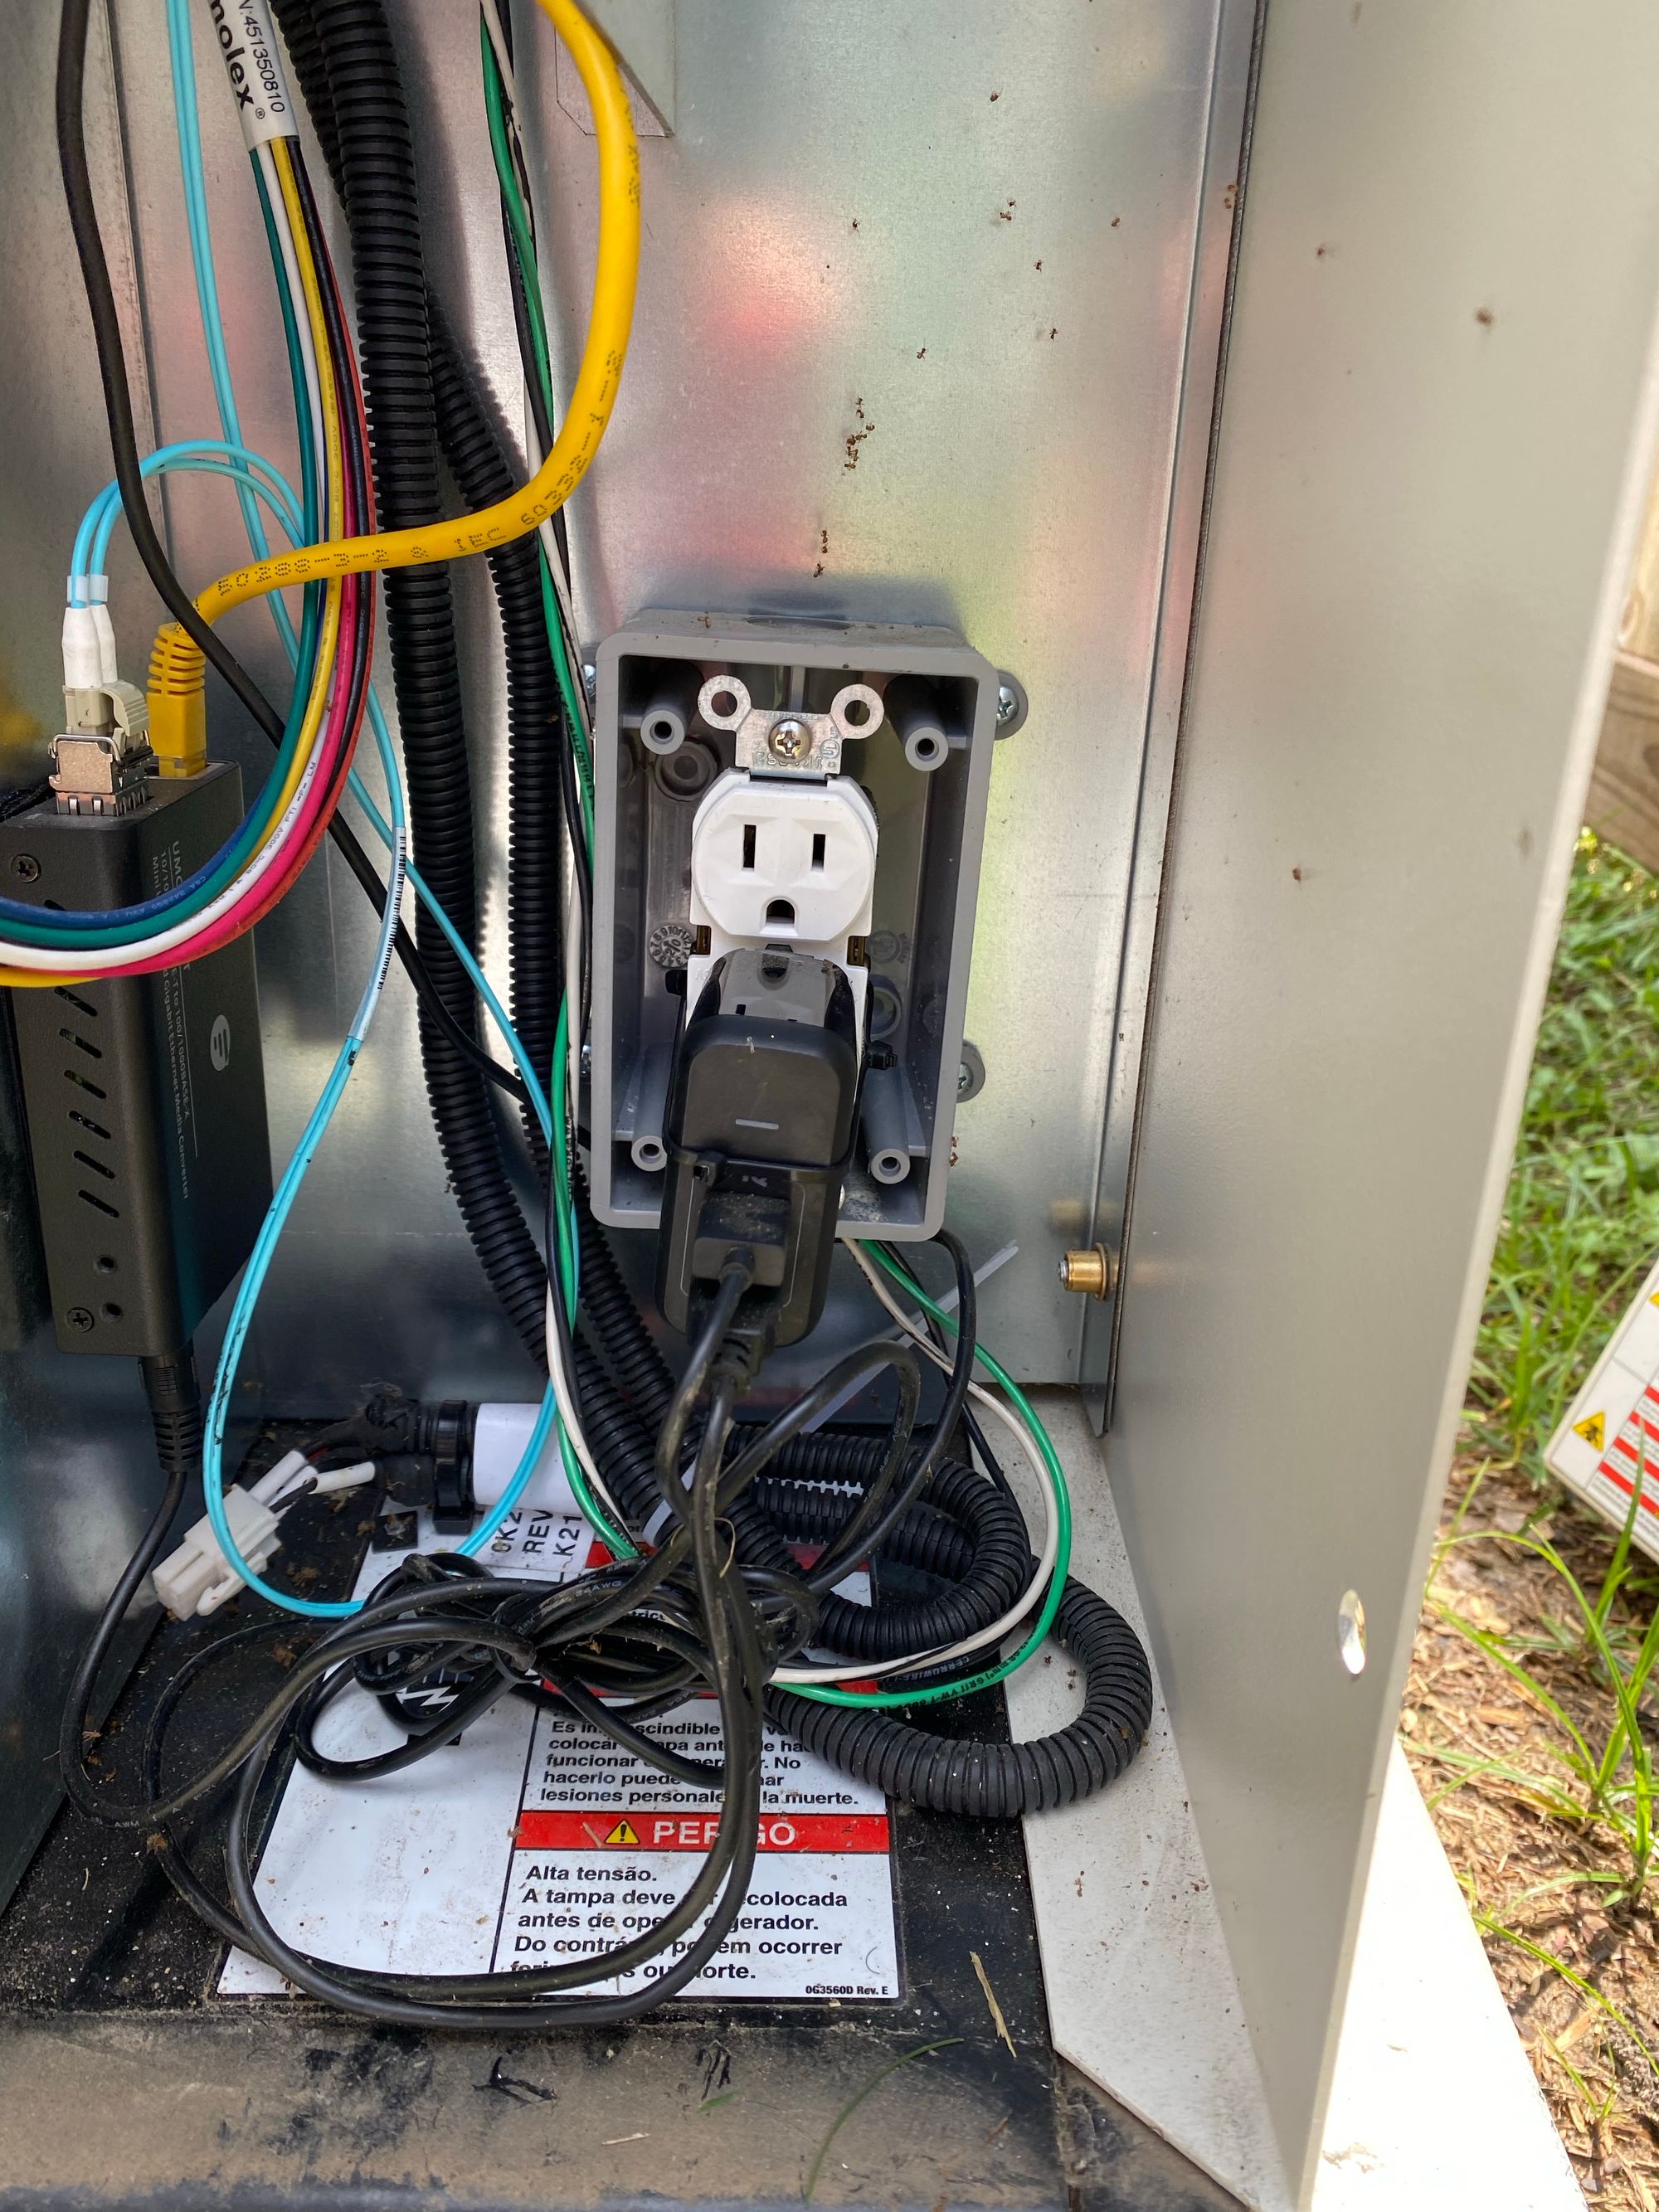
I zip tied the USB Power supply to the receptacle just so vibration doesn't cause it to come loose.
So far, this setup is perfect. If I wanted to, I could even install a 120v light switch in the garage to power on and off this circuit, which would be handy if the Pi ever crashed or hung (It never has).
A few people have already brought up that there is 120v in the generator all the time anyway, so why didn't I use that? well, that is not UPS backed. That will go out for 10 seconds when the grid power goes out, which I do not want for a Raspberry Pi, much less something that should be monitoring the generator at that very time.
This brings me to the third problem. When I initially started this project, I didn't have a means of getting another wire into the conduit to the generator, so I had to pull the fiber back through, attach a pull cord to it, and back again to the generator. This did a real number on the LC connector because its so long and not designed at all to be pulled through conduit. In the end, I actually pulled some of the fiber jacket off the connector which I couldn't get back in, it worked, but it wasn't pretty and I wasn't happy with the result. I also noticed some errors on the interface, nothing crazy and it still worked fine, but clearly I needed to fix it.
So, I went to FS.com and ordered some of their short boot fiber, you may have already spotted it near the outlet above. The LC ends on this fiber are MUCH shorter than a normal LC connector.
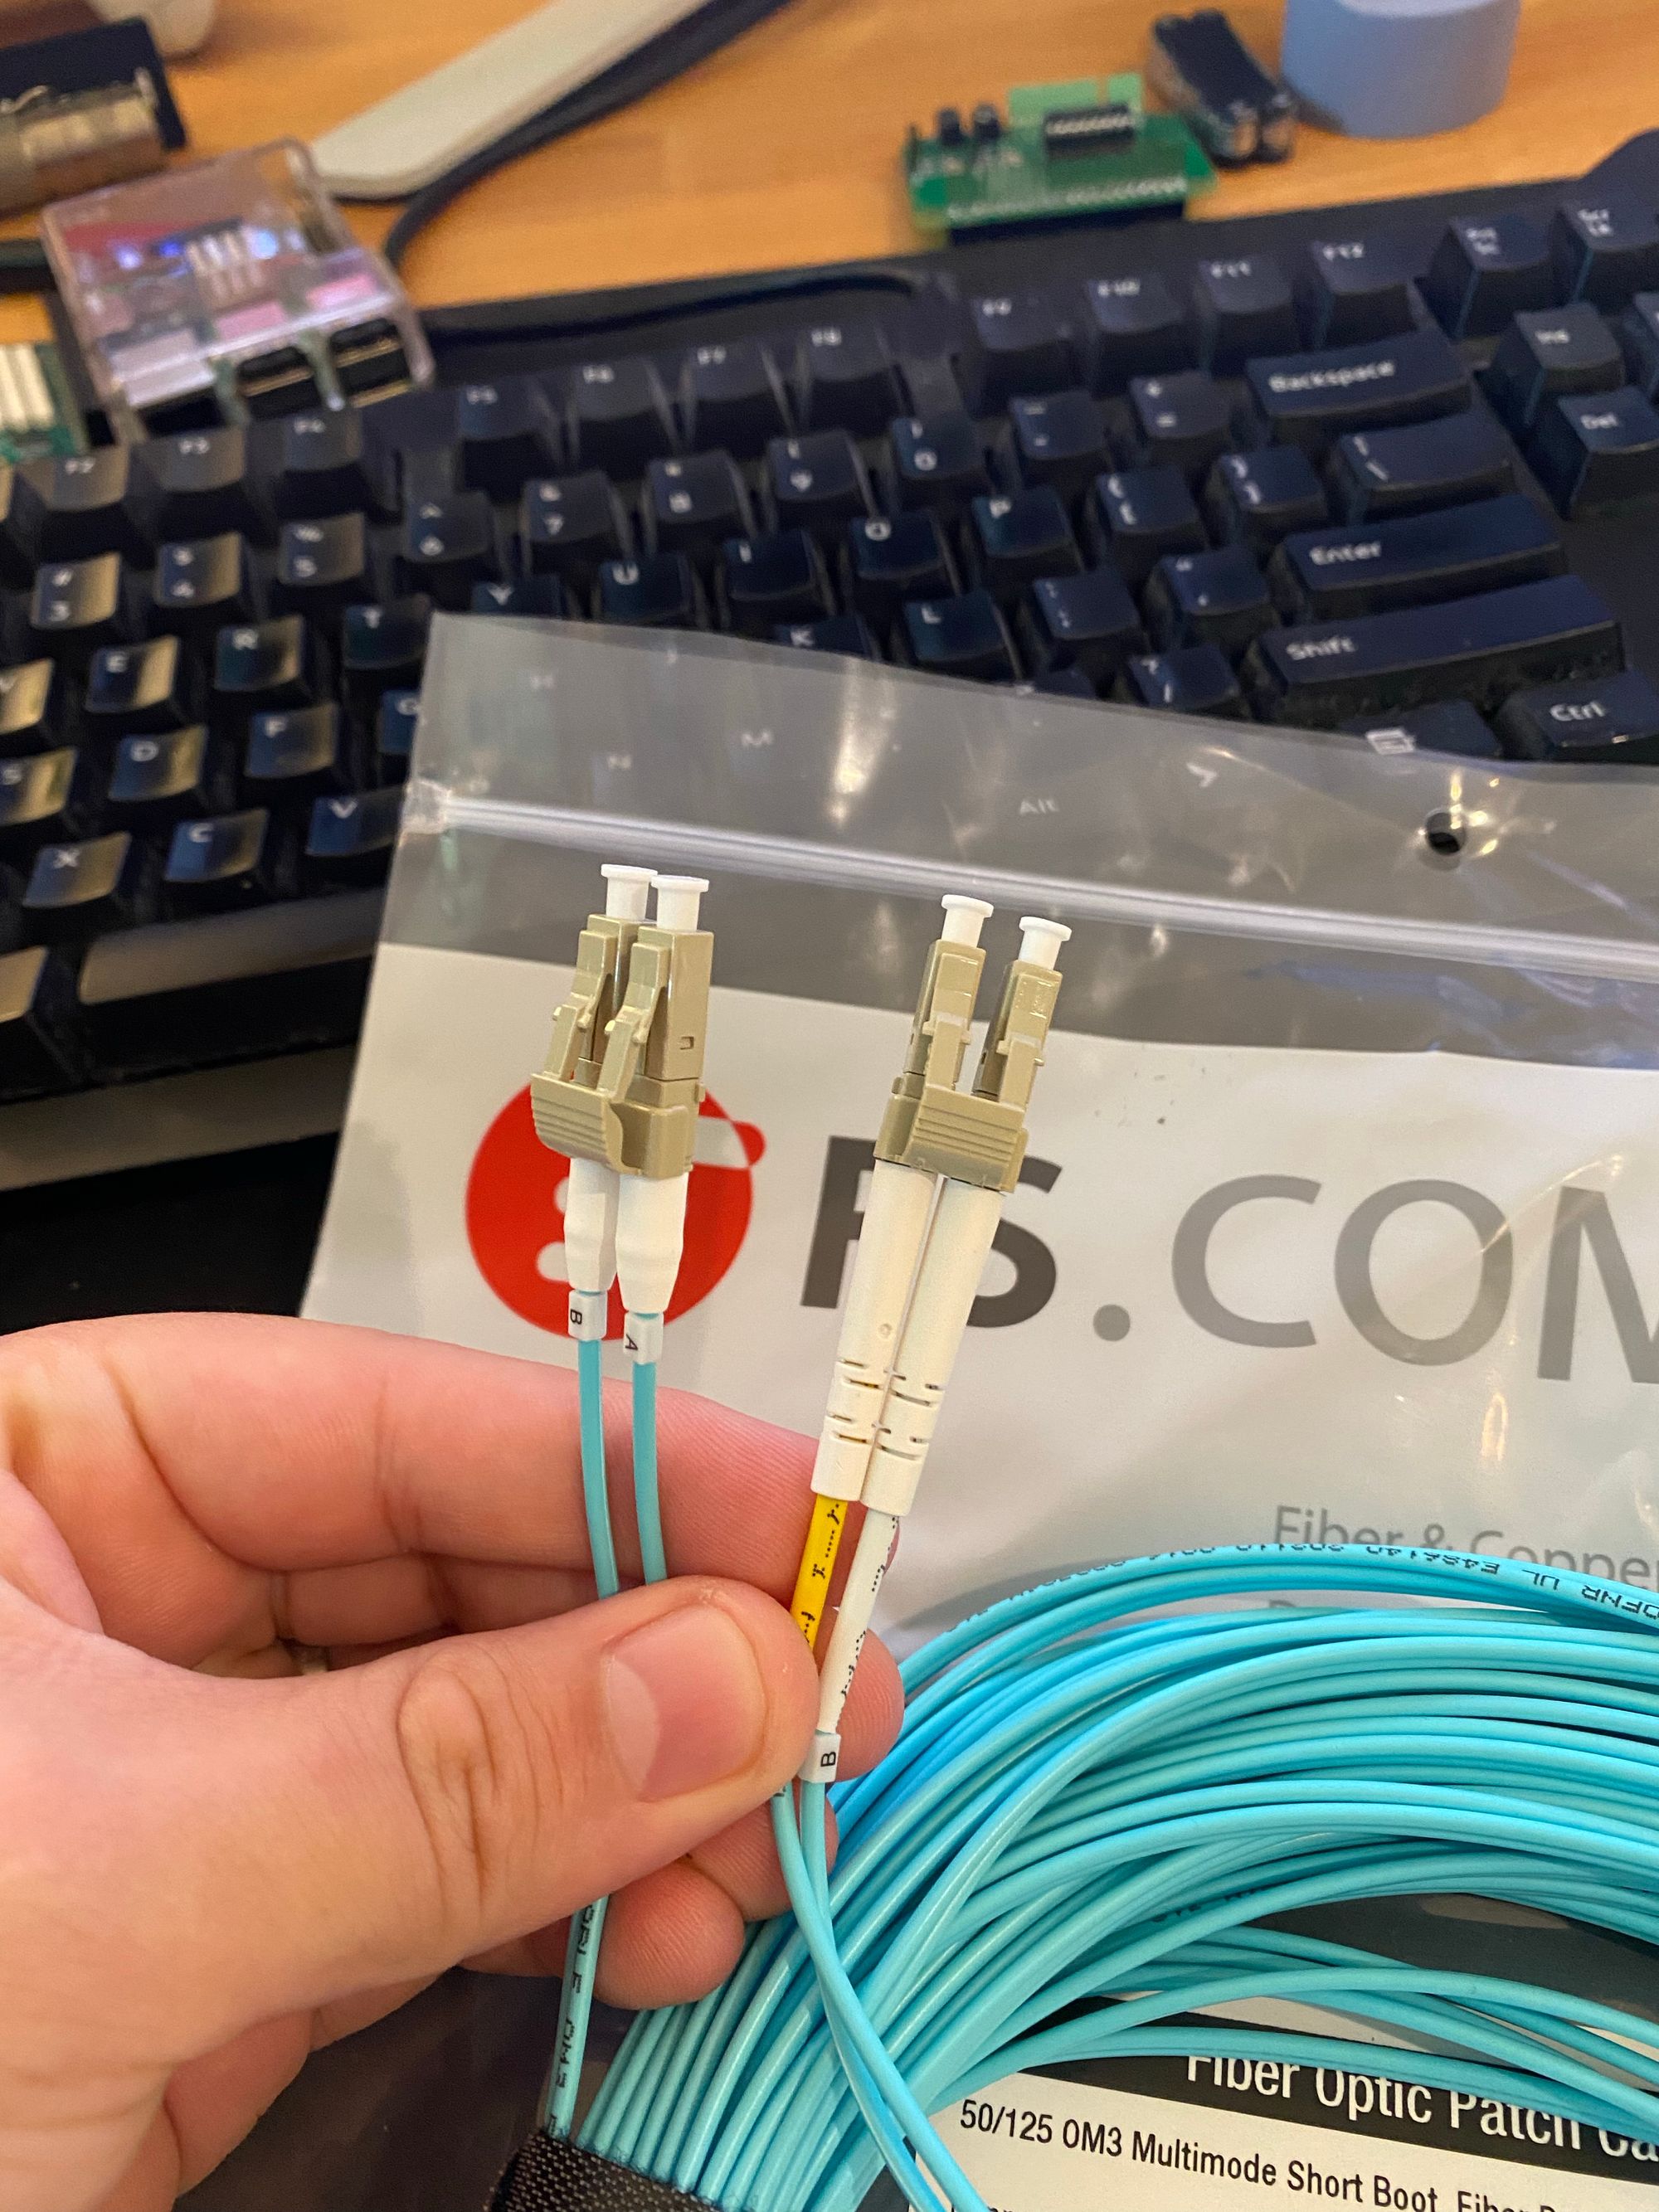
This was SO MUCH easier to pull through the conduit and make it through the 90 degree conduit fitting.
I think that concludes any Genmon posts, as I am very happy I have the perfect setup at this point.
Around this time, my Generator was around 25 hours, and storms were starting to brew in the Gulf of Mexico. I had to change the oil at 30 hours for the initial break-in oil change at 30 hours anyway, so figure now was a good time. I did not want to have a multi-day power outage and have to instantly change the oil as soon as the power went out.
Generac made things pretty easy by including a drain hose. It does have to go UP and over the generator frame though. It seems to do a good enough job, but in the future I may drill a hole in the steel frame so I can fish it through and perhaps get more oil out of the pan.
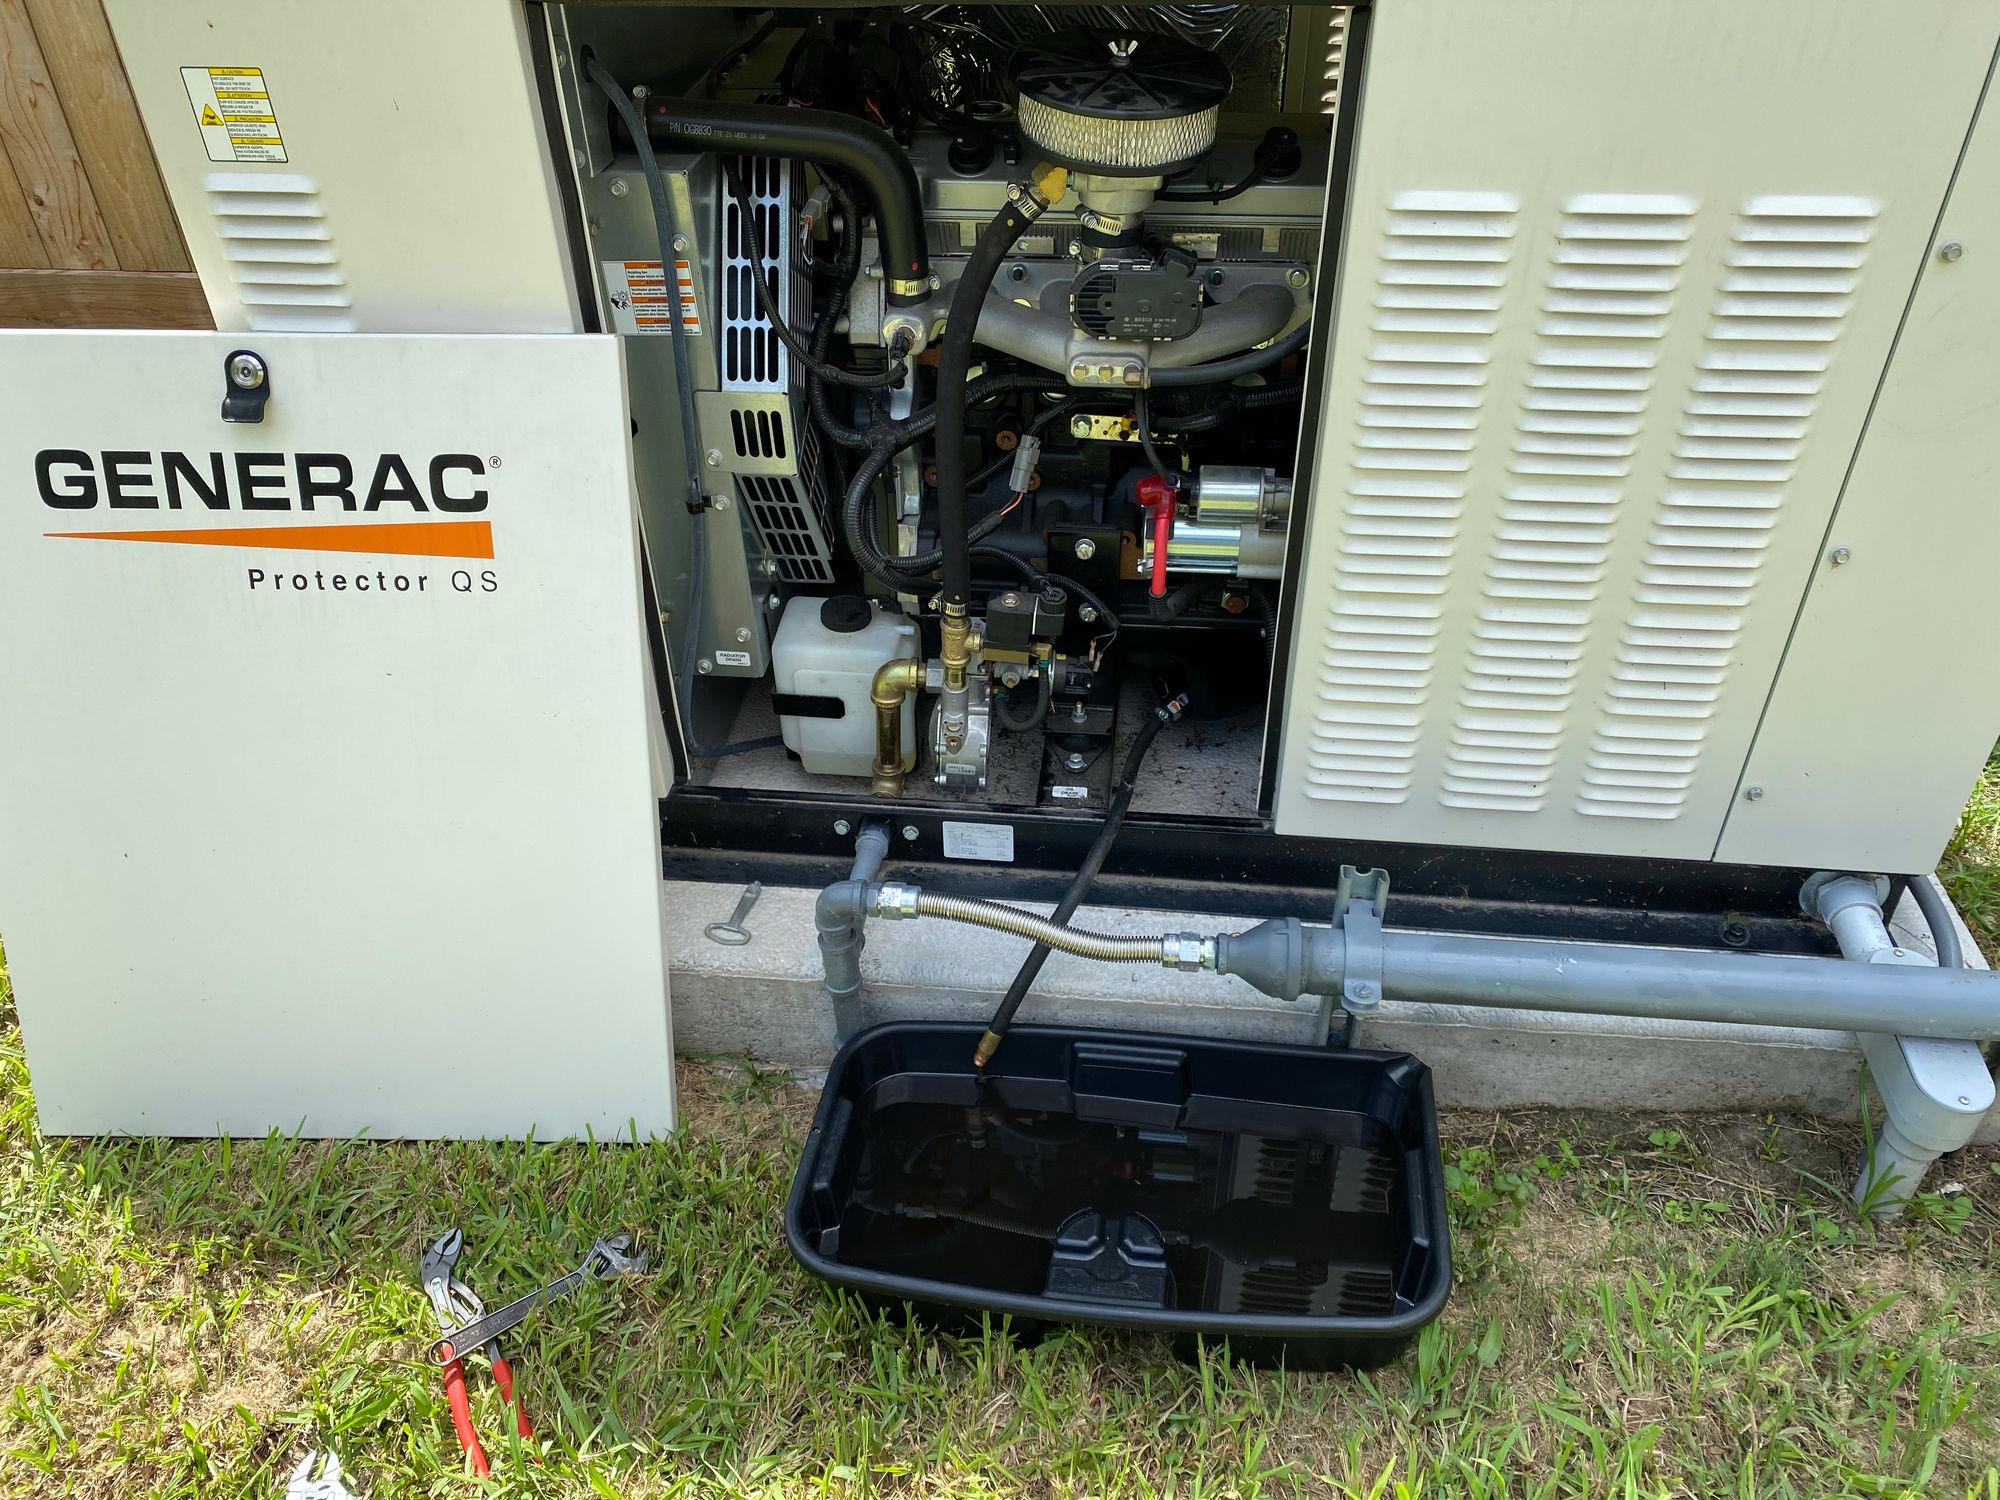
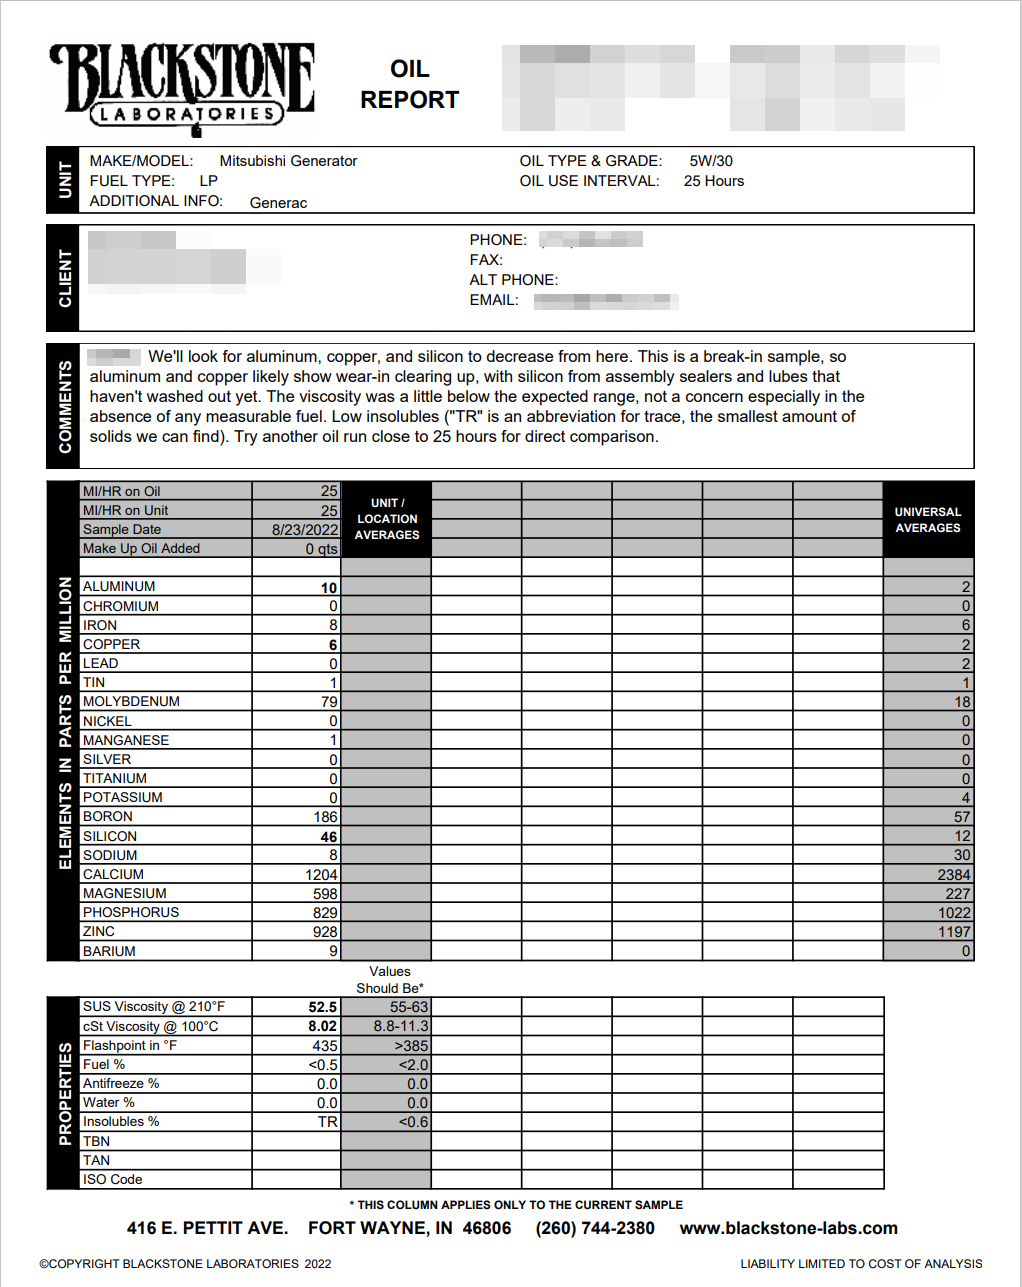
The oil was very dark and full of contaminants (Which is expected for a break-in oil change). I took some directly out of the drain tube into a jar so I could send it into Blackstone Labs. You need to use their bottles they supply free, but I never had one on hand, so I will transfer it later. You can actually send in oil in a different container to them, but not a glass jar...

Some notes on the oil change:
The book says 4 Quarts is needed for an oil change. 4 Quarts never even got me onto the dip stick! I pre-filled the new filter and filled it to the full mark also per the book, and it used around 5 and half quarts! I don't know where the 4 quart number came from, and I really hope generator technicians are not only putting 4 quarts into customers generators. I questioned this and measured the oil from my drain pan by putting it into an empty 5 quart oil bottle, and sure enough the same amount came out as went in. So 4 quarts is just flat out wrong!
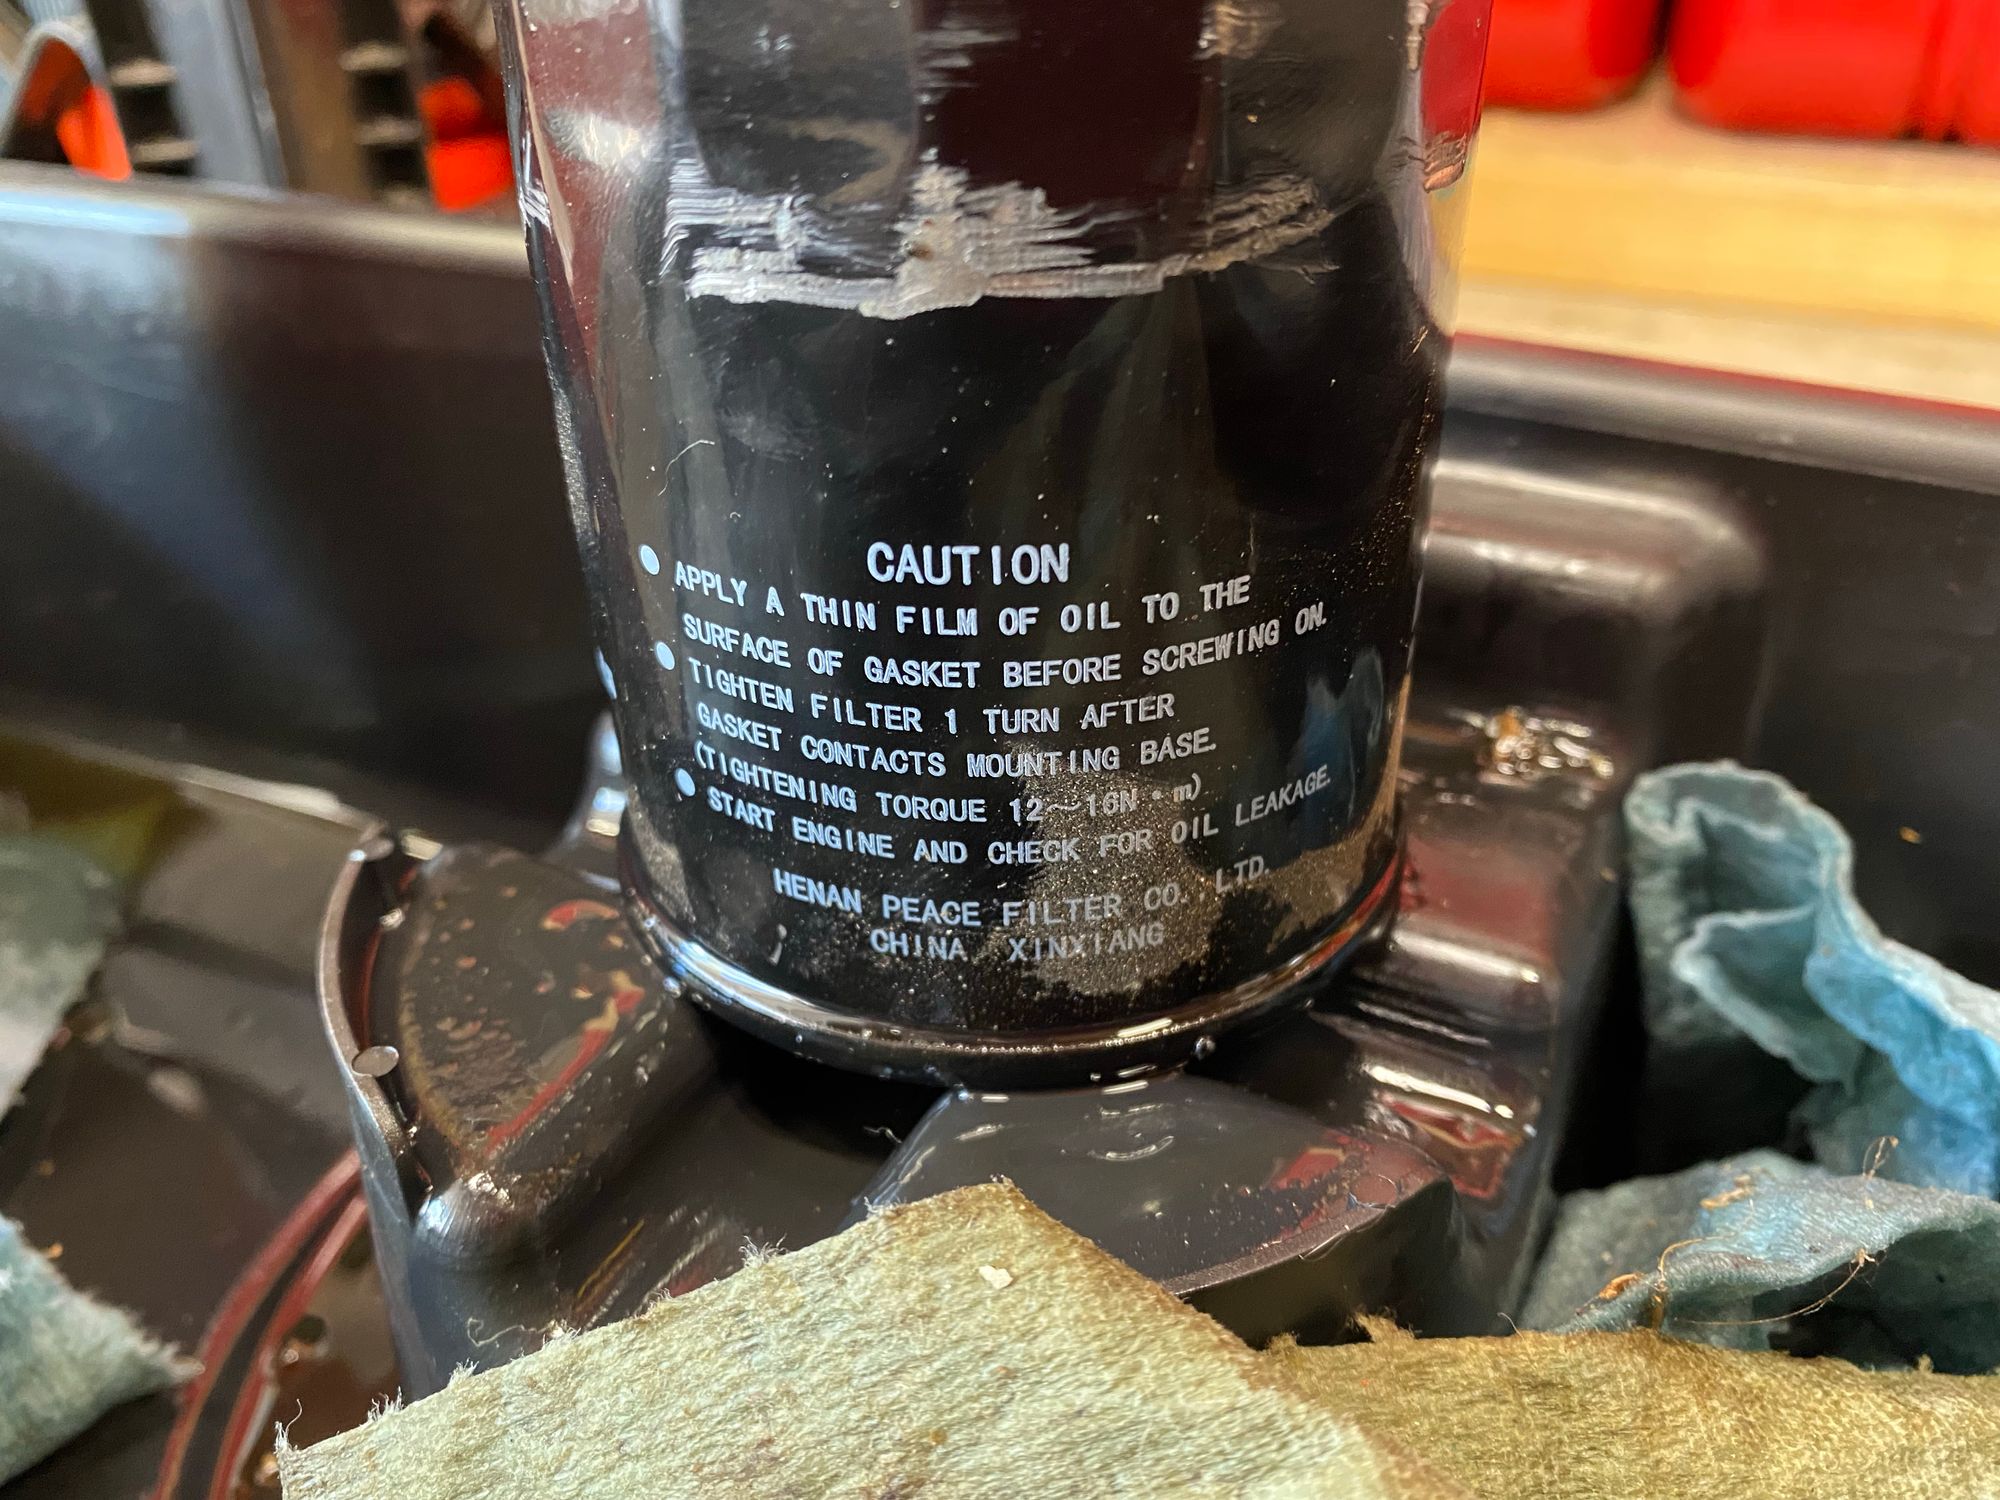
The oil filter that came stock was not Generac branded, but the OEM Mitsubishi filter (Its a Mitsubishi engine). It was very narrow and didn't look high quality, and sure enough its made in China too. It was also on WAY too tight and took a lot of work to remove.
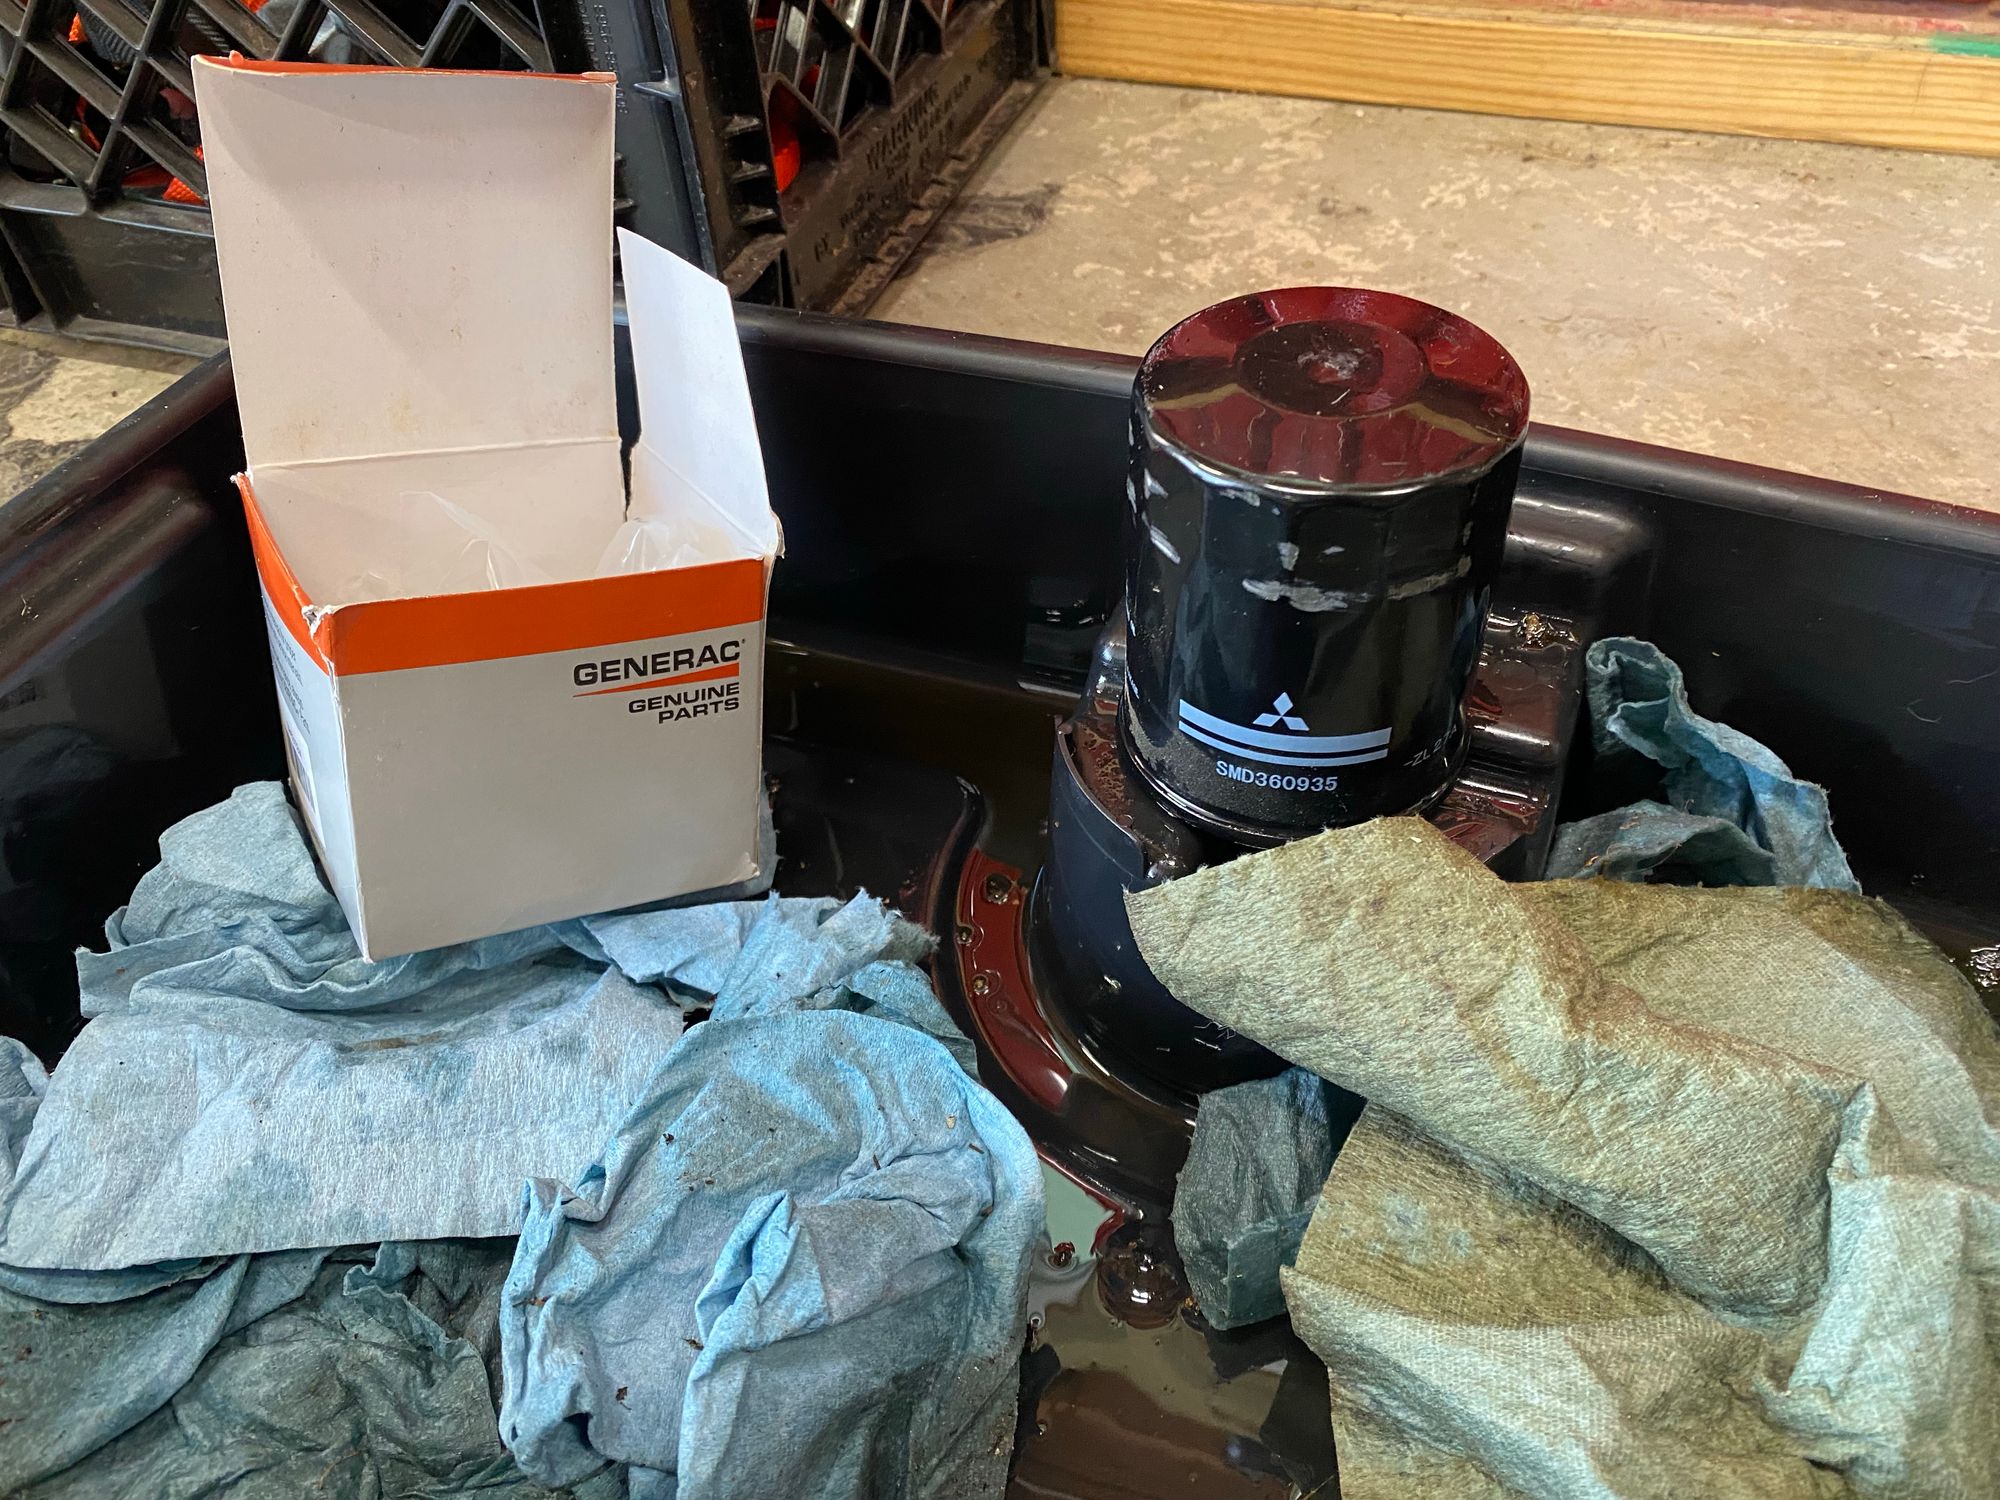
Getting the filter off also made a complete mess. Next time I will make something out of an old bottle to catch the oil and filter, like in this video:
If you watch that video, they also mention it being low on oil and that they will top it up a little so its on the dip stick. In my opinion, they under filled this ladies generator. The book specifically states it should be at the FULL mark.
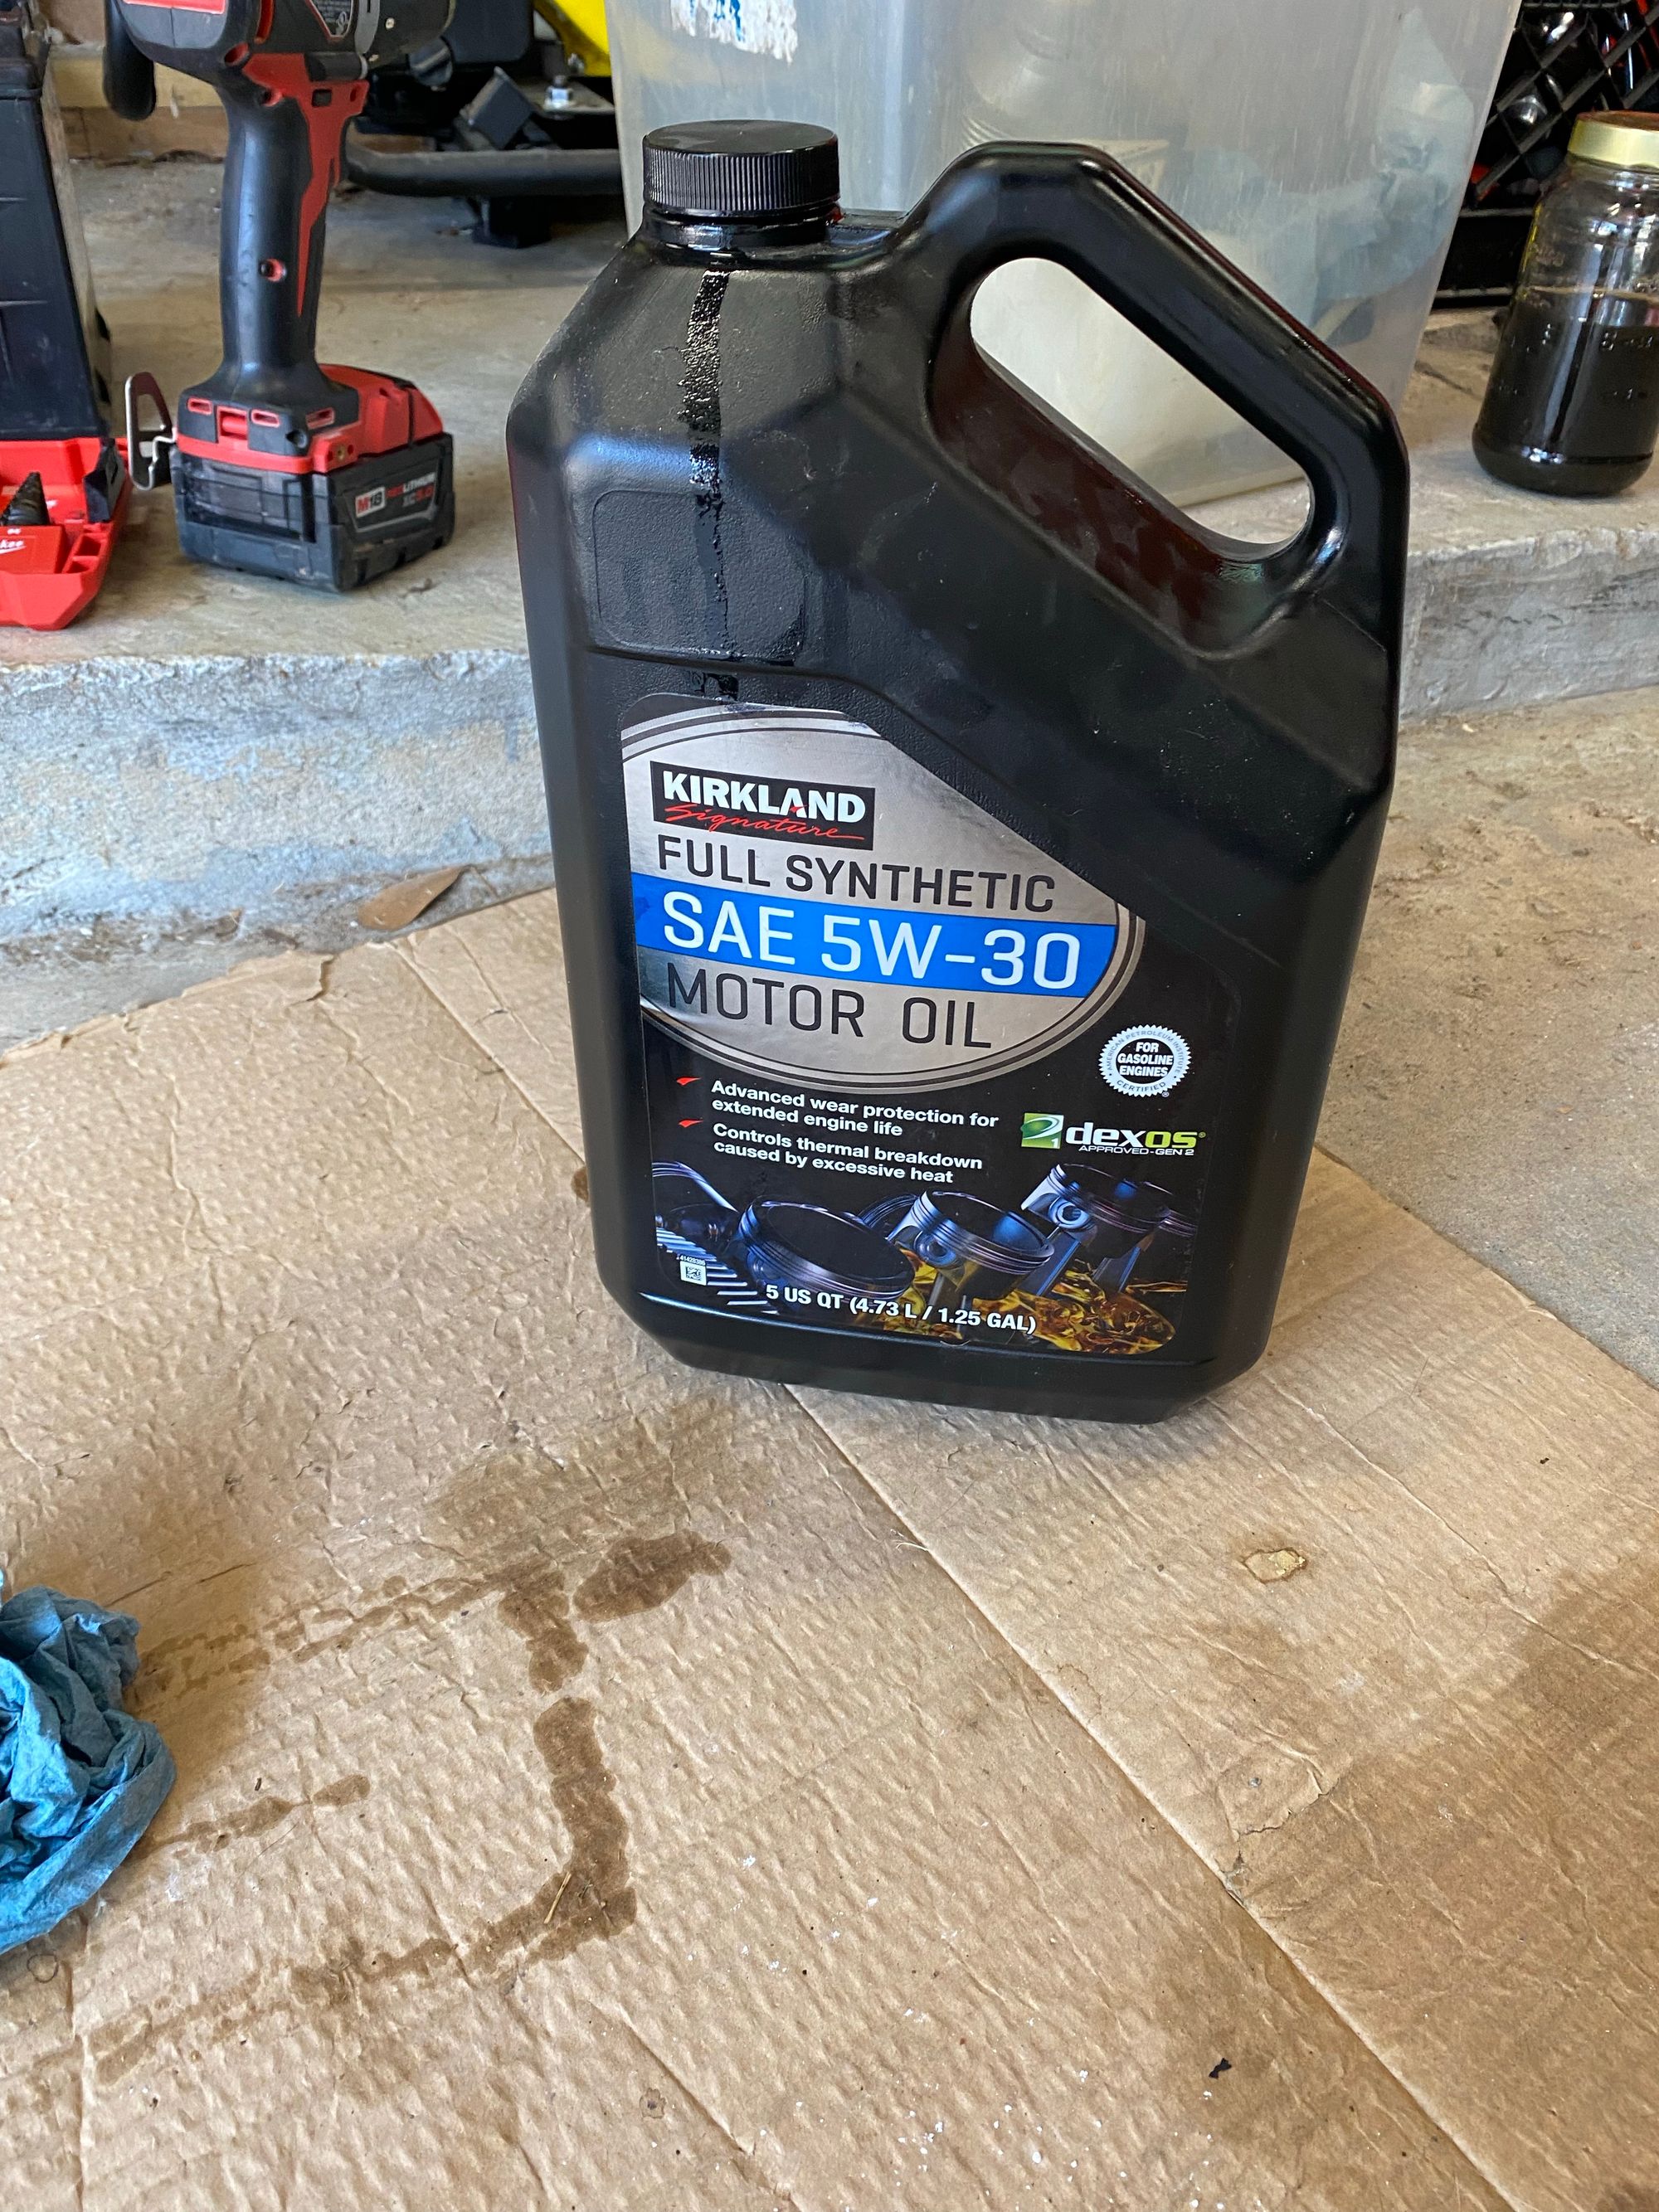
I filled my generator with the Kirkland brand Synthetic oil. Its significantly cheaper than almost every other oil, and it gets good ratings.
If you don't believe me, take Project Farm's word for it.
Note that he show it costing $12.50 for 5 quarts which would be $25 for the box containing 2 x 5 Quart bottles. I just restocked oil from Costco, and the price is significantly higher, its not actually $37 for the 10 quarts. Though, that is still cheaper than Mobil1 and other Synthetic oils. Its also available at Costco where I shop often, so I will still buy it. I checked Amazon, and they raised the price of their oil too. Hopefully when the price of oil goes back down, so will this.
On the topic of oil and filters, I keep a LOT of oil at home, just incase we do get hit by a long outage and I need to change the oil. The oil in the generator needs to be changed every 125 hours. I also like to keep a stock to beat any supply chain issues. This shelf in my garage is stocked all the way back with oil. I use the oldest box first to rotate through it. Luckily the Generac, my portable generator, my lawnmower and both mine and my wife cars all use 5W-30, so I don't need to keep many different kinds on hand.
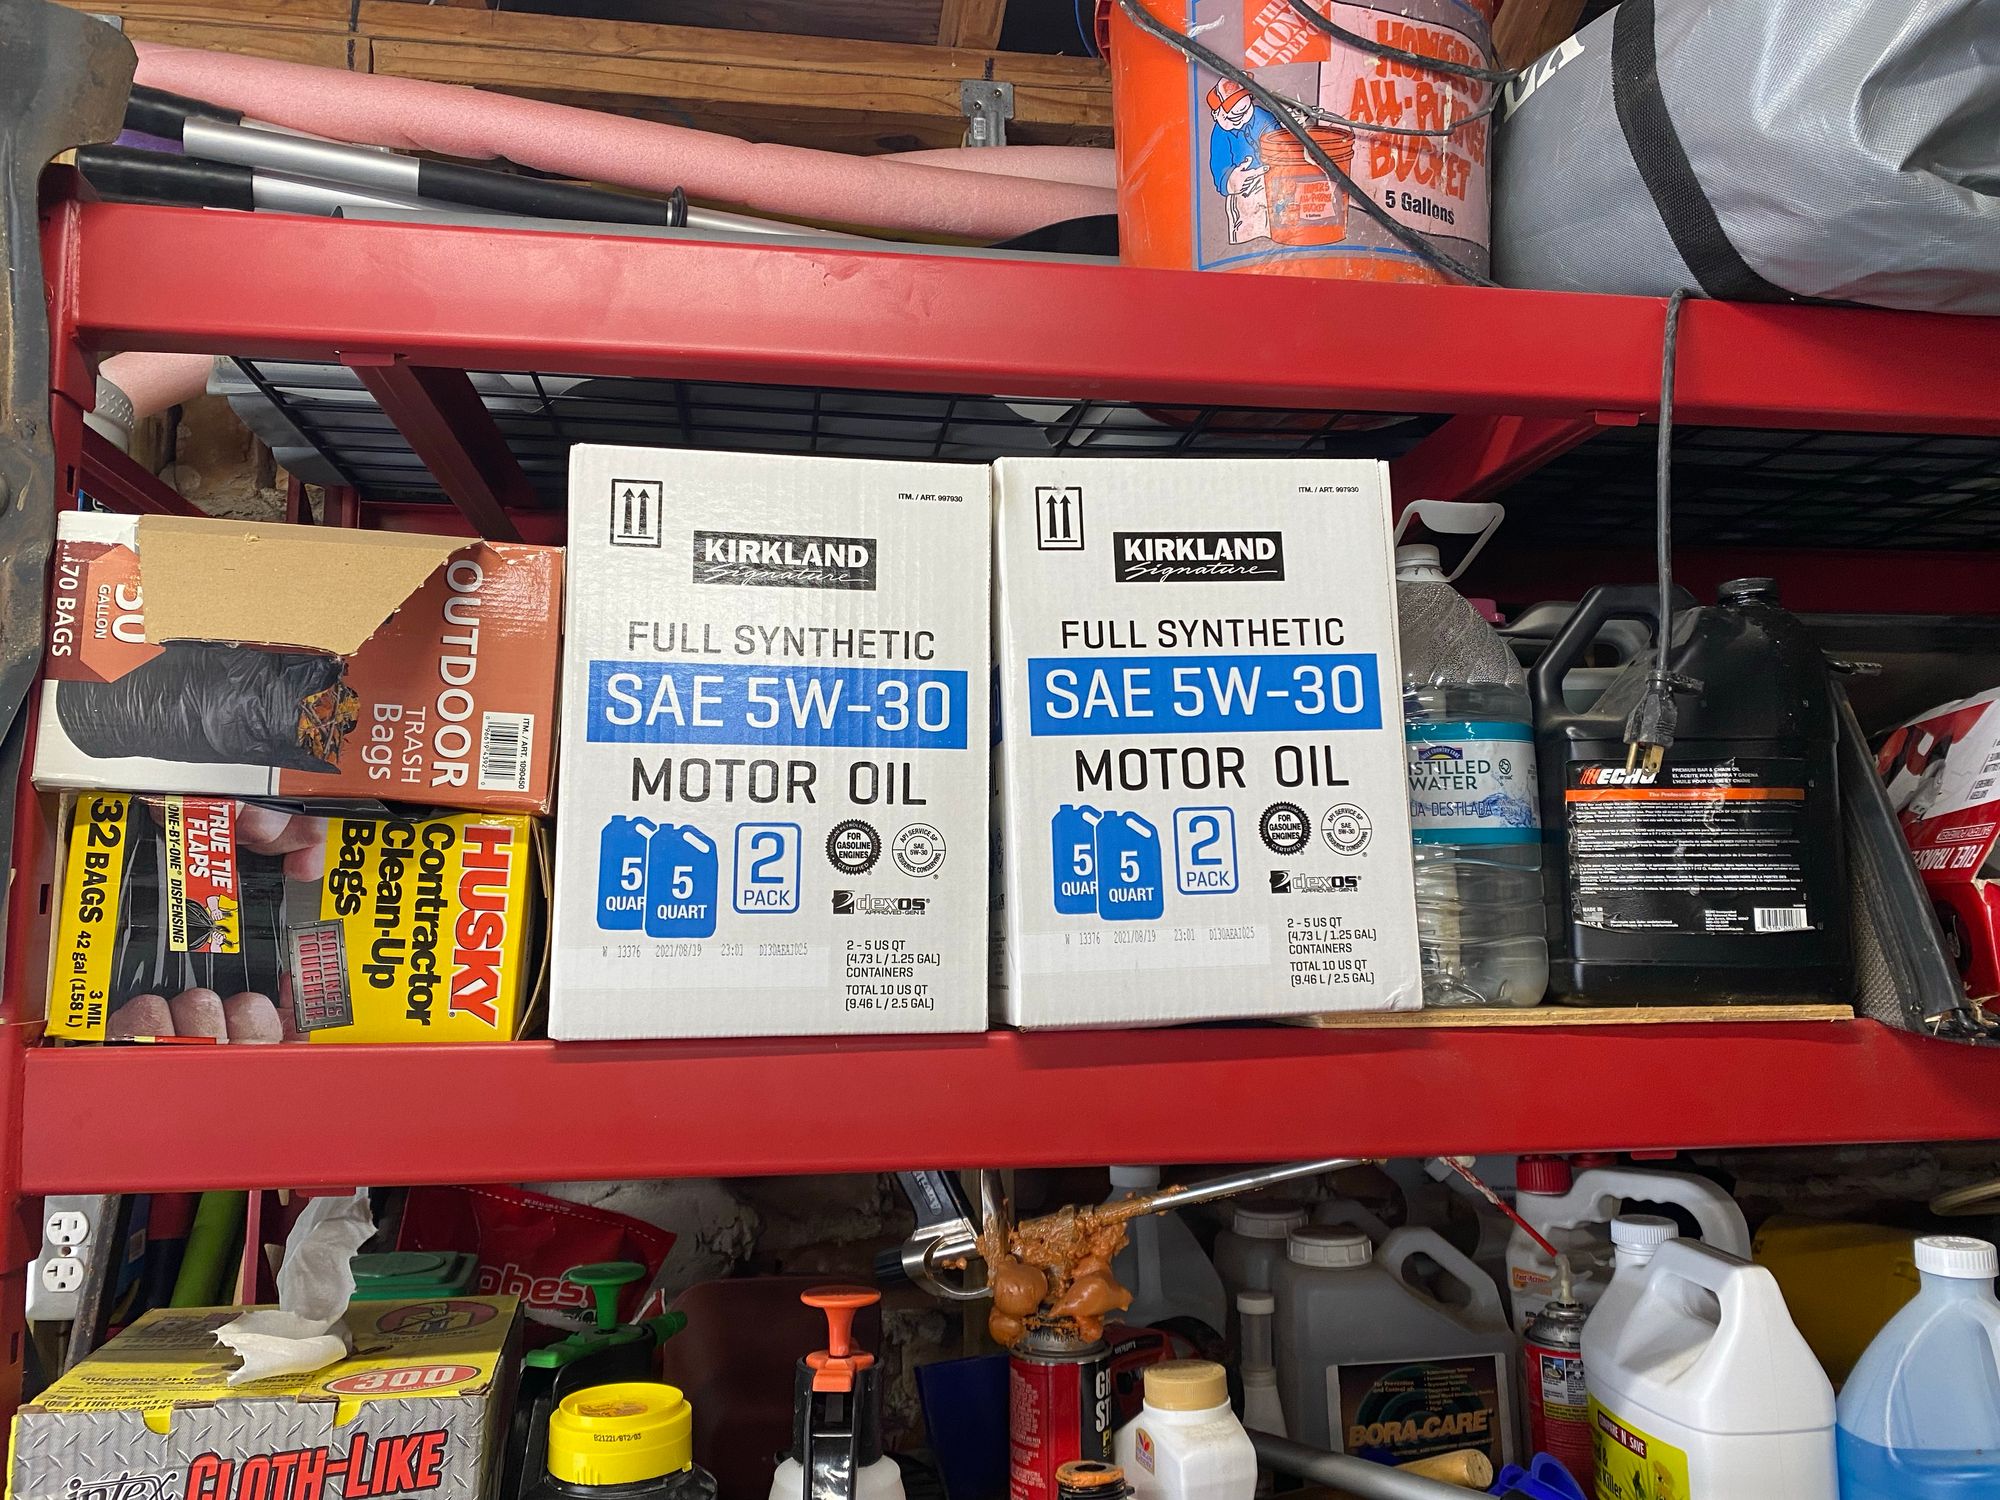
I also keep a bunch of filters and other maintenance items for the generator. I have more filters on the way, but this should keep me running on generator for over 1 month which I assume will never happen. I think most people would run it and not change the oil, possibly causing premature wear in the engine. You will need to buy these filters in the long run anyway, so you may as well stock up now.

You'll notice I have a lot of spark plugs there, that's because the Kit that contains the air filter, oil filer and spark plugs is just $2 more than just the filter alone. For $2 I may as well get spark plugs and an air filter. I am still trying to find a source for cheaper OEM oil filters, as the cost for the kit is $30, which isn't cheap. The increased cost of oil and the high filter cost brings a full service to around $50, which I assume is still much cheaper than getting it done by a "pro".
Finally, I got the oil analyzed, and here is the results. Very glad to see nothing out of the ordinary, and no coolant in the oil. I will continue to send the oil for analysis, just because its interesting. If you want to do it, just go to the website and they will send you a free kit with free return shipping. Then you just pay $30 to have it analyzed.