VM's and Containers I am Running - 2023

My last post detailed all the hardware I am running, so this post will list all the software that I run in VM's and containers. All of the following are virtual machines running on top of ESXi 7.0 U3 on three hosts. All containers are run within Virtual Machines. I will try and link the website or Github page for each of the services so you can deploy them too.
This post might end up being quite long.
Backup01 - Virtual Machine
- OS: Windows Server 2022 Standard
- CPU's: 4 vCPU cores of Intel i7-8700T
- RAM: 10GB
- Disk: 1 x 100GB OS Disk and 1 x 300GB Data Disk - Both Thin Provisioned
- NIC: Single VMware VMXNET 3 on main VLAN (10Gb Backed)
Applications:
- Veeam Backup and Replication with NFR Key

Veeam Backup and Replication handles all of the backups of my VMware VM's to my NAS and external storage. It also replicates VM's to other hosts. Veeam is also used for some Agent backups like my NVR, and my VPS. I would love to find an alternative solution so I don't have to reply on the NFR Licensing, but I think my best bet would be to move off of ESXi entirely as there are not many free solutions to backup ESXi. The concern with the NFR key is that if they stop offering it, or limit the number of instances, I would be stuck with no backups.

Here is a link to the NFR licensing where you can get your own key.

- Veeam Backup for Microsoft 365 with NFR Key
This connects to my Office 365 Business instance that I use for my personal email, and backs up the mailboxes to the 300GB Data disk every 15 mins. Frustratingly it doesn't support SMB shares, which is just crazy. One day I hope to replace this solution too.
- Arq Backup with Arq Premium Subscription
Arq Backup is a very simple file backup application. I pay for their yearly subscription which includes 1TB of file storage (You can get more, but it costs per GB) and a great web based UI to restore files. This would be very handy in the event of a disaster like my house burning down. Many people have good backups, but accessing those backups is hard. Not so with Arq. 1TB of space doesn't sound like a lot, but for just important files that need a cloud backup, its fine. I also have the retention set very low, just 5 days. After all this is not a historical backup, but a cloud backup.
I also use Arq for a historical, long term, local backup to my NAS, of files from my NAS. That may sound backwards, but its not used to restore files in the case of disaster, but in case of file deletion. My snapshots only go back so far, but this backup goes back as long as I've used Arq (4-5 years). It has a very limited backup set, and runs nightly. The backed up data is also replicated and protected in a few different ways. Think of if you deleted a Word document 3 years ago, this is where you'd probably find it.

Here is the cloud hosted Web UI where you can download files directly, you can only get to the backups after putting in your encryption key


- Misc Scheduled Tasks for file list backups
I have a scheduled task here to get a list of filenames in my media folders. I don't backup my 40+TB of media as its too costly, so I backup the file names so I can get the media again if needed. Its a VERY basic PowerShell script which does the job.
cd "\\NAS01\Media\Comedy"
dir | Out-File "\\NAS01\Backup\File Lists\Comedy.txt"
cd "\\NAS01\Media\Documentaries"
dir | Out-File "\\NAS01\Backup\File Lists\Documentaries.txt"
cd "\\NAS01\Media\TV Shows"
dir | Out-File "\\NAS01\Backup\File Lists\TV Shows.txt"
cd "\\NAS01\Media\4K HDR Movies"
dir | Out-File "\\NAS01\Backup\File Lists\4K HDR Movies.txt"
cd "\\NAS01\Media\Movies\SD"
dir | Out-File "\\NAS01\Backup\File Lists\Movies-SD.txt"
cd "\\NAS01\Media\Movies\x264 4K LDR"
dir | Out-File "\\NAS01\Backup\File Lists\Movies-x264 4K LDR.txt"
cd "\\NAS01\Media\Movies\x264 720p"
dir | Out-File "\\NAS01\Backup\File Lists\Movies-x264 720p.txt"
cd "\\NAS01\Media\Movies\x264 1080p"
dir | Out-File "\\NAS01\Backup\File Lists\Movies-x264 1080p.txt"
cd "\\NAS01\Media\Movies\x265 4K LDR"
dir | Out-File "\\NAS01\Backup\File Lists\Movies-x265 4K LDR.txt"
cd "\\NAS01\Media\Movies\x265 1080p"
dir | Out-File "\\NAS01\Backup\File Lists\x265 1080p.txt"
cd "\\NAS01\Media\Movies\x265 4K HDR"
dir | Out-File "\\NAS01\Backup\File Lists\Movies-x265 4K HDR.txt"
Backup02 - Virtual Machine
- OS: Debian 11
- CPU's: 4 vCPU cores of Intel i7-8700T
- RAM: 1GB
- Disk: 30GB Thin Disk
- NIC: Single VMware VMXNET 3 on main VLAN (10Gb Backed)
This VM purely runs Borg Backup. It has SMB mounts to my NAS, and I use it to backup to external drives that live off-site. I connect the external drives to my desktop, and have Backup02 connect to that also via SMB. I fire this VM up monthly to take backups and turn it off again.
Docker01 - Virtual Machine
- OS: Debian 11
- CPU's: 4 vCPU cores of Intel i7-8700T
- RAM: 4GB
- Disk: 100GB Thin Disk
- NIC: Single VMware VMXNET 3 on main VLAN (10Gb Backed)
This VM hosts the majority of my self-hosted applications, all in Docker.
Applications:
- Docker
Docker Engine must be installed first, as all the applications run under Docker
- Portainer CE in Docker
Portainer provides a really nice Web-UI for managing all of your Docker contains and hosts in one single screen. You can also deploy Docker compose stacks right from the UI which is very handy.


Portainer has been getting better every release, but I do worry that I rely on it too much. Its a paid product with a free community edition version, and I hope they end up limiting the features. I would transition to just using the Docker CLI, however when its 11PM at night and I need to quickly update PLEX, its so much easier doing it from a Web UI.
I run Portainer with Docker Run and have it update on a script every time I patch the system. To deploy it is very easy, just decide where you want your Portainer Data to be stored (This inclides all the docker-compose.yml files) and deploy it using the following
docker create -p 9000:9000 --name=Portainer_Docker01 --restart always -v /var/run/docker.sock:/var/run/docker.sock -v /portainer_data:/data portainer/portainer-ce:latest

docker container start Portainer_Docker01
In the above example, it stores the Portainer data in a folder called /portainer_data on the host, and makes the application available on port 9000
Mealie in Docker
Mealie stores all my recipes for food and drinks. You can import recipes from websites directly into Mealie so you have them locally without risk of the site going down, etc. I have this exposed externally via NGINX so I can easily check on ingredients needed while at the store without having to get on the VPN, and I can share recipes with friends


Here is how I have my docker-compose file setup. In the below example it stores local Mealia data in /media/mealie and exposes the application over port 9925
version: "3.1"
services:
  mealie:
    container_name: Mealie
    image: hkotel/mealie:latest
    restart: always
    ports:
      - 9925:80
    environment:
      PUID: 1000
      PGID: 1000
      TZ: America/Chicago

      # Default Recipe Settings
      RECIPE_PUBLIC: 'true'
      RECIPE_SHOW_NUTRITION: 'false'
      RECIPE_SHOW_ASSETS: 'true'
      RECIPE_LANDSCAPE_VIEW: 'true'
      RECIPE_DISABLE_COMMENTS: 'false'
      RECIPE_DISABLE_AMOUNT: 'false'

      # Gunicorn
      # WEB_CONCURRENCY: 2
      # WORKERS_PER_CORE: 0.5
      # MAX_WORKERS: 8
    volumes:
- /media/mealie/:/app/data- Navidrome in Docker
Navidrone is like PLEX but for music. I don't currently use it too much, but I've been working on getting all of my music in FLAC and adding anything I listen to often. More than once now a song I liked has been removed from Apple Music which is frustrating. My eventual goal is to use locally hosted music entirely.


Here is my docker compose config for navidrome. In this example it uses /media/navidrome for the local files, but /media/music for the actual music, which is actually an SMB share. The application is exposed of port 4533
version: "3"
services:
  navidrome:
    container_name: navidrome
    image: deluan/navidrome:latest
    user: 1000:1000 # should be owner of volumes
    ports:
      - "4533:4533"
    restart: unless-stopped
    environment:
      # Optional: put your config options customization here. Examples:
      ND_SCANSCHEDULE: 1h
      ND_LOGLEVEL: info
      ND_SESSIONTIMEOUT: 24h
      ND_BASEURL: ""
    volumes:
      - "/media/navidrome:/data"
      - "/media/music:/music:ro"
To mount a share in Debian just edit the /etc/fstab file and configure your share
Here is a basic example of the line you'd need to add to fstab
//10.0.0.11/Data/Music /media/music cifs rw,credentials=/home/credentials/.smbcreds,uid=1000,gid=1000,file_mode=0660,dir_mode=0770,vers=3.0,iocharset=utf8,x-systemd.automount 0 0- Stirling PDF in Docker
I found this application from a discussion on the selfhosted board on Lemmy, and I can't live without it. It has every single PDF editing feature you could want, and everything happens locally. This is something I think everyone should have hosted!

Here is my docker compose config. This will expose the application at port 8082, and it looks for OCR training data in the folder /media/stirling/trainingdata
version: '3.3'
services:
  stirling-pdf:
    container_name: stirling-pdf
    image: frooodle/s-pdf:latest
    ports:
      - '8082:8080'
    volumes:
      - /media/stirling/trainingdata/:/usr/share/tesseract-ocr/4.00/tessdata #Required for extra OCR languages
#      - /location/of/extraConfigs:/configs
#      - /location/of/customFiles:/customFiles/
    environment:
      APP_LOCALE: en_US
      APP_HOME_NAME: PDF Editor
      APP_HOME_DESCRIPTION: ""
      APP_NAVBAR_NAME: Stirling PDF
      APP_ROOT_PATH: /
#      ALLOW_GOOGLE_VISIBILITY: true
The OCR Training data is located here (As outline in the Github instructions)
- Kiwix Serve in Docker
Kiwix Serve provides a Web UI for locally reading Kiwix ZIM files, such as the entirety of Wikipedia, all offline with no internet. This is extremely handy if you ever think you may be without internet for a period of time, like if a hurricane hits your city, or even if you just have slow internet, or a government that censors the internet.


Here is a full list of the ZIM files I thought it would be handy to keep around, which totals around 450GB
100r-off-the-grid_en_2023-06.zim
3dprinting.stackexchange.com_en_all_2023-07.zim
apple.stackexchange.com_en_all_2023-05.zim
appropedia_en_all_maxi_2021-03.zim
arduino.stackexchange.com_en_all_2023-05.zim
askubuntu.com_en_all_2023-05.zim
aviation.stackexchange.com_en_all_2023-05.zim
based.cooking_en_all_2023-08.zim
bicycles.stackexchange.com_en_all_2023-05.zim
boardgames.stackexchange.com_en_all_2023-05.zim
cheatography.com_en_all_2022-03.zim
cooking.stackexchange.com_en_all_2023-05.zim
courses.lumenlearning.com_en_all_2021-03.zim
crafts.stackexchange.com_en_all_2023-05.zim
crashcourse_en_all_2023-06.zim
diy.stackexchange.com_en_all_2023-03.zim
earthscience.stackexchange.com_en_all_2023-05.zim
edu.gcfglobal.org_en_all_2023-08.zim
electronics.stackexchange.com_en_all_2023-05.zim
fitness.stackexchange.com_en_all_2023-05.zim
gaming.stackexchange.com_en_all_2023-05.zim
gardening.stackexchange.com_en_all_2023-05.zim
gutenberg_en_all_2023-08.zim
ham.stackexchange.com_en_all_2023-05.zim
health.stackexchange.com_en_all_2023-05.zim
history.stackexchange.com_en_all_2023-05.zim
ifixit_en_all_2023-07.zim
interpersonal.stackexchange.com_en_all_2023-05.zim
iot.stackexchange.com_en_all_2023-05.zim
law.stackexchange.com_en_all_2023-05.zim
lifehacks.stackexchange.com_en_all_2023-05.zim
lowtechmagazine.com_en_all_2023-08.zim
mechanics.stackexchange.com_en_all_2023-05.zim
movies.stackexchange.com_en_all_2023-05.zim
networkengineering.stackexchange.com_en_all_2023-05.zim
outdoors.stackexchange.com_en_all_2023-05.zim
pets.stackexchange.com_en_all_2023-05.zim
phet_en_all_2023-04.zim
photo.stackexchange.com_en_all_2023-05.zim
politics.stackexchange.com_en_all_2023-05.zim
productivity.stackexchange.com_en_all_2017-10.zim
raspberrypi.stackexchange.com_en_all_2023-05.zim
rationalwiki_en_all_maxi_2021-03.zim
retrocomputing.stackexchange.com_en_all_2023-05.zim
security.stackexchange.com_en_all_2023-05.zim
serverfault.com_en_all_2023-05.zim
space.stackexchange.com_en_all_2023-05.zim
stackoverflow.com_en_all_2023-05.zim
superuser.com_en_all_2023-05.zim
sustainability.stackexchange.com_en_all_2023-05.zim
teded_en_all_2023-07.zim
theworldfactbook_en_all_2023-05.zim
travel.stackexchange.com_en_all_2023-05.zim
unix.stackexchange.com_en_all_2023-05.zim
urban-prepper_en_all_2023-06.zim
vikidia_en_all_nopic_2023-08.zim
wikem_en_all_maxi_2021-02.zim
wikibooks_en_all_maxi_2021-03.zim
wikihow_en_maxi_2023-03.zim
wikinews_en_all_maxi_2023-08.zim
wikipedia_en_all_maxi_2023-08.zim
wikiquote_en_all_maxi_2023-07.zim
wikispecies_en_all_maxi_2023-08.zim
wikiversity_en_all_maxi_2021-03.zim
wikivoyage_en_all_maxi_2023-07.zim
wiktionary_en_all_maxi_2023-07.zim
woodworking.stackexchange.com_en_all_2023-05.zim
workplace.stackexchange.com_en_all_2023-05.zim
www.ready.gov_en_2023-06.zim
www.shtfblog.com_4d9ce8d7.zim
zimgit-post-disaster_en_2023-06.zim
Here is my docker compose config. In this example it makes the web interface available at port 8888 and looks for all ZIM files at /media/kiwix
version: '3'
services:
  kiwix:
    container_name: kiwix-serve
    image: ghcr.io/kiwix/kiwix-serve
    command: '*.zim'
    ports:
      - '8888:8080'
    volumes:
      - "/media/kiwix:/data"
A handy tool to go along with Kiwix is this update script, which has been invaluable and saved hours of time looking for updated ZIM files


- Sonarr in Docker
Sonarr indexes your locally saved TV Shows, and searches and automatically downloads new episodes in the best quality, which goes well with PLEX. If you configure everything right, you don't have to lift a finger to get new TV Shows
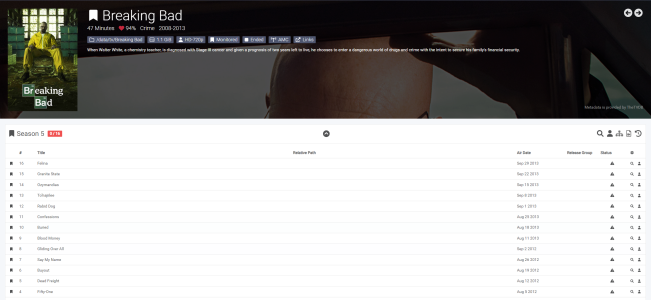
Here is my docker compose config. It saves the local config at /media/sonarr-config and looks for TV shows at /media/PLEX/TV Shows which is an SMB share. It exposes the application at port 8989
---
version: "2.1"
services:
  sonarr:
    image: lscr.io/linuxserver/sonarr:latest
    container_name: sonarr
    environment:
      - PUID=1000
      - PGID=1000
      - TZ=America/Chicago
    volumes:
      - /media/sonarr-config:/config
      - /media/PLEX/TV Shows:/media/Sonarr/TV Shows
    ports:
      - 8989:8989
restart: unless-stopped- Microbin in Docker
Microbin is an interesting application that is like a locally hosted version of pastebin

I deploy it a while ago with the hopes to expose it to the internet and be able to share snippits of code, like on here with docker compose configs. The problem is that there is very limited control over functions available, as there is no authentication. This means any random person could upload files, which I don't like. I'm keeping it around incase they add new features

Here is my docker compose config which stores the local config in /media/microbin and exposes the application at port 8083
services:
  paste:
    image: danielszabo99/microbin
    container_name: microbin
    restart: unless-stopped
    ports:
     - "8083:8080"
    volumes:
- /media/microbin:/app/pasta_data- Nextcloud in Docker
Nextcloud is like a self hosted Dropbox, or something similar. I use it for all my file sharing needs and have it available under multiple domains.
If you want to deploy it, the Nextcloud docs are your best bet, but I'll share some of my config as it took some work to get a perfectly working stable setup with no errors in the administration page
The compose file. Note the extra container for cron! This is needed to get cron working properly. At least its the best way I found.
version: '2'

services:
  db:
    container_name: nextcloud-db
    image: mariadb:10.5
    restart: unless-stopped
    command: --transaction-isolation=READ-COMMITTED --binlog-format=ROW
    volumes:
      - /home/nextcloud-db:/var/lib/mysql
    environment:
      - MYSQL_ROOT_PASSWORD="%%%%%%%%%%%%%%%%%%%%%%%%"
      - MYSQL_PASSWORD="%%%%%%%%%%%%%%%%%%%%%%%%%%%%%"
      - MYSQL_DATABASE=nextcloud
      - MYSQL_USER=nextcloud

  app:
    container_name: nextcloud-app
    image: nextcloud:stable
    restart: unless-stopped
    ports:
      - 8081:80
    links:
      - db
    volumes:
      - /home/nextcloud-docroot:/var/www/html
      - /home/nextcloud-data:/var/www/html/data
    environment:
      - MYSQL_PASSWORD="%%%%%%%%%%%%%%%%%%%%%%%%%%"
      - MYSQL_DATABASE=nextcloud
      - MYSQL_USER=nextcloud
      - MYSQL_HOST=db
  cron:
    image: nextcloud:stable
    container_name: nextcloud-cron
    restart: unless-stopped
    volumes:
      - /home/nextcloud-docroot:/var/www/html
      - /home/nextcloud-data:/var/www/html/data

    entrypoint: /cron.sh
    depends_on:
      - db
I actually have the data folder mounted seperately as that is stored on my NAS, just make sure the fstab line has www-data having access to it, not the usual uid1000
//10.0.0.11/Nextcloud /home/nextcloud-data cifs rw,credentials=/home/credentials/.smbnxt,uid=33,gid=33,file_mode=0660,dir_mode=0770,vers=3.0,iocharset=utf8,x-systemd.automount 0 0You also need some additional config in your reverse proxy, in my case nginx to get rid of some caldev errors

Here is that text
location /.well-known/carddav {
    return 301 $scheme://$host/remote.php/dav;}

location /.well-known/caldav {
    return 301 $scheme://$host/remote.php/dav;}
And here is a sanitized copy of my config.php so you can compare
<?php
$CONFIG = array (
  'htaccess.RewriteBase' => '/',
  'memcache.local' => '\\OC\\Memcache\\APCu',
  'apps_paths' =>
  array (
    0 =>
    array (
      'path' => '/var/www/html/apps',
      'url' => '/apps',
      'writable' => false,
    ),
    1 =>
    array (
      'path' => '/var/www/html/custom_apps',
      'url' => '/custom_apps',
      'writable' => true,
    ),
  ),
  'instanceid' => '$$$$$$$$$$$$$$$$$$$$$$$$$$$$$$$$$',
  'passwordsalt' => '$$$$$$$$$$$$$$$$$$$$$$$$$$$$$$$$$$$$$$$$',
  'secret' => '$$$$$$$$$$$$$$$$$$$$$$$$$$$$$$$$$$$',
  'trusted_domains' =>
  array (
    0 => '$$$$$$$$$$$$$$$$$$$$$$$$',
    1 => '$$$$$.$$$$$$$$$$$$$$$$$$$$$$$$',
    2 => 'files.$$$$$$$$$$$$$$$$$$$$$$$$$',
    3 => '$$$.$$$$$$$$$$$$$$$$$$$$$$$$',
  ),
  'datadirectory' => '/var/www/html/data',
  'filesystem_check_changes' => 1,
  'dbtype' => 'mysql',
  'version' => '26.0.5.1',
  'overwrite.cli.url' => 'https://files.$$$$$$$$$$$$$$$$$$$$$',
  'overwriteprotocol' => 'https',
  'dbname' => 'nextcloud',
  'dbhost' => 'db',
  'dbport' => '',
  'dbtableprefix' => 'oc_',
  'mysql.utf8mb4' => true,
  'dbuser' => 'nextcloud',
  'dbpassword' => '"$$$$$$$$$$$$$$$$$$$$$$$$$$$$$$$"',
  'installed' => true,
  'mail_smtpmode' => 'smtp',
  'mail_smtpsecure' => 'tls',
  'mail_sendmailmode' => 'smtp',
  'mail_smtpauth' => 1,
  'mail_smtpport' => '$$$',
  'mail_smtphost' => 'smtp.$$$$$$$$$$$$$$$$$$$$$$$$$$$$$$$$$$$$',
  'mail_smtpauthtype' => 'LOGIN',
  'mail_from_address' => 'nextcloud',
  'mail_domain' => '$$$$$$$$$$$$$$',
  'mail_smtpname' => '$$$$$$$$$$$$$$$$',
  'mail_smtppassword' => '$$$$$$$$$$$$$$$$$$$$$$$$$$',
  'loglevel' => 2,
  'maintenance' => false,
  'default_phone_region' => 'us',
);
Once you've got that working, its a good idea to use the NextCloud security Scanner


- PLEX in Docker
PLEX is pretty self explanatory, I think everyone knows what PLEX is at this point. If not, read the page!

Here is the config for docker compose. This may look a little weird, and it could be because I converted it from a long running "Docker Run" container to a compose file using docker autocompose. But, it works for me.
version: "3"
services:
  PLEX:
    container_name: PLEX
    entrypoint:
      - /init
    environment:
      - ADVERTISE_IP=http://########:32400/
      - ALLOWED_NETWORKS=172.17.0.0/16,10.0.0.0/8
      - CHANGE_CONFIG_DIR_OWNERSHIP=true
      - HOME=/config
      - LANG=C.UTF-8
      - LC_ALL=C.UTF-8
      - PATH=/usr/local/sbin:/usr/local/bin:/usr/sbin:/usr/bin:/sbin:/bin
      - PLEX_GID=1000
      - PLEX_UID=1000
      - TERM=xterm
      - TZ=America/Chicago
    hostname: PLEX01
    image: plexinc/pms-docker:plexpass
    ipc: shareable
    logging:
      driver: json-file
      options: {}
    ports:
      - 1900:1900/udp
      - 3005:3005/tcp
      - 32400:32400/tcp
      - 32410:32410/udp
      - 32412:32412/udp
      - 32413:32413/udp
      - 32414:32414/udp
      - 32469:32469/tcp
      - 8324:8324/tcp
    restart: unless-stopped
    volumes:
      - /media/music:/music
      - /media/plex-transcode:/transcode
      - /media/plex-config:/config
      - /media/PLEX:/media/PLEX
networks: {}- SFTP In Docker
I use this SFTP Docker container to provide externally accessible SFTP access with SSH Keys from my phone to upload photos back to my NAS, without needing to connect to the VPN
Here is my compose config with some things removed for privacy. You'll have to generate your SSH keys and map them to the container, and make some config files.
services:
  sftp:
    container_name: "sftp"

    environment:
      - "PATH=/usr/local/sbin:/usr/local/bin:/usr/sbin:/usr/bin:/sbin:/bin"
      - "TZ=America/Chicago"

    image: "atmoz/sftp:latest"
    ports:
      - "8000:22/tcp"

    restart: "unless-stopped"
    volumes:
      - "/home/sftp-server/host-keys/ssh_host_ed25519_key:/etc/ssh/ssh_host_ed25519_key:ro"
      - "/home/sftp-server/host-keys/ssh_host_rsa_key:/etc/ssh/ssh_host_rsa_key:ro"
      - "/home/sftp-server/keys/camupload/authorized_keys:/home/camupload/.ssh/authorized_keys:ro"
      - "/home/sftp-server/camupload:/home/camupload/upload"
      - "/home/sftp-server/sshd_config:/etc/ssh/sshd_config:ro"
- "/home/sftp-server/users.conf:/etc/sftp/users.conf:ro"- Netbox in Docker
Netbox is a fantastic way to document your network. Getting everything into Netbox lead me to many things I needed to fix, like devices with non-static addresses etc.
Here are some screenshots, of course with quite a lot blurred!


To deploy it, you want to use their own documentation as there is a scrip to run
But I did make some changes, in the docker-compose.override.yml I added names for the containers to make things neater, and I changed the port to 8002, as 8080 was in use on my docker host. So this is what it looks like
version: '3.4'
services:
  netbox:
    container_name: netbox-app
    ports:
      - 8002:8080
  netbox-worker:
    container_name: netbox-worker
  netbox-housekeeping:
    container_name: netbox-housekeeping
  postgres:
    container_name: netbox-postgres
  redis:
    container_name: netbox-redis
  redis-cache:
    container_name: netbox-redis-cache
And to update it, follow their direction also
That's it for Docker01, until I add more services...
Docker02 - Virtual Machine
- OS: Debian 11
- CPU's: 4 vCPU cores of Intel i7-8700T
- RAM: 1GB
- Disk: 30GB Thin Disk
- NIC: Single VMware VMXNET 3 on main VLAN (10Gb Backed)
This VM is connected to the internet via Mullvad VPN. I have firewall rules to make sure it only uses the VPN for outbound internet.
You can read more about routing over Mullvad VPN here

Applications:
- Docker
- qBitTorrent in Docker
I used qBitTorrent for all my torrents. I used to use Deluge, but I found qBitTorrent to be much faster and have fewer problems.
It is very simple to deploy, here is my compose file. The downloads folder is an SMB share.
---
version: "2.1"
services:
  qbittorrent:
    image: lscr.io/linuxserver/qbittorrent:latest
    container_name: qbittorrent
    environment:
      - PUID=1000
      - PGID=1000
      - TZ=America/Chicag
      - WEBUI_PORT=8080
    volumes:
      - /media/downloads:/downloads
      - /media/qbit-config:/config
    ports:
      - 8080:8080
      - 6881:6881
      - 6881:6881/udp
restart: unless-stopped- Prowlarr in Docker
Prowlarr is something I am still working on setting up fully, it it aims to fix a problem with Sonarr, in that most of the trackers are offline. Prowlarr integrates with Sonarr and adds many more trackers.
- Portainer Agent in Docker
Each Docker host that doesn't have the main Portainer container on it needs an agent to connect back to Portainer. Its very simply to deploy
docker pull portainer/agent:latest
docker run -d -p 9001:9001 --name portainer_agent --restart=always -v /var/run/docker.sock:/var/run/docker.sock -v /var/lib/docker/volumes:/var/lib/docker/volumes portainer/agent:latest
docker start portainer_agent
Docker03 - Virtual Machine
- OS: Debian 12
- CPU's: 4 vCPU cores of AMD Ryzen 7 4800U
- RAM: 2GB
- Disk: 50GB Thin Disk
- NIC: Single VMware VMXNET 3 on main VLAN (1Gb Backed)
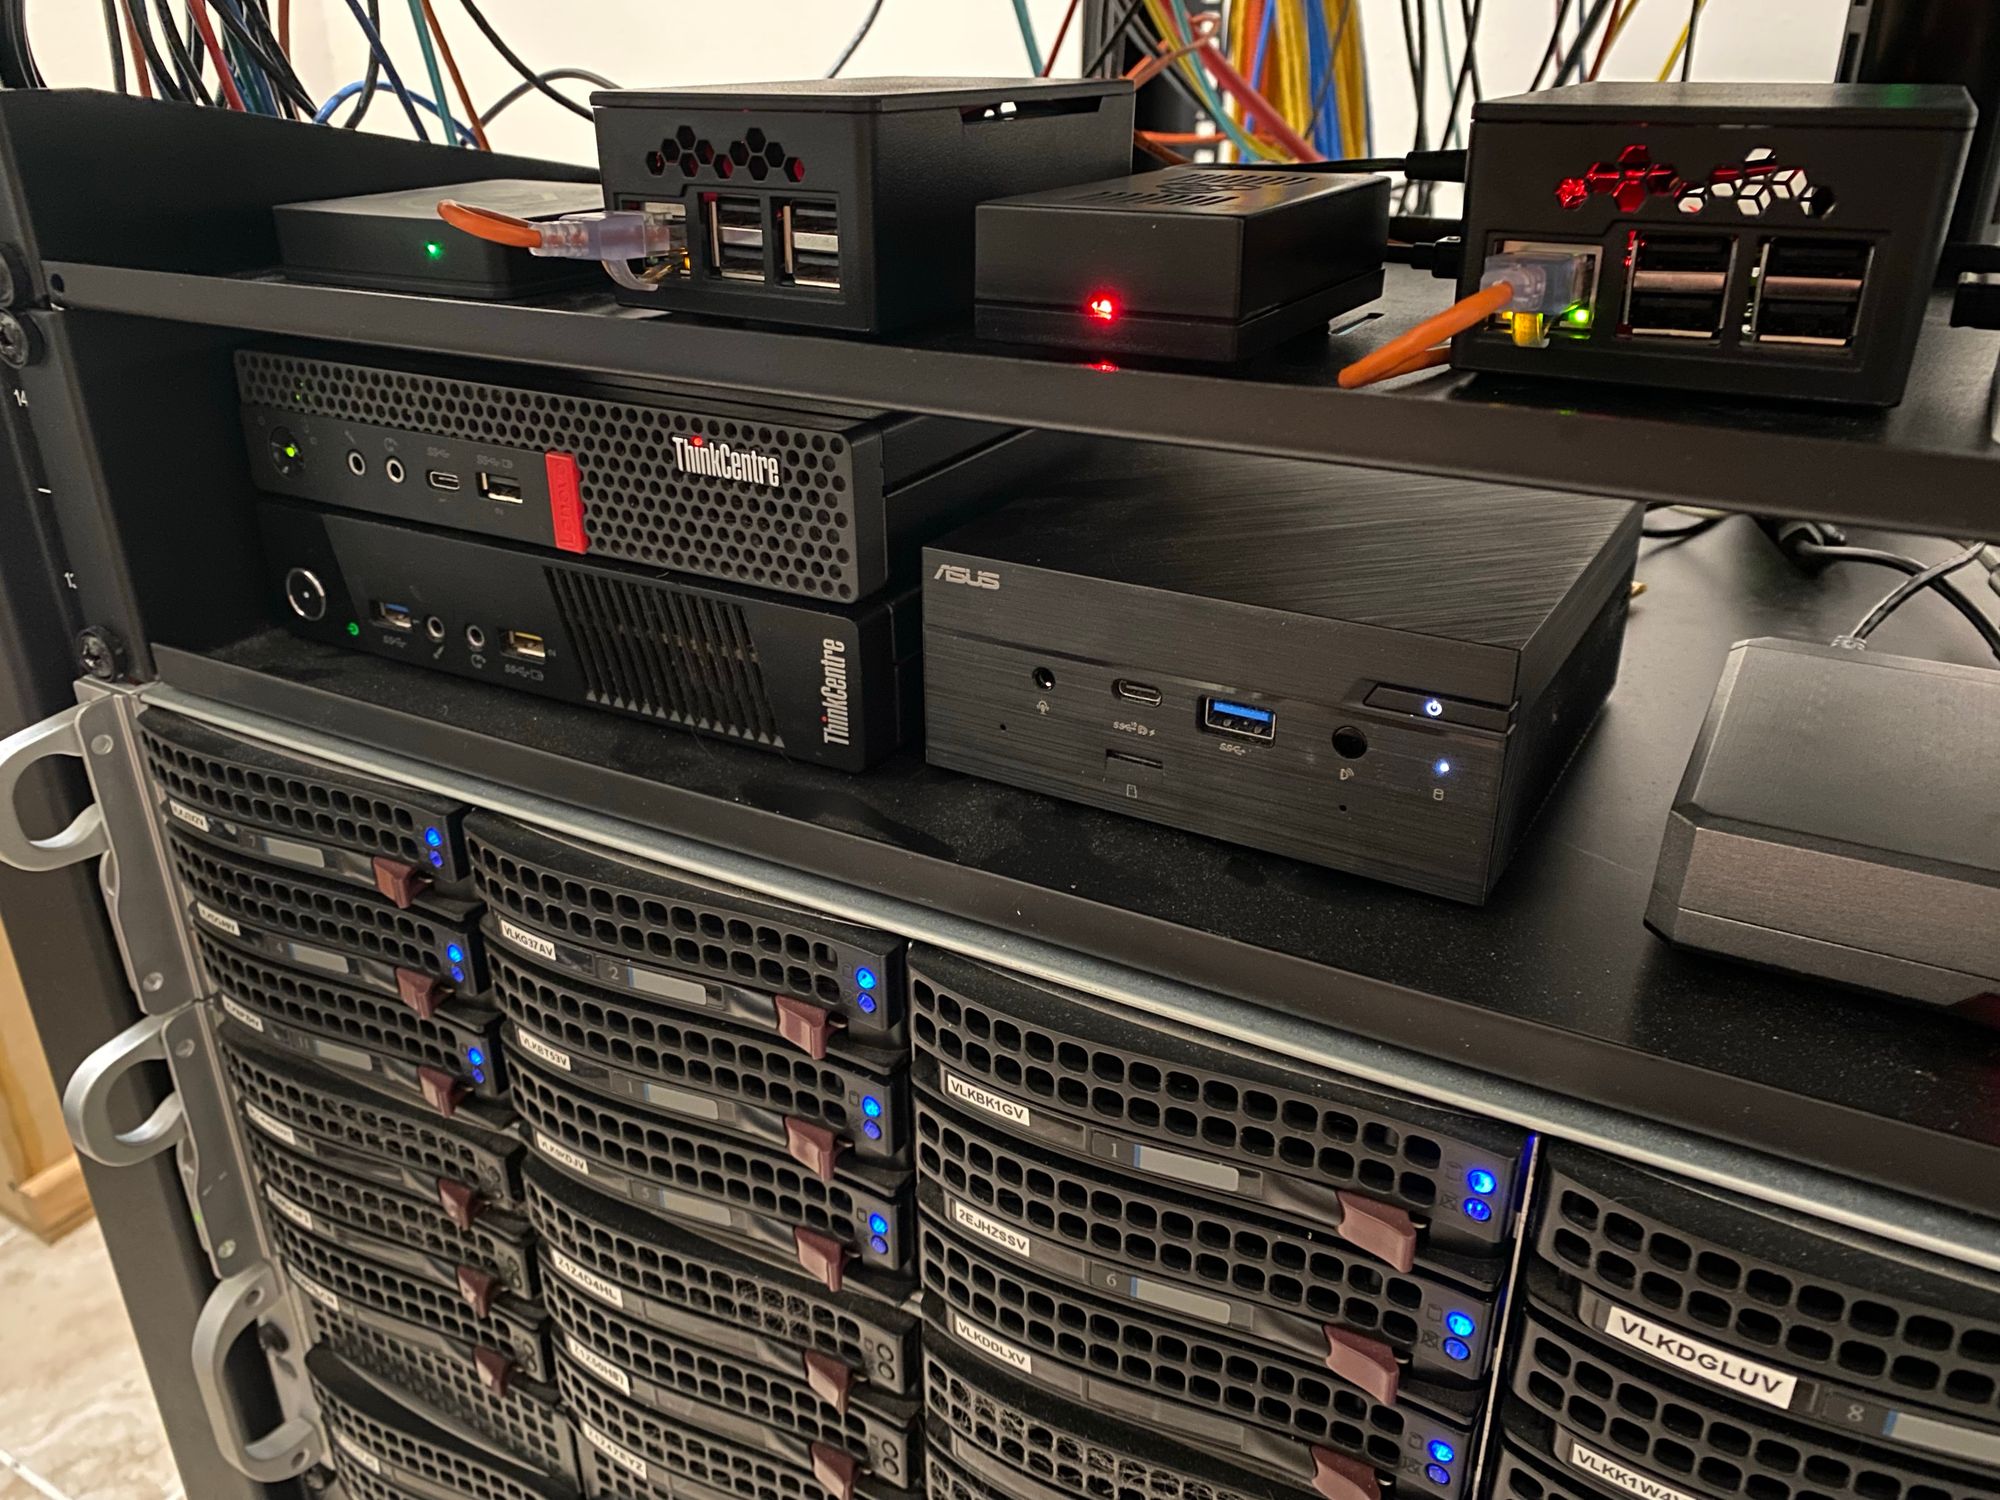
This is a new VM I deployed in my Web VLAN, and it hosts this very blog. It runs Docker, and a Ghost container.
Applications:
- Docker
- Ghost in Docker
Ghost is the software that runs this website
Here is how I have deployed it
version: "3.1"
services:
  blog-ghost:
    container_name: blog-ghost
    environment:
      - admin__url=https://blog.whatever.com
      - url=https://blog.whatever.com
      - database__client=mysql
      - database__connection__host=ghost-db
      - database__connection__user=ghost
      - database__connection__password=##########################3
      - database__connection__database=ghost
      - NODE_ENV=production
    image: ghost:latest
    ipc: shareable
    logging:
      driver: json-file
      options: {}
    ports:
      - 3001:2368/tcp
    restart: unless-stopped
    volumes:
      - /media/ghost:/var/lib/ghost/content
    working_dir: /var/lib/ghost
    depends_on:
      - ghost-db
  ghost-db:
    image: mysql:8.0
    restart: unless-stopped
    container_name: ghost-db
    cap_add:
      - SYS_NICE
    environment:
      - MYSQL_ROOT_PASSWORD=######################3
      - MYSQL_DATABASE=ghost
      - MYSQL_USER=ghost
      - MYSQL_PASSWORD=##################################
      - MYSQL_ROOT_HOST=172.*.*.* ## Ensures the Docker network has access
    volumes:
    - /media/ghost-db:/var/lib/mysql
networks: {}
I got the above from this great guide on upgrading to MySQL

- Portainer Agent in Docker
Datamon - Virtual Machine
- OS: Debian 11
- CPU's: 4 vCPU cores of AMD Ryzen 7 4800U
- RAM: 2GB
- Disk: 60GB Thin Disk
- NIC: Single VMware VMXNET 3 on main VLAN (1Gb Backed)
I separated these containers onto their own host, as I wasn't sure the eventual storage requirements of all the data that ends up in influxdb.
Applications:
- Docker
- Grafana in Docker
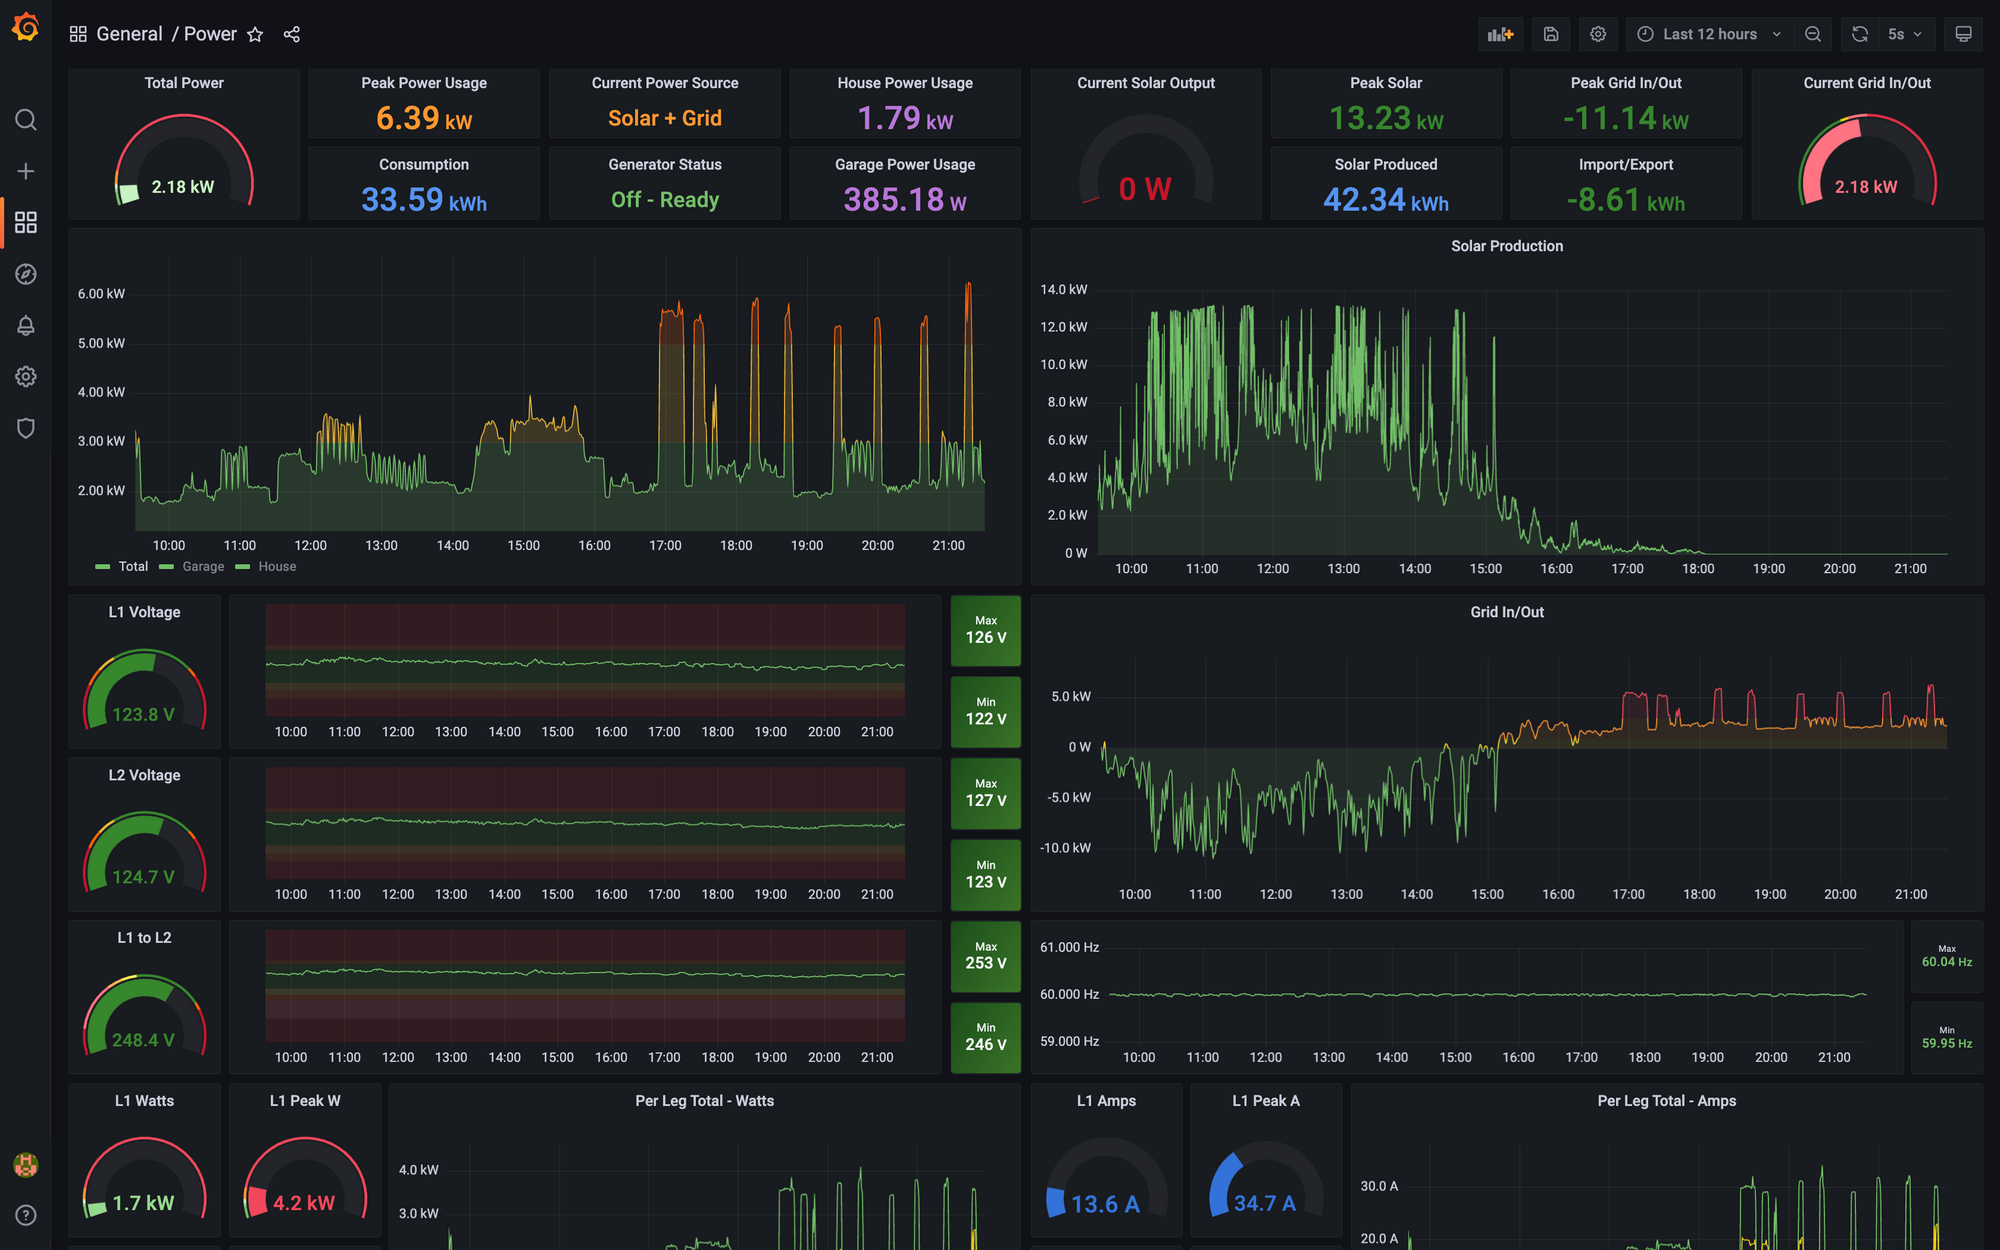
Grafana gets its data from InfluxDB (in my case) and makes GREAT looking graphs out of it

Right now I am only doing power monitoring, however I plan to do much more in the future
The deployment is fairly easy
grafana:
    image: grafana/grafana:latest
    container_name: grafana
    restart: unless-stopped
    ports:
      - 3000:3000
    user: "1000"
    volumes:
      - /media/grafana:/var/lib/grafana
    environment:
      - GF_USERS_ALLOW_SIGN_UP=false
- GF_PANELS_DISABLE_SANITIZE_HTML=true- Influxdb2 in Docker
InfluxDB is where the data actually lives for Grafana. I currnetly have a few different things loading data into InfluxDB


Again, the deployment is quite easy
version: '3.3'
services:
    influxdb:
        container_name: influxdb2
        ports:
            - '8086:8086'
        volumes:
            - /media/influxdb:/root/.influxdb2
            - /media/influxdb2:/var/lib/influxdb2
        image: 'influxdb:2.0'
user: "1000"- Portainer Agent in Docker (We already covered this)
More details on the power monitoring here
Home-Assistant - Virtual Machine
- OS: Home Assistant OS
- CPU's: 2 vCPU cores of AMD Ryzen 7 4800U
- RAM: 2GB
- Disk: 32GB Thin Disk
- NIC: Single VMware E1000 NIC on main VLAN (1Gb Backed)
This one is fairly self explanatory, this is a VM for Home-Assistant which handles all of the IoT Devices in my house. This then connected to Apple HomeKit also, so I can control everything from my phone easily.
I don't have any fancy dashboards setup in here as I use HomeKit for that, so no screenshots.

HomeBridge - Virtual Machine
- OS: Debian 11
- CPU's: 2 vCPU cores of AMD Ryzen 7 4800U
- RAM: 1GB
- Disk: 20GB Thin Disk
- NIC: Single VMware VMXNET 3 on main VLAN (1Gb Backed)
Applications:
- Docker
- Portainer Agent in Docker
- Homebridge in Docker
This VM will soon go away, it hosts Docker with a HomeBridge container running. It connects a few devices like my Nest Thermostat and my MyQ door and gate openers to Apple HomeKit. Eventually I will move these to Home-Assistant and decommission this VM. The reason it is seperate is that I have some firewall rules in place for it to get to my IoT network, and I didn't want the main docker host to.
Deployment of HomeBridge is fairly easy. Here is my docker compose
version: '2'
services:
  homebridge:
    image: oznu/homebridge:latest
    container_name: Homebridge
    restart: always
    network_mode: host
    environment:
      - TZ=US/Chicago
      - PGID=1000
      - PUID=1000
      - HOMEBRIDGE_CONFIG_UI=1
      - HOMEBRIDGE_CONFIG_UI_PORT=8581
    volumes:
      - /media/homebridge:/homebridge
NGINX-PM - Virtual Machine
- OS: Debian 11
- CPU's: 2 vCPU cores of Intel i7-8700T
- RAM: 1GB
- Disk: 30GB Thin Disk
- NIC: Single VMware VMXNET 3 on main VLAN (10Gb Backed)
This is a dedicated machine to host 1 container, NGINX Proxy Manager. I separated this out for the sake of firewall rules and security.
Applications:
- Docker
- Portainer Agent in Docker
- NGINX Proxy Manager in Docker
NGINX Proxy Manager is a great tool that gives you all the functionality of of the reverse proxy NGINX but with a nice easy to use WebUI, and self-renewing lets-encrypt certificates.


Deploying it is quite easy, here is my compose file
version: '3'
services:
  app:
    image: 'jc21/nginx-proxy-manager:latest'
    restart: unless-stopped
    container_name: nginxpm
    ports:
      - '80:80'
      - '81:81'
      - '443:443'
    volumes:
      - /media/nginxpm/data:/data
      - /media/nginxpm/letsencrypt:/etc/letsencrypt
At first login, login with [email protected] and changeme as the password, and it will prompt you to change it.
NMS01 - Virtual Machine
- OS: Debian 11
- CPU's: 4 vCPU cores of AMD Ryzen 7 4800U
- RAM: 1GB
- Disk: 100GB Thin Disk
- NIC: Single VMware VMXNET 3 on main VLAN (1Gb Backed)
This VM runs the bare metal install of LibreNMS, because that is the best way to run it.
LibreNMS is an SNMP based monitoring and alerting tool. I have setup extensive alerts for almost all of my devices, from reboots, offline alerts, packet loss, temprature, disk errors, etc. If it has SNMP, LibreNMS can monitor it


Their documentation is quite good to install, so follow that

To configure linux clients with SNMP I have made a config file and script. It also downloads the LibreNMS distro file to get the nice pretty device icons for Linux installs, and the version.
Create a file called snmpd.conf which you will copy to your home directory. the community is what you will enter into LibreNMS along with the device IP/FQDN when you add it
rocommunity whateveryouwamt
syslocation Home
syscontact [email protected]
extend .1.3.6.1.4.1.2021.7890.1 distro /usr/bin/distro
Then, make a script to copy this file to the correct location and take care of some pre-reqs. Be sure to change where it says USER. This script assumes Debian, but should work on anything Debian based also.
#!/bin/bash
sudo apt install snmpd -y
sudo curl -o /usr/bin/distro https://raw.githubusercontent.com/librenms/librenms-agent/master/snmp/distro
sudo chmod 755 /usr/bin/distro
sudo chmod +x /usr/bin/distro
sudo mv /etc/snmp/snmpd.conf /etc/snmp/snmpd.conf.bak
sudo mv /home/USER/snmpd.conf /etc/snmp/snmpd.conf
sudo ufw allow 161
sudo ufw allow 162

echo "Restarting SNMPD...."

sudo /etc/init.d/snmpd restart
vCSA01-7.0 - Virtual Machine
- OS: VMware Photon Appliance
- CPU's: 2 vCPU cores of AMD Ryzen 7 4800U
- RAM: 12GB
- Disk: ~400GB of whatever the hell VMWare does with all its disks
- NIC: Single VMware VMXNET 3 on main VLAN (1Gb Backed)
This VM is my VMware vCenter Appliance with the "Tiny" install option. I am still on vCenter 7, as I don't trust 8 enough to upgrade yet!


WINLPR01 - Virtual Machine
- OS: Windows Server 2019 Standard
- CPU's: 6 vCPU cores of AMD Ryzen 7 4800U
- RAM: 6GB
- Disk: 500GB Thin Disk
- NIC: Dual VMware VMXNET 3's. One on main VLAN and one on CCTV VLAN (Both 1Gb Backed)
This machine is for my OpenALPR setup, and has 2 NIC's to traffic from the camera VLAN doesn't have to traverse the firewall.
Applications:
- Rekor Scout/OpenALPR
Rekor Scout is a paid application that once you give it some cameras, it does licence plate recognition including alerts. Its worth noting that you need very good cameras to do this.

I spent many hours tuning my cameras to get a good plate read on a fast moving car. My cameras are around 125 feet from the road, so they needed a good amount of optical zoom.


- DahuaSunriseSunset
This is just a very small tool to set cameras to different modes based on time. This lets me have different focus levels at night vs the day, which is needed to get a good read.
WS-Test - Virtual Machine
- OS: Windows Server 2022 Standard
- CPU's: Varies
- RAM: Varies
- Disk: 100GB Thin Disk
- NIC: Varies
This is a VM running Windows Server 2019 and is used for all sorts of misc testing. Running packet captures, firewall testing
MYNAME-VM - Virtual Machine
- OS: Windows Server 2022 Standard
- CPU's: 4 vCPU cores of Intel i7-8700T
- RAM: 8GB
- Disk: 80GB Thin Disk
- NIC: Single VMware VMXNET 3 on main VLAN (10Gb Backed)
This is a Windows Server 2022 VM with 4 vCPU's, 8GB of RAM and 90GB vDisk. This is a jump box/utility VM that is available over the internet secured with an IP whitelist and Duo 2FA
WIFESNAME-VM - Virtual Machine
- OS: Windows 10 Pro
- CPU's: 2 vCPU cores of Intel i5-4570T
- RAM: 8GB
- Disk: 80GB Thin Disk
- NIC: Single VMware VMXNET 3 on main VLAN (1Gb Backed)
Similar to above, this runs Windows 10 Pro but is for my wife
That's all, for now!


