Full Lab Details - September 2022

Its that time of year again!
Last year in September I posted a full update to my home lab/home network. Since it has been a year, I thought I would do it again. You can read last years post below. I will try go into as much detail as possible, but if I skip something you'd like more information on, check out the older posts.
 SpookyGhost
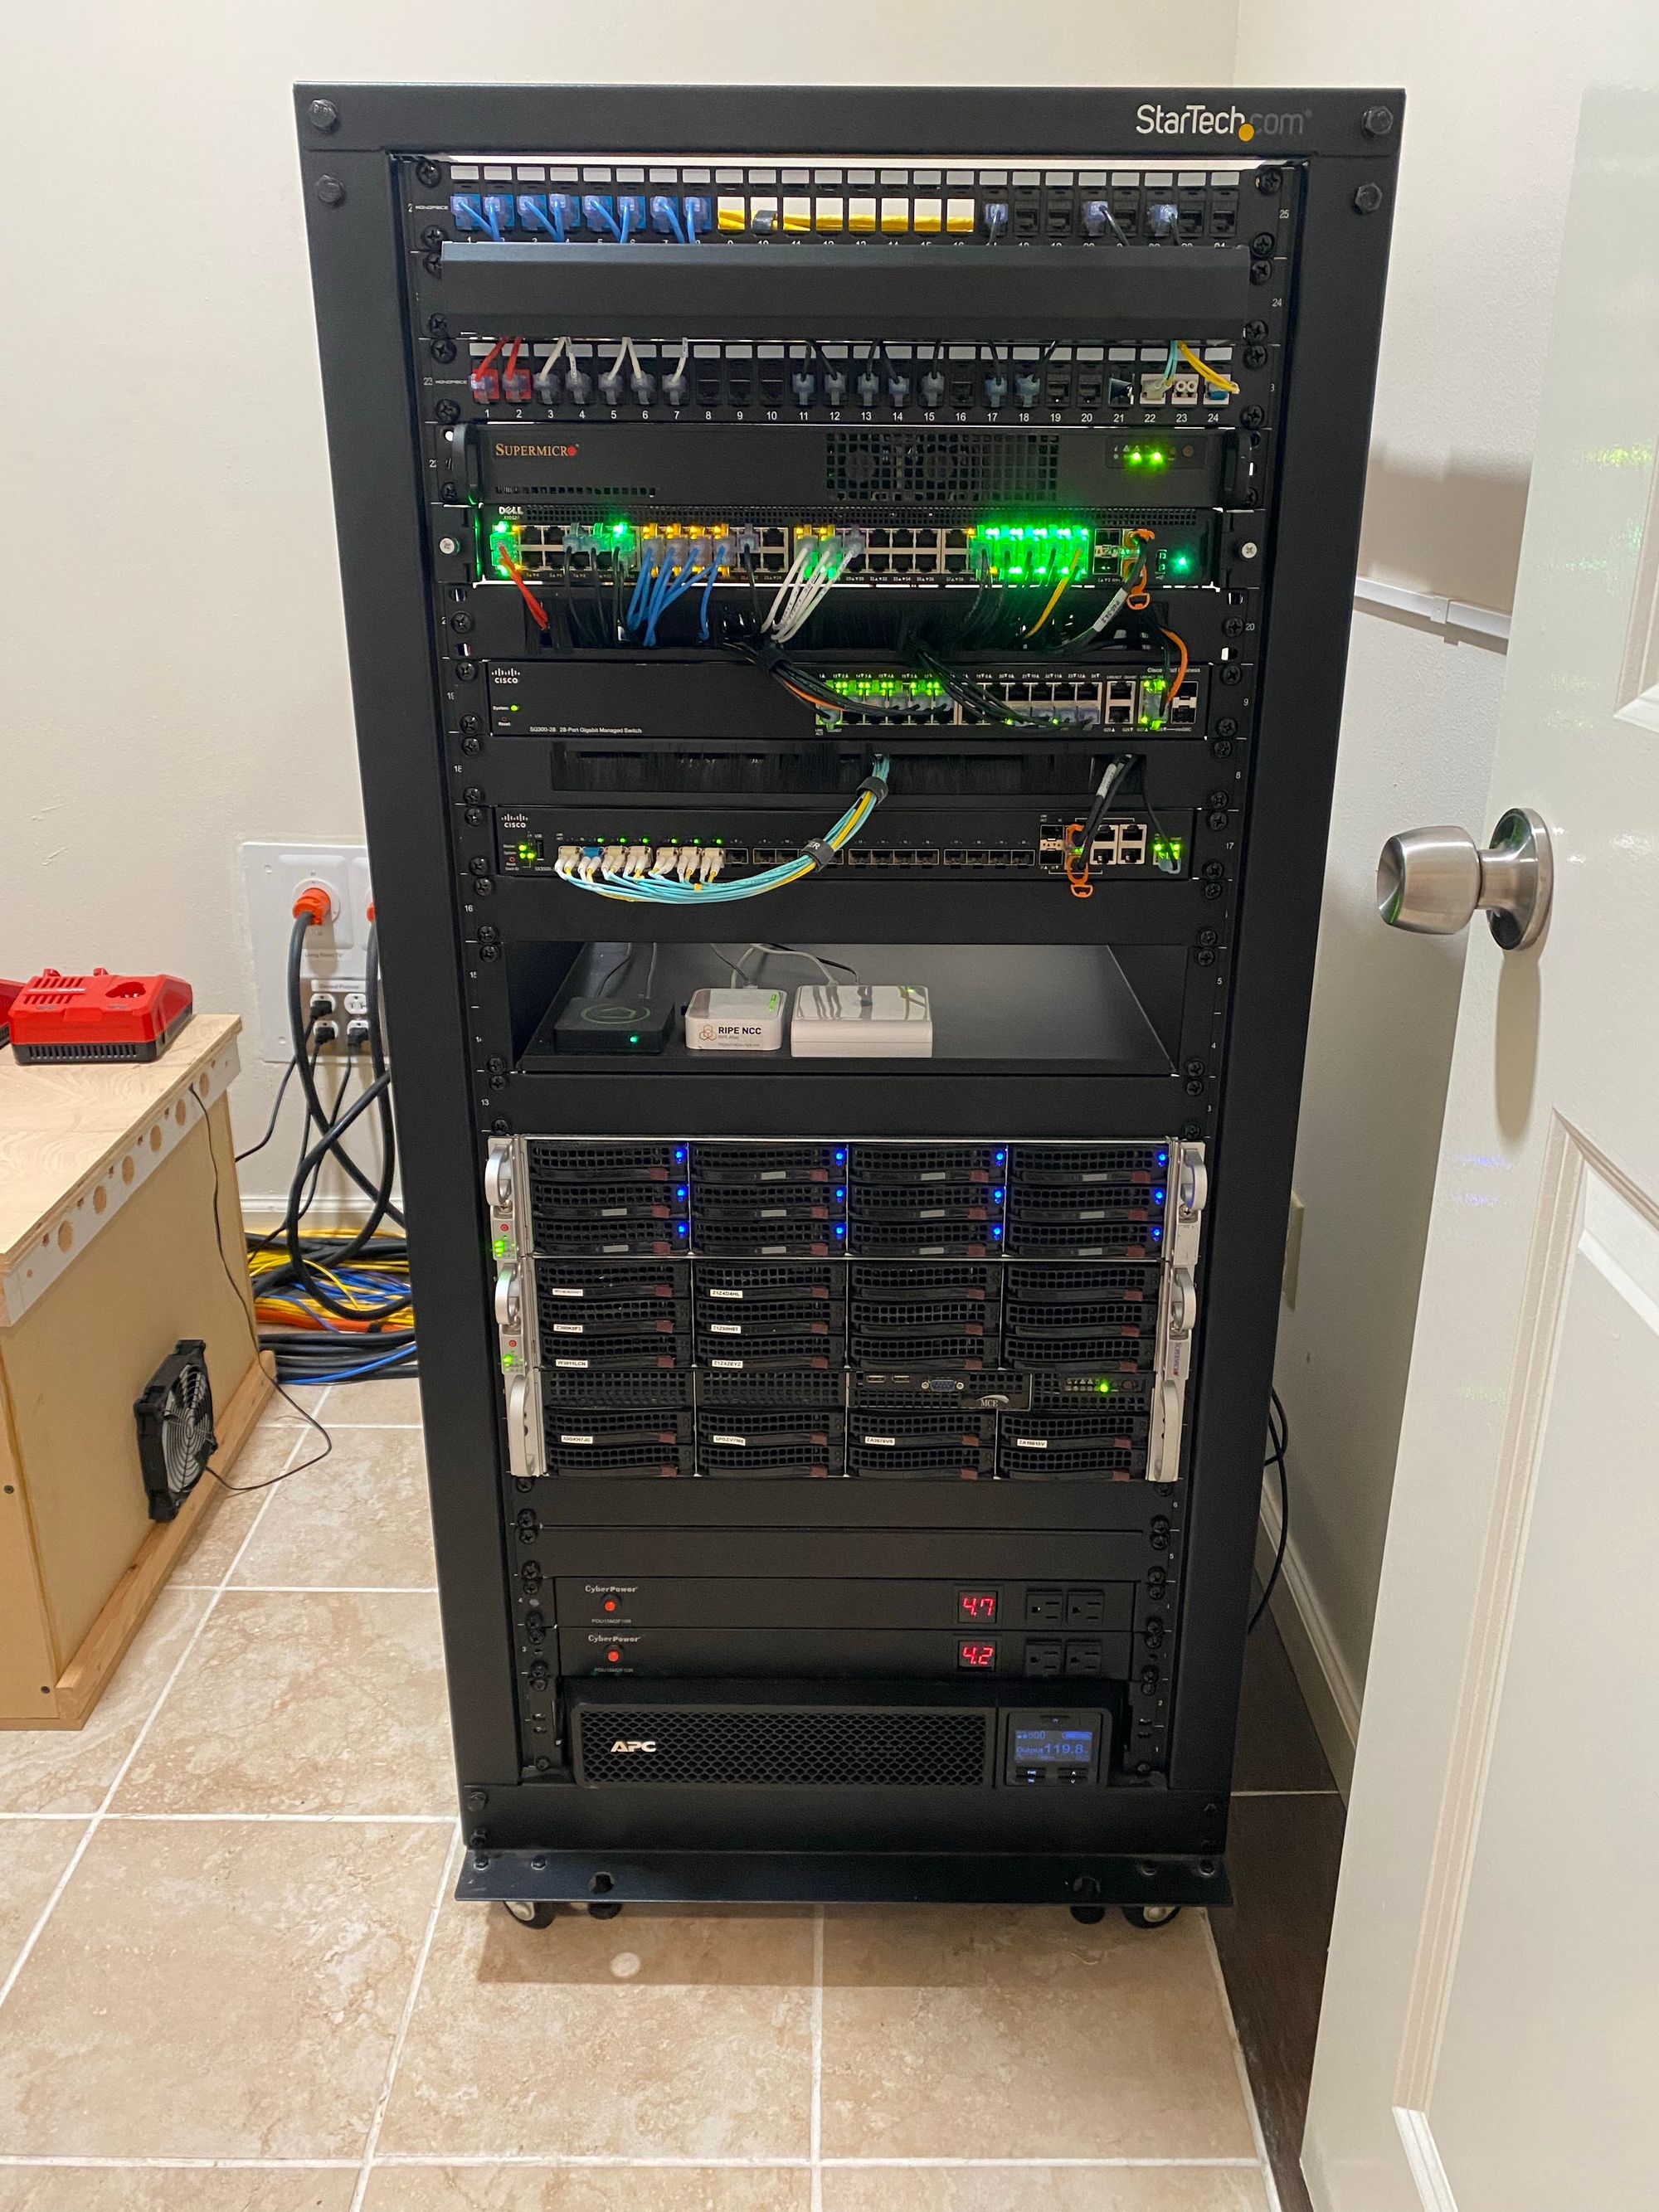
Not TOO much has changed, but here are all the details
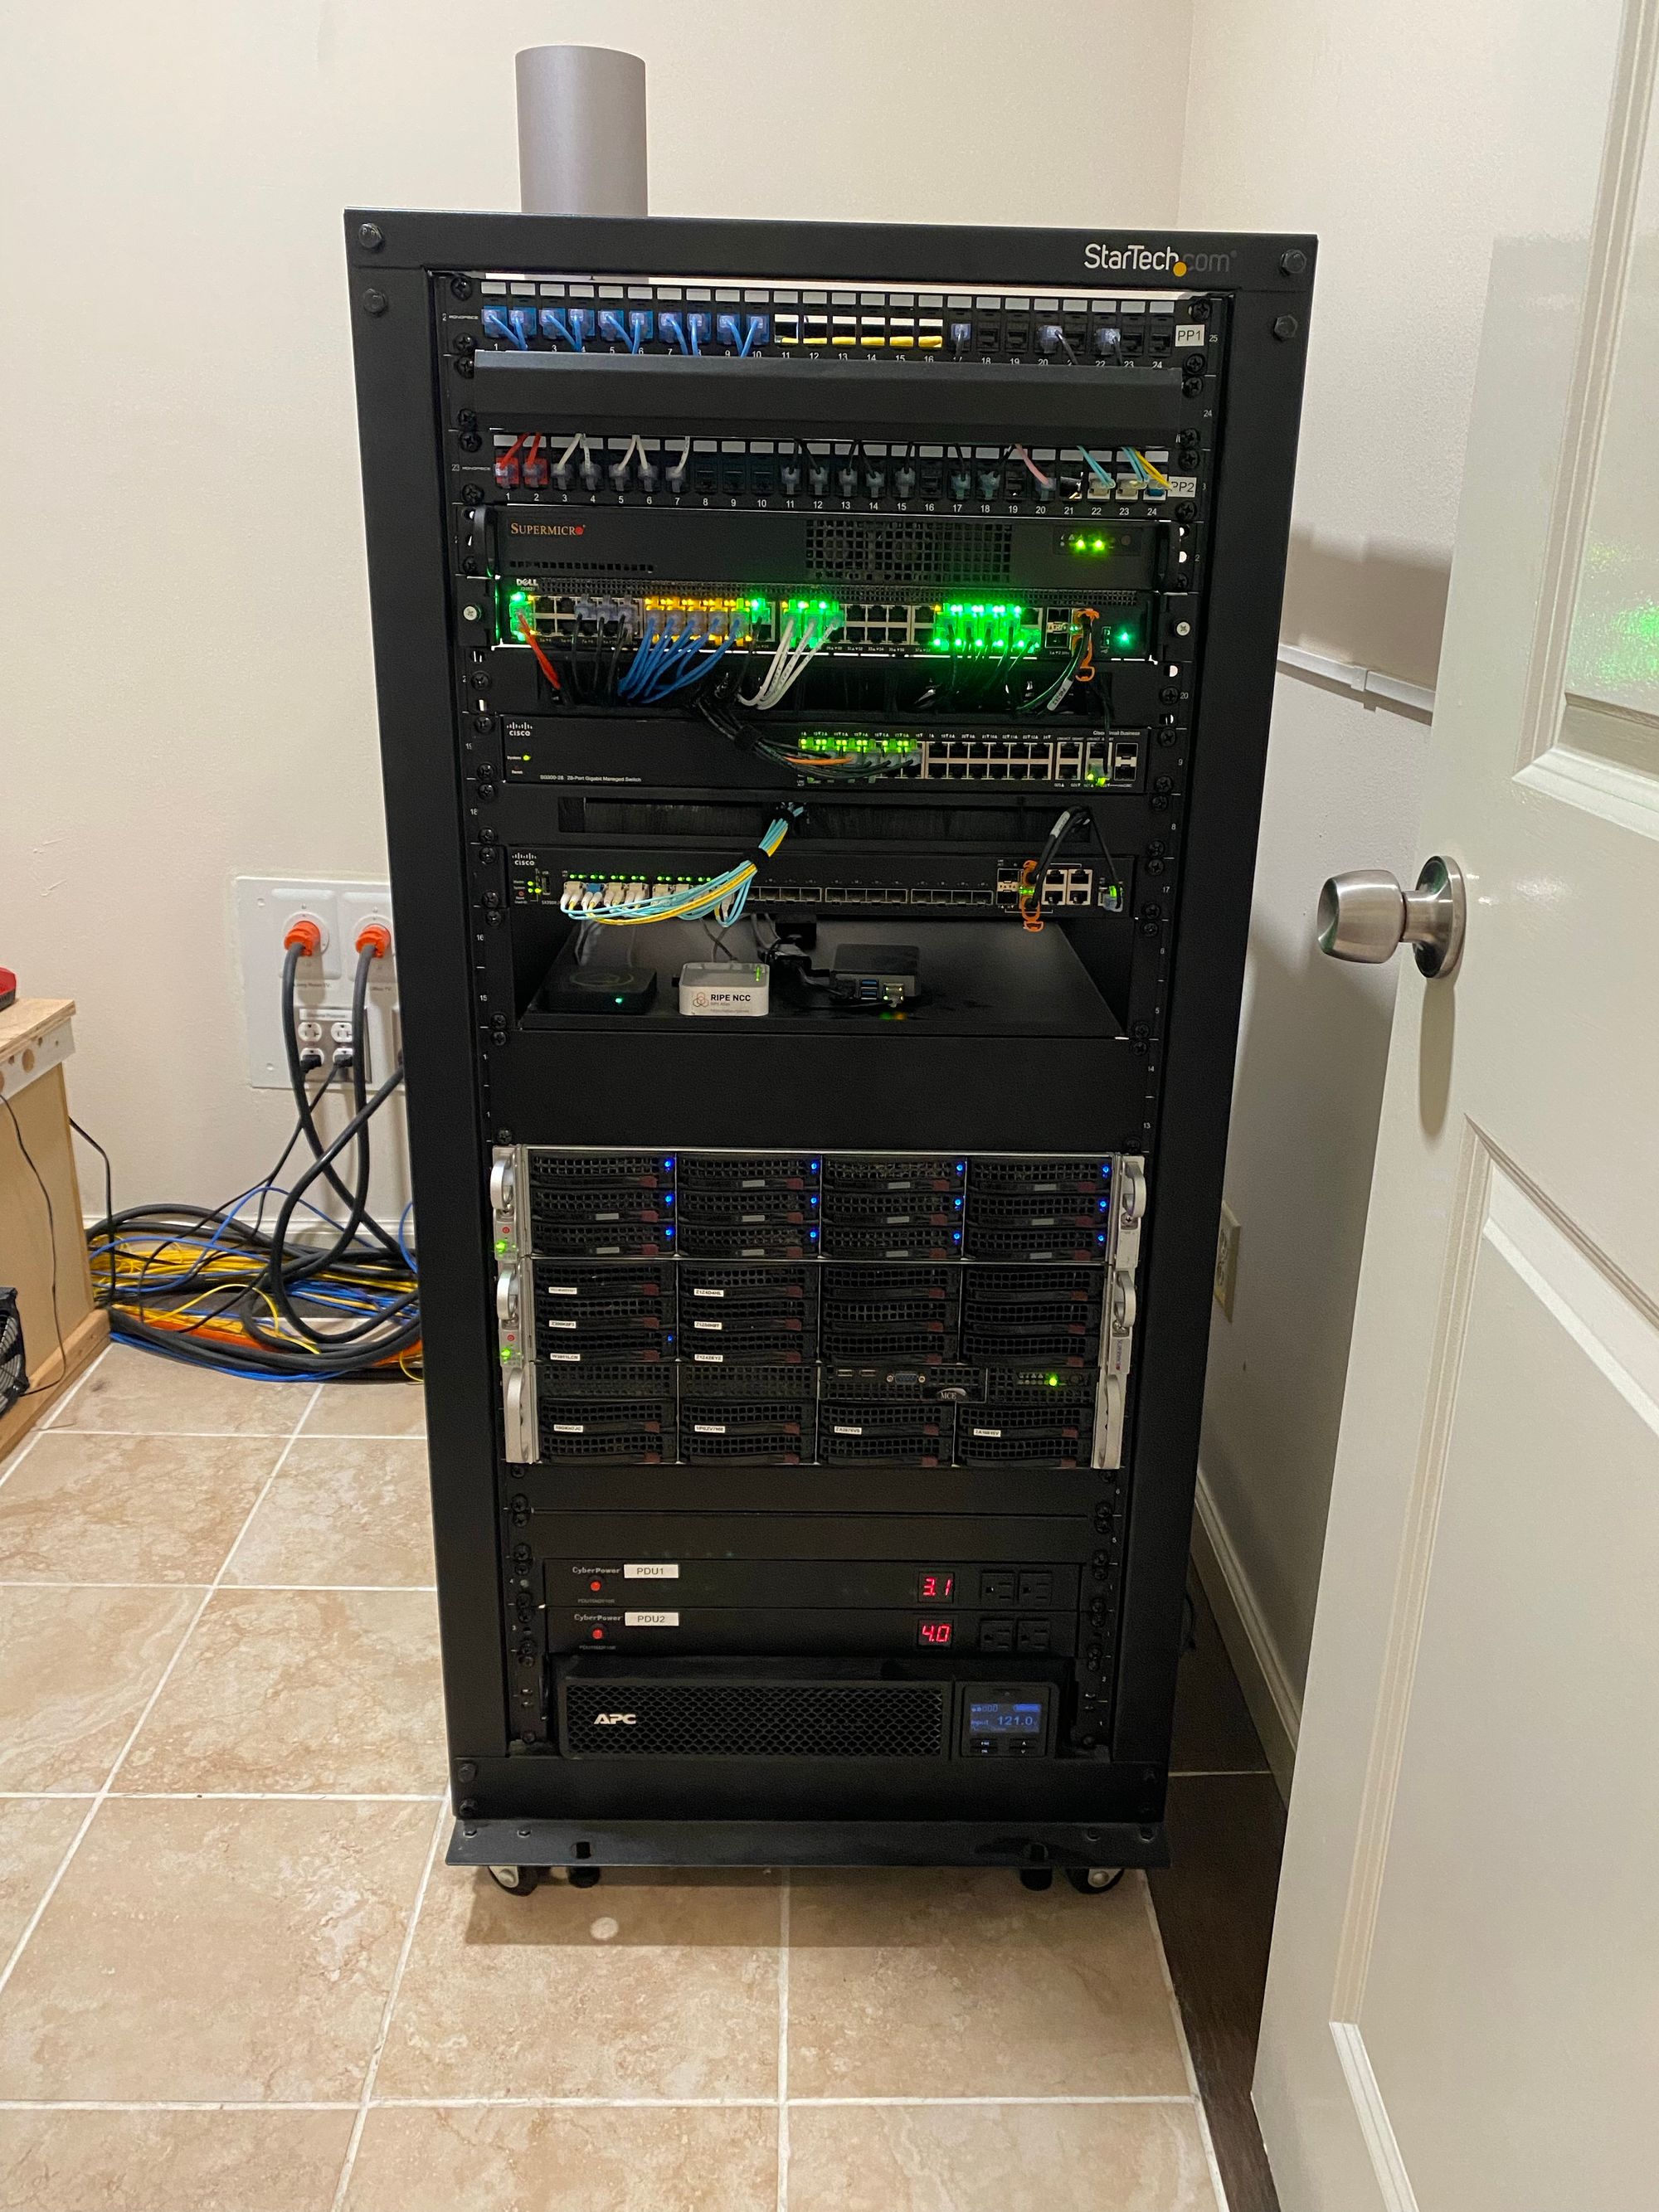
Lets start at the top and work down.
Starting at the very top is a T-Mobile 5G Home Internet gateway which is velcroed to the rack
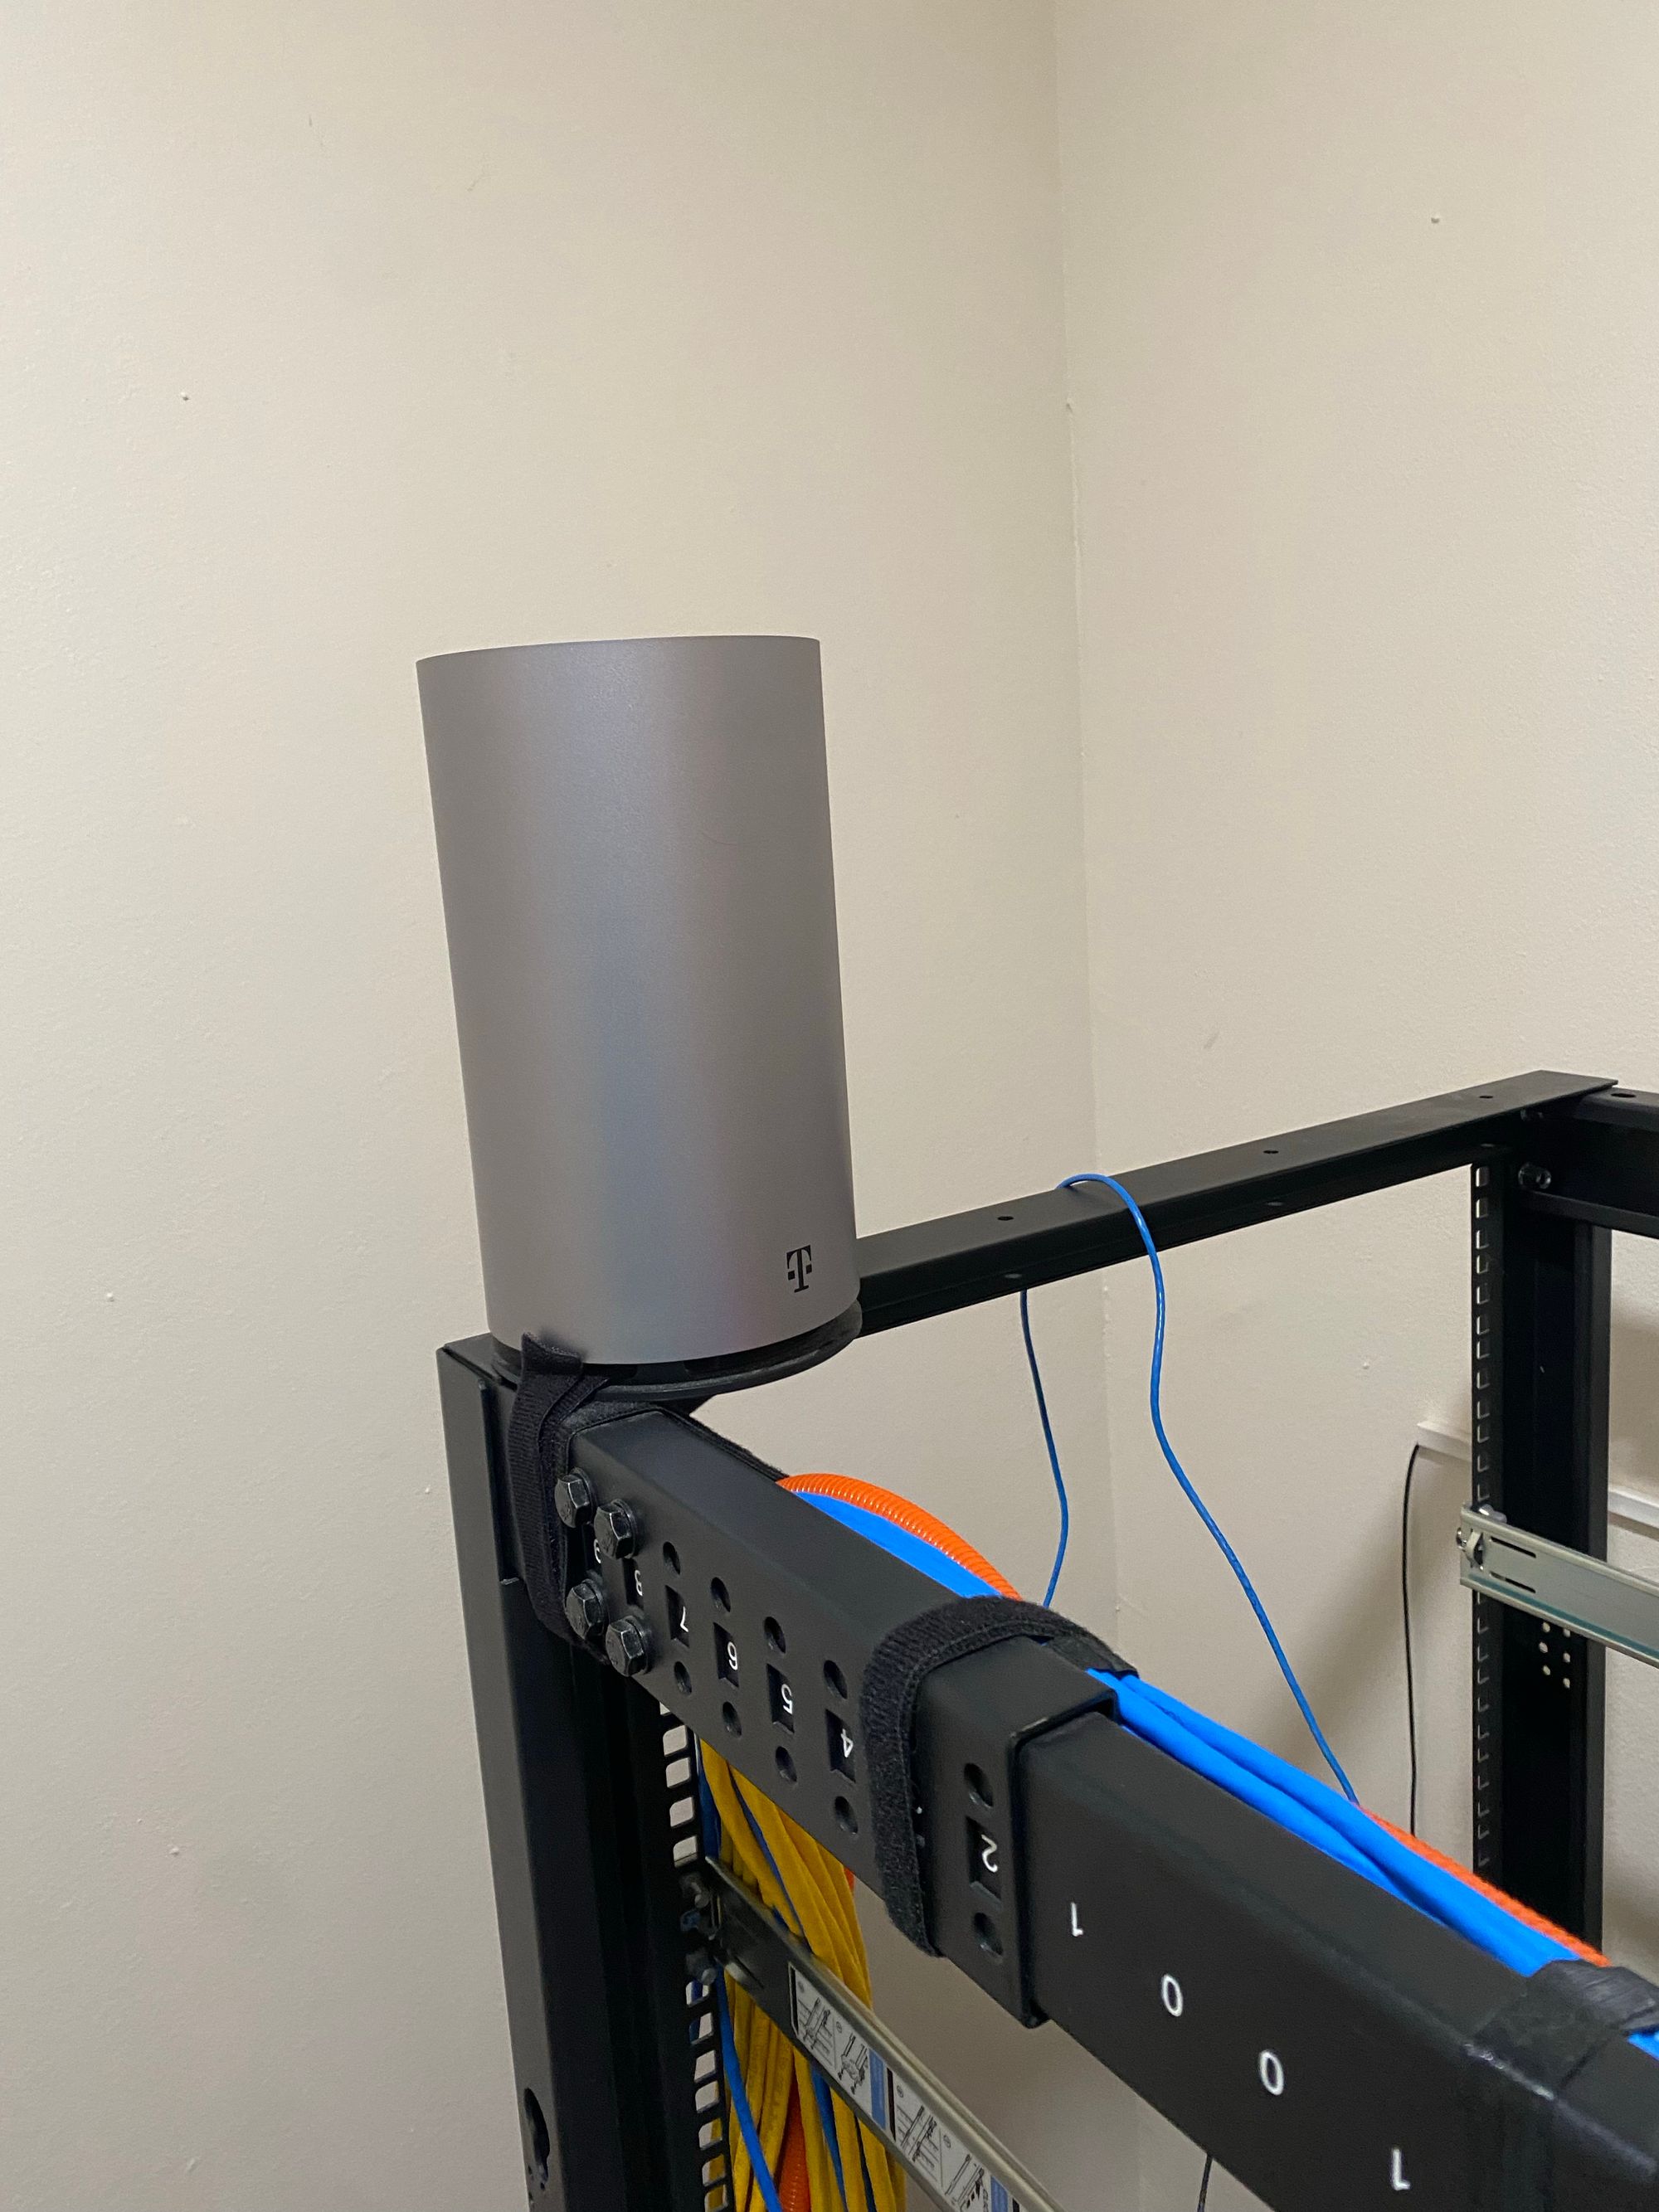
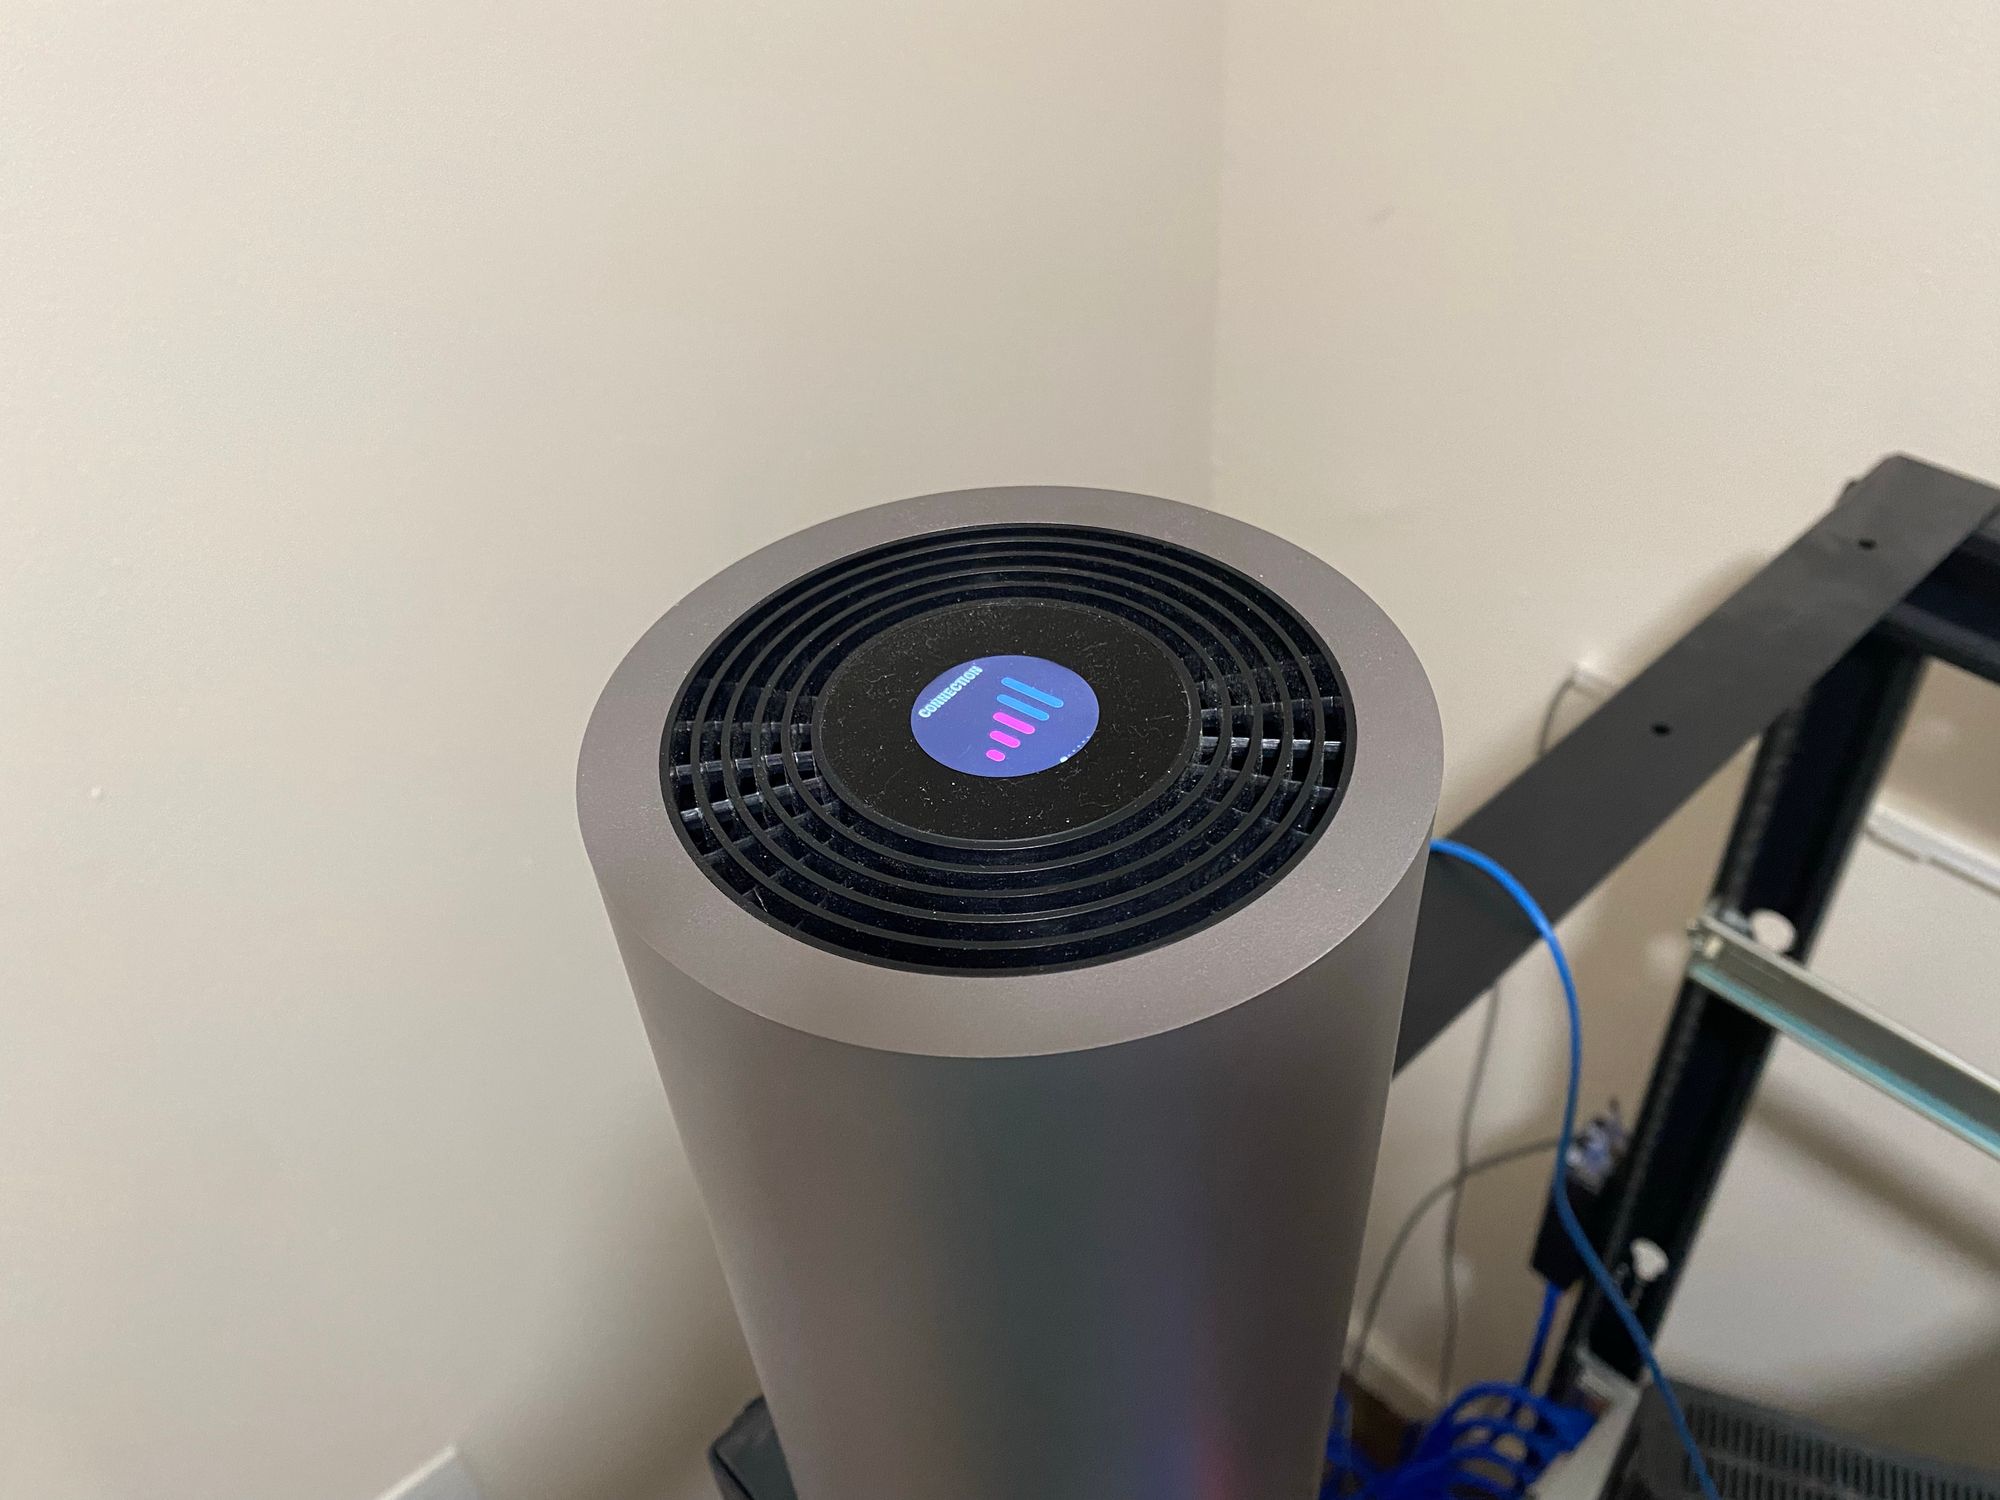
If you read the last post about it (Link below) you'll know I had it in my office for better signal. That has since changed with the addition of more towers, so now it lives in the server closet.
SpookyGhost
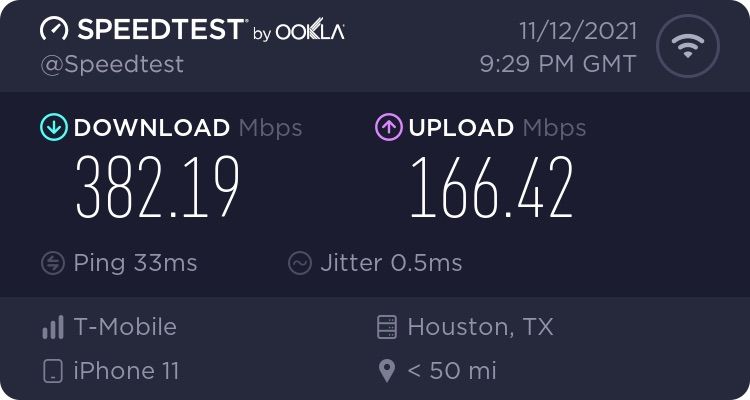
This 5G connection is a backup to my main connection, which is AT&T Fiber (1Gb/1Gb) and setup in a gateway group for failover.
I get pretty good speed out of this, but the catch is that its CGNAT. But, for being a backup connection, that's fine
It costs $50 a month with zero contract, and zero data caps. Pretty good really.
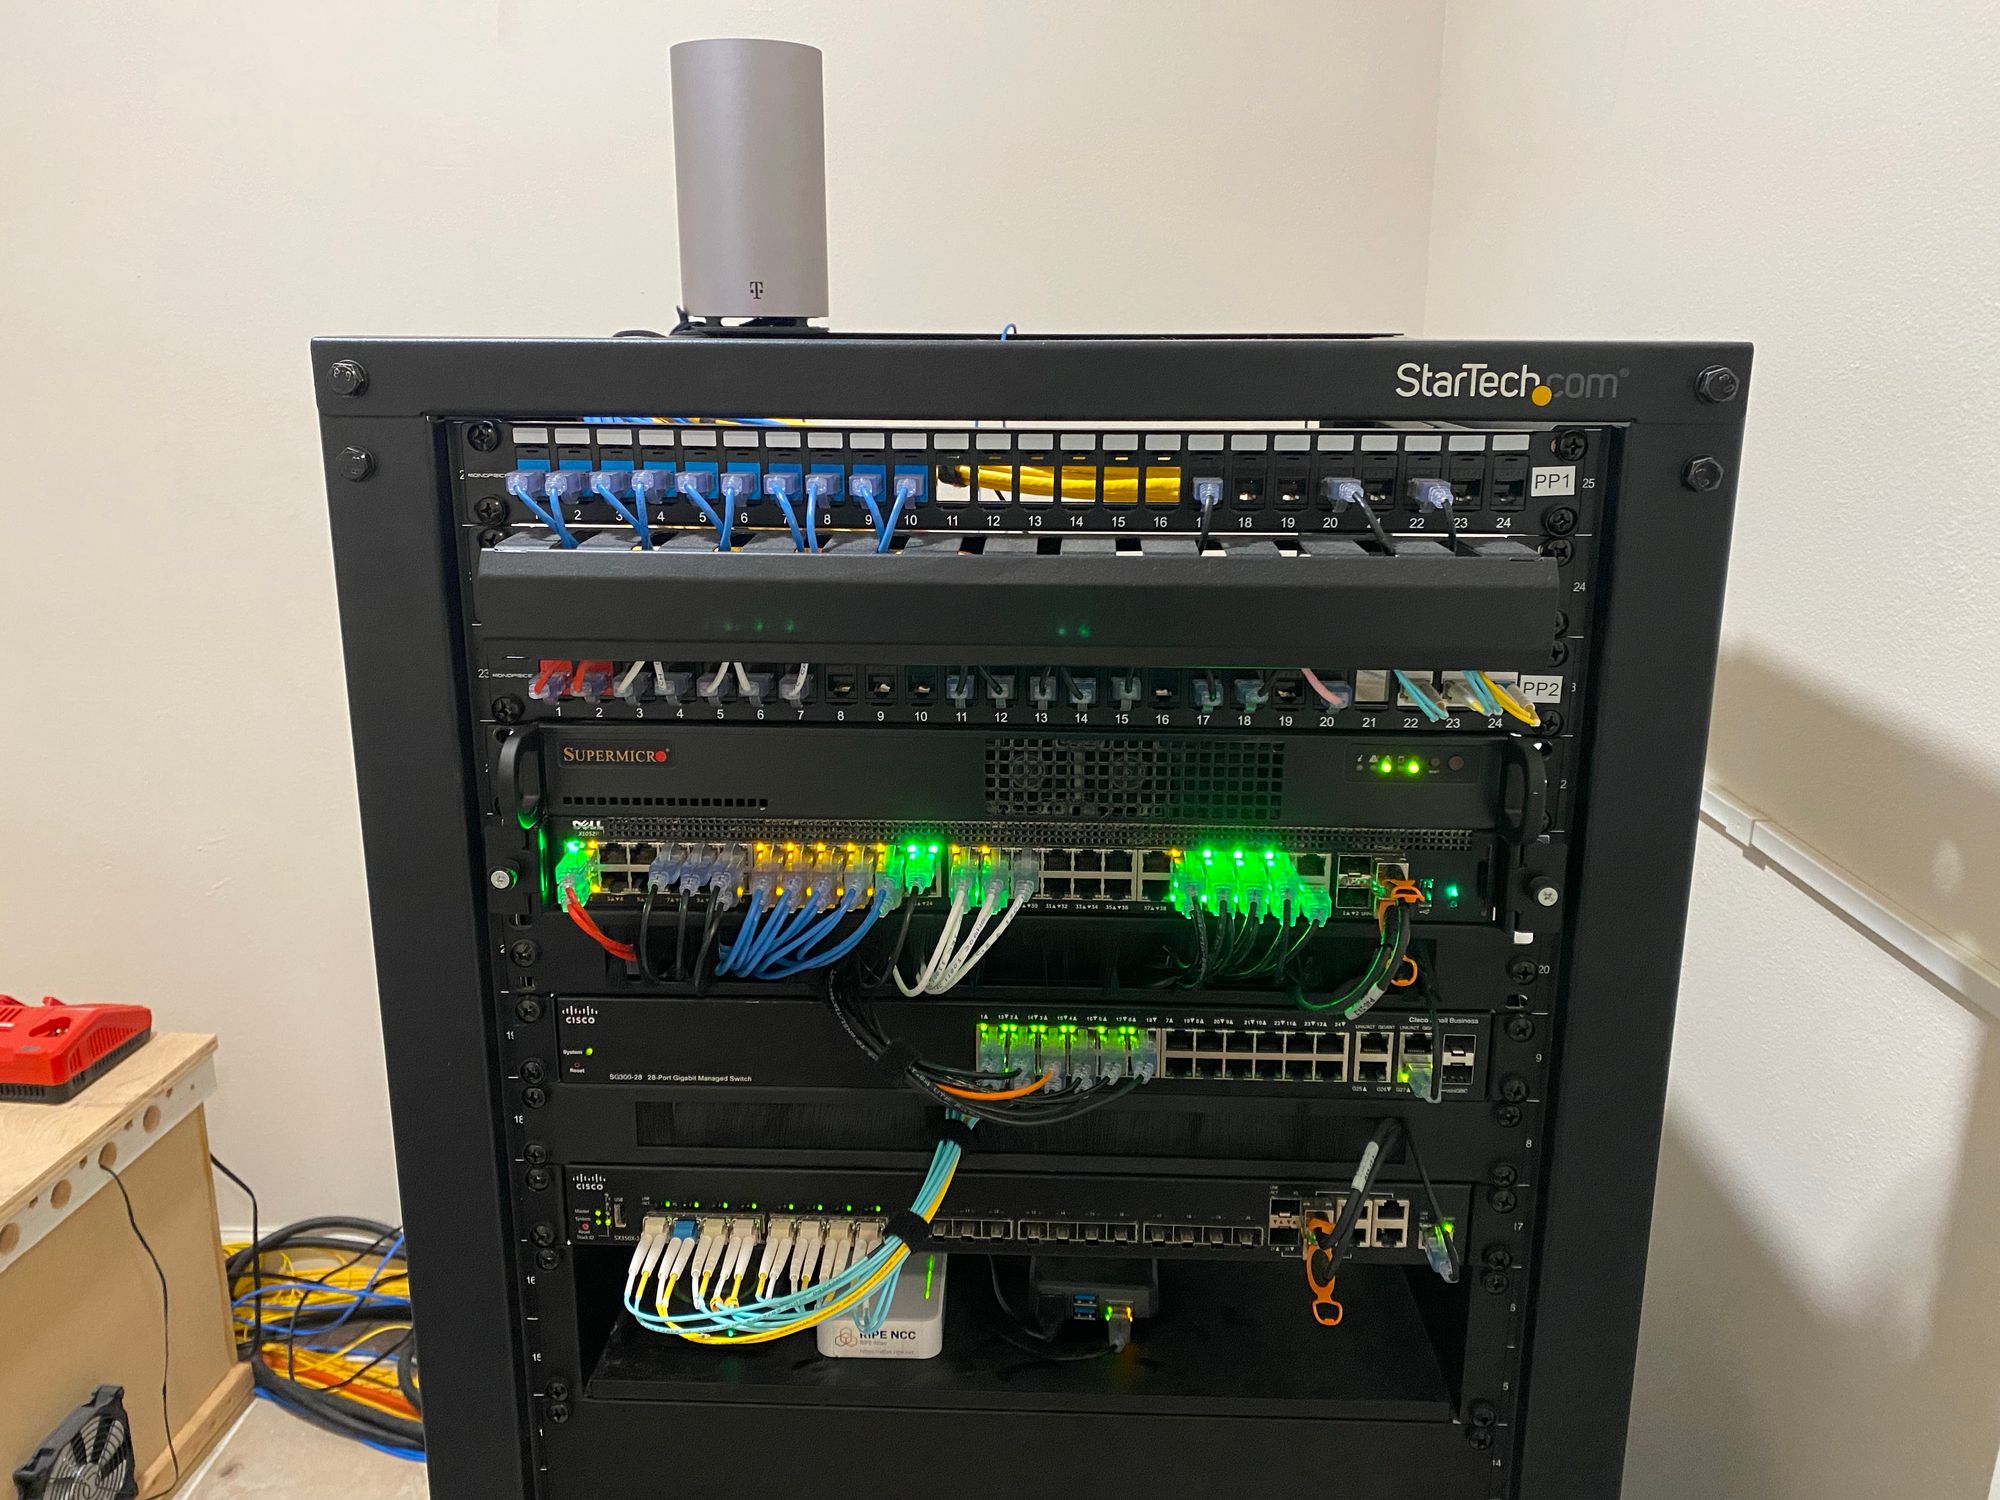
Moving into the rack itself, there are 2 Keystone patch panels with some cable management in the middle. They are basic 24 port Monoprice branded Keystone panels with all Cat6a Keystone jacks.
This is the 1u cable management
https://www.amazon.com/gp/product/B06XHCG56K
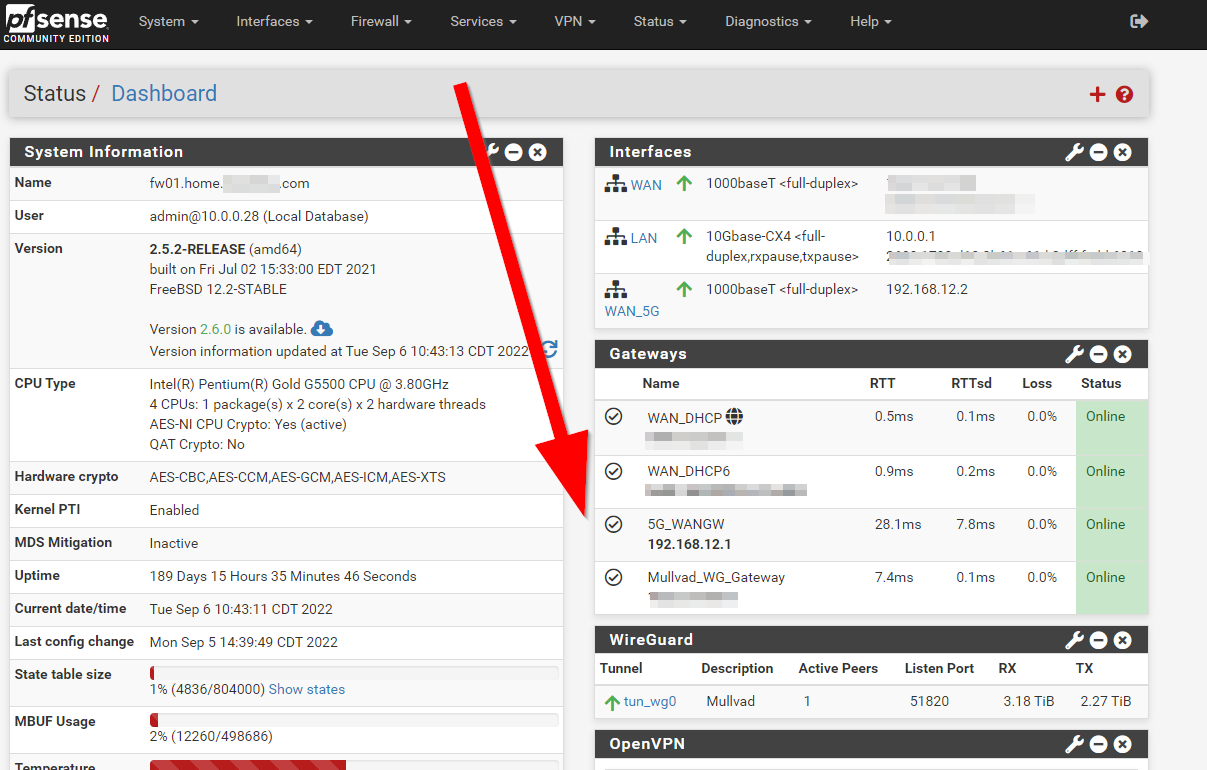
Below that if my PFSENSE Firewall which is based on a Supermicro board and chassis, a Pentium Gold G5500, 8GB ECC RAM and a 10Gb ConnectX-3 NIC for LAN. It has Wireguard tunnels to my VPS where this blog is hosted, as well as to Mullvad. I then use policy based routing to move specific traffic over the tunnels. The tunnel to the VPS also lets me have port forwarding while on either WAN connections, import for some services I have running. I got the 10G NIC for LAN as I can easily max out a 1Gb port running traffic over both of my WAN connections, as well as some intervlan routing.
I am bypassing my AT&T Gateway and connecting my firewall directly to the ONT, with pfatt. This gives me lower latency and removes several performance issues introduced by the AT&T gateways (Mainly a NAT table getting filled, because there is no REAL passthrough mode on AT&T Fiber currently)
 MonkWho
More details in the above post about network upgrades, and this post when I built the firewall:
SpookyGhost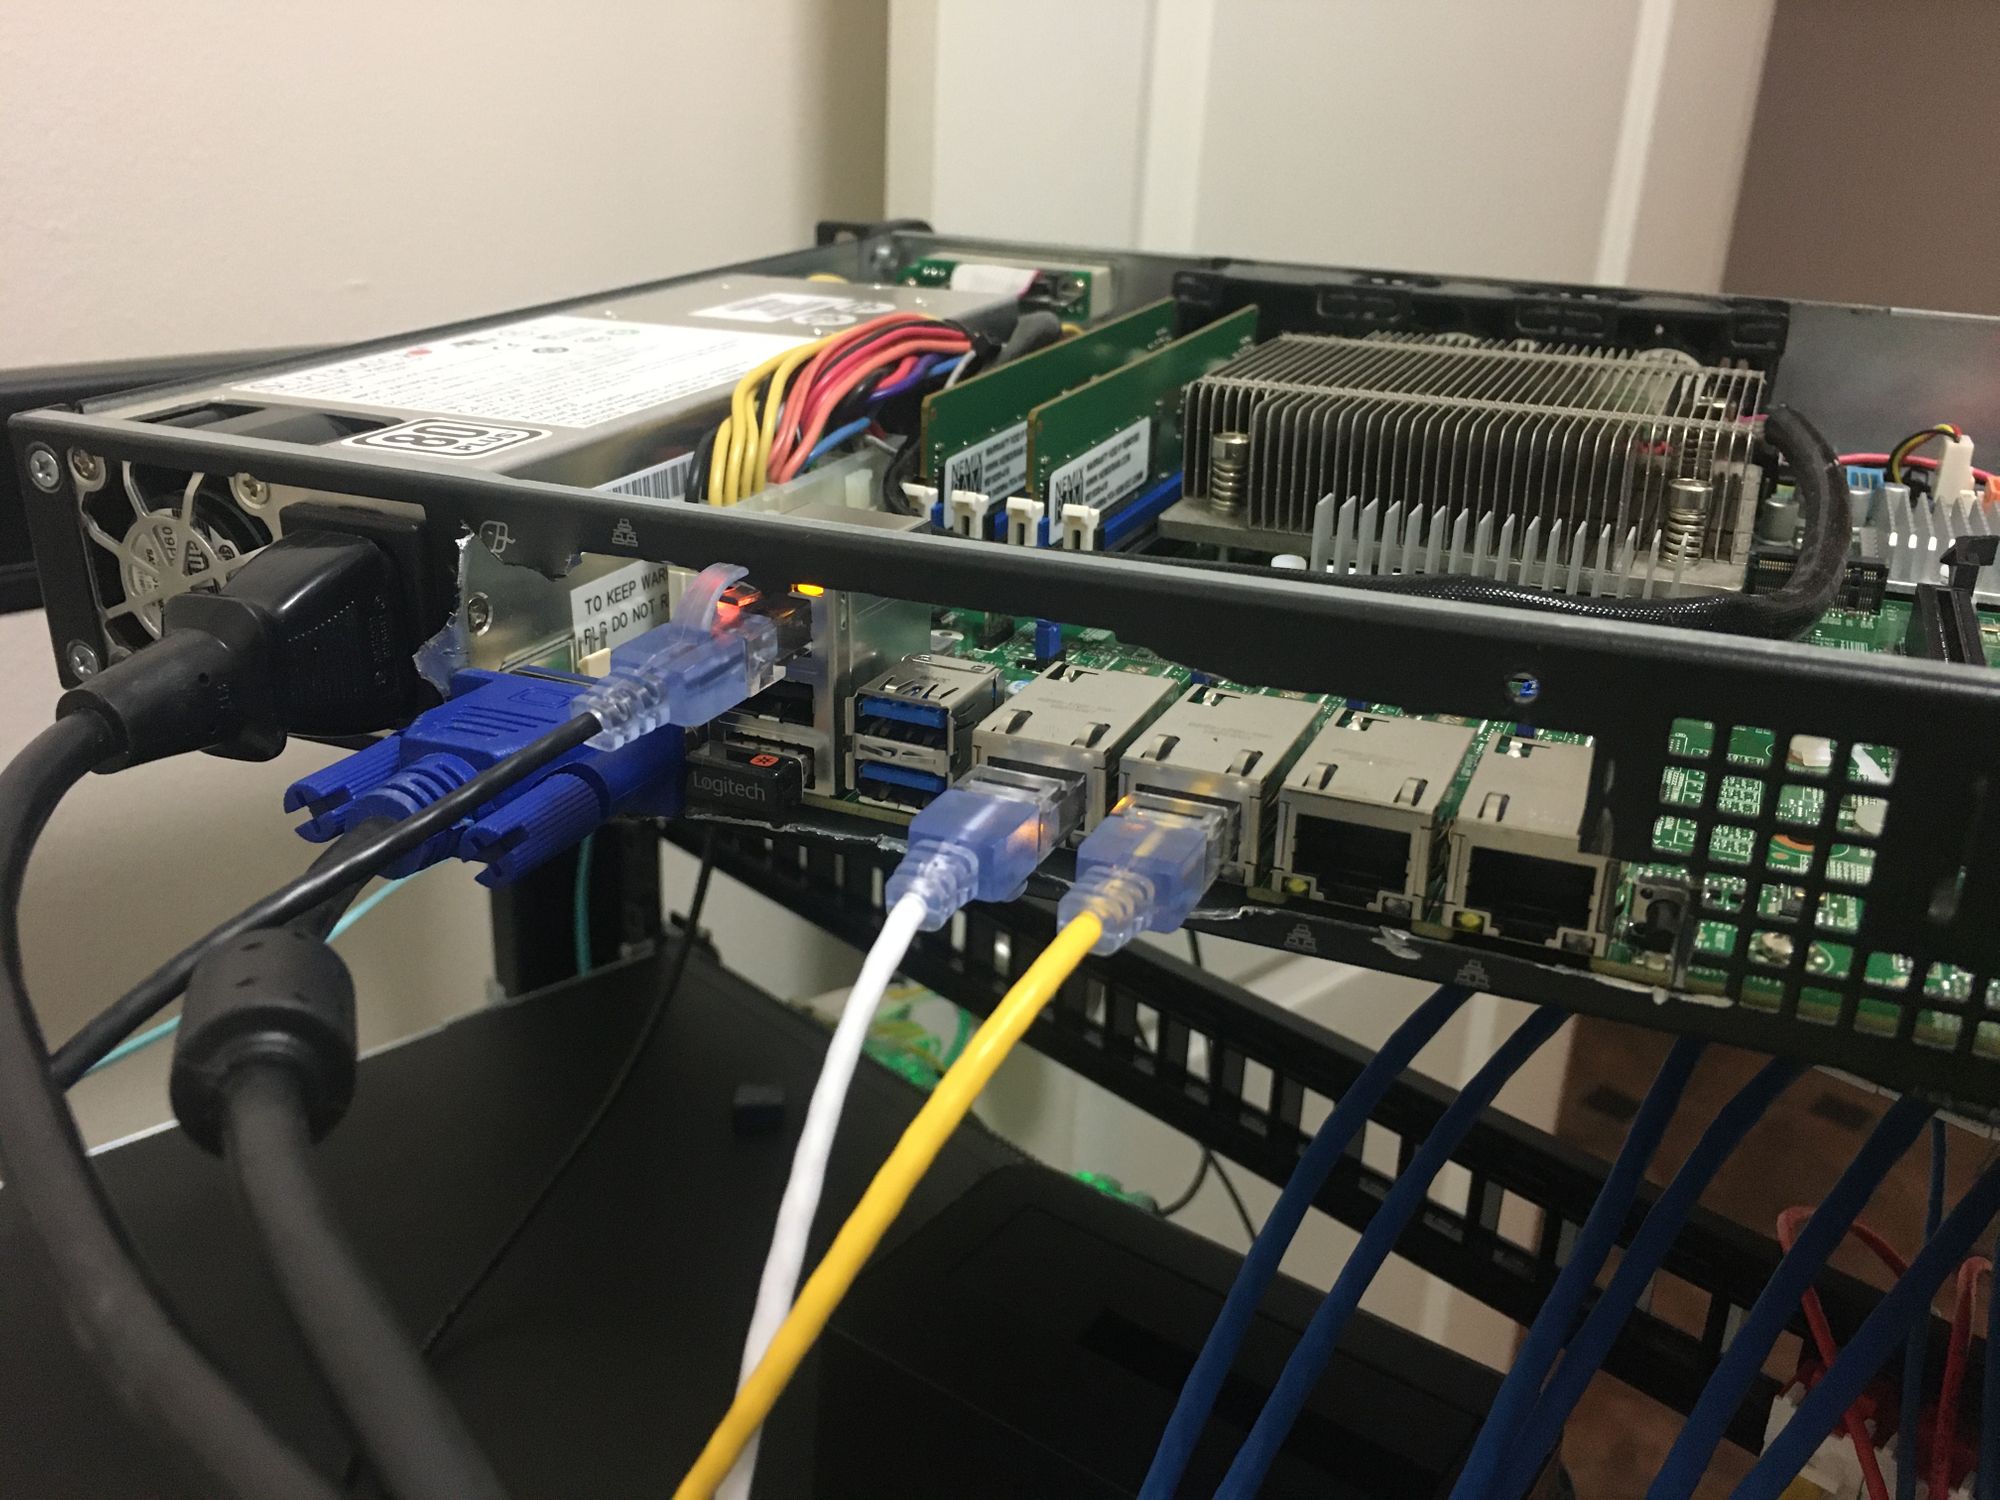
Below the firewall is a Dell X1052P switch. It has PoE+ and 4 x SFP+ ports. Its served me well and its reliable, but the management is a giant pain. You can't use CLI and the WebUI is the worst I've ever seen. I plan to replace it at some point, but there is not much pushing me into replacing it since it serves its purpose and I don't make config changes too much. This switch gets all of the higher bandwidth 1Gb connections, all of the PoE for IP Cameras (I run about 12 in total) and it has a dual 10GB connection to my main 10Gb switch via 2 x SFP+ DAC's.
Below that is a 1u brush panel for passing patch panels. Boring
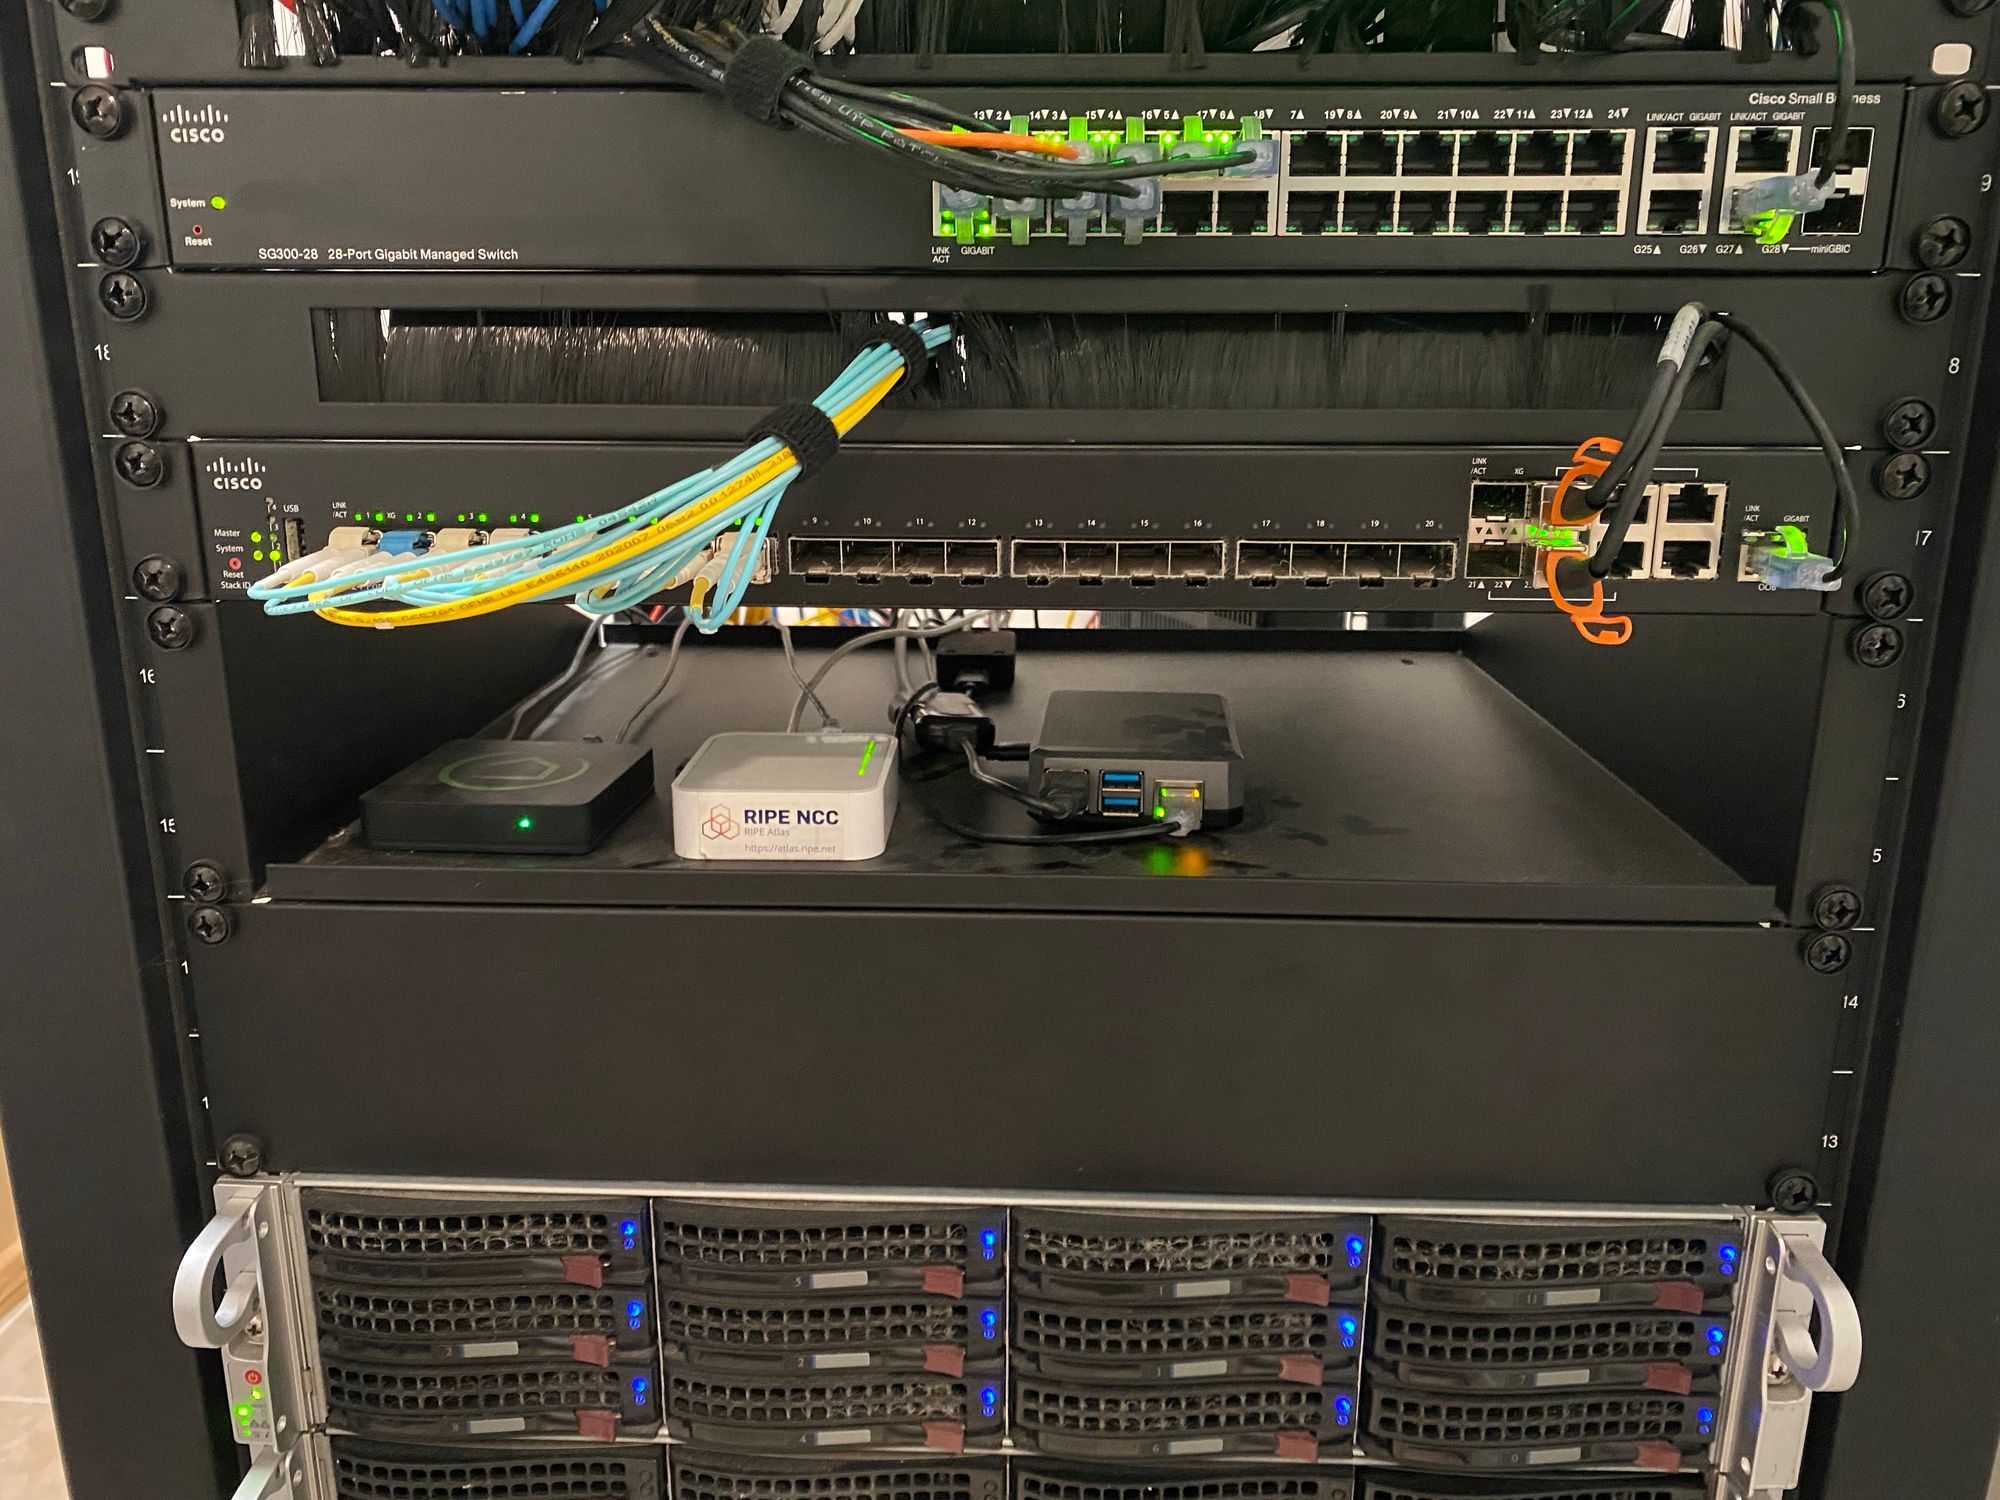
Below that is my Cisco SG300-28 Switch. This switch has a single 1Gb uplink to the Dell switch, and has all of the really low bandwidth stuff like IPMI connections, printers, etc. The reason this switch exists is because all of those connections push the Dell switch to being almost completely full. I also wanted a second gigabit switch just so I could connect everything in the event the Dell failed.
Below that is another brush panel, again, boring.
And below that is one of my favorite items here, the Cisco SX350X-24F switch. its a 24 Port 10GB SFP+ switch, with 4 of them being combo ports with additional 10Gb Copper ports. This switch connects my desktop PC, my wifes desktop PC, my ESXi server, my NAS, my firewall and then also my rack in the garage. Read more about that below
SpookyGhost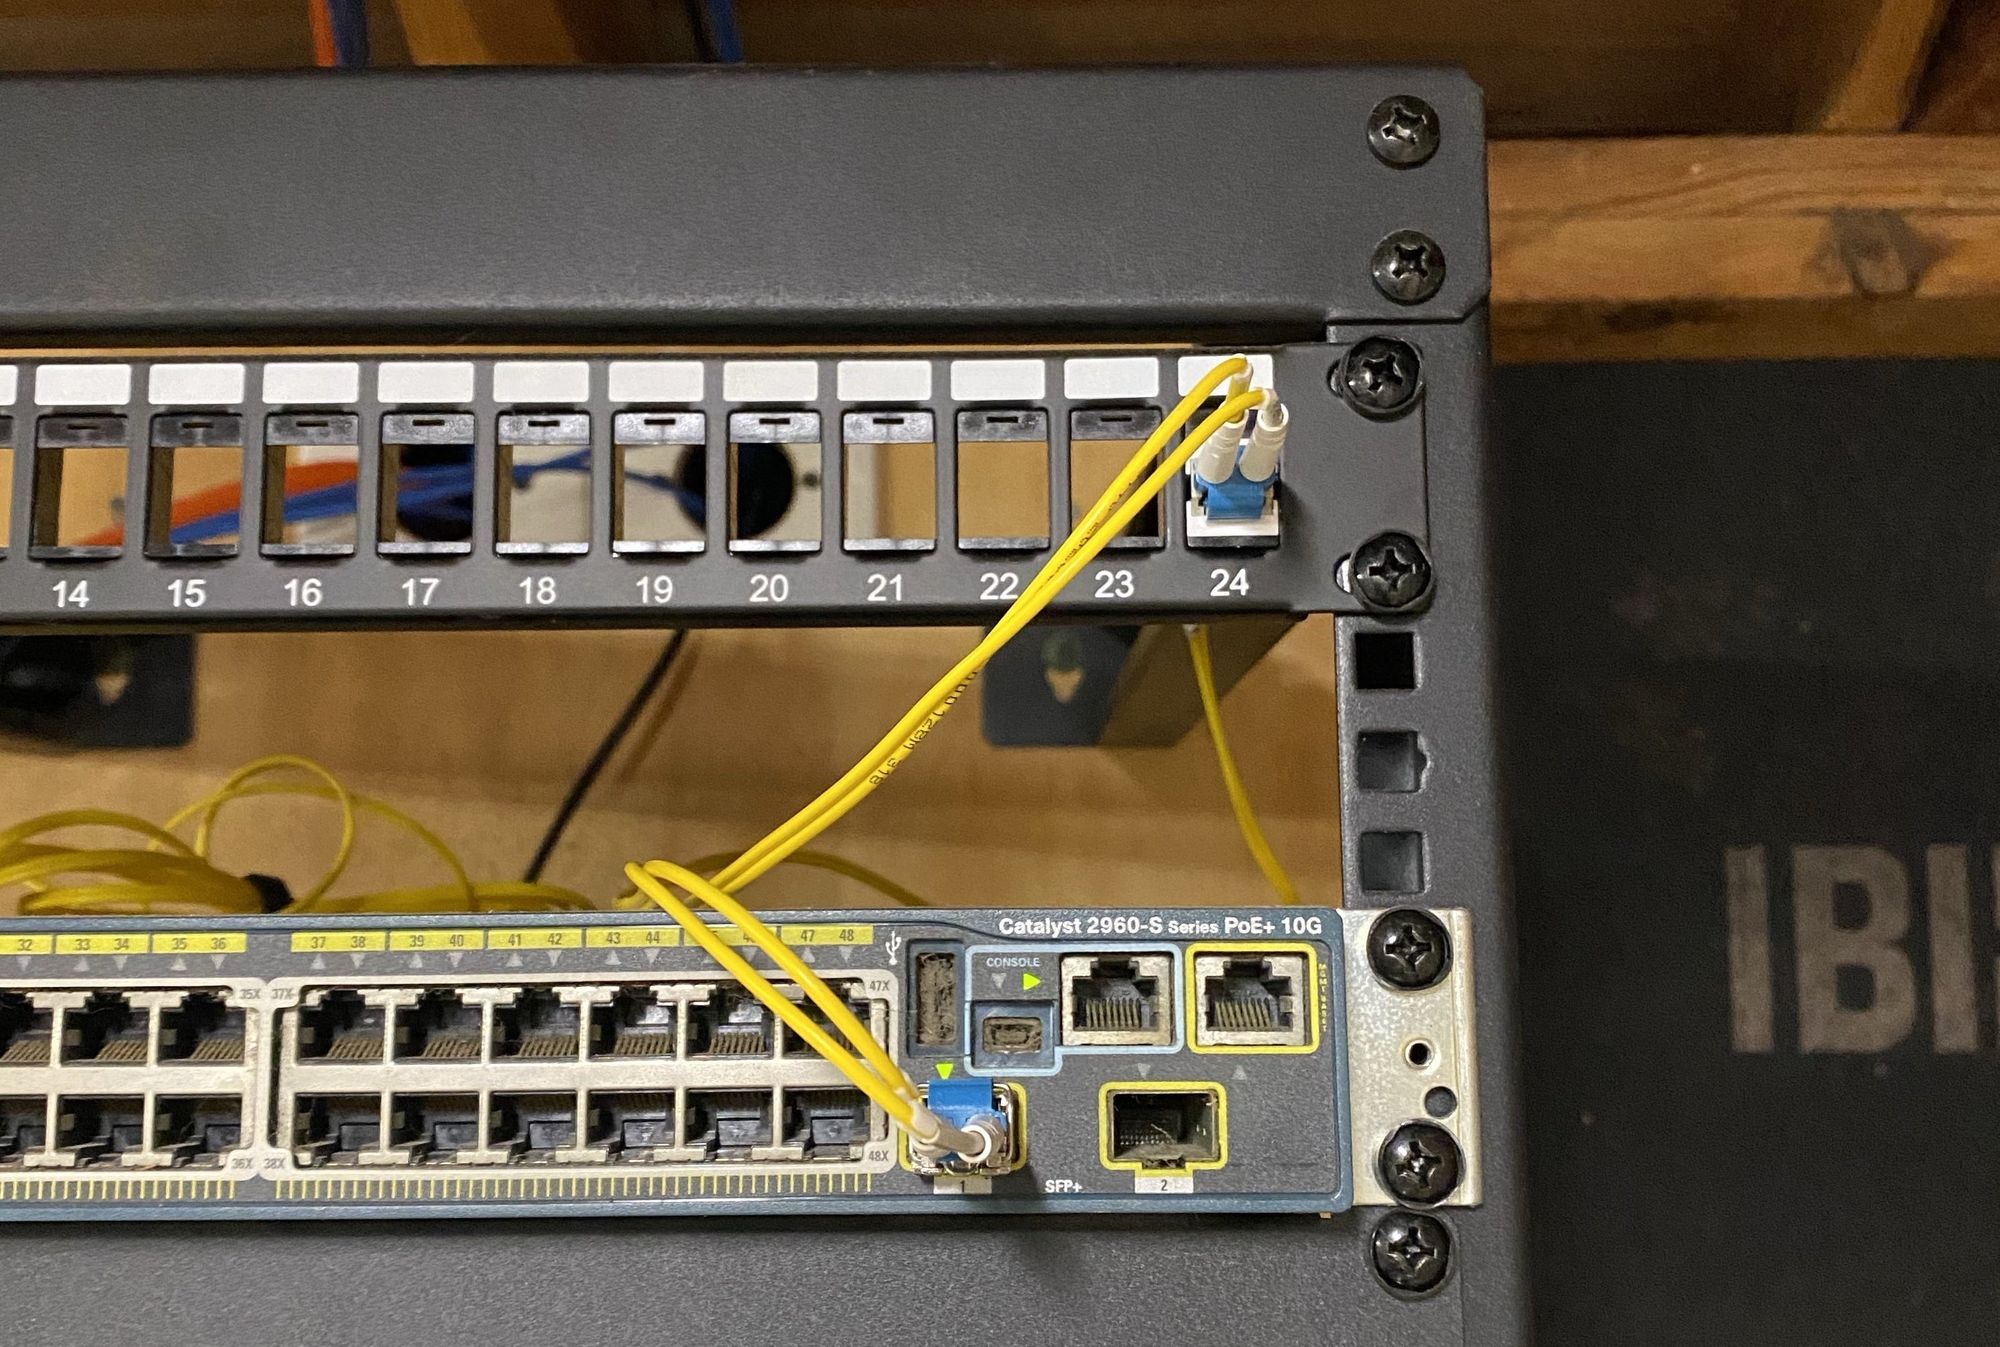 SpookyGhost
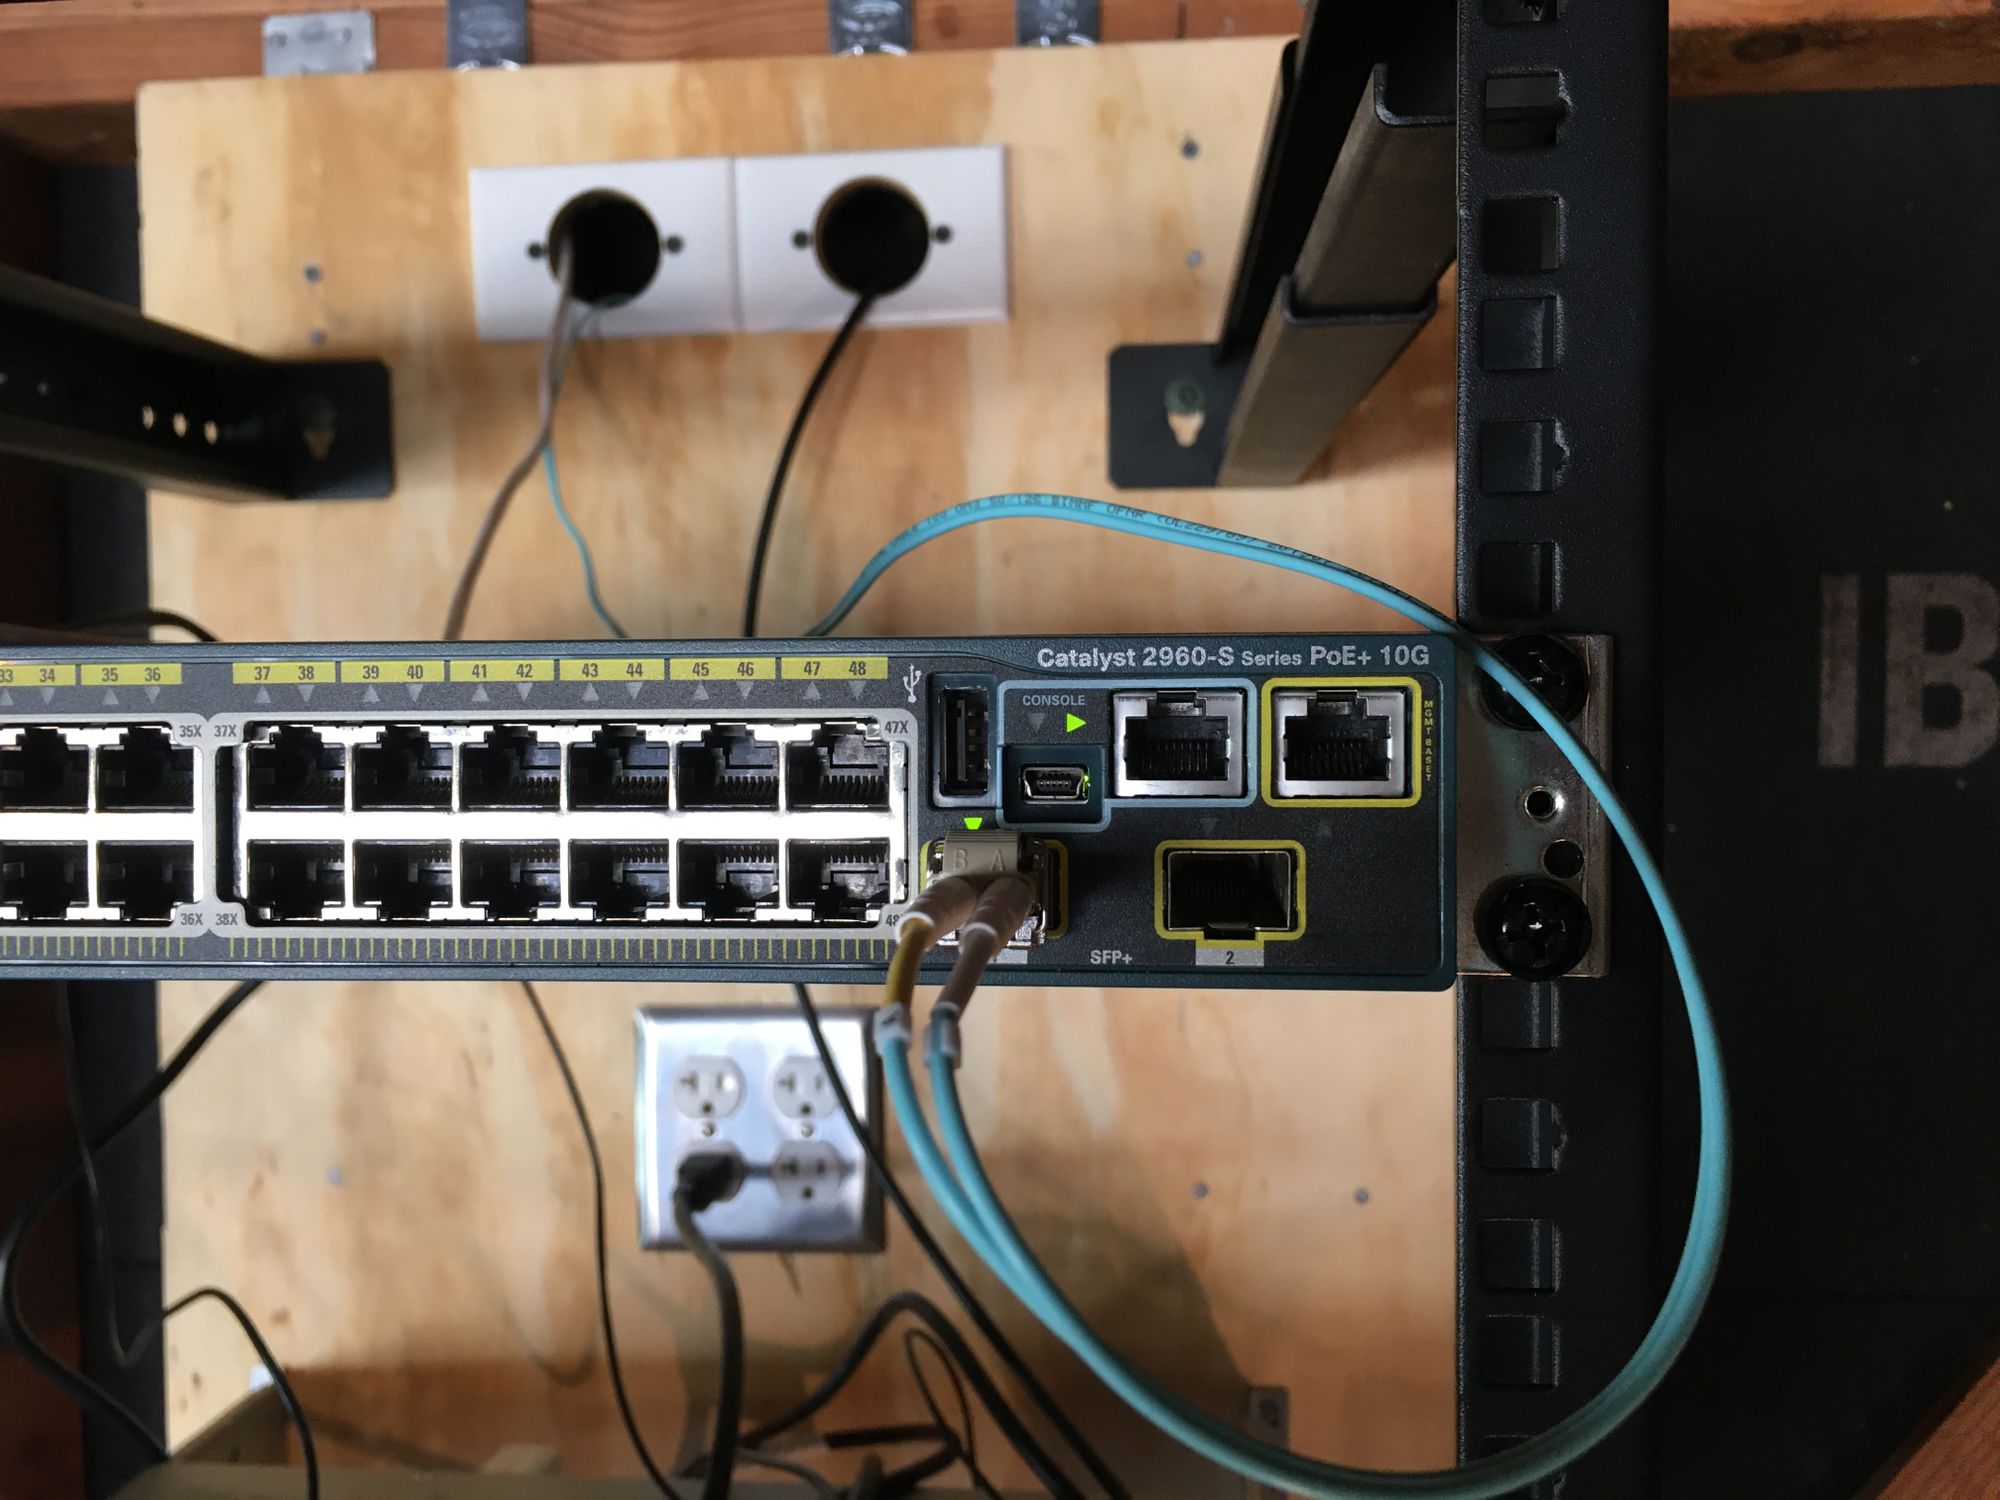
Below that is some smaller items on a shelf
All the way on the left is a Hubitat, which I don't really get along with too well. At this point I have moved all my home automation and handling of IoT devices to Home Assistant running in a VM. Now it simply serves as a radio for the remaining Zigbee and Z-Wave devices. Even just handling 17 devices and pushing them into Home Assistant via the Maker API causes severe load, and the Hubitat complains. How anyone actually uses one of these for their entire house is a mystery to me
To the right of that is a Ripe Atlas. These connect back to Ripe NCC which can then test latency and other metrics about the internet. Its pretty cool, and you should check it out
To the right of that is a TinyPilot iKVM device which runs on a Raspberry Pi 4. This is to get console access to my Blue Iris NVR server we will see further down. It runs on a consumer board with no remote management.
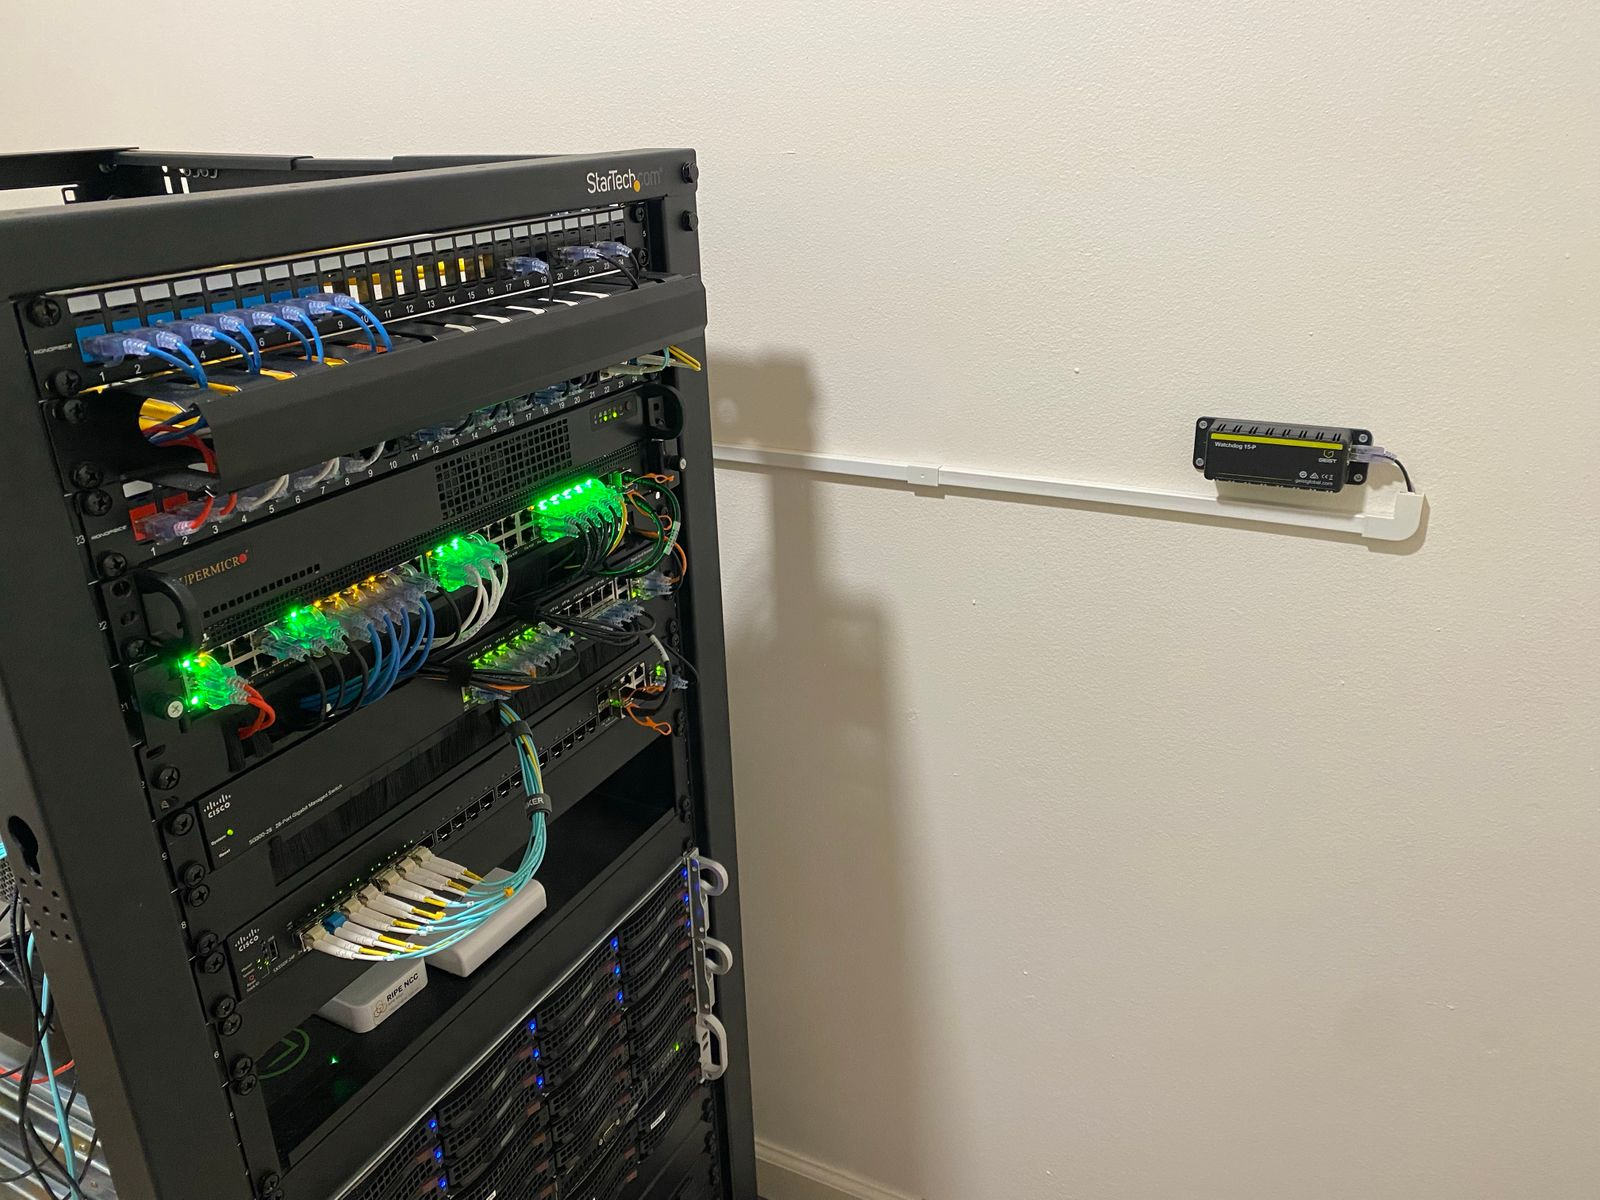
Over to the right of the rack, I'm still running a Watchdog 15-P for temp monitoring. It does great (Old picture, so ignore any inconsistencies)
Below all this is where servers and storage lives. I've stolen the picture from last time because nothing has changed, and it had less dust in it last year...
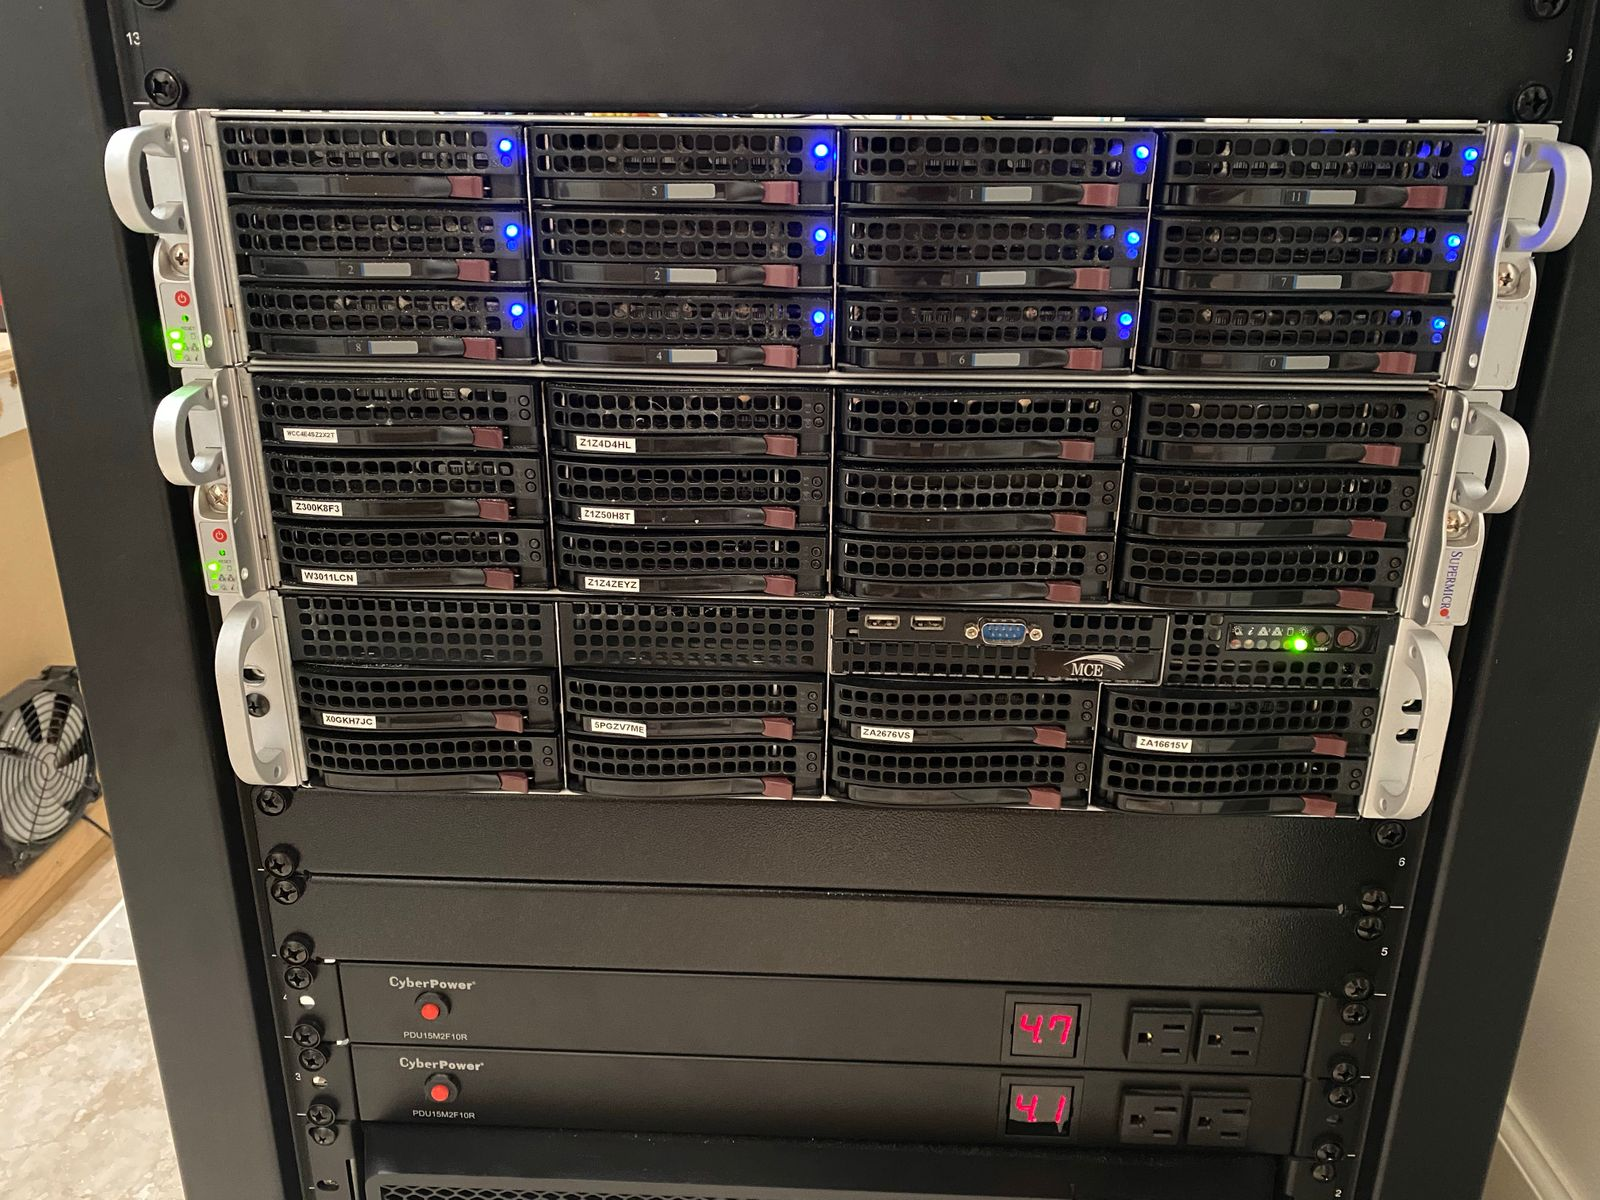
Up top is my ESXi server which hasn't changed at all really. Its running 2 x E5-2680 V4's with 256GB of ECC DDR4, Dual 10G NIC's, Micron 9100 Pro 3.4TB HHHL NVMe SSD and an LSI 9207-8i which I passed through to a TrueNAS VM. I added 12 x 8TB NL-SAS drives I got for cheap, and put them into a large RAIDZ2 array for my media. I made it quiet by using the following fans FAN-0094L4 9G0812P1G09
I am trying to plan the replacement for this server. Ideally I want to get 3 Micro PC's in a cluster, but boy are they expensive! My main issue with this server is that it uses more power than I would like. I do not use anywhere near to the capabilities of those CPU's, but I can't remove the second one or I lose half my PCI-E slots, which I need.
ESXi runs VM's for pretty much everything I use. Docker hosts for PLEX and supporting services, Windows VM's for Veeam, Arq etc, all the stuff I mess with.
Below that is my NAS. Its a TrueNAS box based on a Supermicro chassis and board
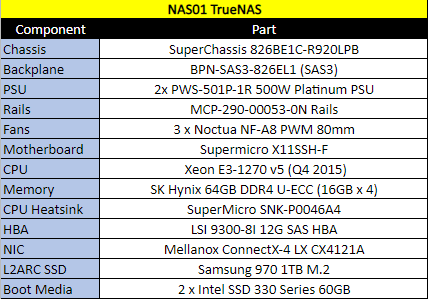
Here is an inside shot. Ignore the horrible cable management
Yes, there are SSD's velcrod inside.
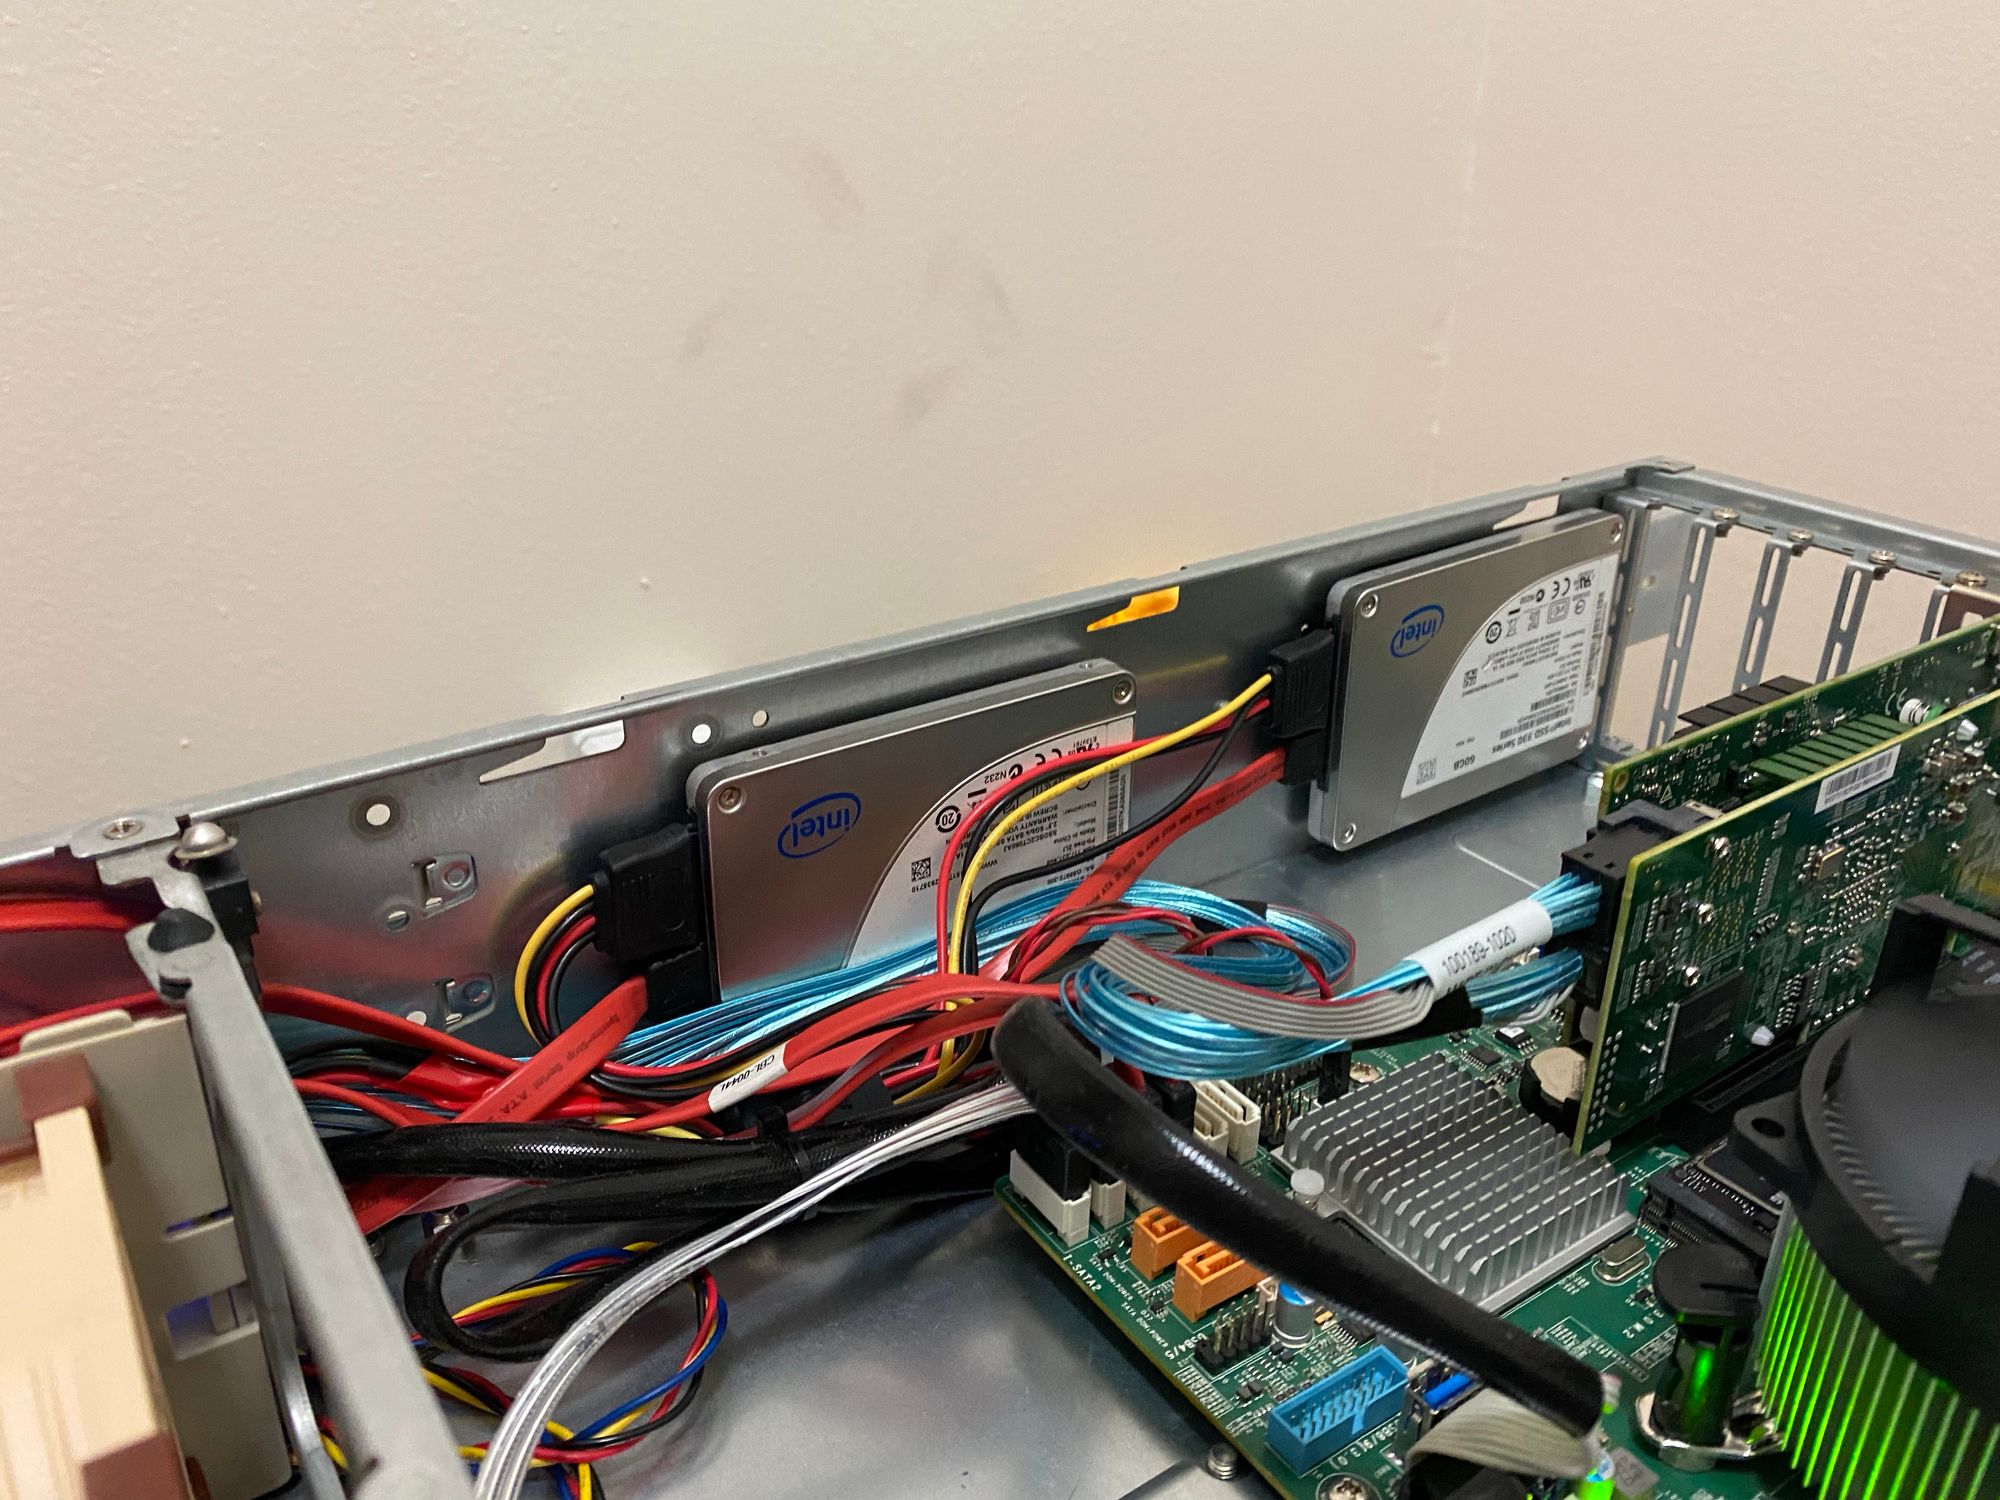
And don't worry, I did go back and put in the IO Shield and PCI Slot covers. They arrived late and I wanted to get everything up
More details on how I protect my data can be found here
SpookyGhost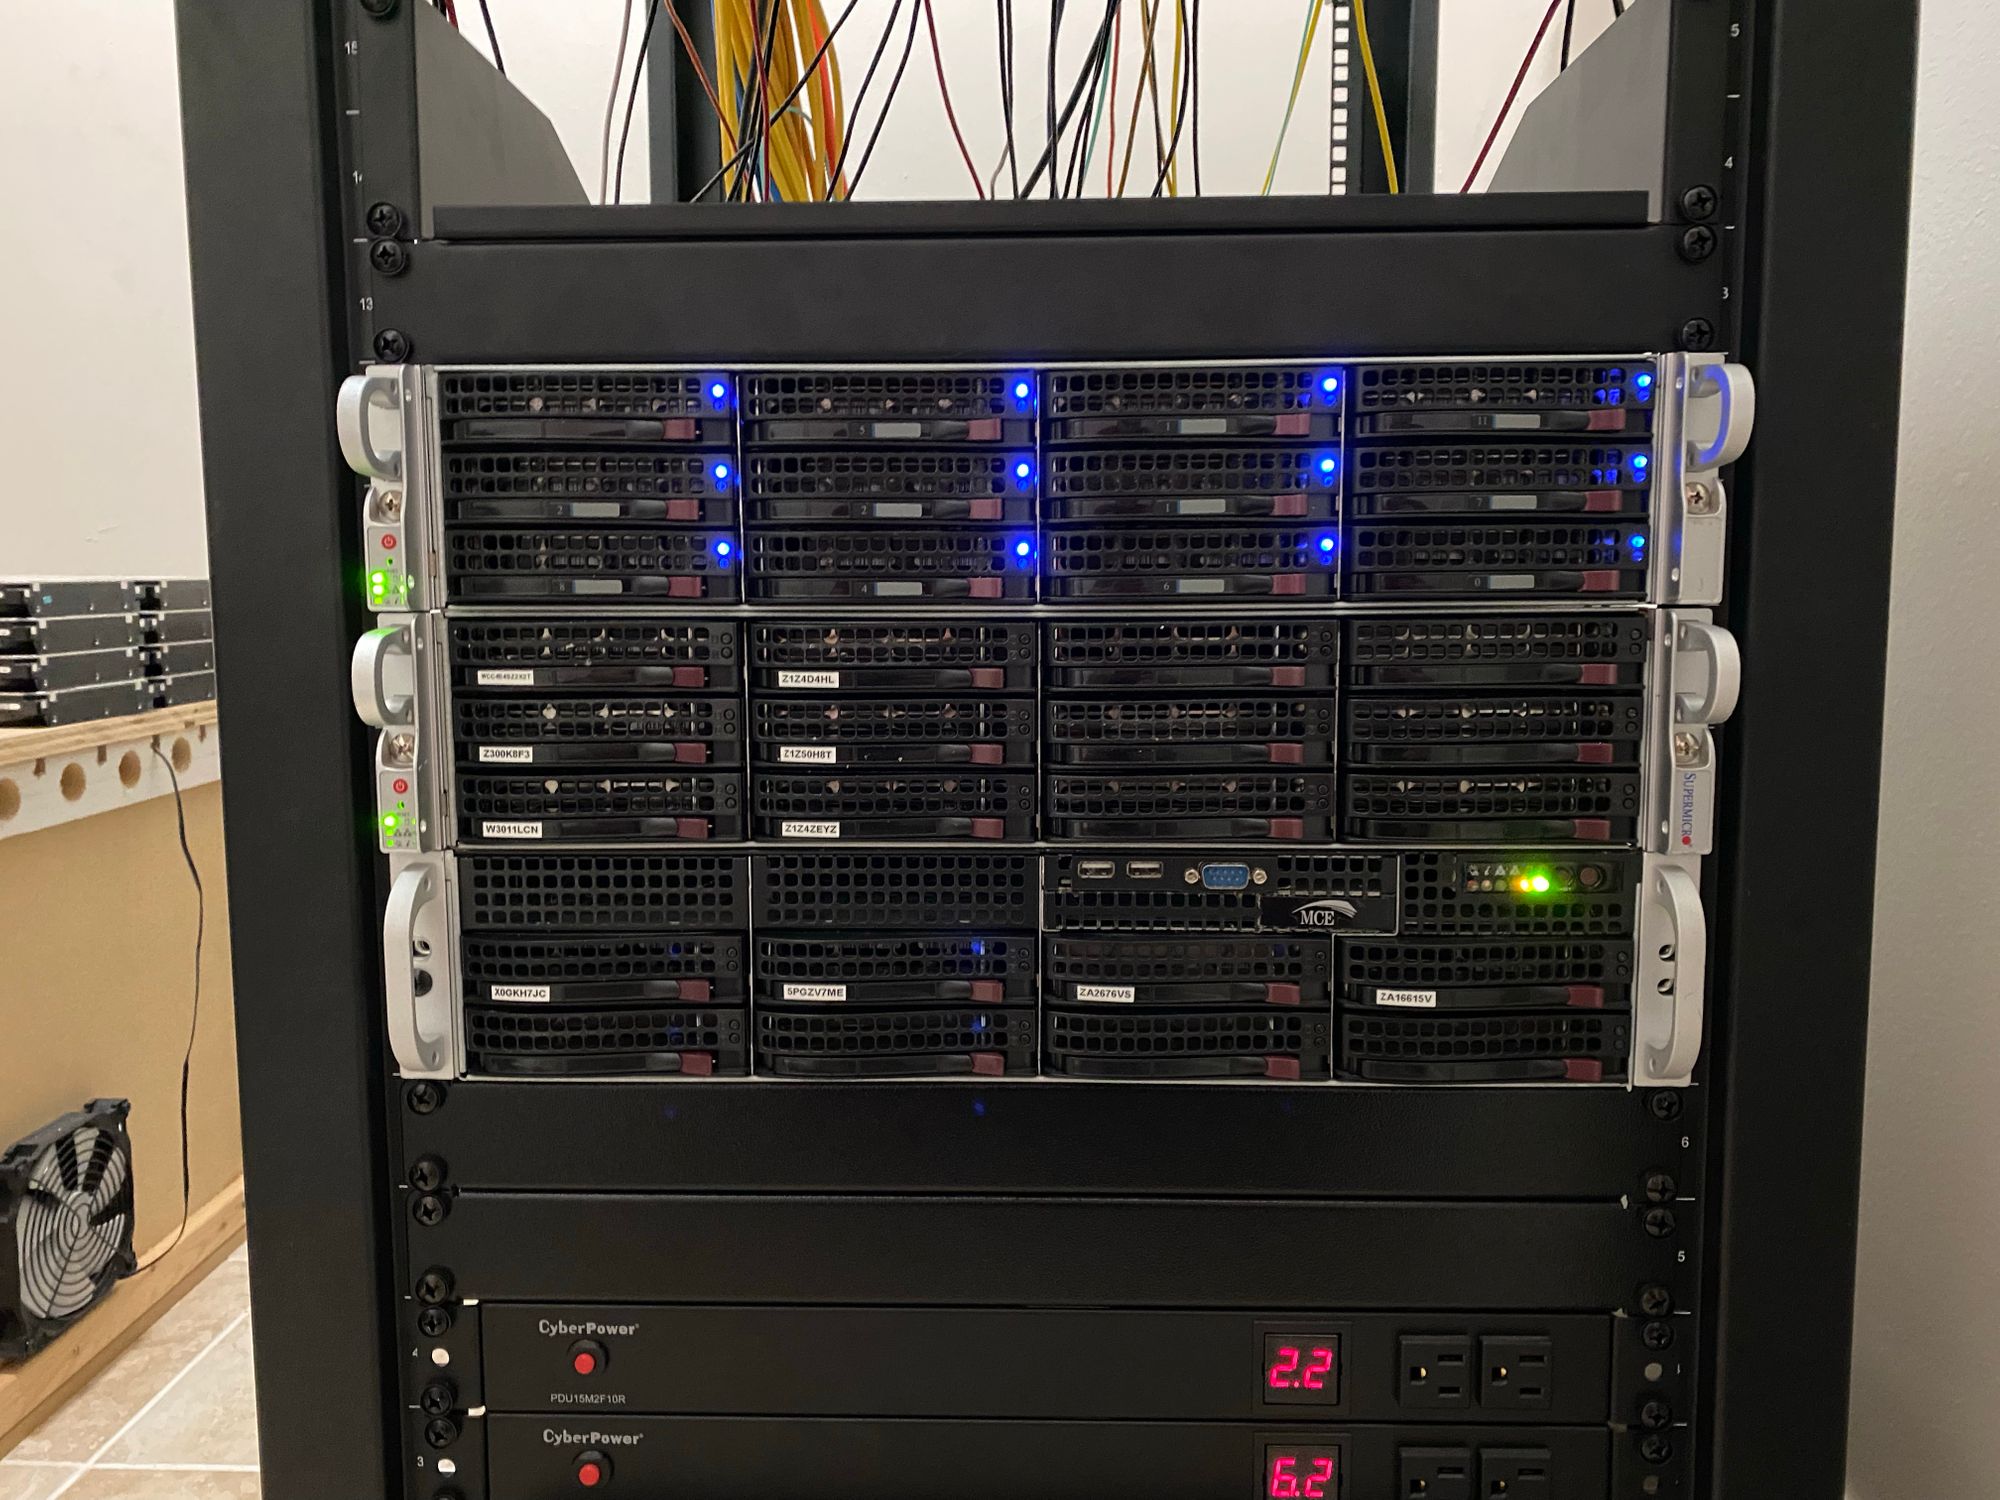
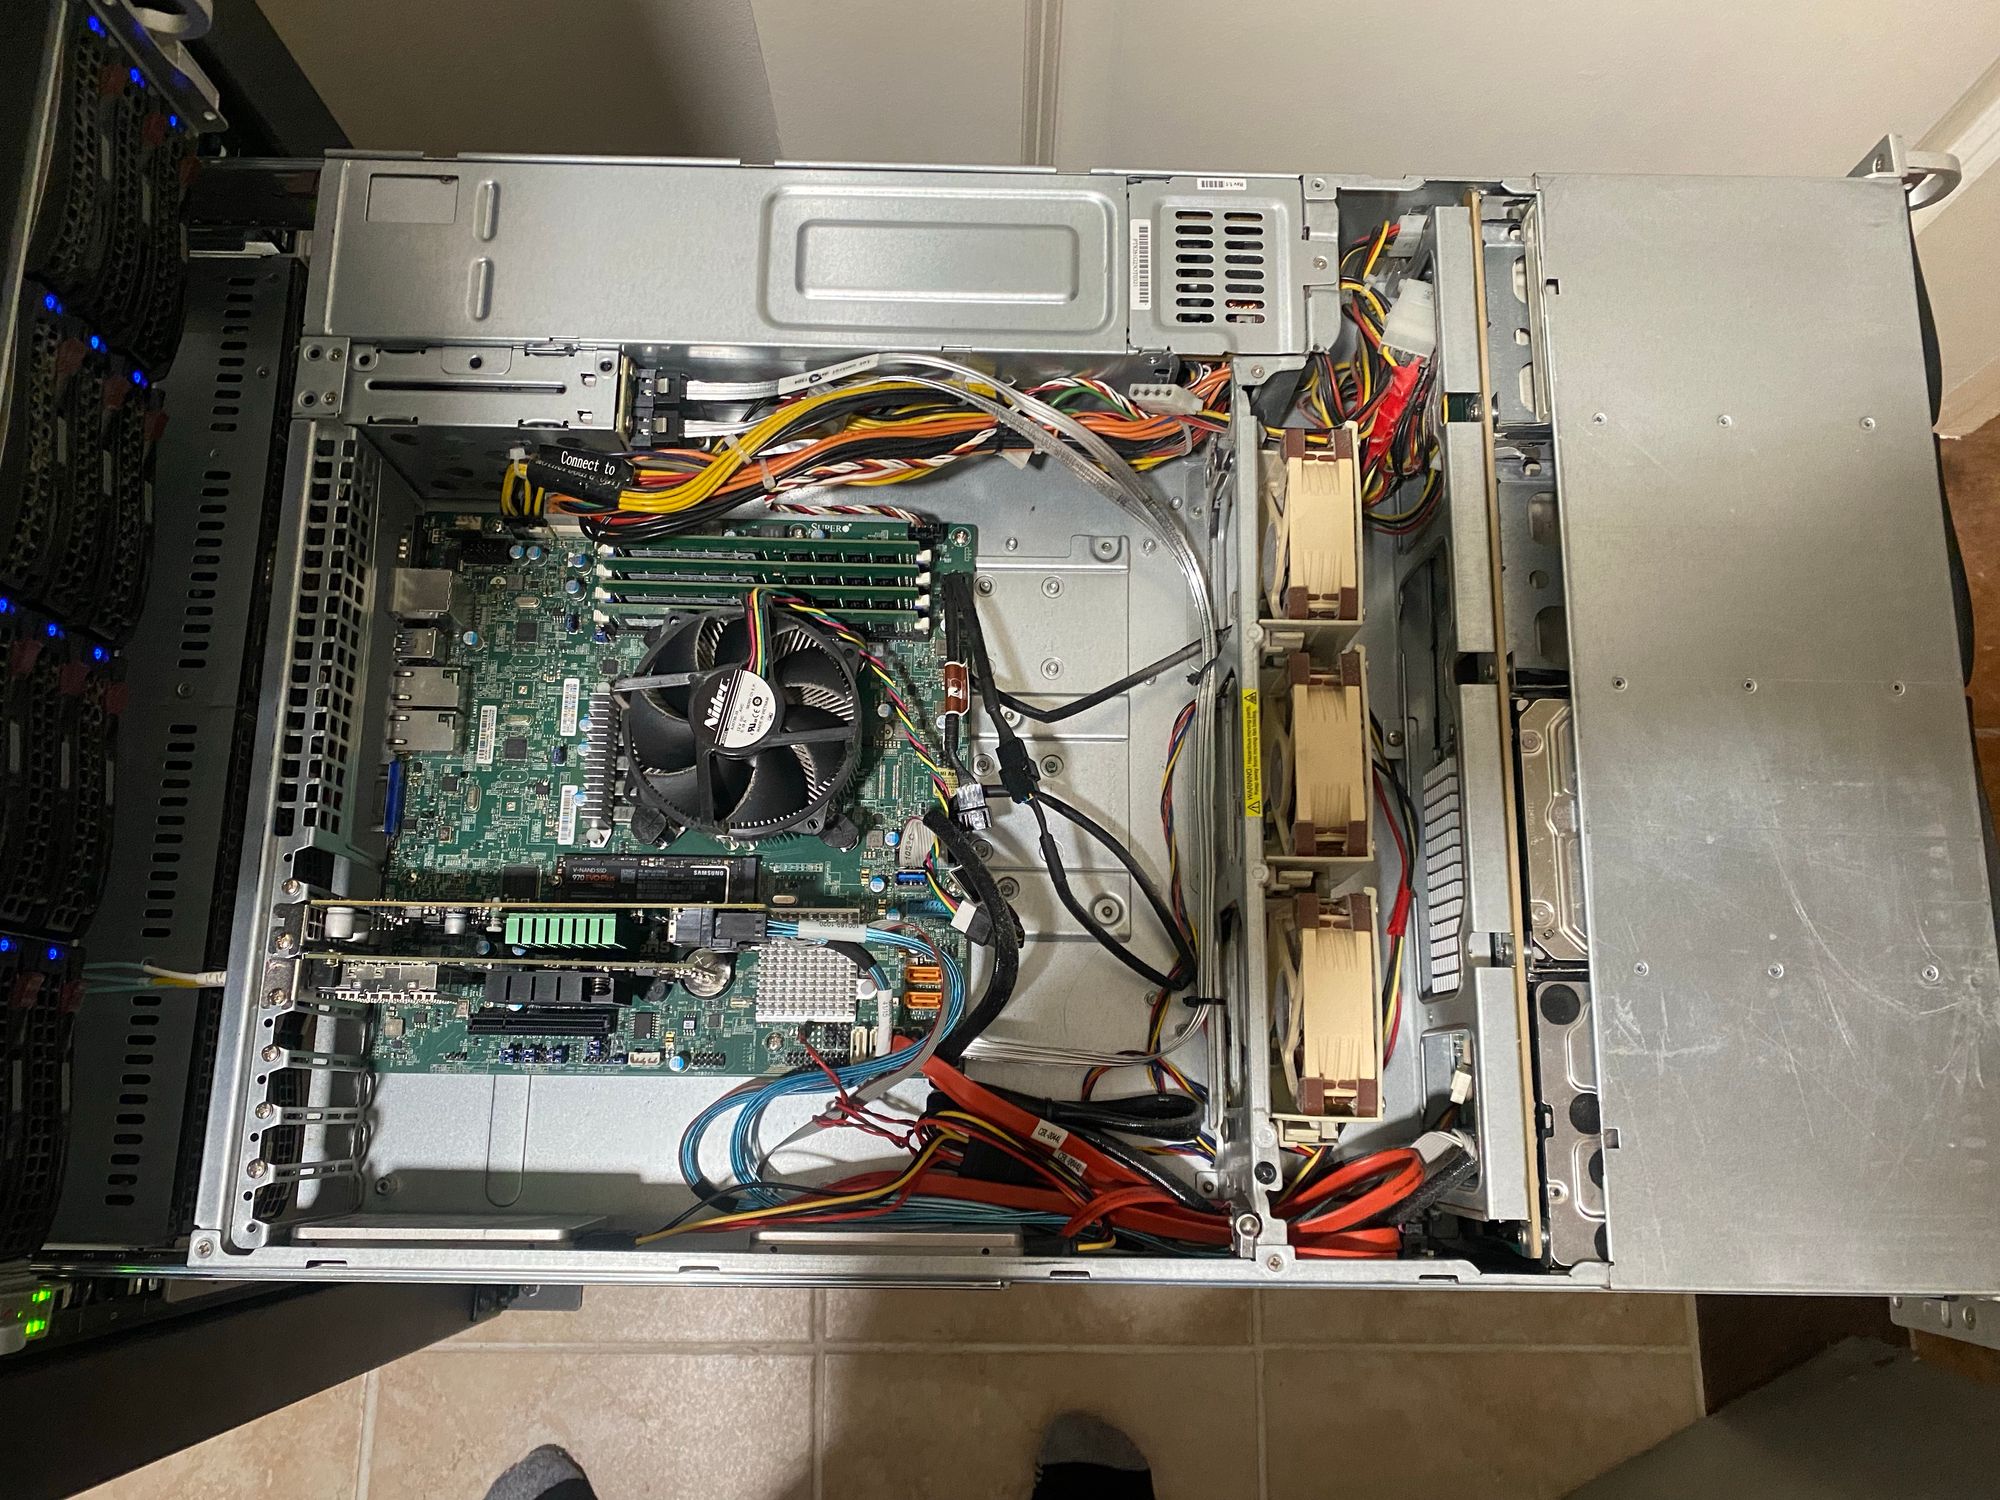
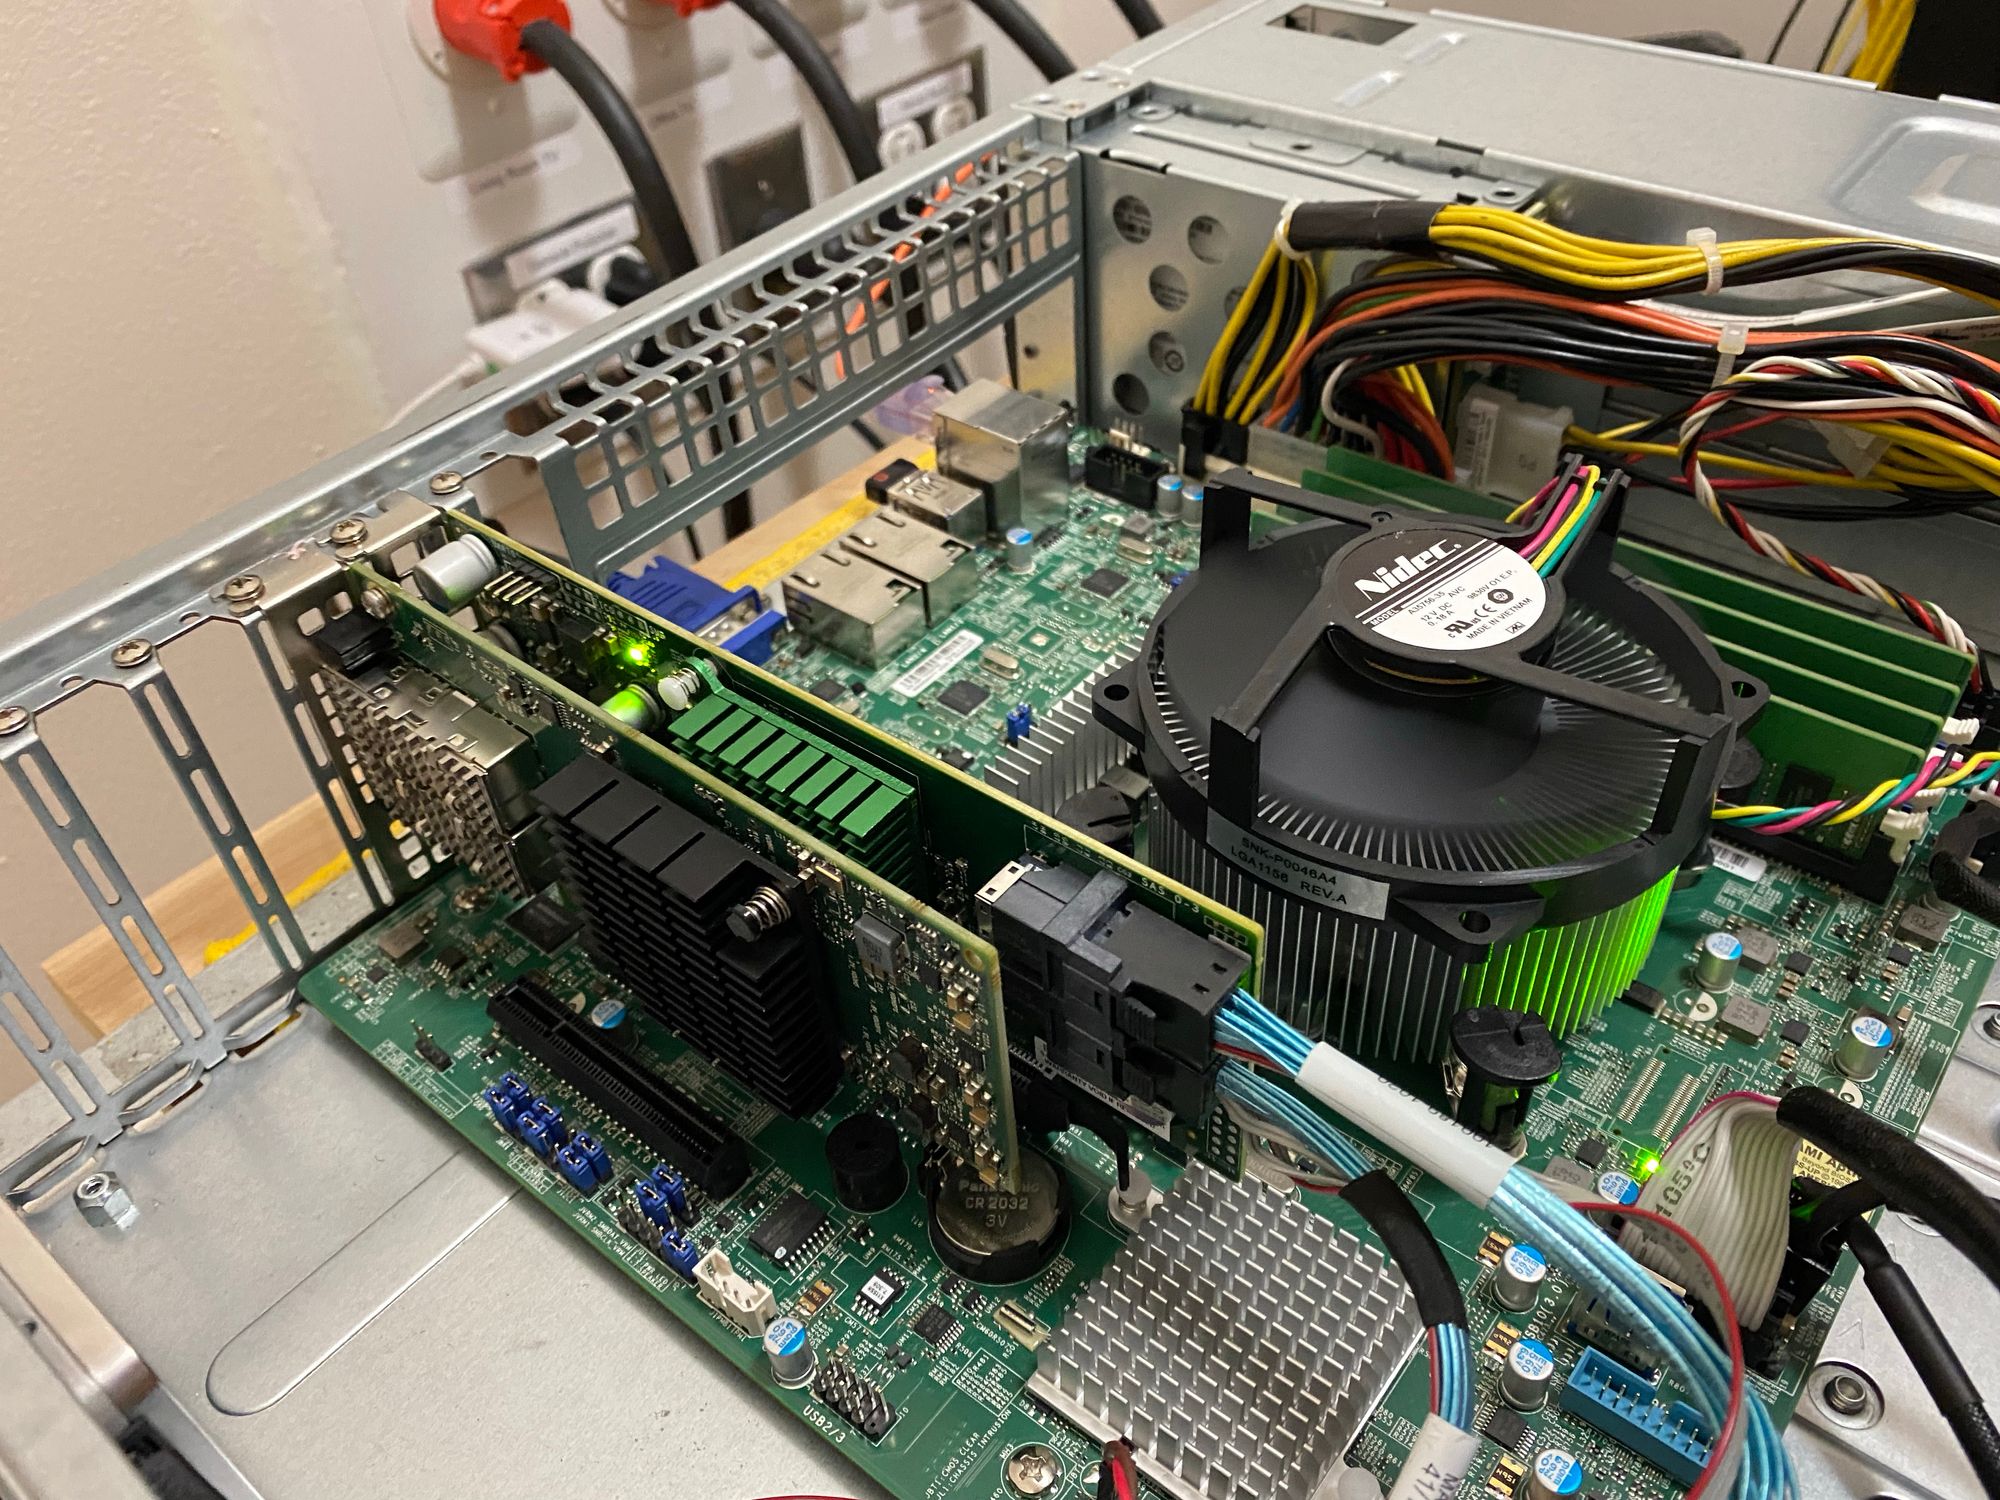
Below the NAS is my Blue Iris server. This also is in a Supermicro Chassis, but with just 8 Hotswap bays, which is plenty.
This server run Windows Server 2019, has an i7-8700K, 16GB DDR4, 512GB NVMe Boot SSD, an LSI 9207-8i to handle the 4 drives (2 x 12TB and 2 x 8TB) which was the same as last time. What's new is that I've added an NVIDIA Tesla P4 so I can do SO MUCH MORE work with Deepstack AI. Deepstack lets me do object detection, and now I can do it super fast
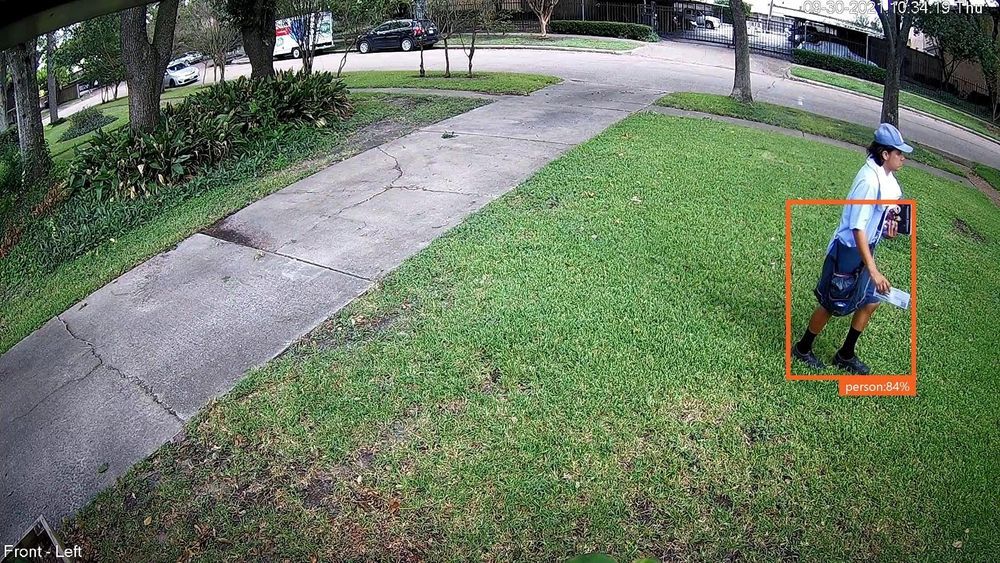
(It only gets 84% and chops off the top because I've masked out the sidewalk)
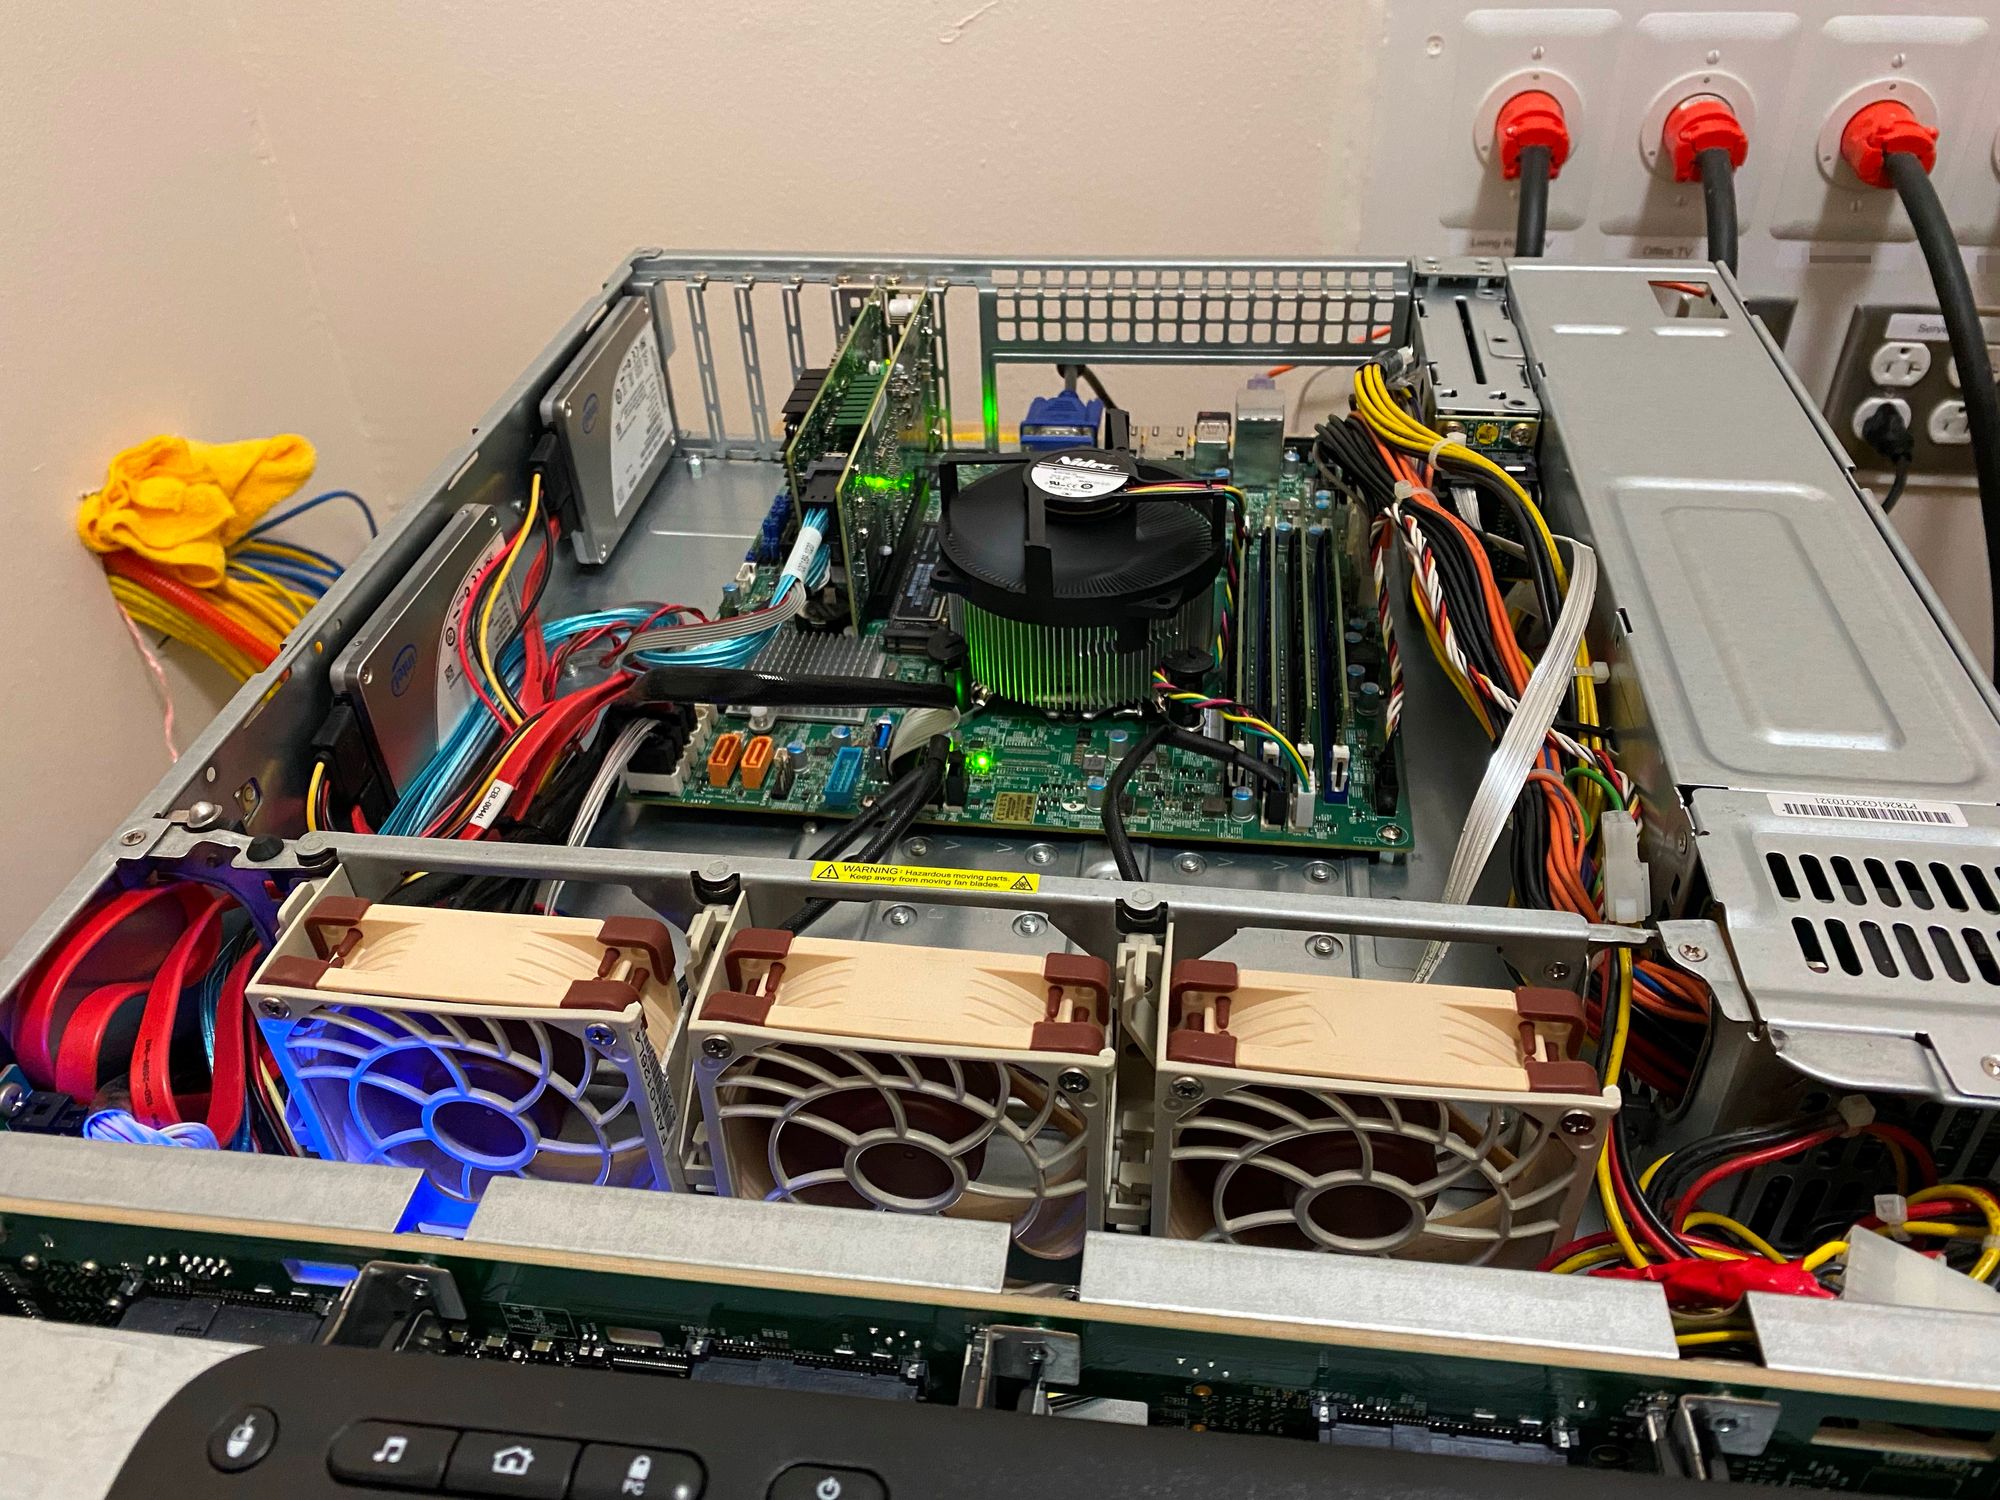
Here are some images of the GPU and the server
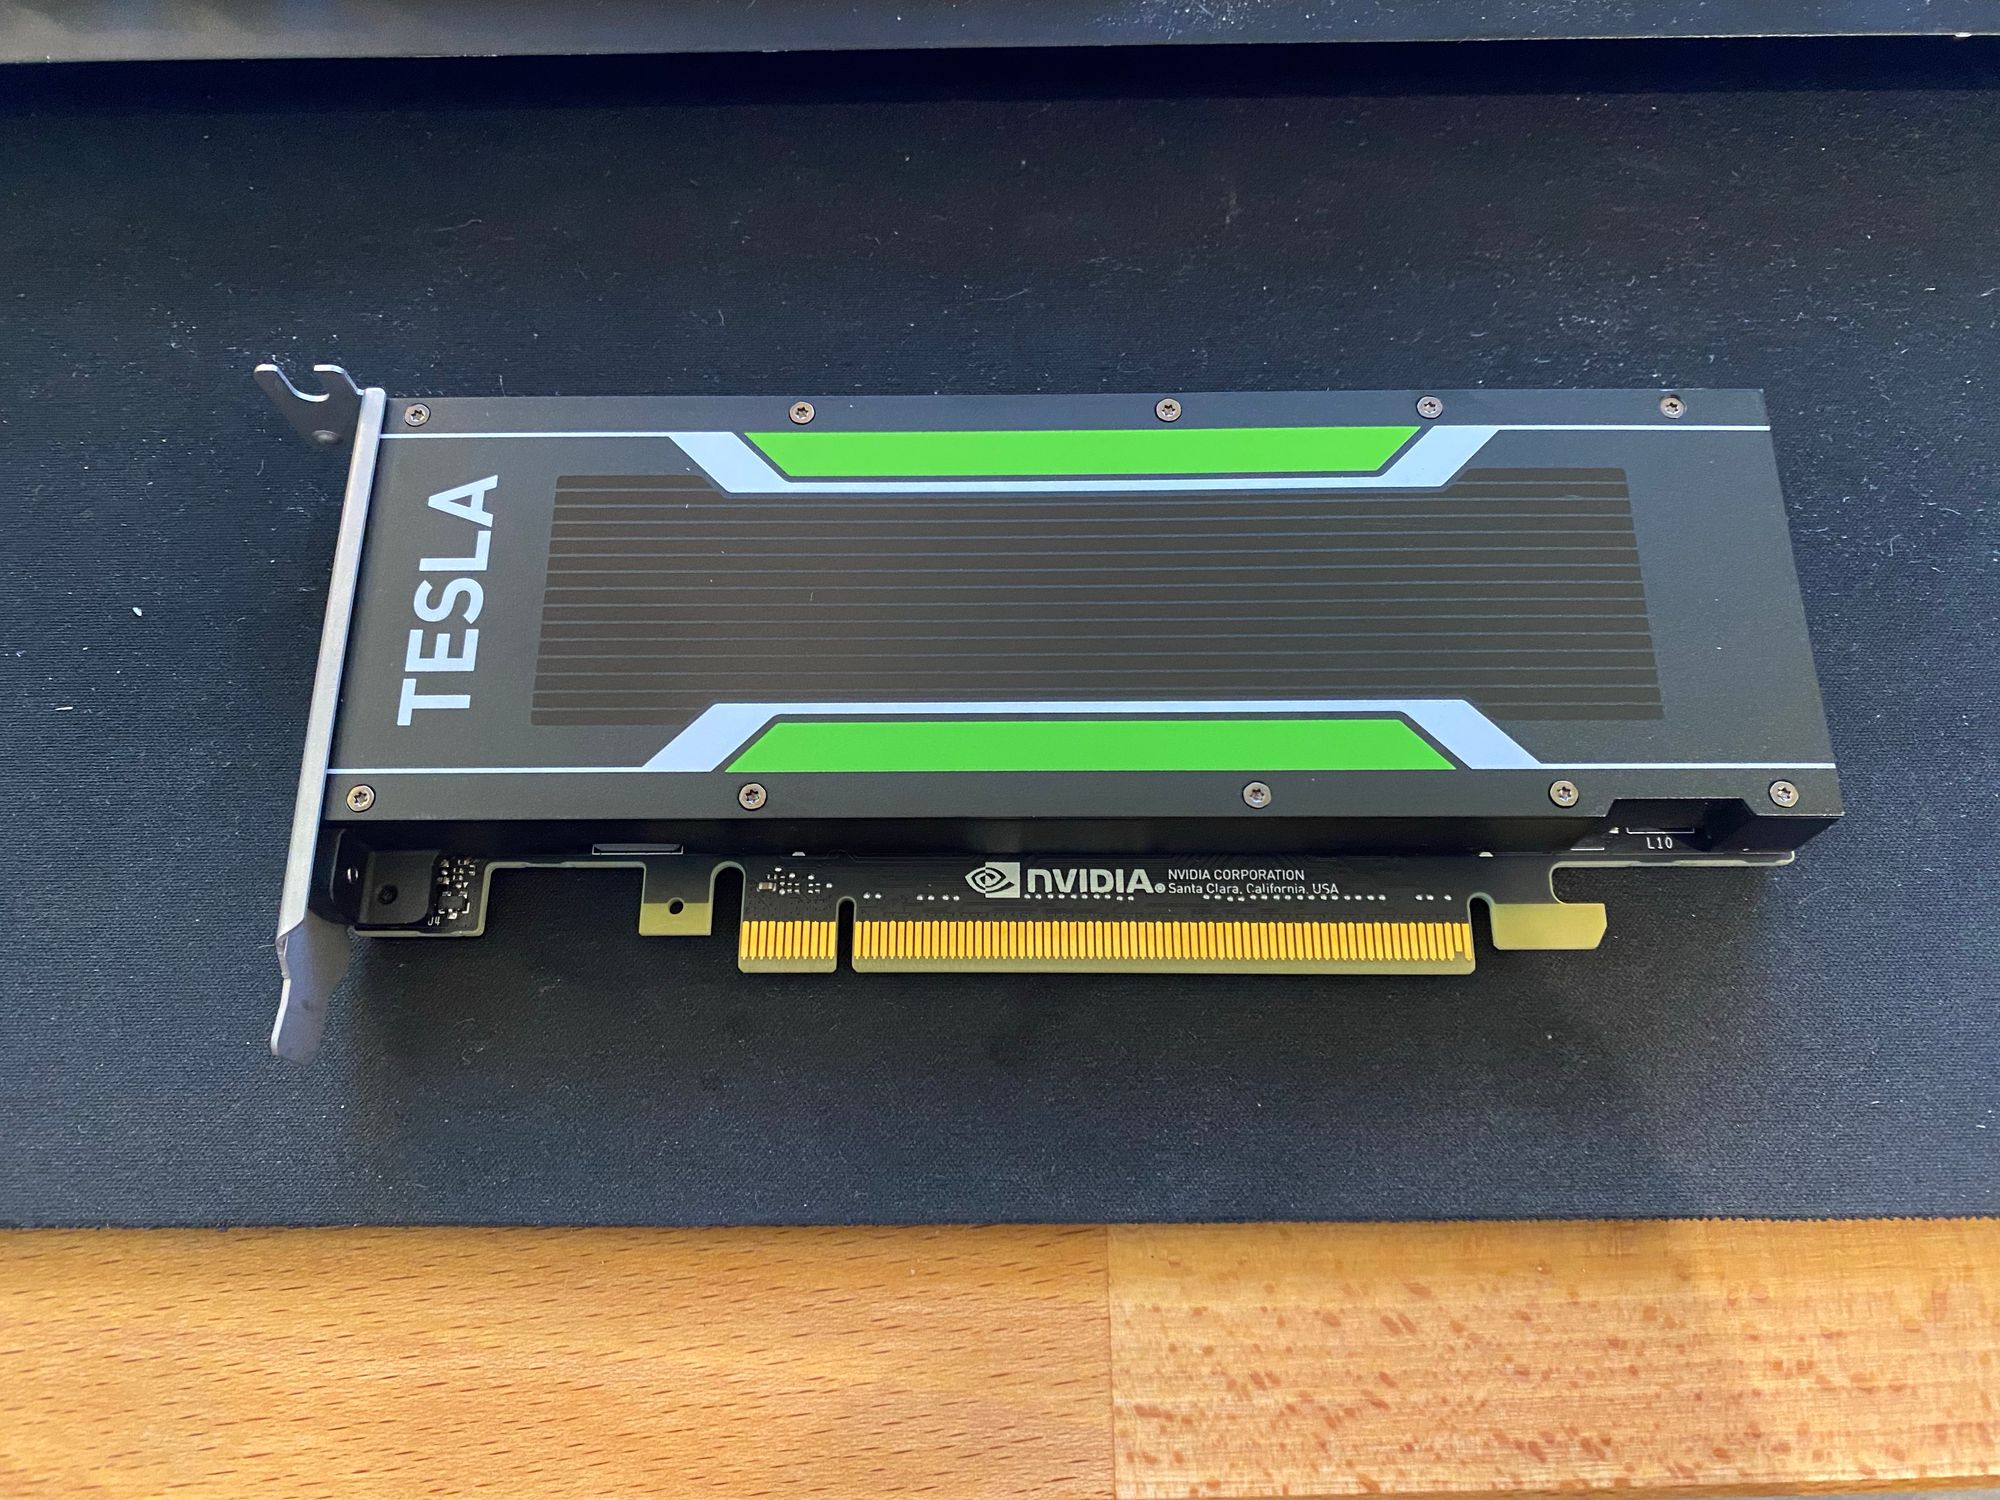
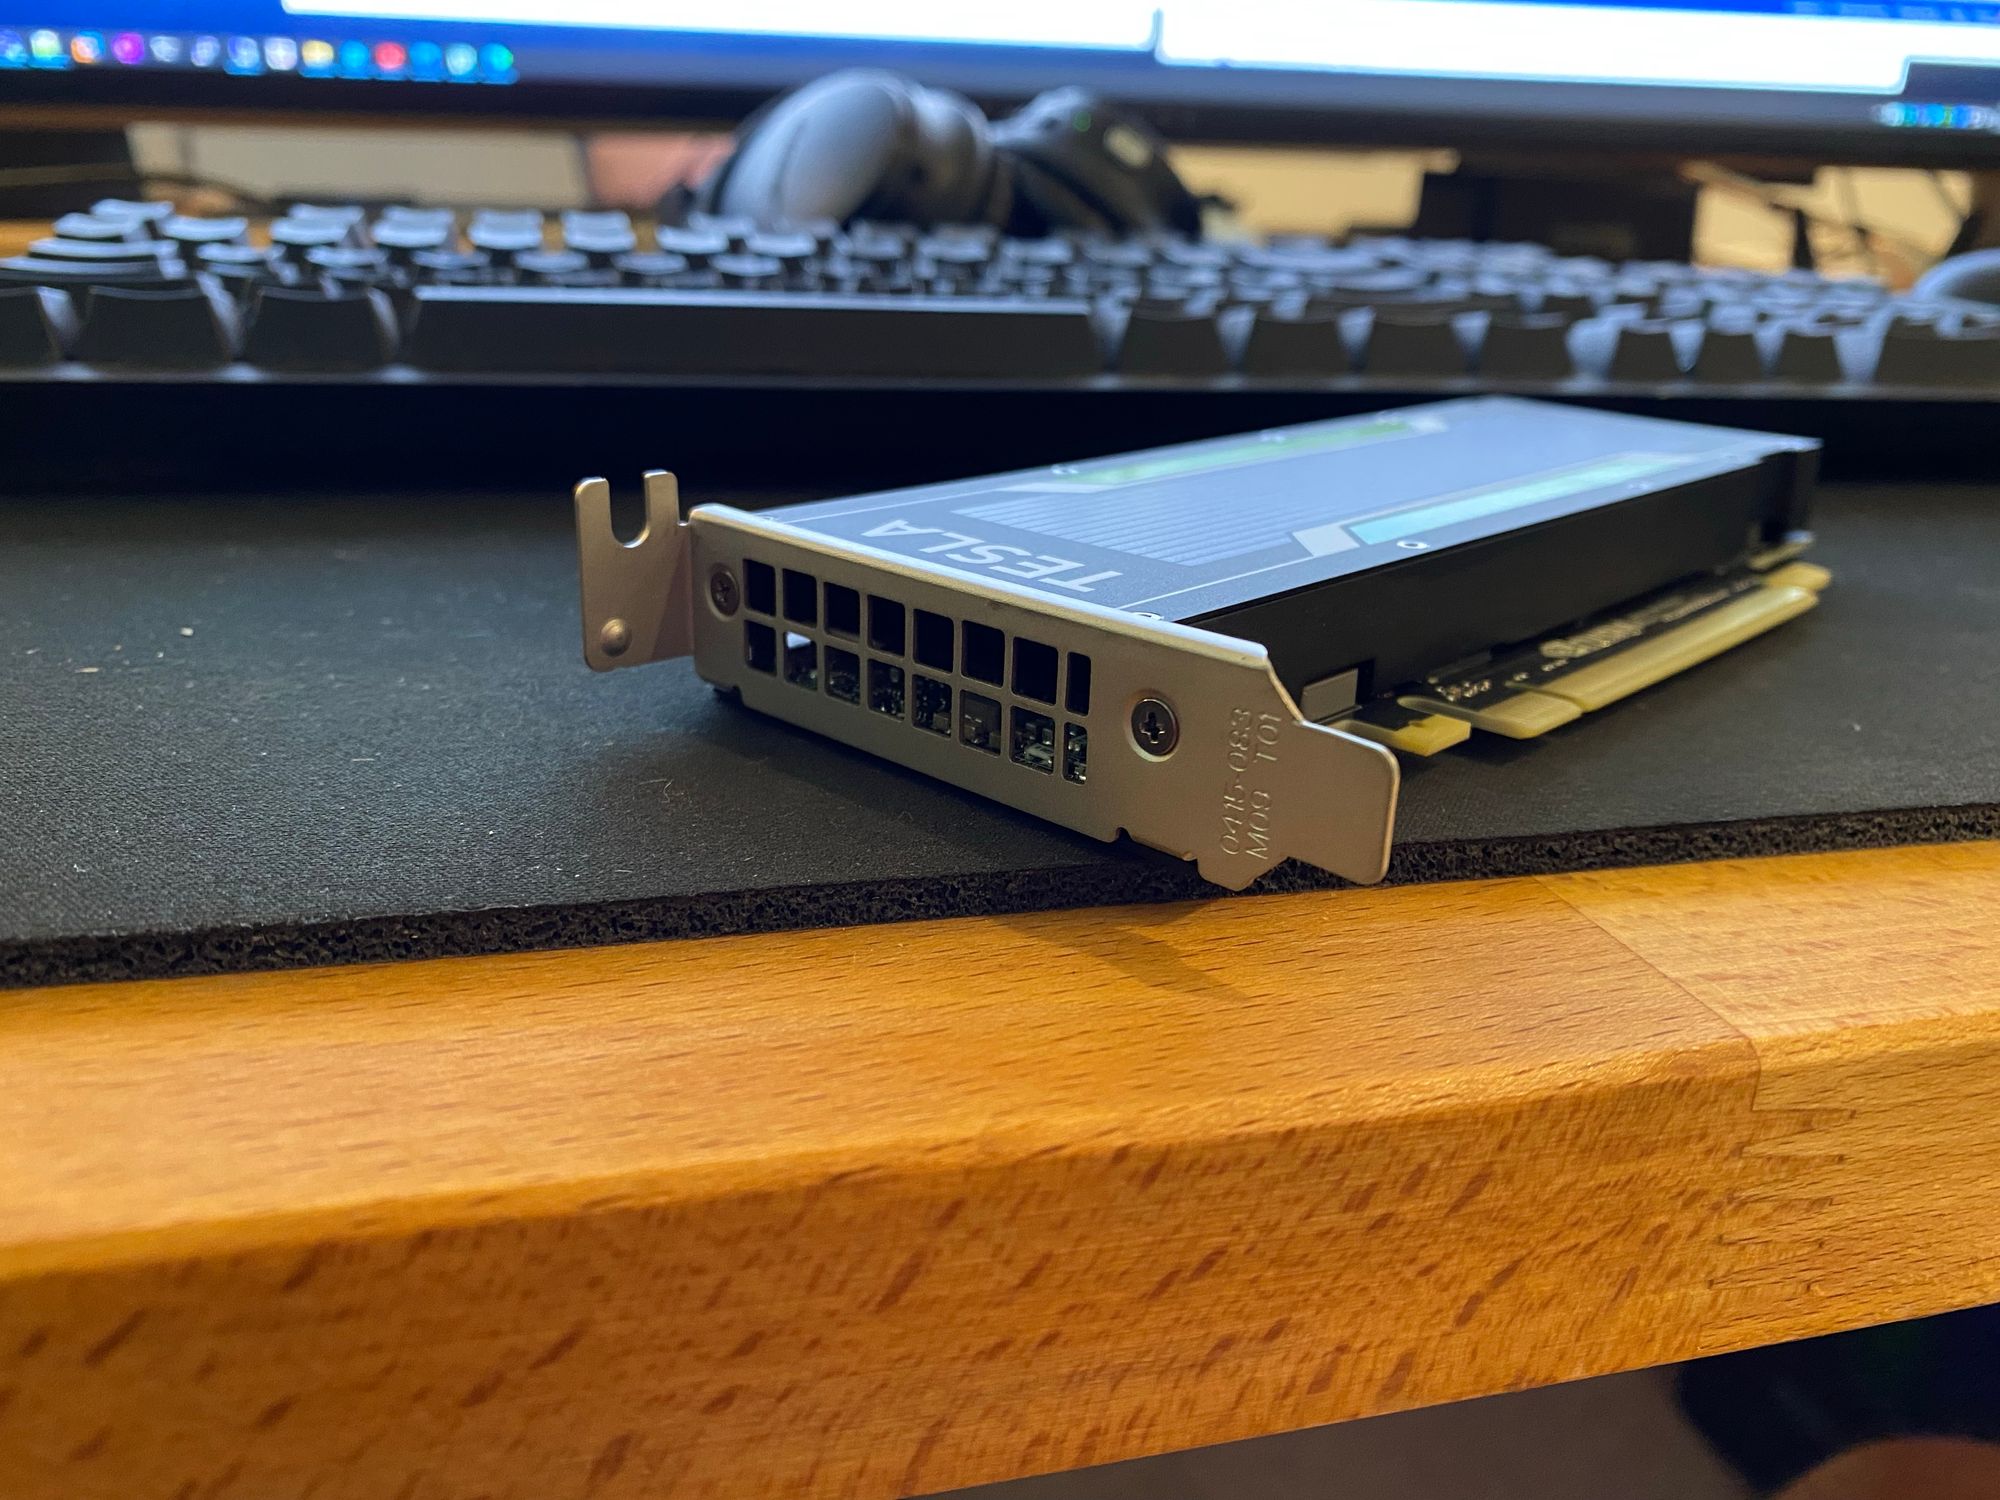

I had to move some PCI-E devices around to get it in
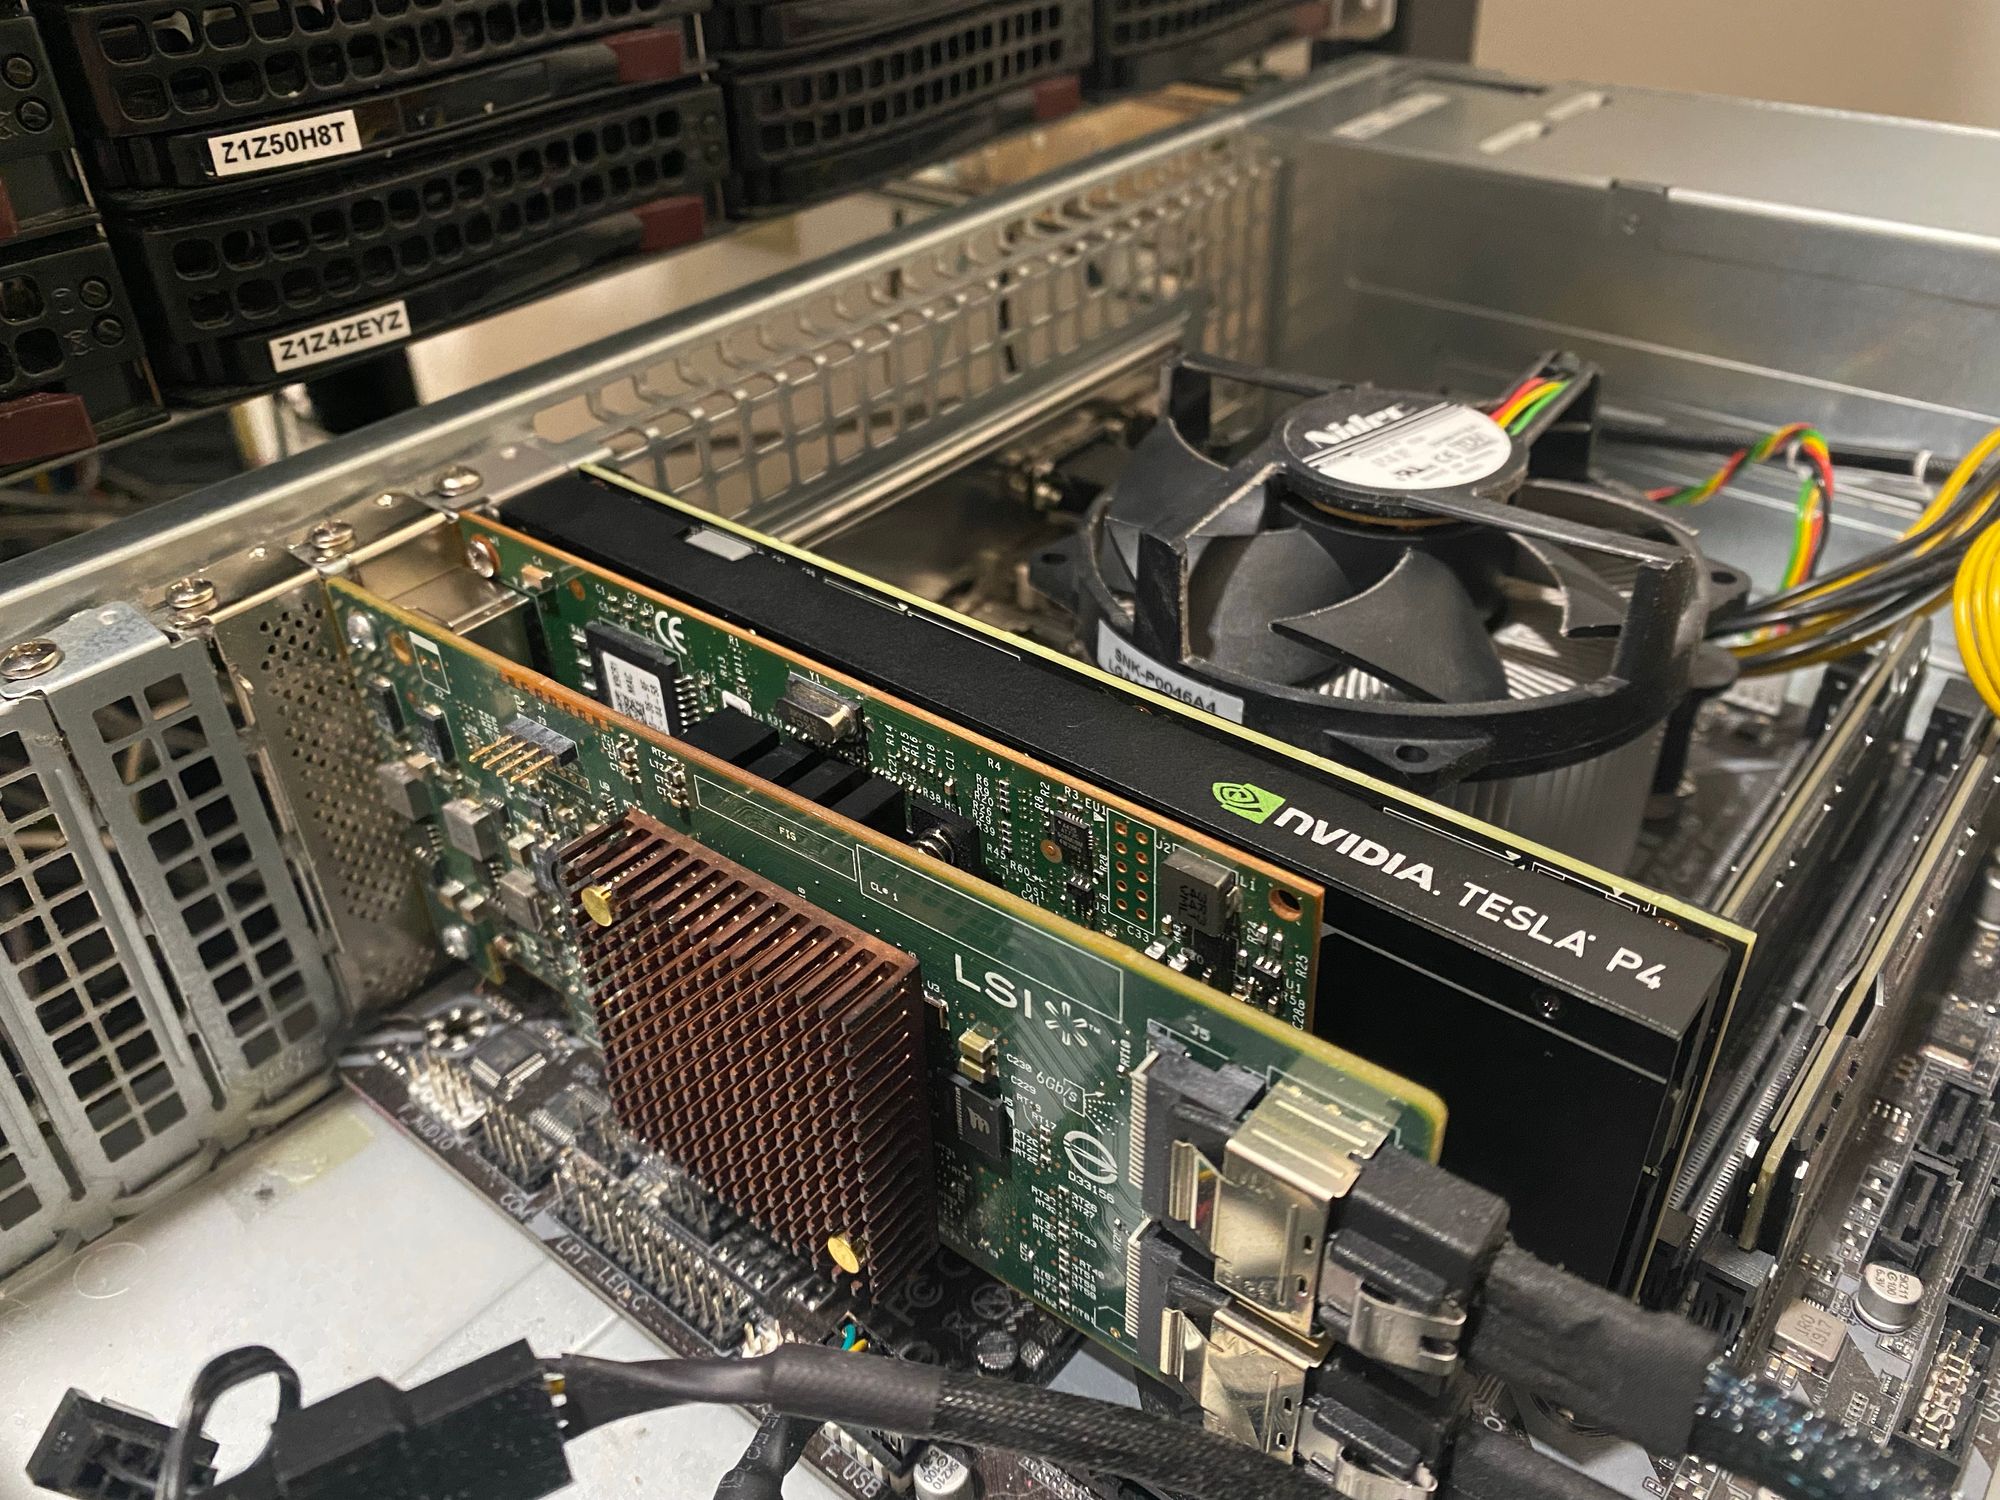
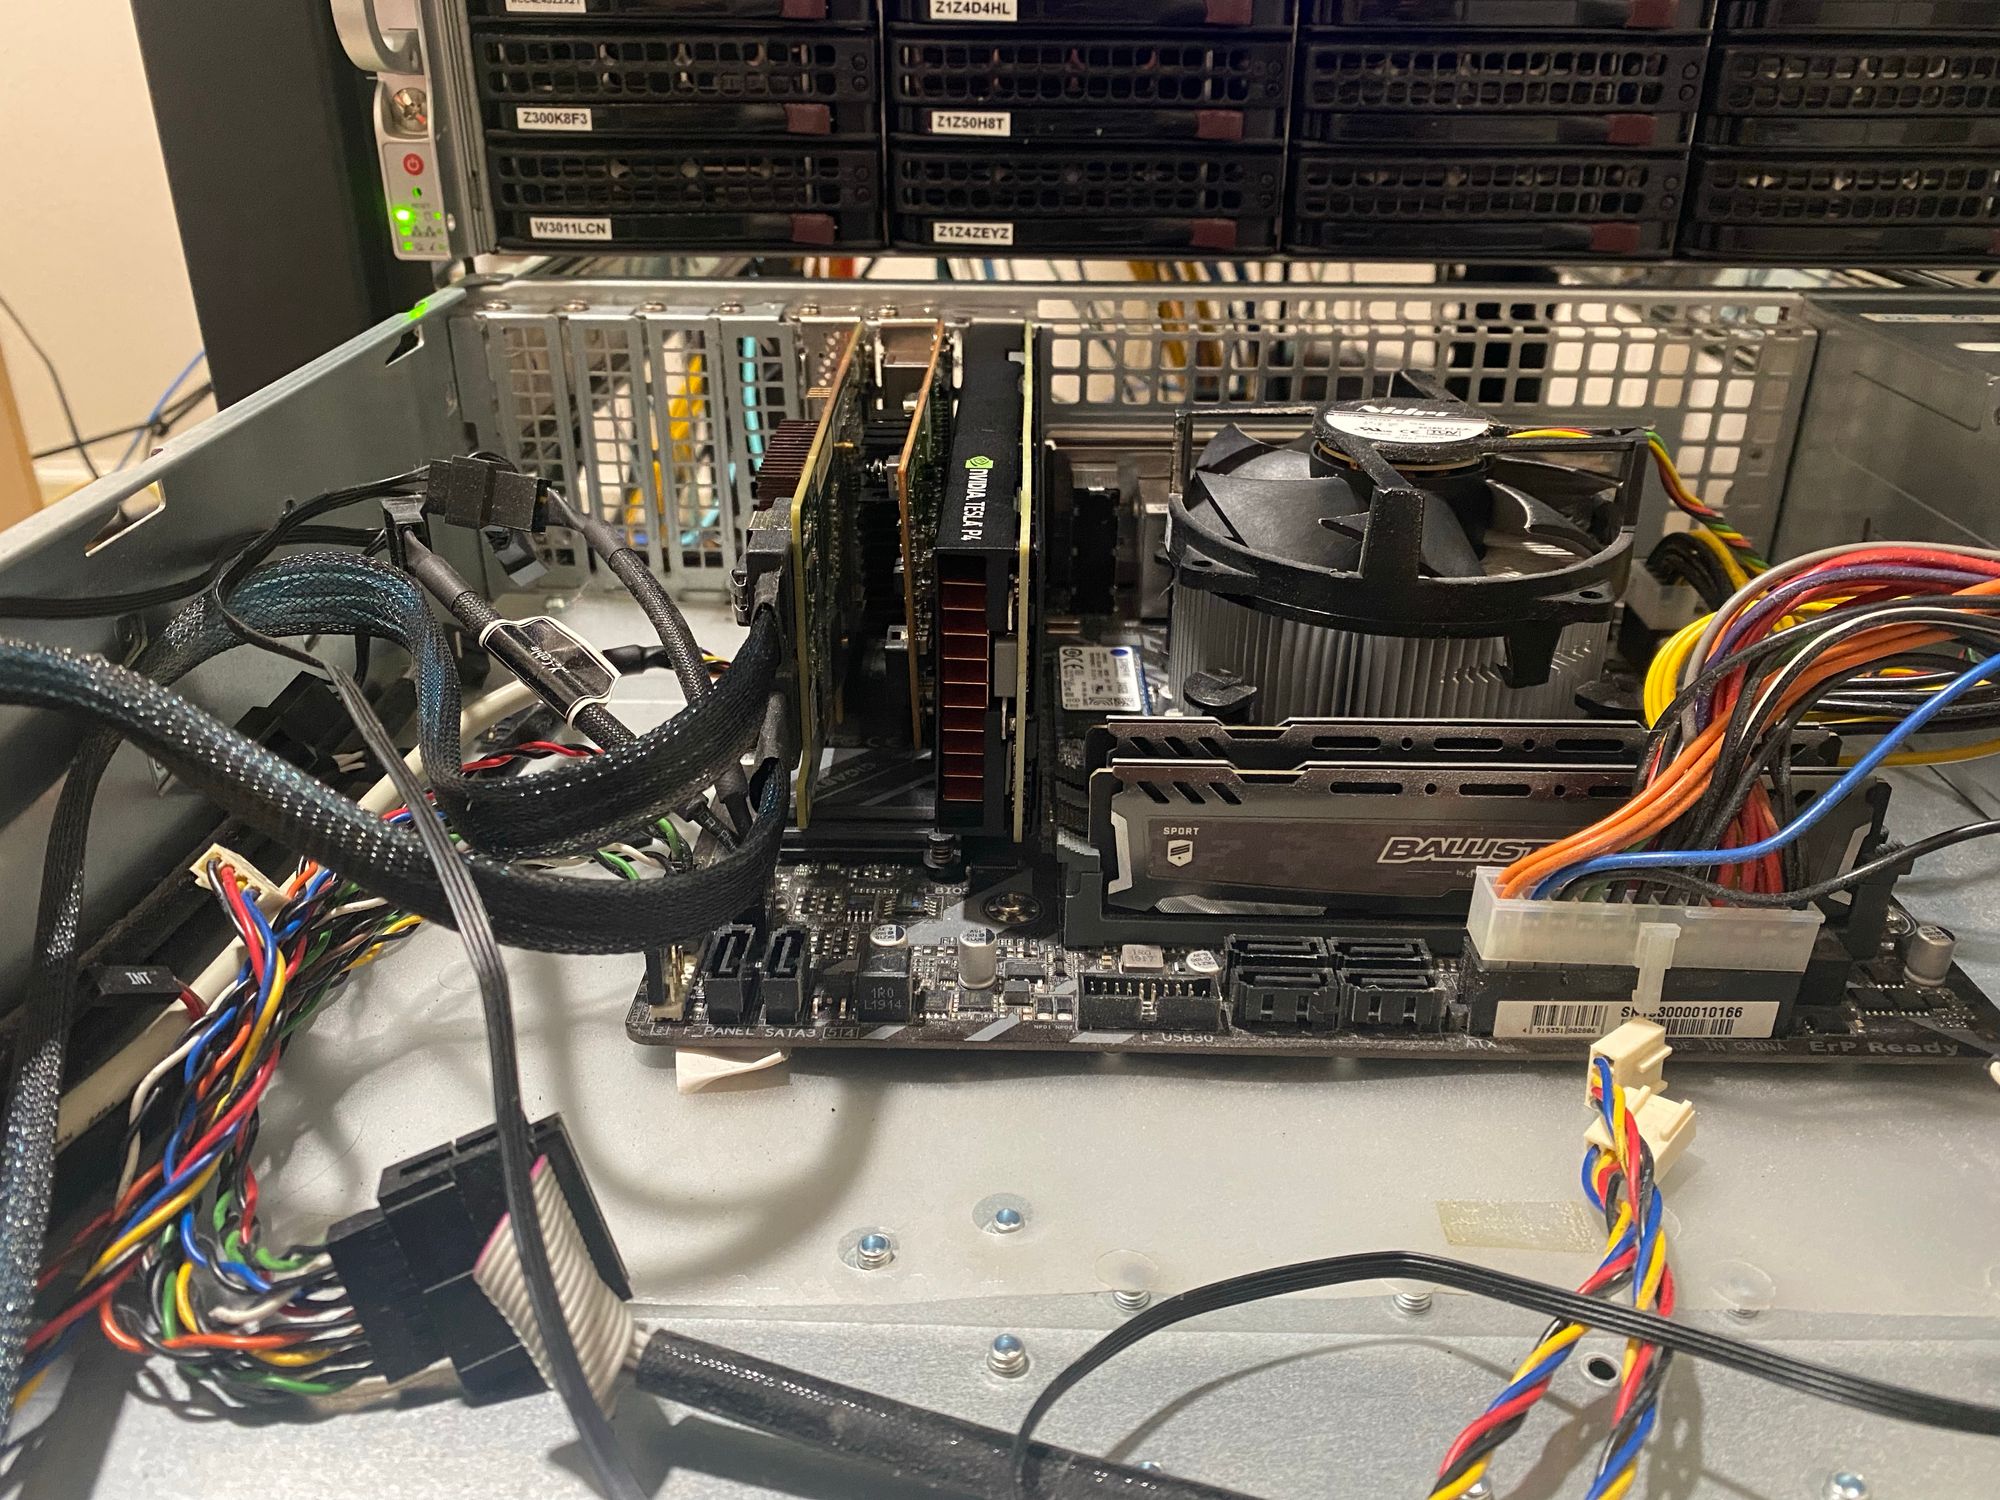
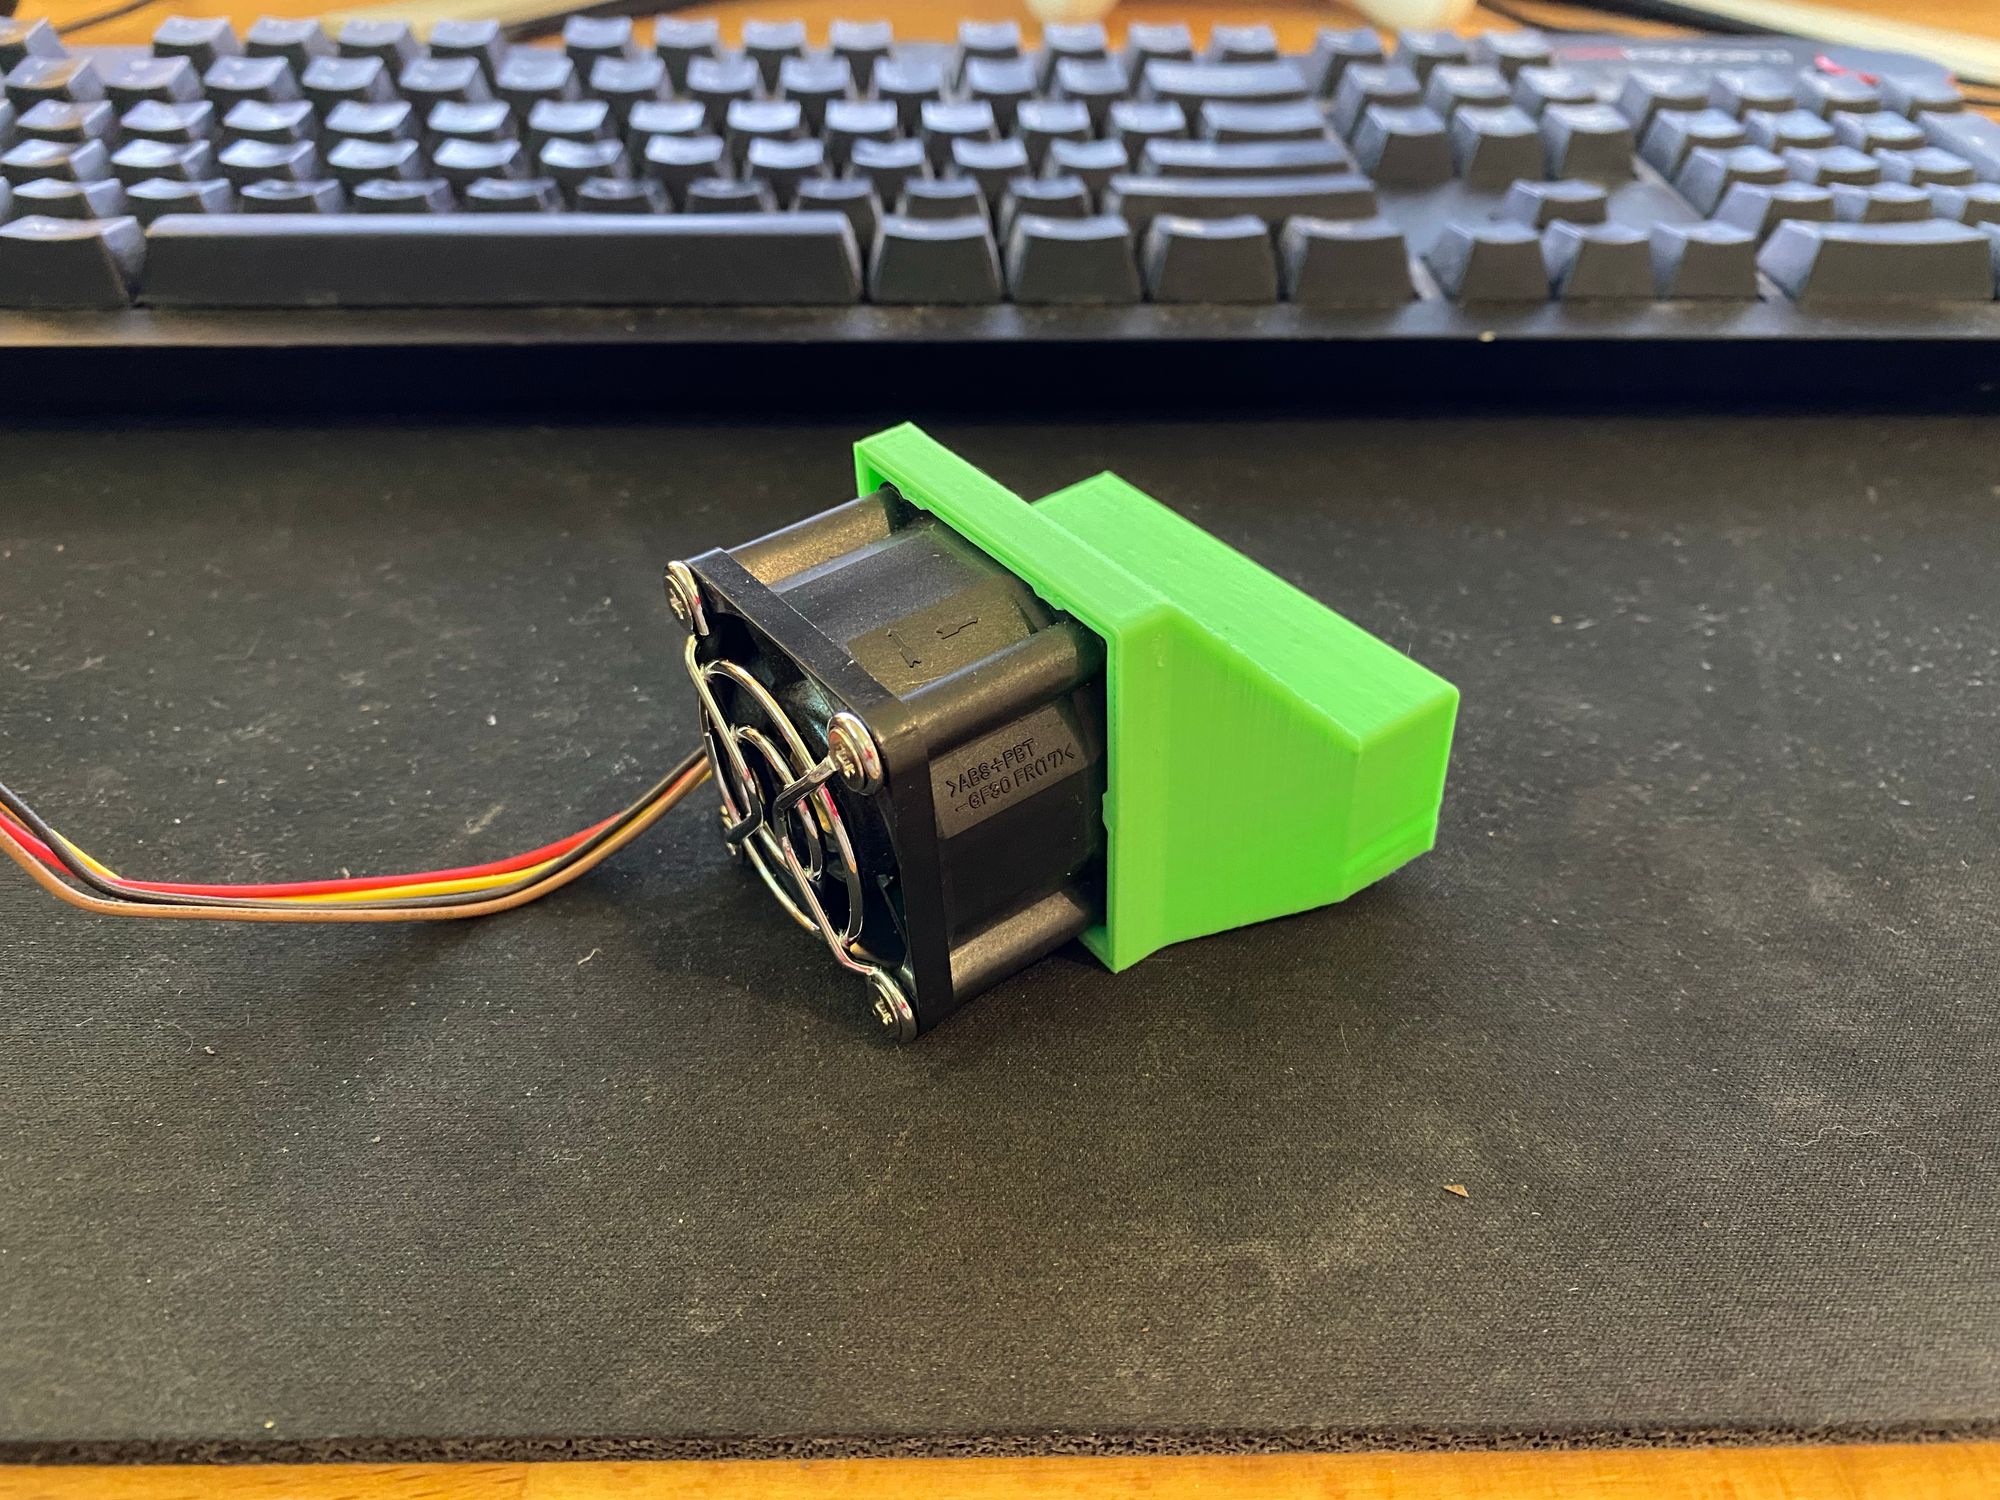
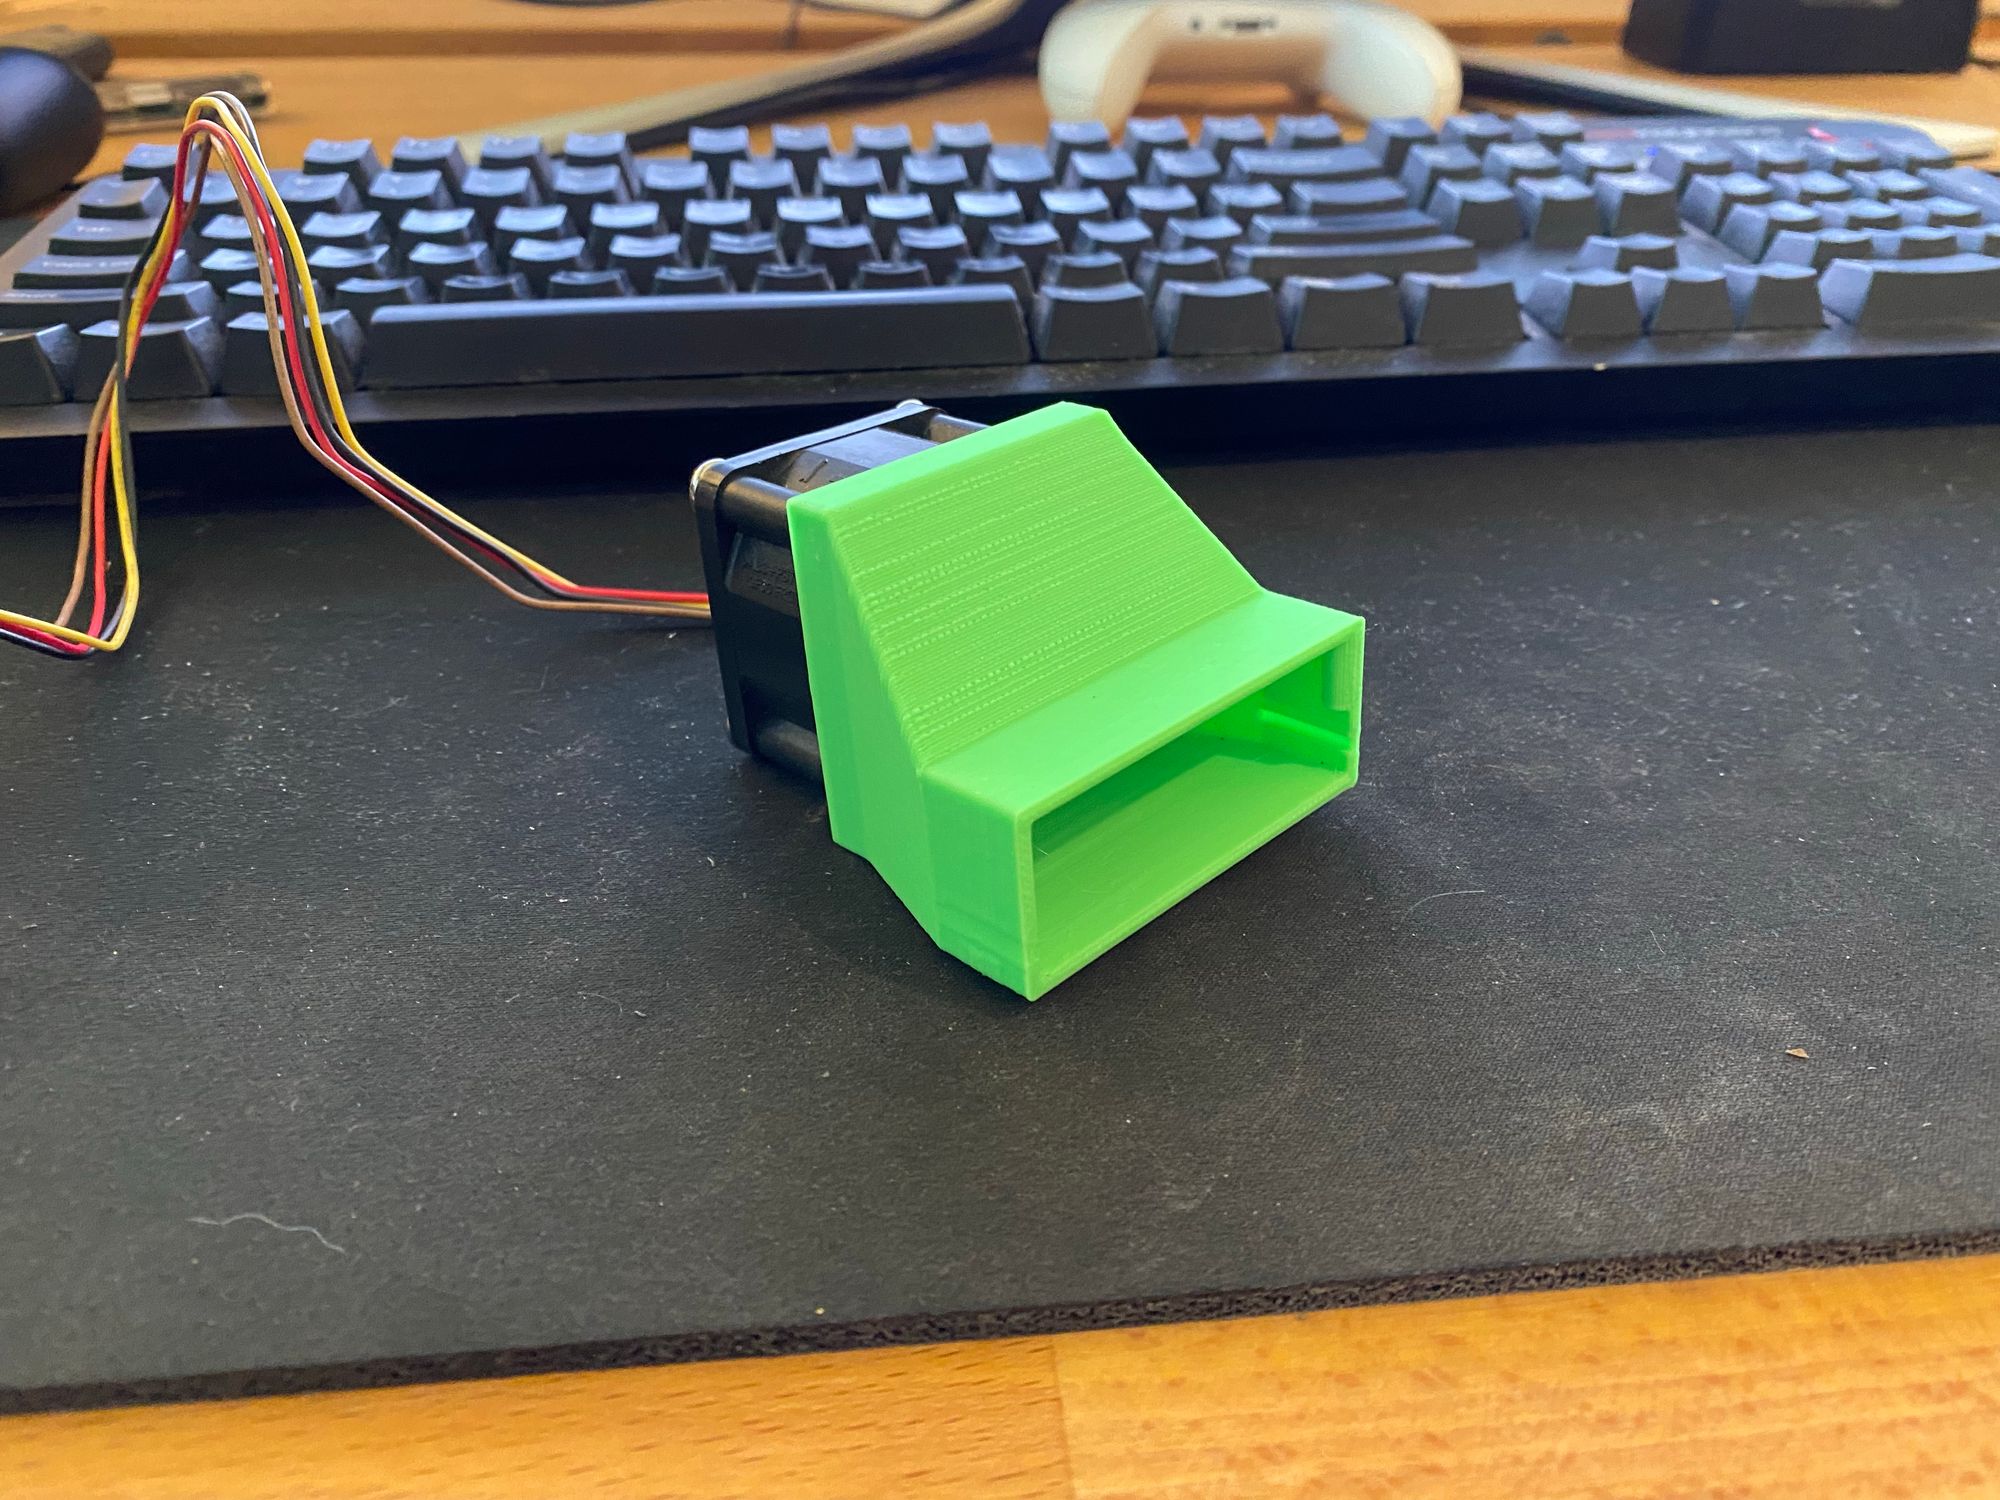
You'll notice that its passive, and I have really turned down the fan in this chassis. Immediately it got to 100c and throttled. So I went on eBay and got this neat fan shroud

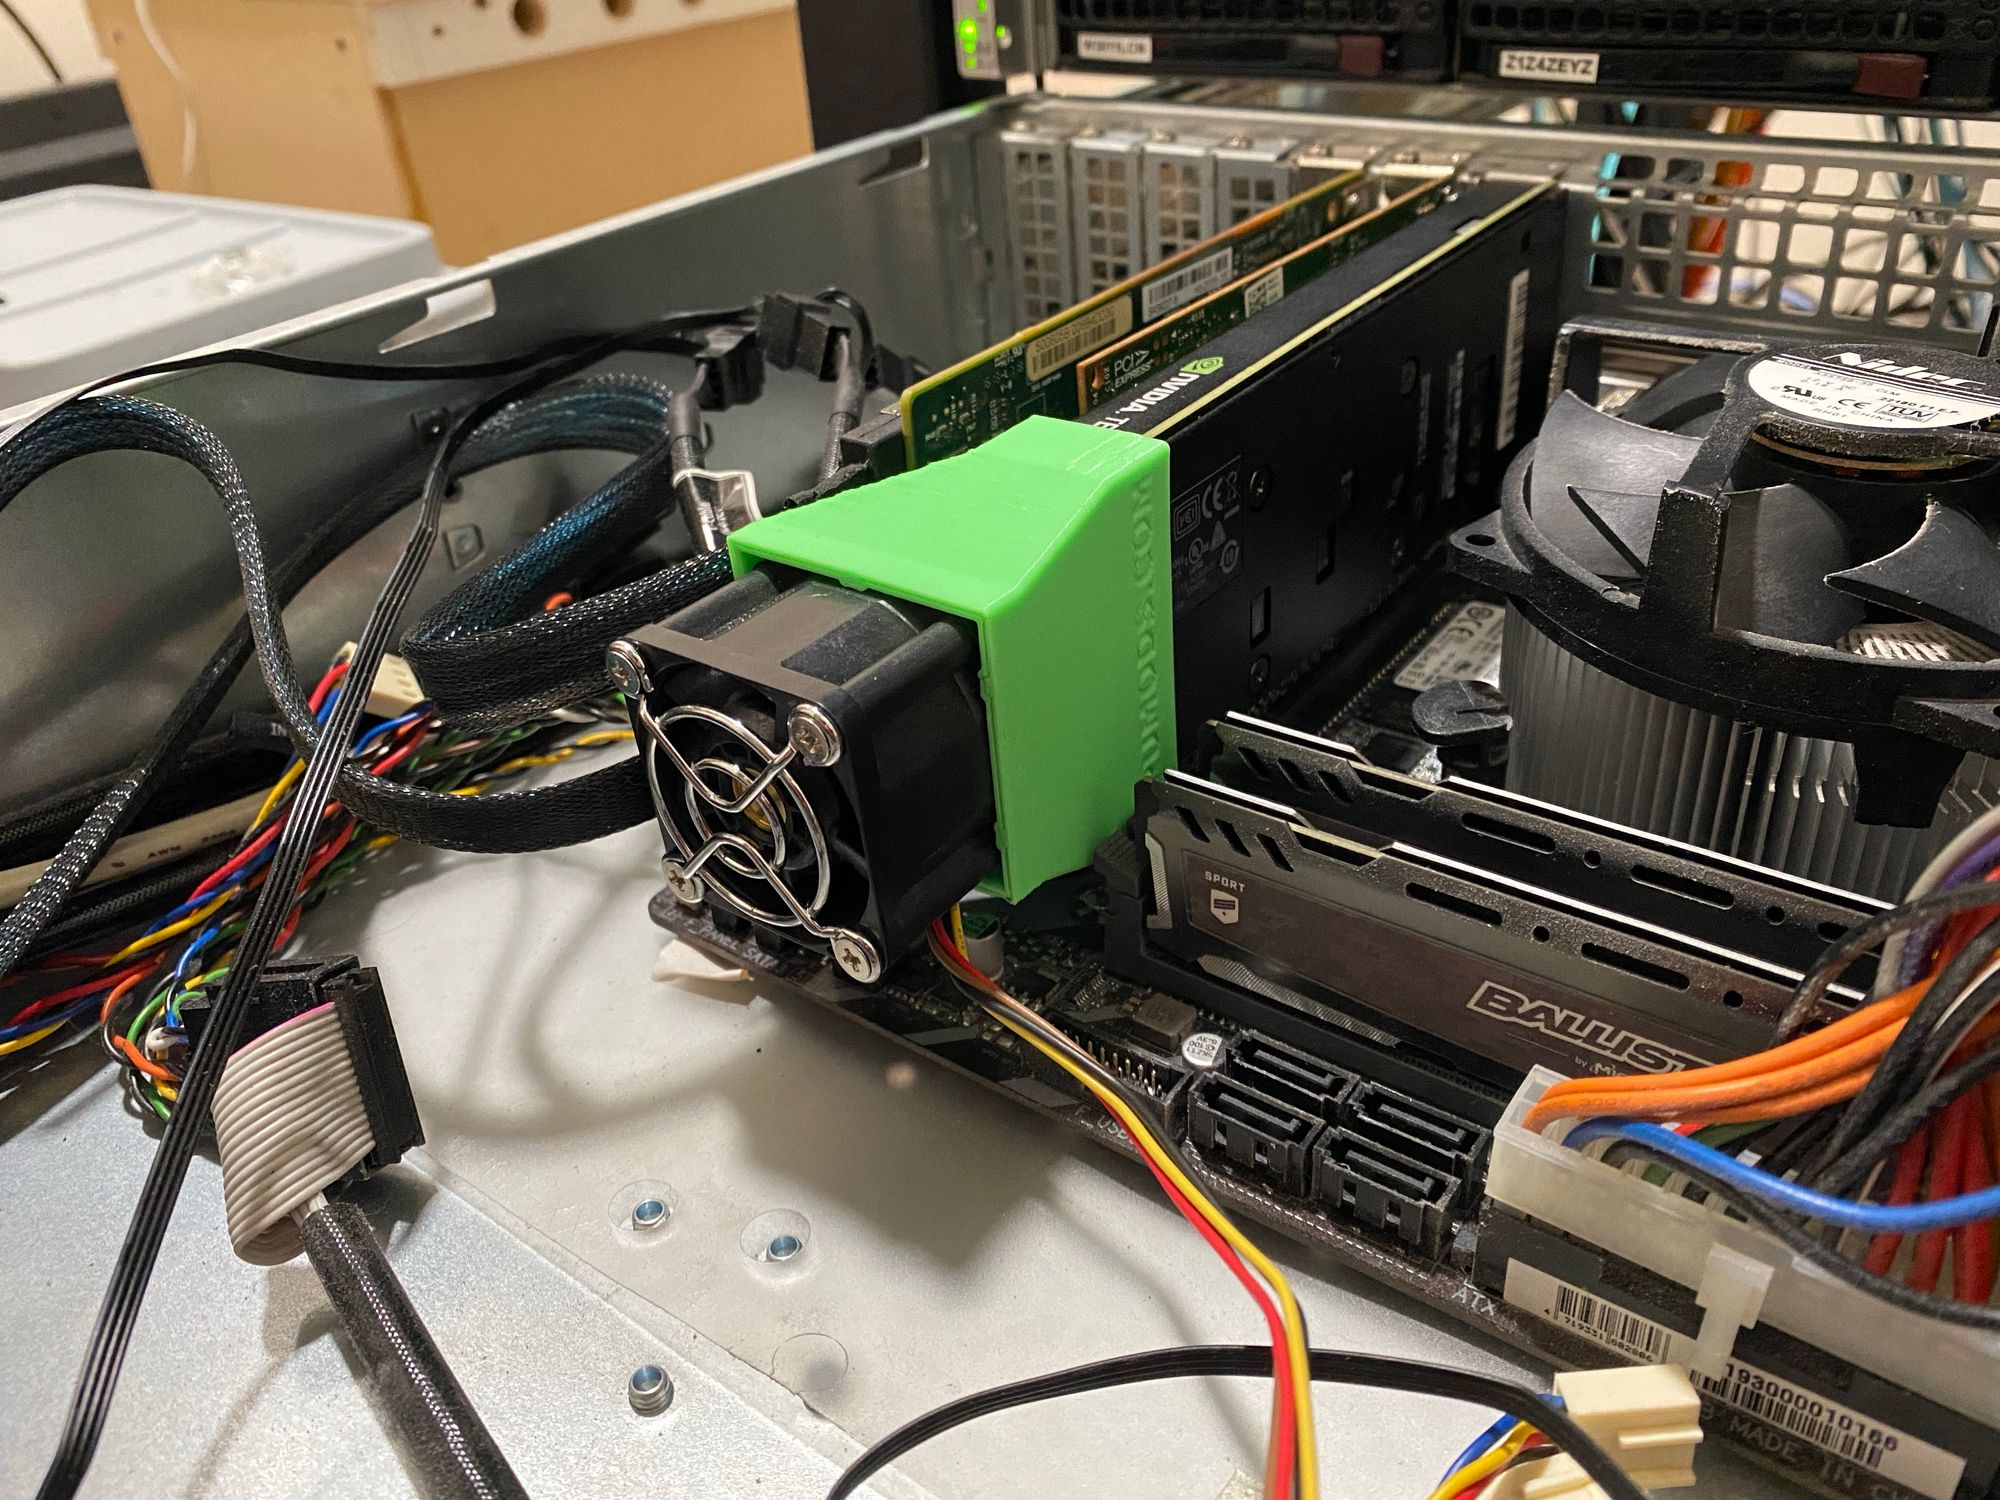
Another thing I had to do to get the card in was move the HBA to the bottom x4 PCI-E slot, and move the NIC to the X1 slot. Bandwidth would be no issue, but the board has a CMOS battery right behind it meaning a longer card can't be put in!
So, I got a spare Intel i350-T4 I had laying around and cut it. This also means I upgrade from the old Quad Port Pro/1000 card
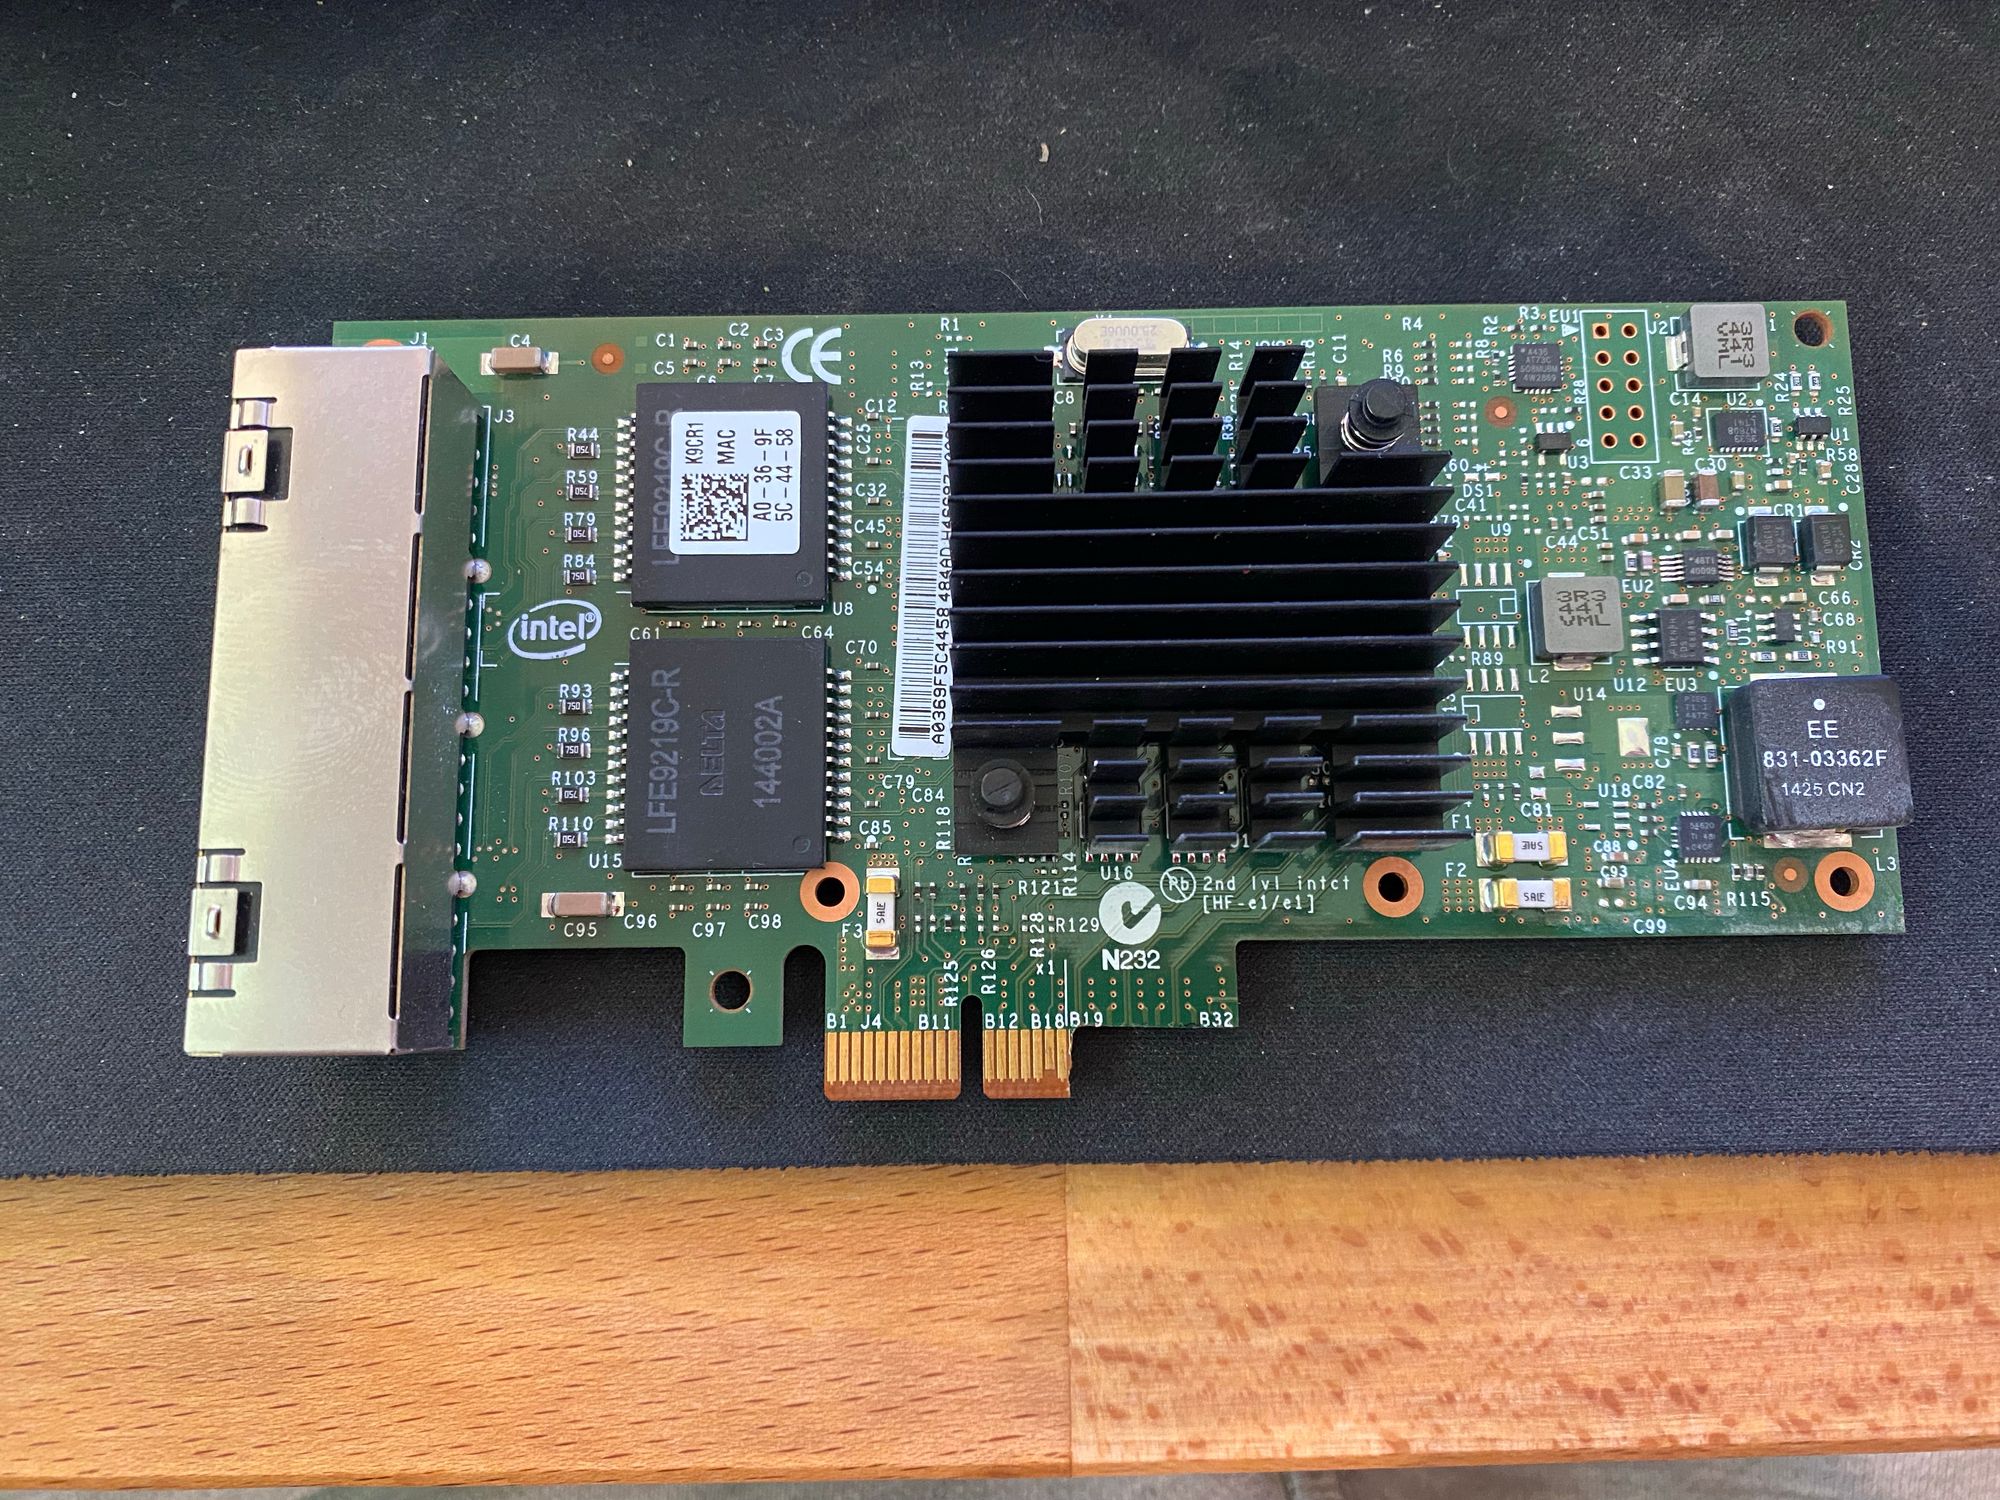
Right away I ran into an issue I'd seen before with this card in this board (The reason I was still using an old Pro/1000) in that when the card was installed, only half my memory would show up, and the system would be unstable. After much troubleshooting, I came across this video
After I followed his instruction and covered the 2 pins, everything worked! I had never come across this before.
Next in the rack we have power
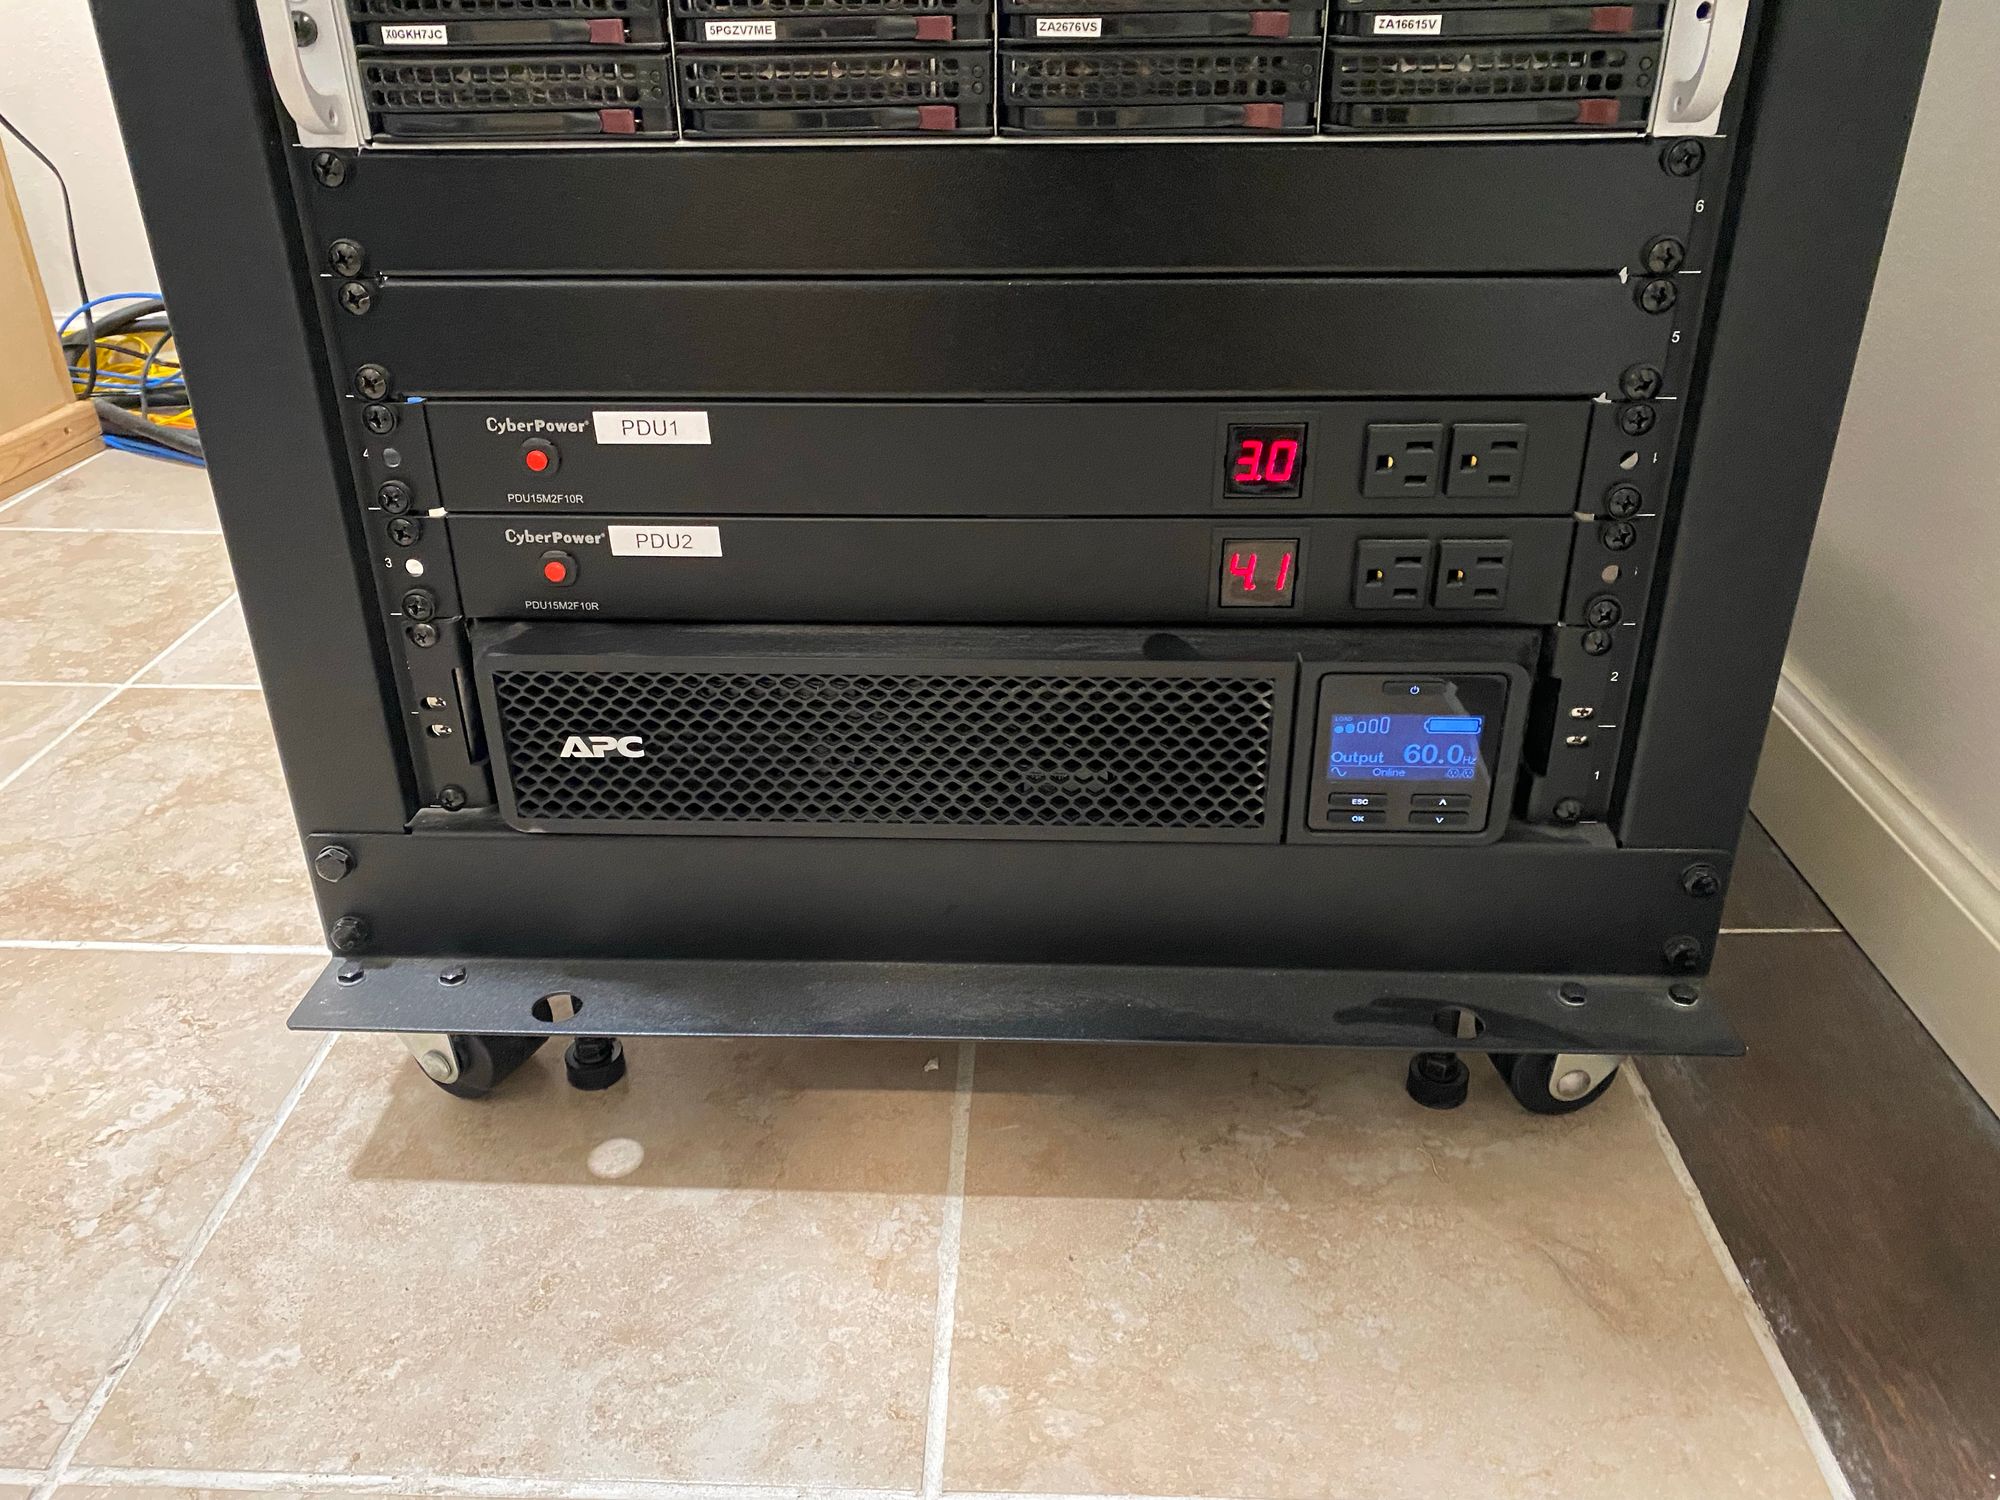
I am running 2 x Cyberpower PDU's, with each side of a redundant PSU on either one, and then just general things plugged in. These are great PDU's and the outlets on the front are very handy when you need to temporarily plug something in and get UPS power.
I've also recently started replacing my random power cords with color coded ones from FS.com. Blue for things that can be unplugged, and red for critical devices
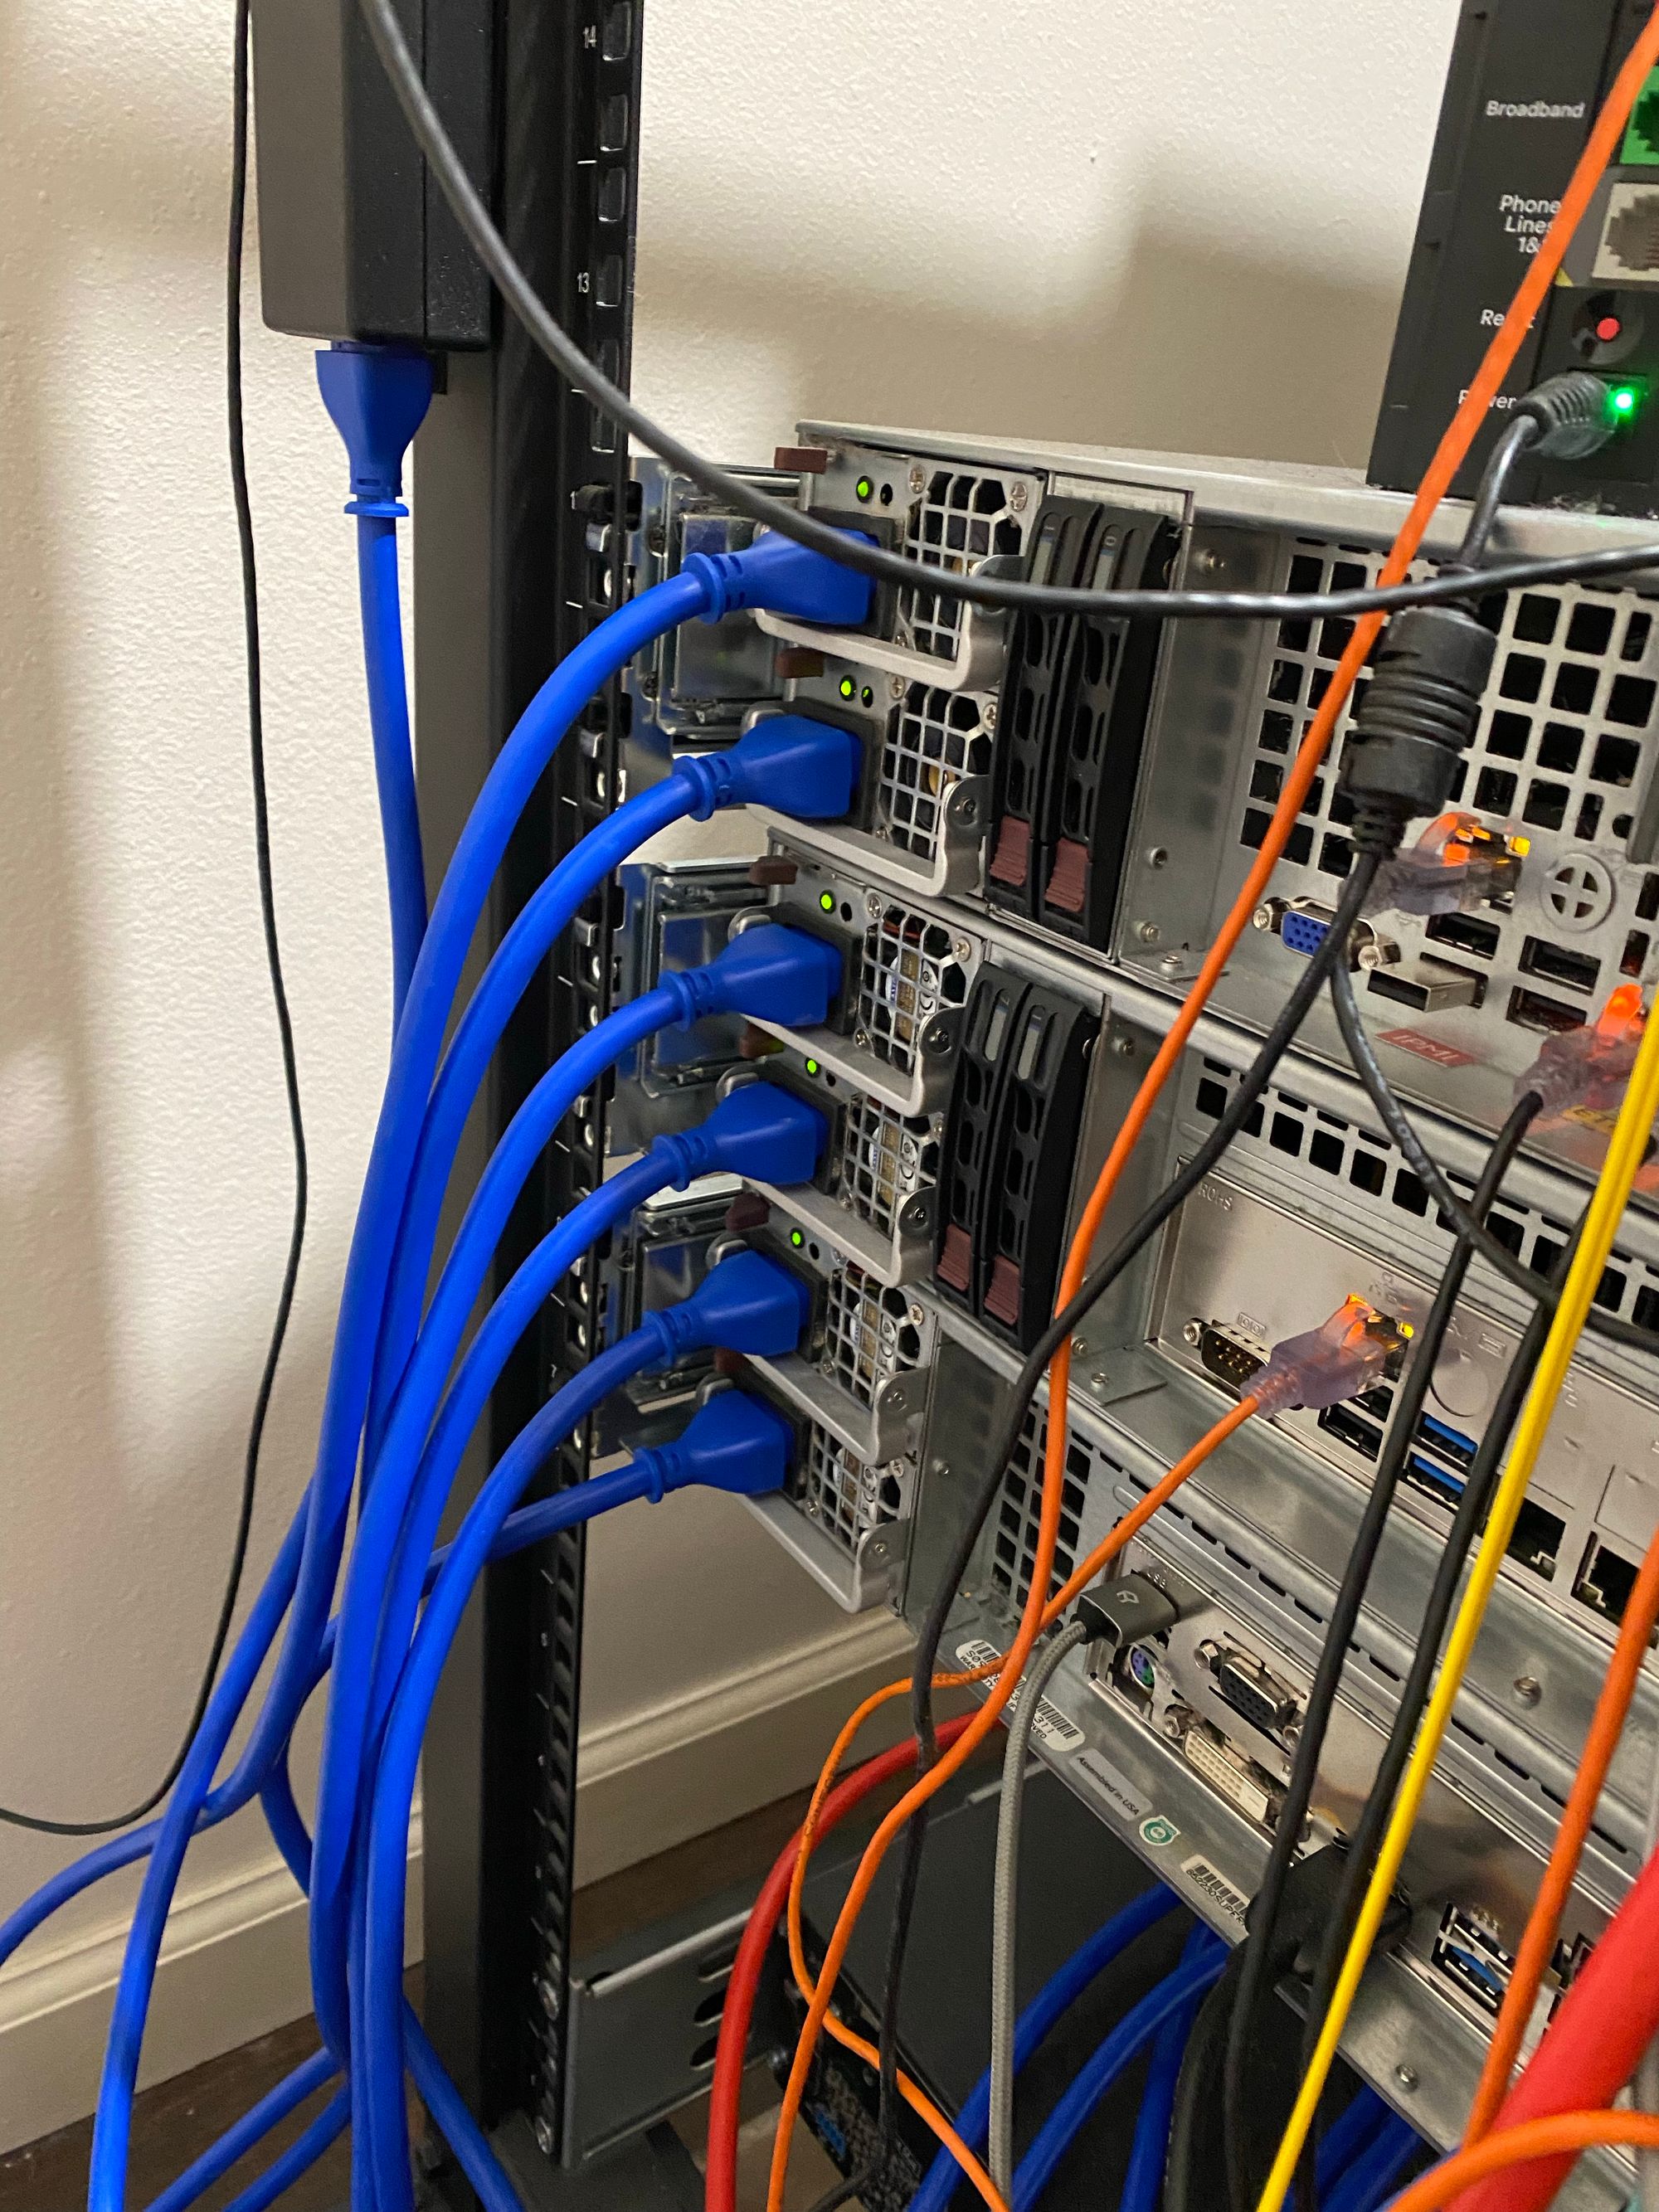

I went with blue for anything with redundant PSU's, as it can be unplugged without issue as long as you don't unplug the other side. Red for things like switches with a single PSU.
Below the PDU's are my APC SRT3000RMXLA Double Conversion UPS. I made a whole post about it here.
SpookyGhost
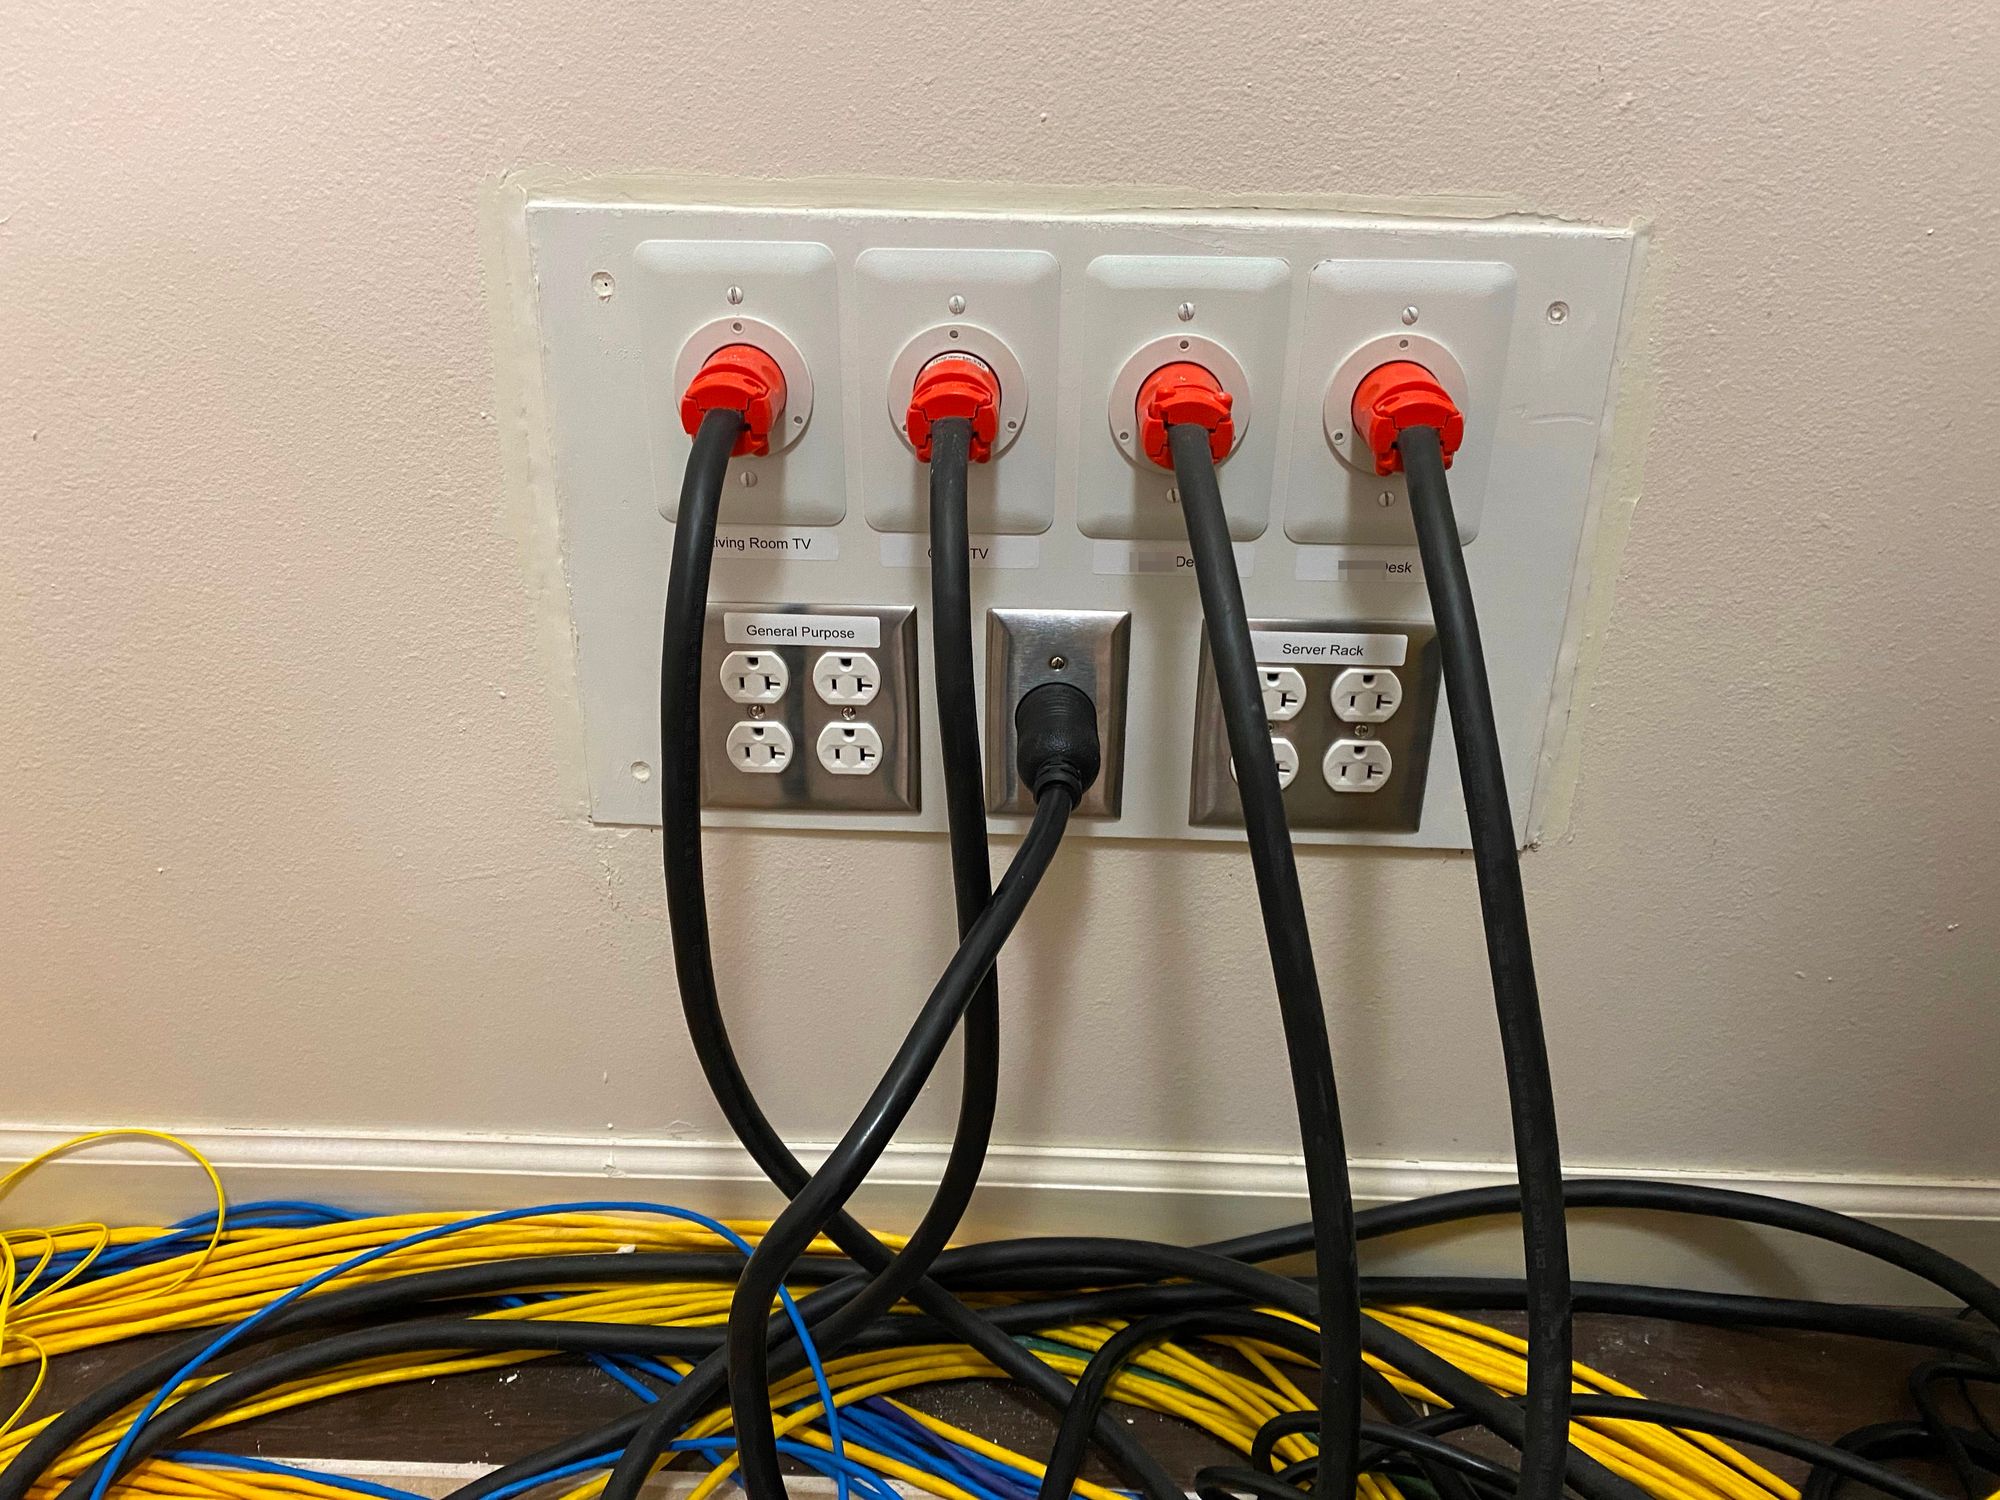
Power comes out of a 30a receptacle into the UPS, and then from the UPS into the PDU's, but also into 4 x Inlet ports. These go to both mine and my wifes desk, the living room HTPC area, and the office HTPC area. This means that all computers and sensitive electronics in the house are backed by a single UPS
That UPS is also then backed up by my generator. I have a Generac RG027-QS, which provides 25kw of power on natural gas which is of course unlimited. Its an 1800RPM Liquid cooled generator, which should be much more reliable than the smaller air cooled generators. The generator is very quiet and turns on AND switches power within 10 seconds of a power outage. This generator powers my whole house (And then some, I've got plenty of capacity free)
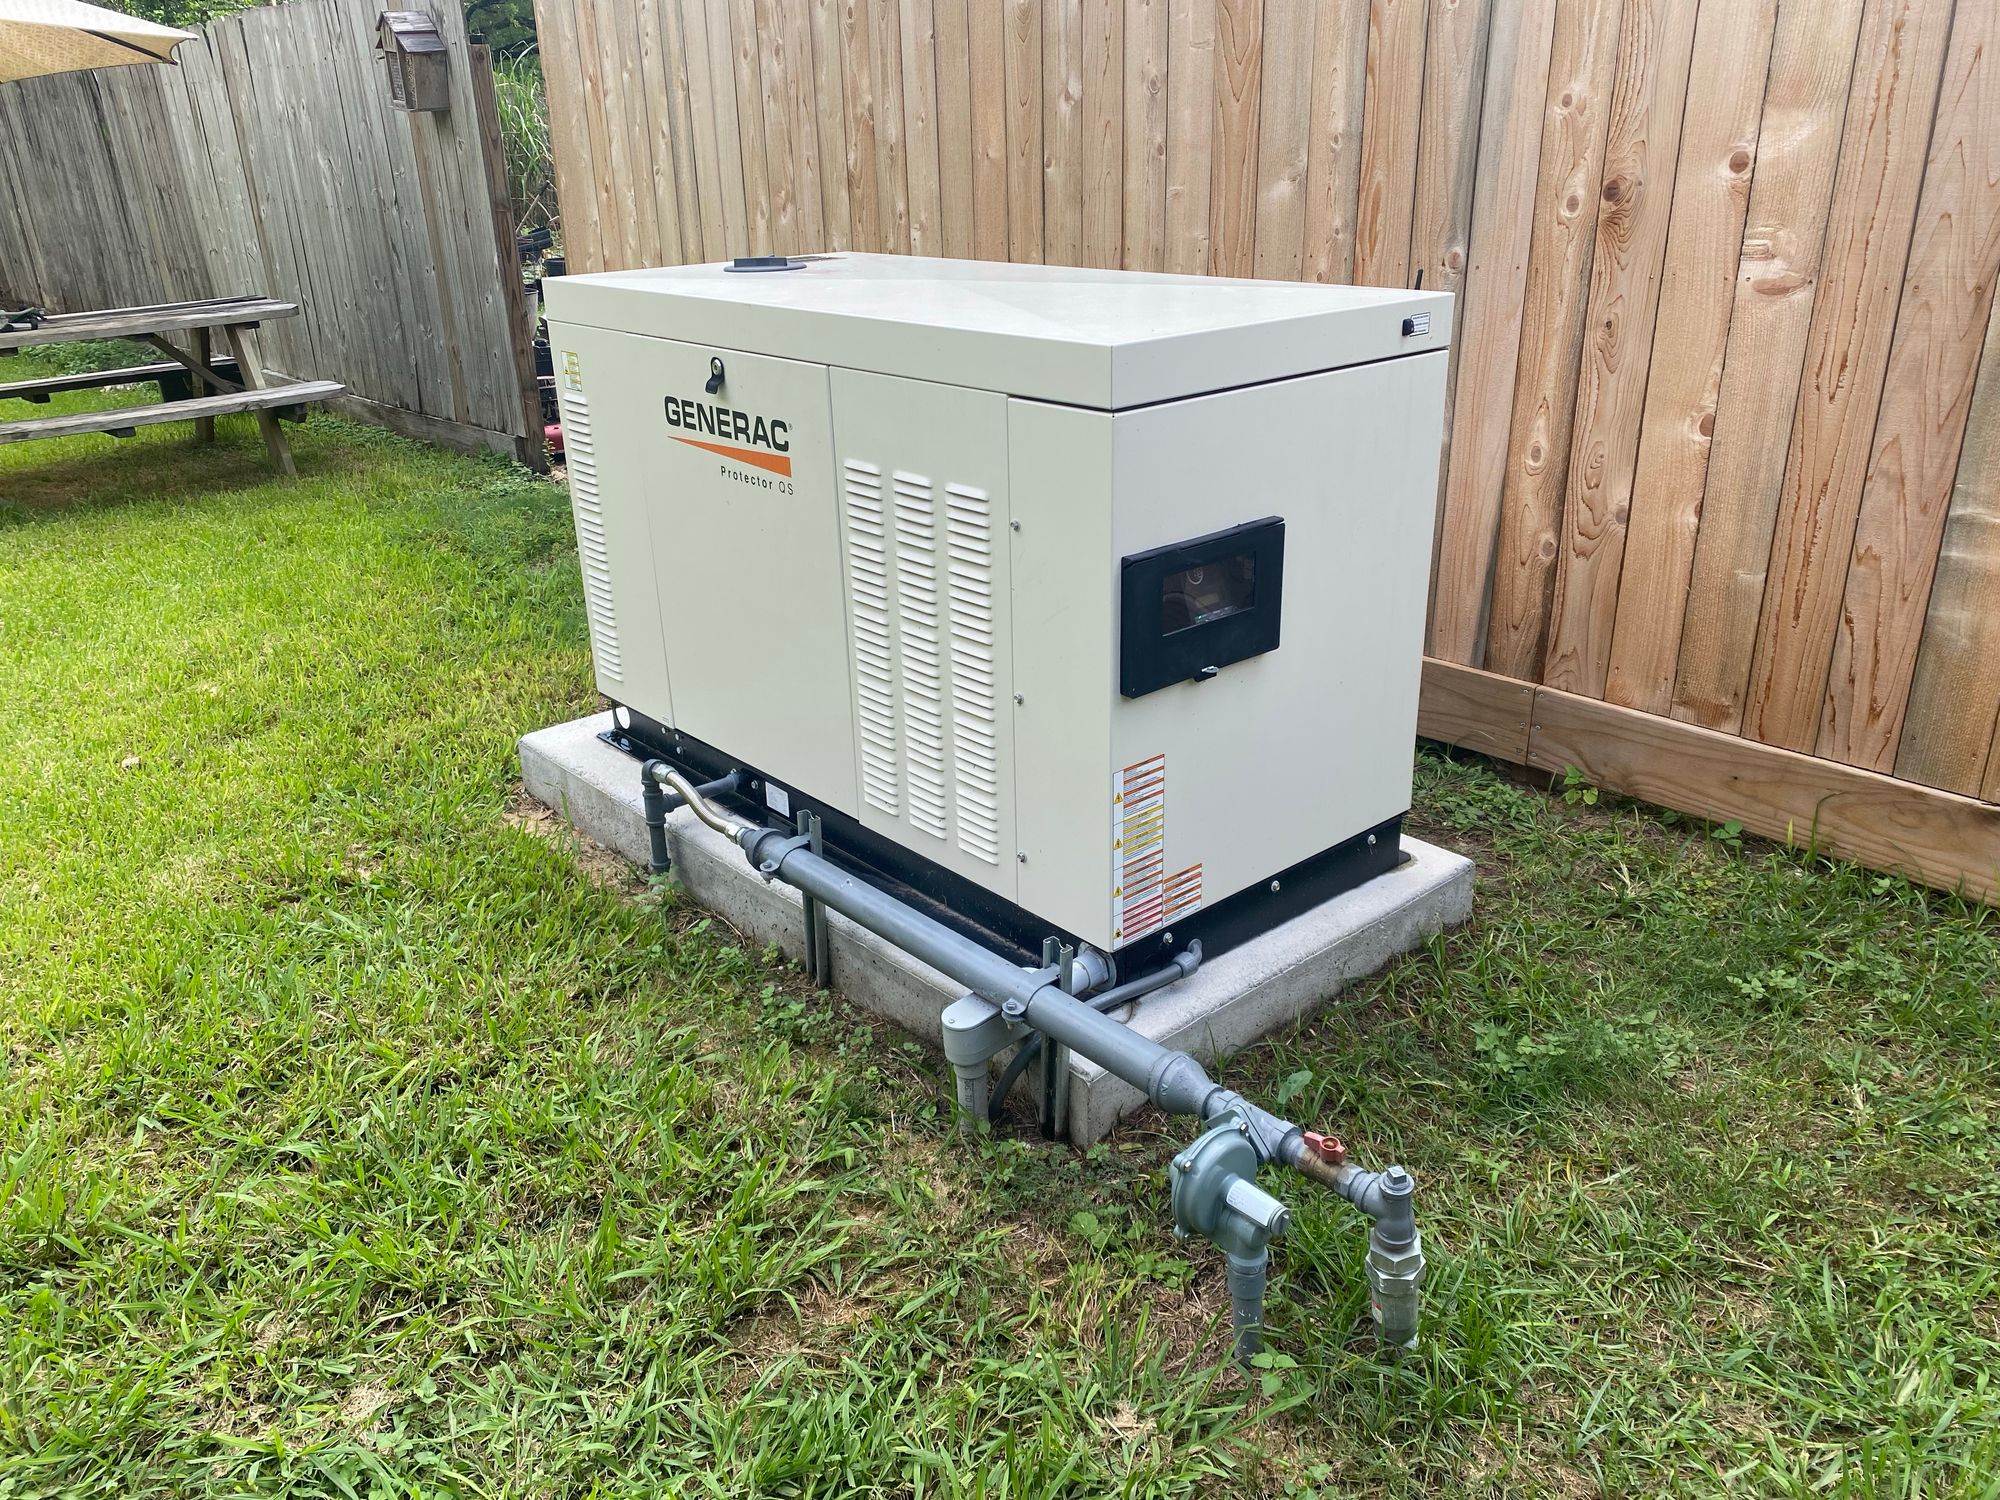
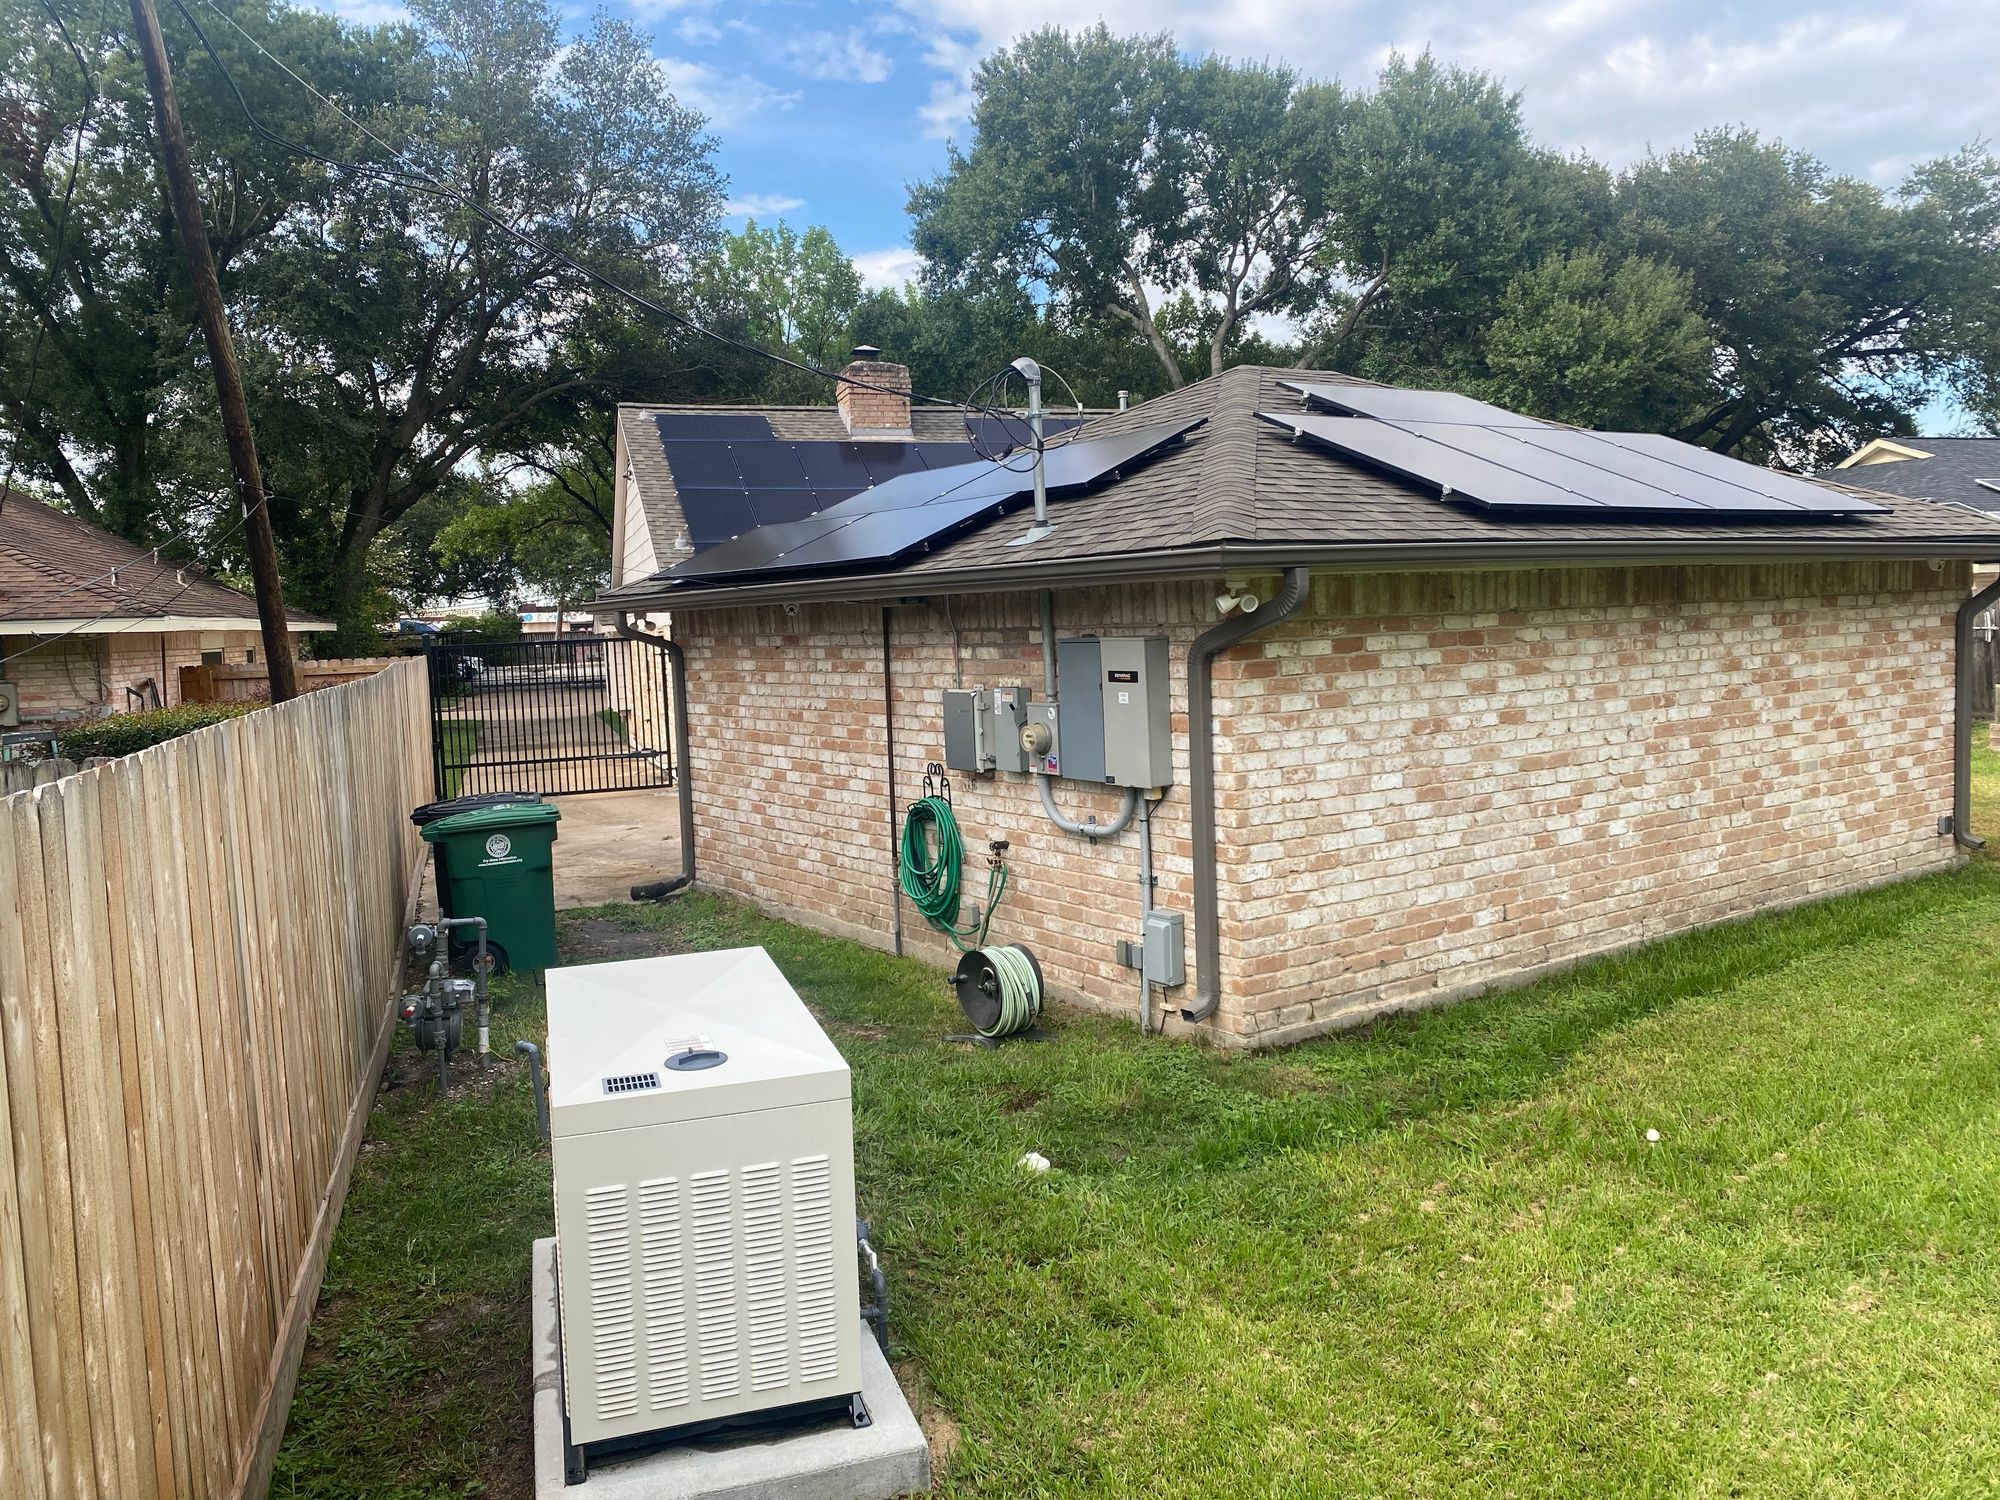
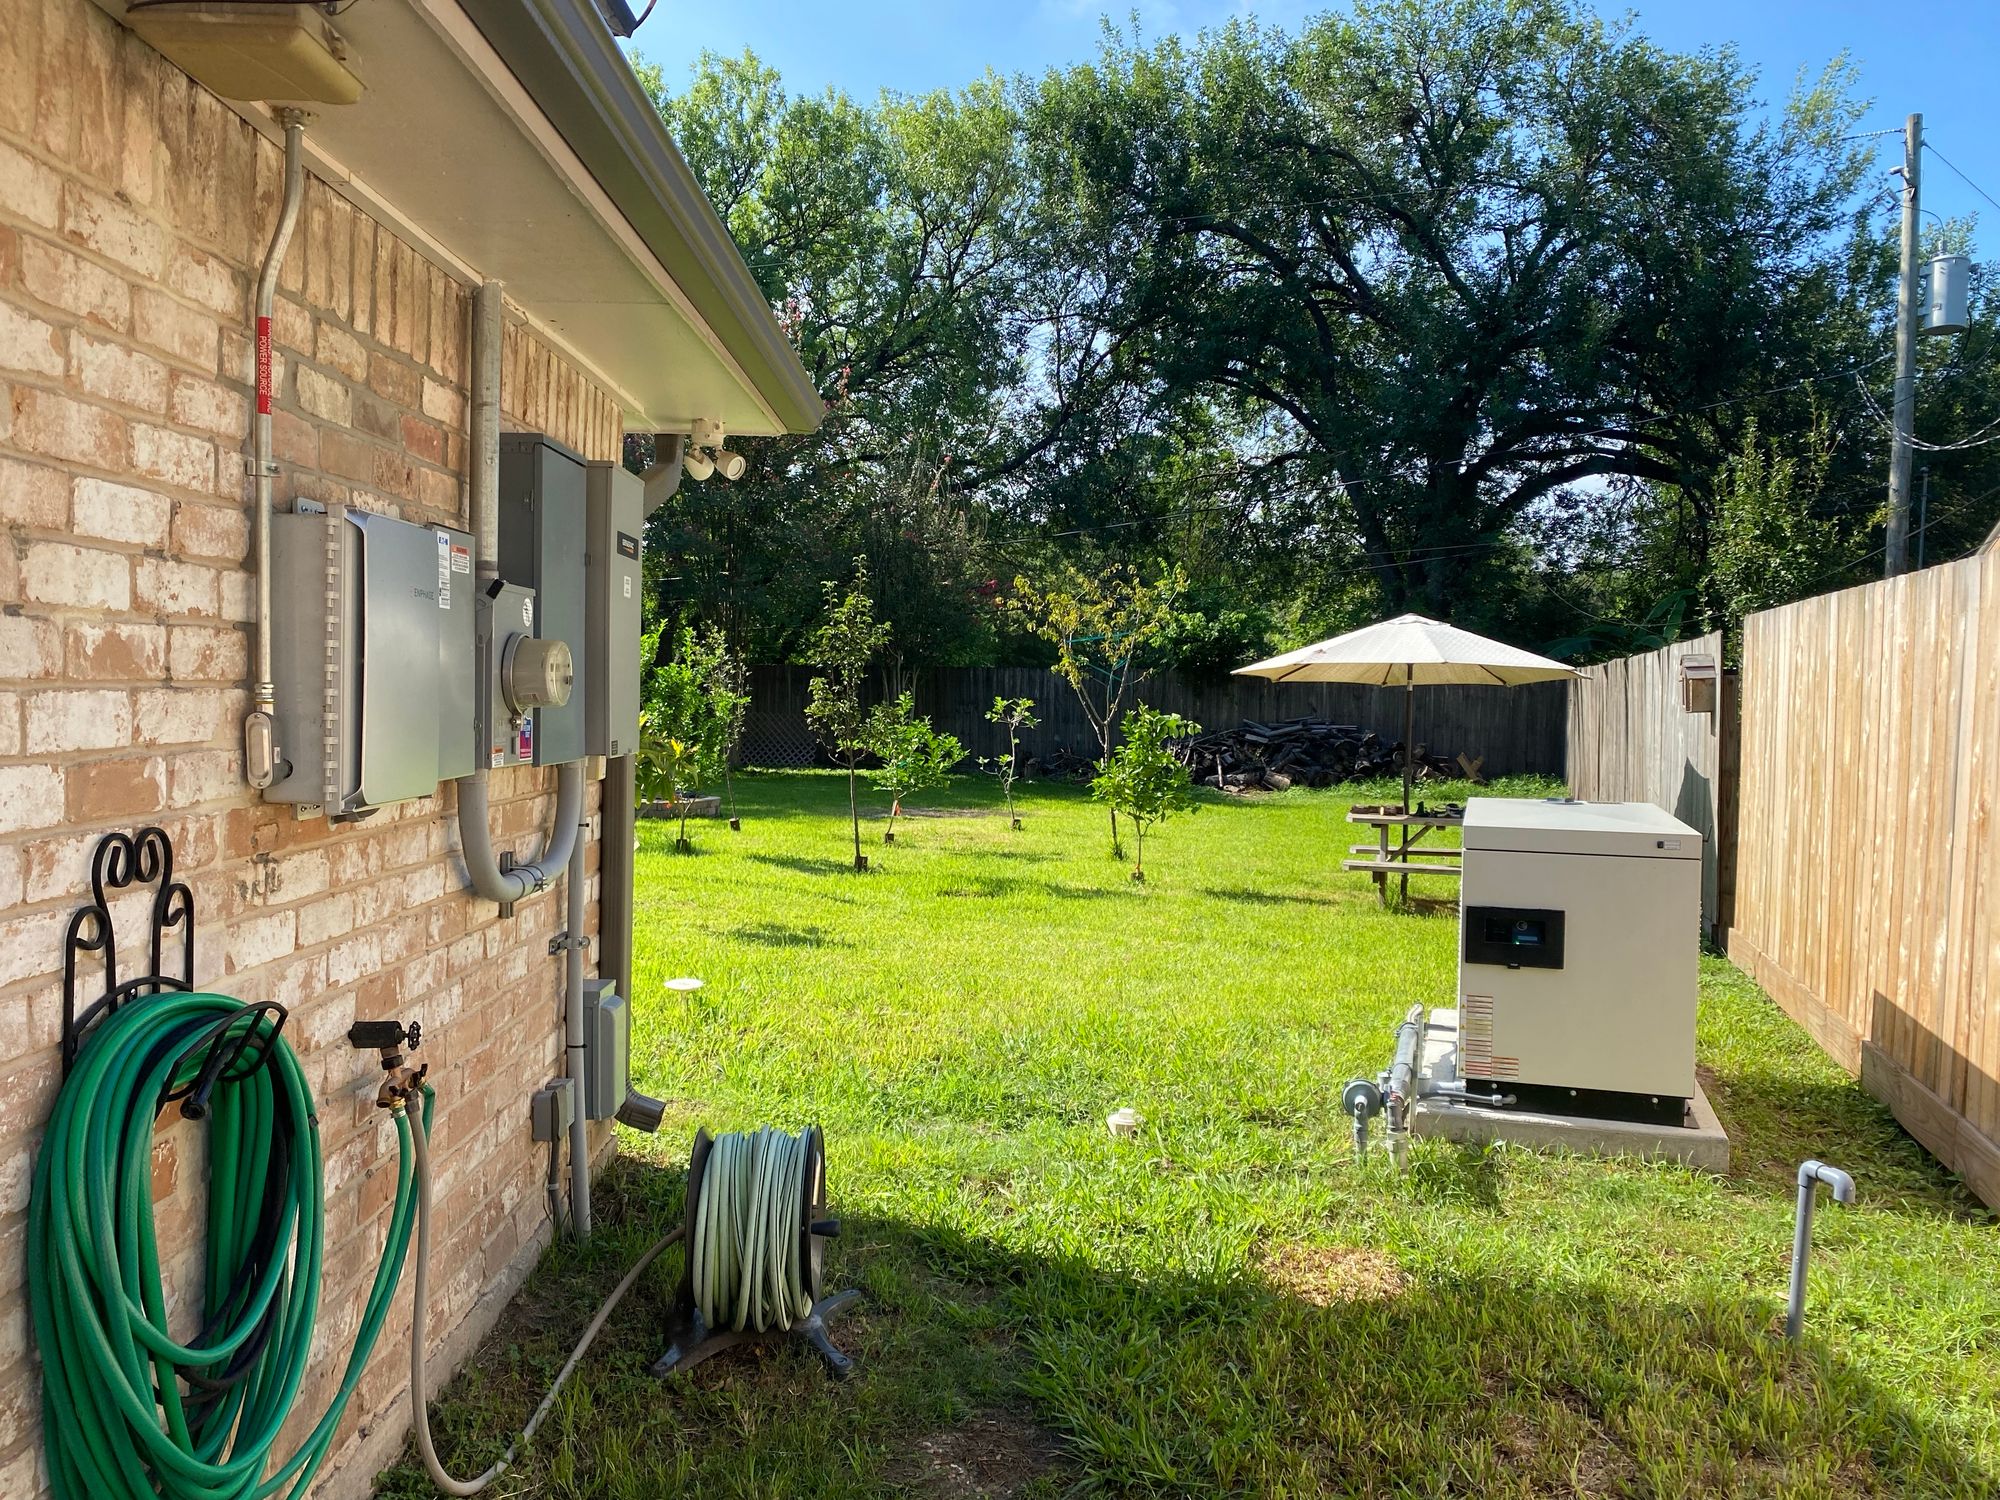
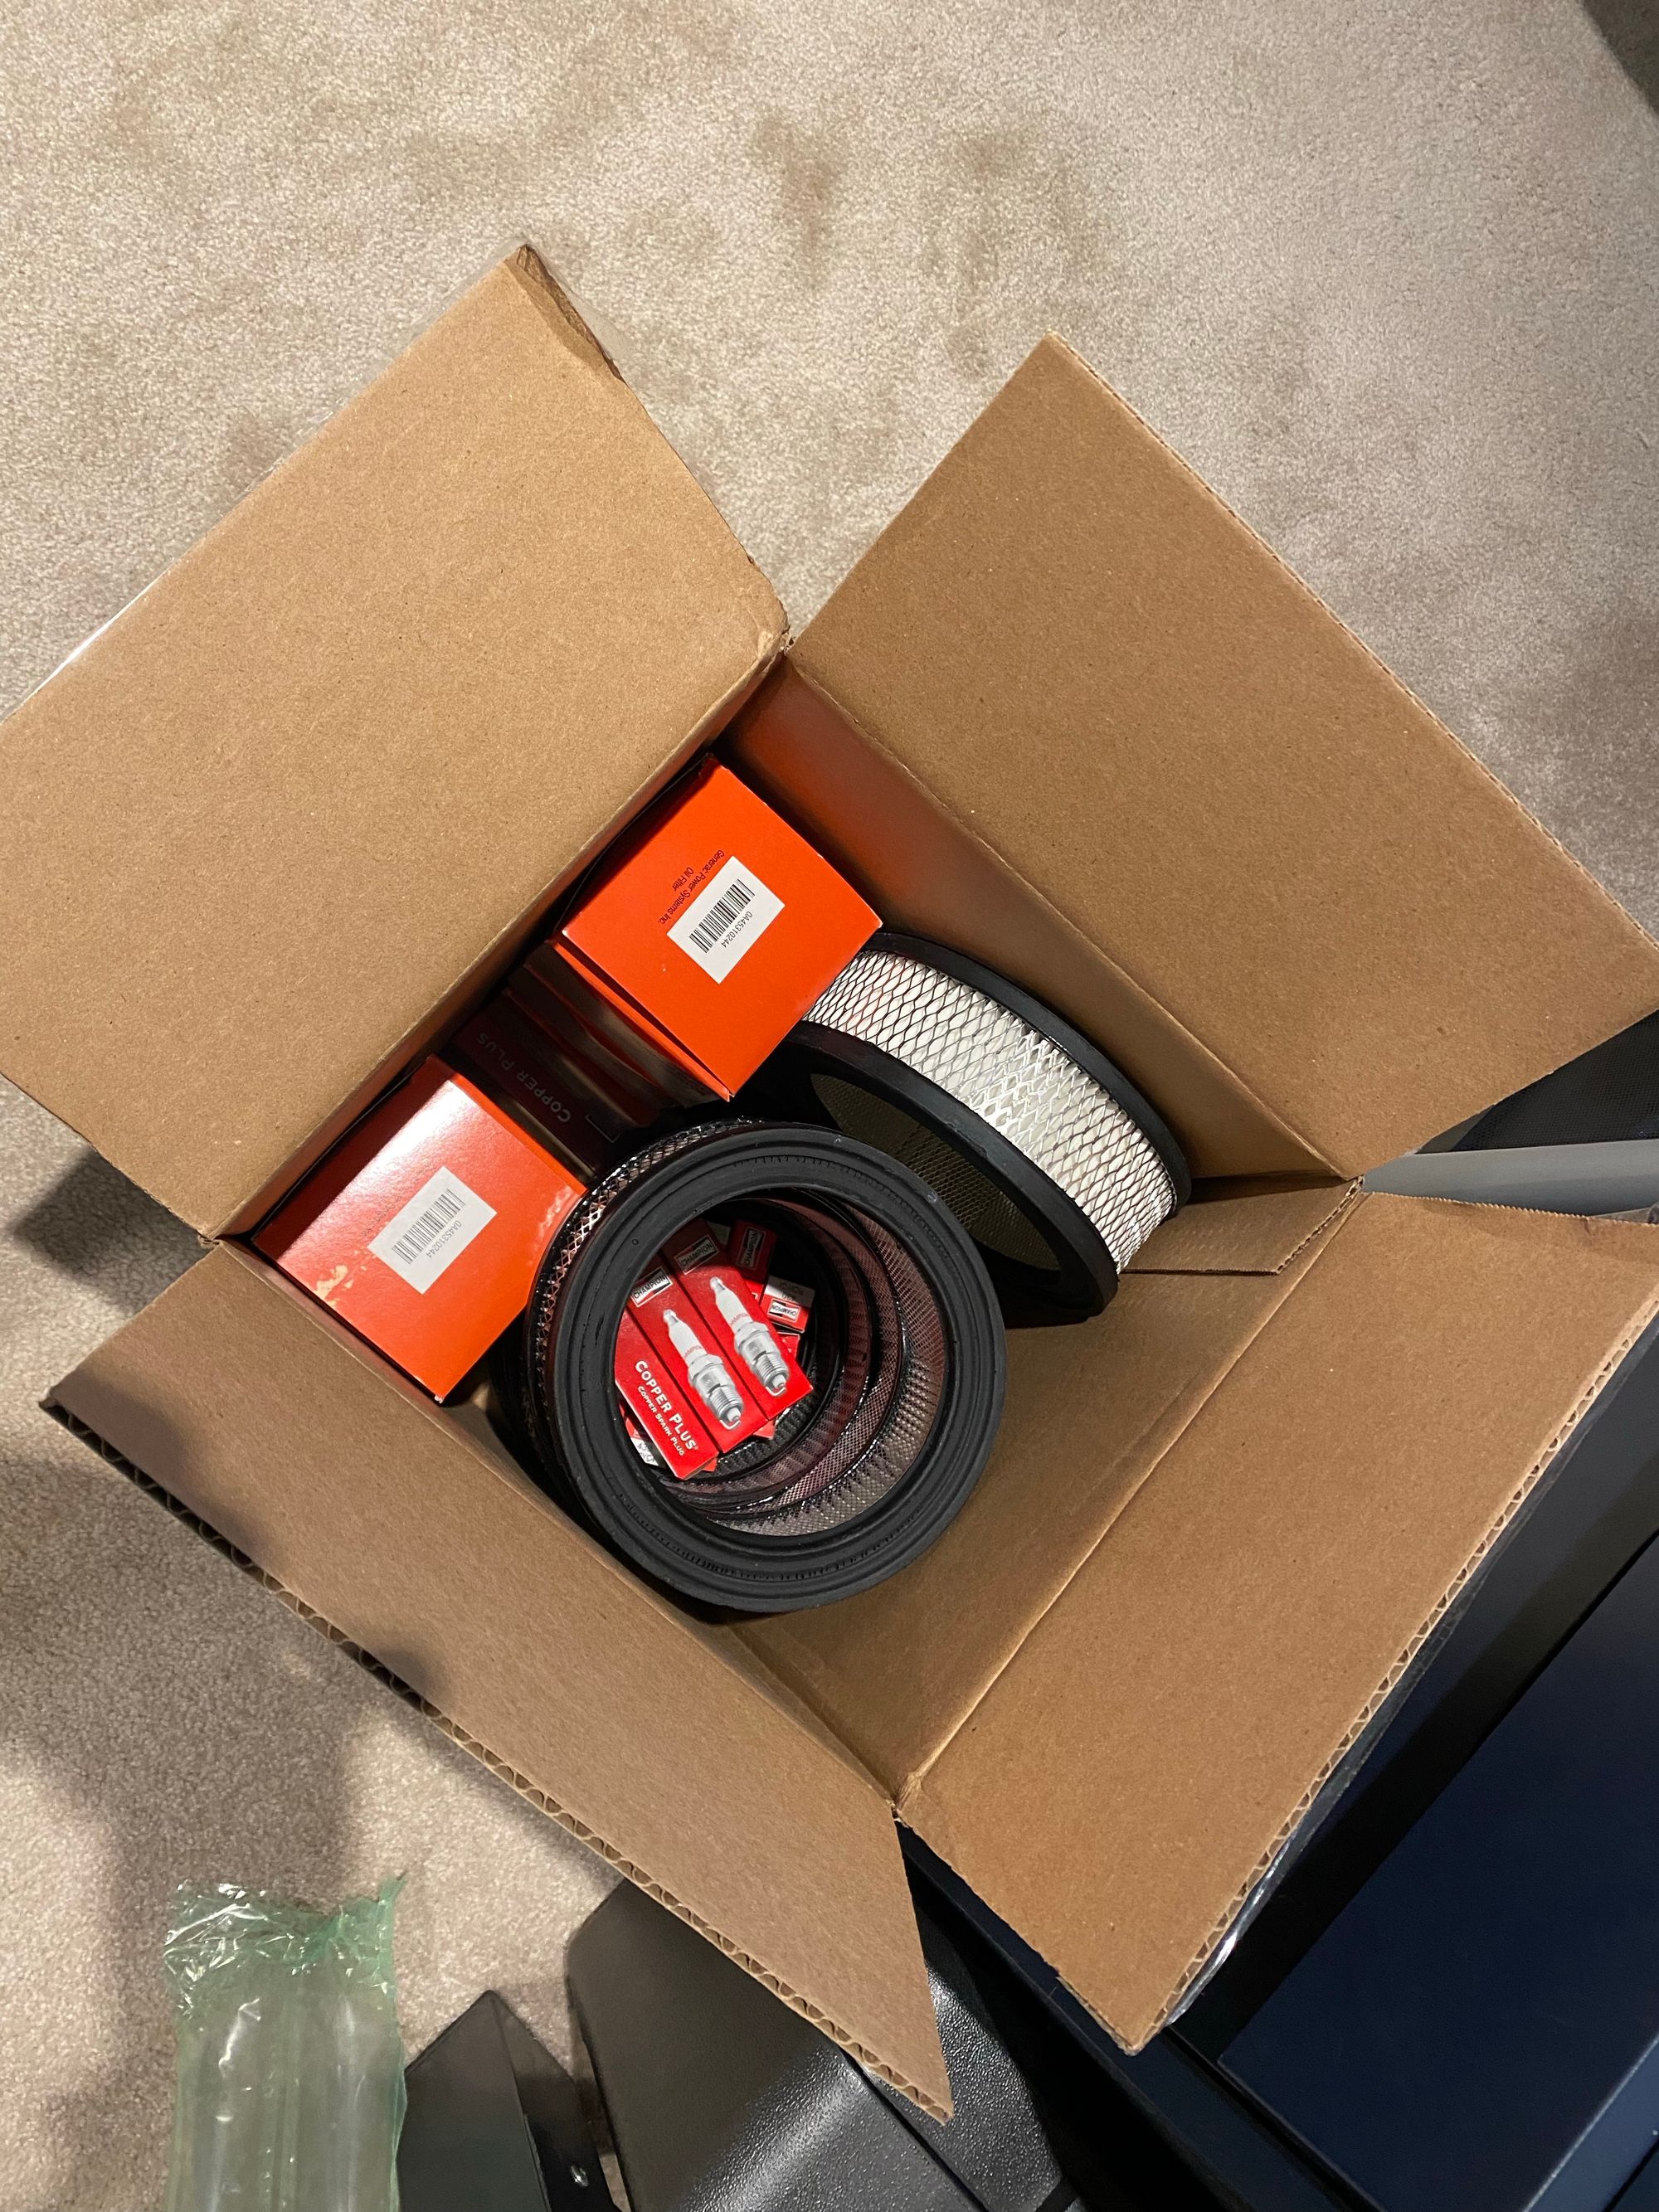
I also keep enough oil and maintenance items to run for well over 1000 hours.
I also have a lot more details on power monitoring and backups, which can be read about here
SpookyGhost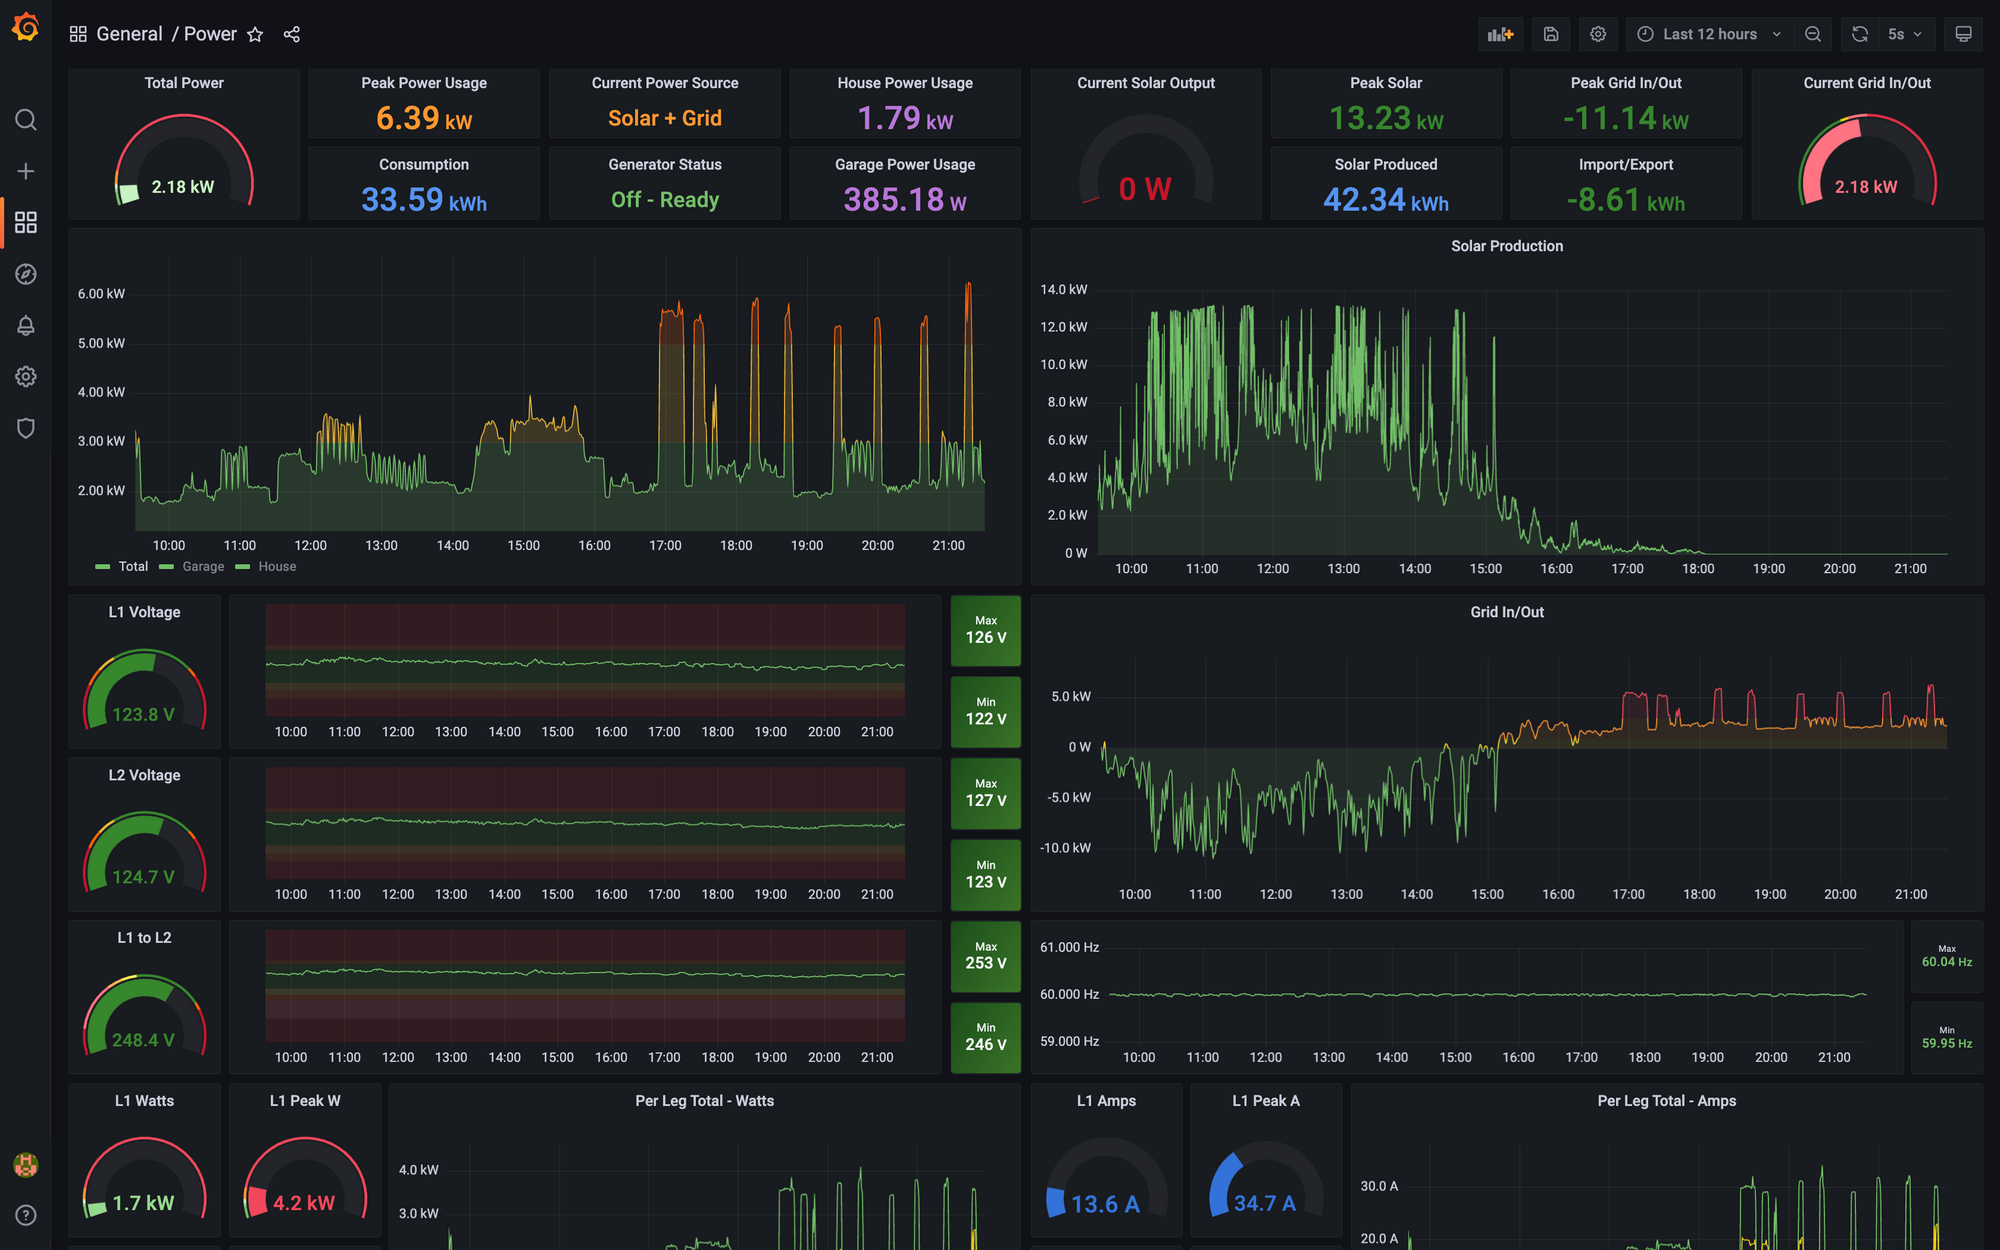 SpookyGhost
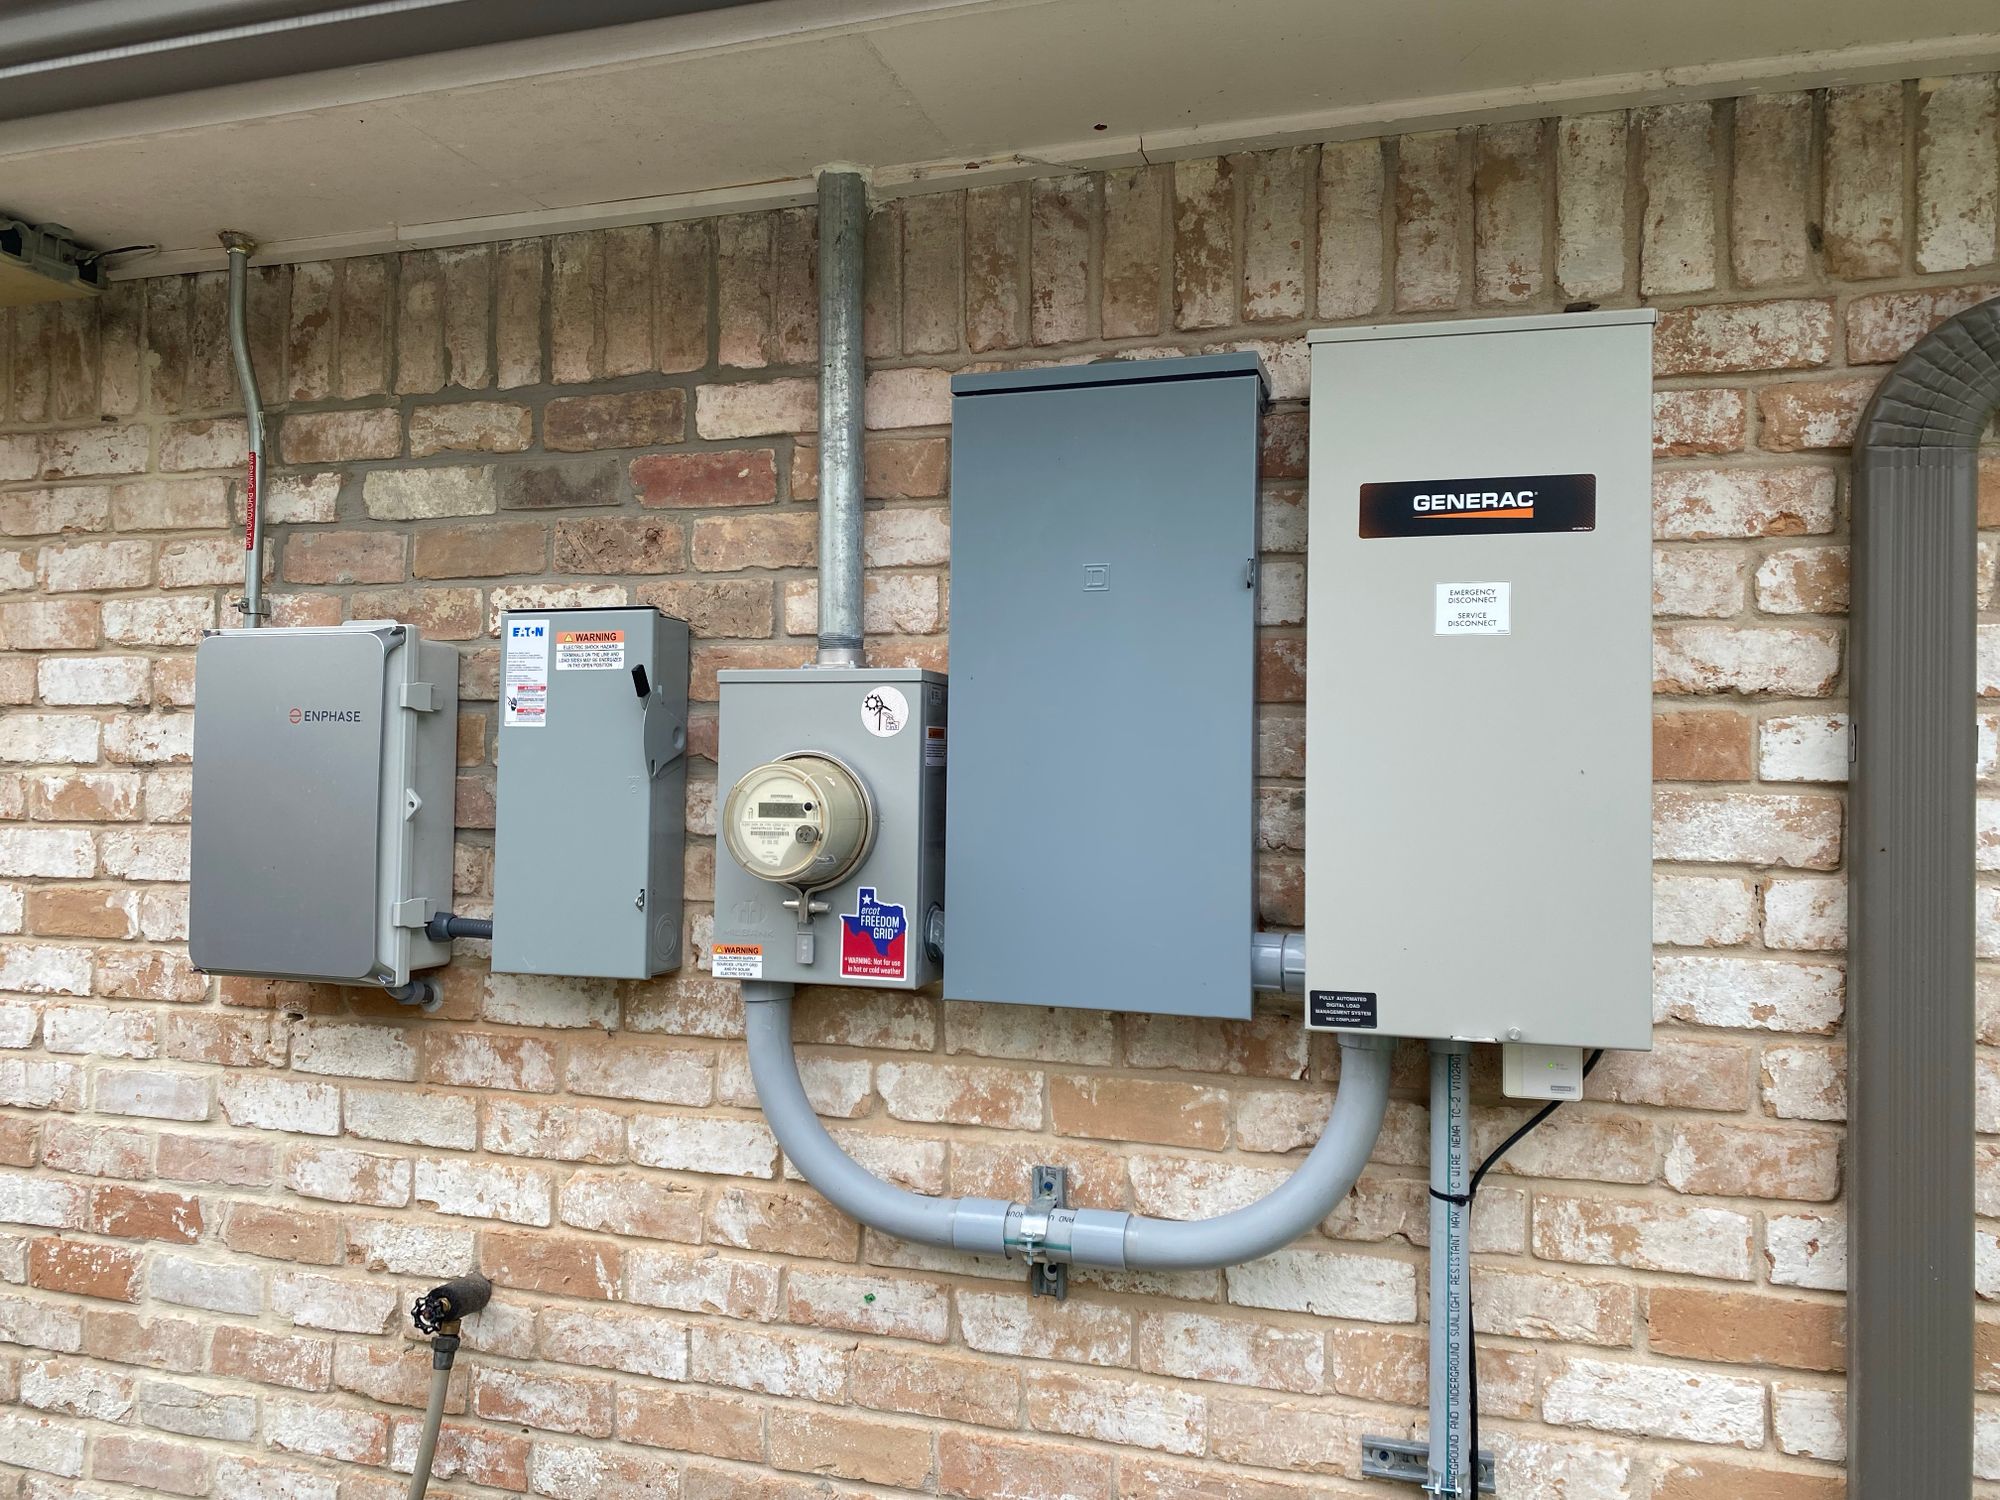 SpookyGhost
And on to the Garage Rack. This is in my hot Texas garage and does just fine

It has a Cisco WS-C2960S-48LPD-L which has 2 x 10G SFP+ ports, and 48 PoE+ ports, and a APC SMT1000RM2U UPS. This UPS powers everything in the rack, and some extra items via an inlet like I did in the house. Mainly my power monitoring setup, and something I have not yet posted about which is powering a Raspberry Pi 4 and Fiber Media converter in my generator, via UPS power to avoid using the battery.
I've got some other things back here, mainly a Raspberry Pi 4 for ADS-B Flight tracking via an antenna in the ceiling of the garage, and the hub for my Tempest Weather Station.

The switch itself connects back to the house, the above mentioned devices as well as some PoE cameras and a Ruckus AP I have in the garage.
I've also now extended my lab into the cloud, via Linode. Read more here:
SpookyGhostThanks all!
Any questions, feel free to jump on the discord or email me. Here is the main image of the rack in a larger format